our DIY wedding invitations

After our relatively pain-free experience with DIY Save the Dates, we decided we might actually be able to pull off DIY wedding invitations. I spent a couple weeks searching sites like Wedding Bee and Snippet & Ink for inspiration, and finally decided on the style of invites I wanted - a pocketfold with a matted invitation, accommodations and directions enclosure cards, and an RSVP. I tried to be consistent with our wedding colors and design elements (red/orange/blue, Hatch show print style typography, birds, and birch trees.) Here are the details:

The belly bands were made of ribbon that I sewed into a band after slipping it through the tag (cut from white cardstock and shaped with a corner punch.)

Pocketfolds from Cardsandpockets.com, ribbon from Fabric Depot, cardstock from Paper Source, custom stamp from Rubberstamps.net, trees, birds, and wood planks for the sign board are from istockphoto.com.

Invitation mats from Cardsandpockets.com, envelopes from Paper Source; fonts: Miama, Mesquite Std Medium, and Palatino; tree and bird vectors are from istockphoto.com; white cardstock and printing from a great local (and green!) print shop here in Portland called NW Printed Solutions.

I designed the stamps for the logo tag and return address/rsvp and had them custom made by RubberStamps.net. They did SUCH an amazing job, and the turnaround time was extremely fast. I wanted to use custom stamps because it was cheaper, easier, and greener than using labels or our home printer for the tags and addresses. Plus they had a great DIY rustic look to them.

The full invitation suite

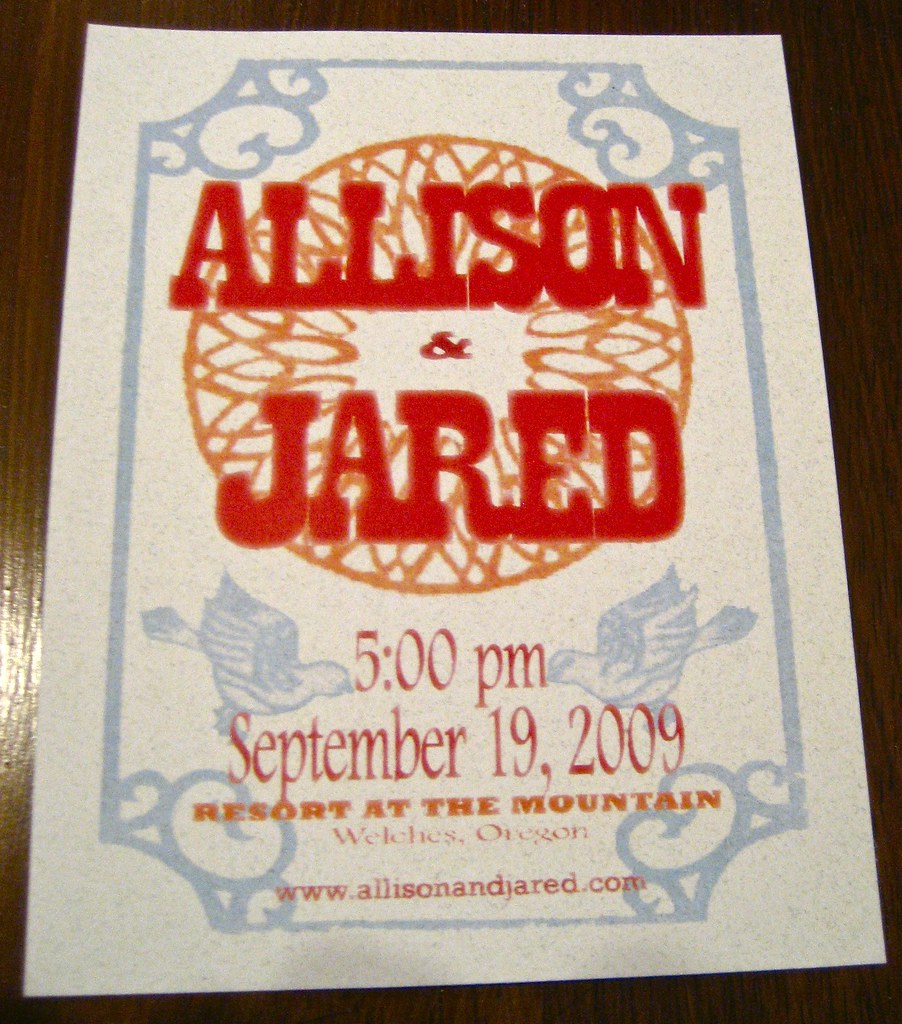
Hatch-style Save the Dates

***I'm very excited to bring you the first post in a new series I'm calling "made to wed," featuring all the DIY wedding crafts from my and Jared's big day.*** Around this time last year, I was in full-on wedding mode.  Jared and I had just gotten engaged, and with 9 months to go until the wedding, there was a ton to do.  Once our lovely Mt. Hood location was booked, it was time to get started on the Save the Dates.  I knew right away that I wanted to do something in the style of a Hatch show print.  Jared and I began collecting show posters not long after we started dating, and they now make up much of the artwork in our home.  Most importantly, we felt like the look was something that was both representative of us and the tone we wanted to set for our wedding.

Here are the steps that went into creating our Save the Dates...

1) I designed the Save the Date in Photoshop at 4.25x5.5" so that we could get 4 cards out of a standard 8.5x11" sheet of cardstock.  I wanted the cards to have a vintage look to them, so the original design had a grainy pale blue background.

2) When we took the design to Kinkos to be printed, the folks there recommended using this great grainy pale blue cardstock they had instead of trying to do a colored background on white cardstock.   We tried it both ways, and they were totally right.  In addition to printing, we also had Kinkos cut the cards for us.  The cost was minimal and definitely worth how much time it saved us.

3) We wanted to back the Save the Dates with magnets for easy fridge-hanging for our friends and family, so we rolled out a magnet sheet from the Xyron and cut it into small strips.

4) The cards were then run through the Xyron to create a sticky backing.

5) Paper Source A6 note cards in bluebell were used as the backing for the Save the Dates, after cutting them to 4.5x5.75".

6) The final step was to adhere the magnet strips.

7) Only 83 more to do!  ;-)

I can't even tell you how thrilled we were with the final result.  Of all the paper goods I did for the wedding, the Save the Dates were by far my personal favorite.  The biggest challenge was settling on a final design, but the design process was actually kind of fun.  Okay, okay... I was in a total engagement bliss haze at the time - everything wedding-related was fun.  But, there was something really exciting and gratifying about doing our own Save the Dates.  We're DIY people, so it only made sense that our wedding be as DIY as we could make it.  Next up: the invitations...