A (BELATED) OSCAR RECAP

oscarsbestworstdressed2013 Aside from the telecast being SUPER long and a little heavy on the music and bad jokes (okay, so that's every Oscars telecast), I was pretty pleased with the winners and fashion this year. I thought Jessica Chastain was flawless - perfect hair, perfect makeup, and that dress! The fit was incredible. Kristen Stewart's tailor could stand to take a few notes. I thought K-Stew looked like a complete train wreck - even more than usual, which is saying something. It must be nice to get paid millions of dollars and still be able to look like a hungover mess any time you show up to a fancy event. Also, what was she even doing there? As my friend Ailsa said, "Kristen Stewart has no business being at any event purportedly rewarding good acting. No business!" Amen, sista. Anywho, my other favorite looks of the night were Naomi Watts, Jennifer Lawrence, and Jennifer Garner.

As for our menu... this is the second year in a row I've made an Oscar themed feast, and while my names were pretty weak this year, the food - thankfully - was not. We had (brace yourselves) Seth MacncheeseFarlane (using our go-to Alton Brown recipe), BroccoLincorn (which was basically just broccoli and corn... we needed a veggie that Emma would eat), and Life of Salted Caramel Apple Hand Pies.

saltedcaramelapplehandpies

Obviously, the hand pies were the best part of the menu. The recipe was surprisingly easy to follow, despite my perpetual fears about making pie crust from scratch. I definitely recommend eating these warm, though... they were still good cooled, but they were heaven when they were just shy of piping hot.

How did you spend your Oscar night? I'd love to hear what you thought of the fashion!

Iron Chef at home... our new favorite date night

Like most married couples with kids, Jared and I spend most evenings relaxing in front of the TV. This is great for catching up on our shows, but it can make for a pretty lame marriage. Since we can't afford to get a babysitter every weekend, I tried to come up with ideas for creating the feel of a date night at home. And then it hit me - we love to cook, we love Iron Chef, and we love a little friendly competition... a weekly Iron Chef battle was just the thing we needed to, uh, spice up our Saturday nights. Here's what we do... earlier in the week we'll pick an ingredient, then toss around some course ideas. We prepare 3 courses, 1 each and then 1 joint course. Everything is made from scratch and we aren't allowed to use recipes (unless it's to make an ingredient that we've never made before, like pie crust.) Jared goes out during Saturday naptime to get all the ingredients, we start prepping during the day as needed, and we start the real cooking once Emma goes to bed. We don't limit ourselves to an hour because, well, that would be insane.

The first week we did Battle Blue Cheese, and it was AH-MAZING! I took a ton of photos, and then promptly accidentally deleted them when I formatted my CF card. So let's move on to Battle Bacon, shall we?

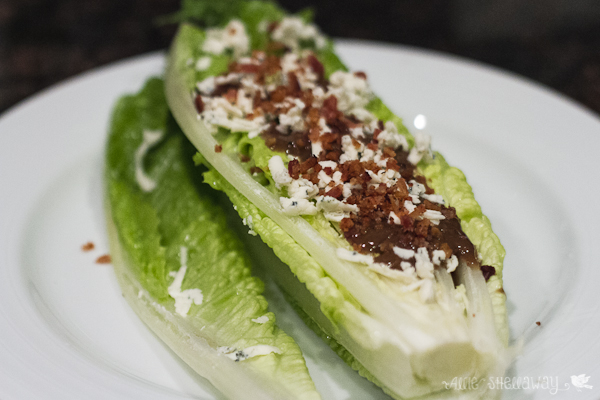
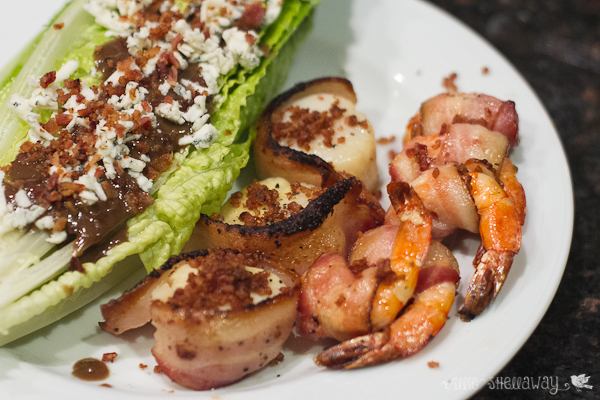
Our first course was our joint course... a romaine salad with shallot bacon balsamic dressing topped with blue cheese crumbles and bacon. It was really tasty, but the blue cheese overpowered the bacon flavor. I'd absolutely make this again, though.

bacon wrapped scallops bacon wrapped shrimp

The second course was all Jared, and the man out-did himself... bacon-wrapped shrimp and bacon wrapped scallops crusted with lemon pepper & sea salt, topped with Old Bay bacon crumbles. The shrimp were good, but the scallops were to-die-for. So juicy and tender, and perfectly complemented by the bacon.

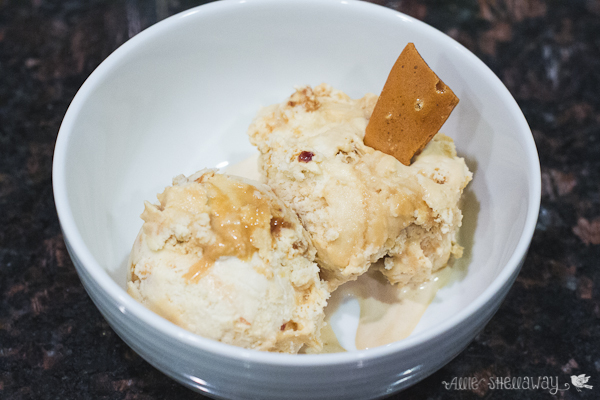
The third course was mine, and if I do say so myself (and I do, because it's my blog), I crushed it. Maple bacon ice cream garnished with bacon brittle. Best. Ice. Cream. Ever. Okay, maybe not the best ever, but easily the best I've ever made. If you've ever been to Voodoo Donuts in Portland, you've probably had their maple bacon bar... well, this is the ice cream equivalent of that deliciousness.

Jared and I agreed that we tied on this battle... his scallops were just as delicious as my ice cream. We high fived each other and agreed that this was the best date night idea ever. Well, second to actually leaving the house. Cooking together is a blast and we get an amazing meal out of it. If you're looking for a way to jazz up your weekends with your significant other, I highly recommend trying your own Iron Chef battle.

Up next for us... Battle Lemon. Kinda unconventional, but lemons are in season so we're just going to roll with it.

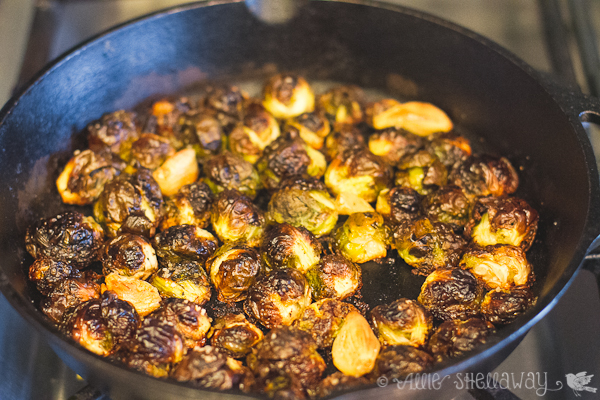
the brussels sprouts that will make you like brussels sprouts

See that one that's missing? I couldn't even wait to take the picture to try one.

If you hate brussels sprouts or think there just "meh" then you clearly haven't had them cooked like this. I stumbled upon Mark Bittman's recipe a while back after making some lackluster sprouts, and it turns out I was cooking them all wrong. This way is not only easy, but they turn out so amazingly good I was eating them like candy before they even hit the plate. Mark said it best himself: "the crisp outside leaves and tender, almost artichoke-like interior cannot be beat."

Ingredients:

  • 1 pint brussels sprouts (about a pound)
  • 4 to 6 tablespoons extra virgin olive oil, to coat bottom of pan
  • 5 cloves garlic
  • Salt and pepper to taste
  • 1 tablespoon balsamic vinegar
Directions:
  1. Heat oven to 450 degrees. Trim bottom of brussels sprouts, and slice each in half top to bottom. Heat oil in cast-iron pan over medium-high heat until it shimmers; put sprouts cut side down in one layer in pan. Put in garlic, and sprinkle with salt and pepper.
  2. Cook, undisturbed, until sprouts begin to brown on bottom, and transfer to oven. Cook, shaking pan occasionally, until sprouts are quite brown and tender, about 1/2 hour.
  3. Taste, and add more salt and pepper if necessary. Stir in balsamic vinegar, and serve hot or warm.

Recipe from The New York Times.

{made for dinner} Beef with Peas

IMG_0766.jpg

In our continued hunt for new weeknight dinner recipes, we tried out Pioneer Woman's Beef with Snow Peas (subbing regular peas for the snow peas so the meal would be more toddler friendly.) I was a little skeptical, but P-dub won us all over, Emma especially. (I swear, the girl loooves her proteins.) The flavor in the sauce is what really makes this, plus you don't have to marinate the meat ahead of time which is huge because we always forget anyway. Here's our adapted recipe:

Ingredients

  • 1-1/2 pound Flank Steak, Trimmed Of Fat And Sliced Very Thin Against The Grain
  • 1/2 cup Low Sodium Soy Sauce
  • 3 Tablespoons Sherry Or Cooking Sherry
  • 2 Tablespoons Brown Sugar
  • 2 Tablespoons Cornstarch
  • 1 Tablespoon Minced Fresh Ginger
  • 1 cup of frozen peas
  • 5 whole Scallions, Cut Into Haf-inch Pieces On The Diagonal
  • Salt As Needed (use Sparingly)
  • 3 Tablespoons Peanut Or Olive Oil
  • Jasmine Or Long Grain Rice, Cooked According To Package

Directions:

In a bowl, mix together soy sauce, sherry, brown sugar, cornstarch, and ginger. Add sliced meat to bowl and toss with hands. Set aside.

Cook frozen peas according to the instructions on the bag, and set aside.

Heat oil in a heavy skillet (iron is best) or wok over high heat. With tongs, add half the meat mixture, leaving most of the marinade still in the bowl. Add half the scallions. Spread out meat as you add it to pan, but do not stir for a good minute. (You want the meat to get as brown as possible in as short amount a time as possible.) Turn meat to the other side and cook for another 30 seconds. Remove to a clean plate.

Repeat with other half of meat, allowing pan to get very hot again first. After turning it, add the first plateful of meat, the rest of the marinade, and the peas. Stir over high heat for 30 seconds, then turn off heat. Check seasonings and add salt only if it needs it. Mixture will thicken as it sits.

Serve immediately over rice.

Recipe adapted from The Pioneer Woman.

Homemade Kettle Corn (it's so easy!)

Snapseed.jpg


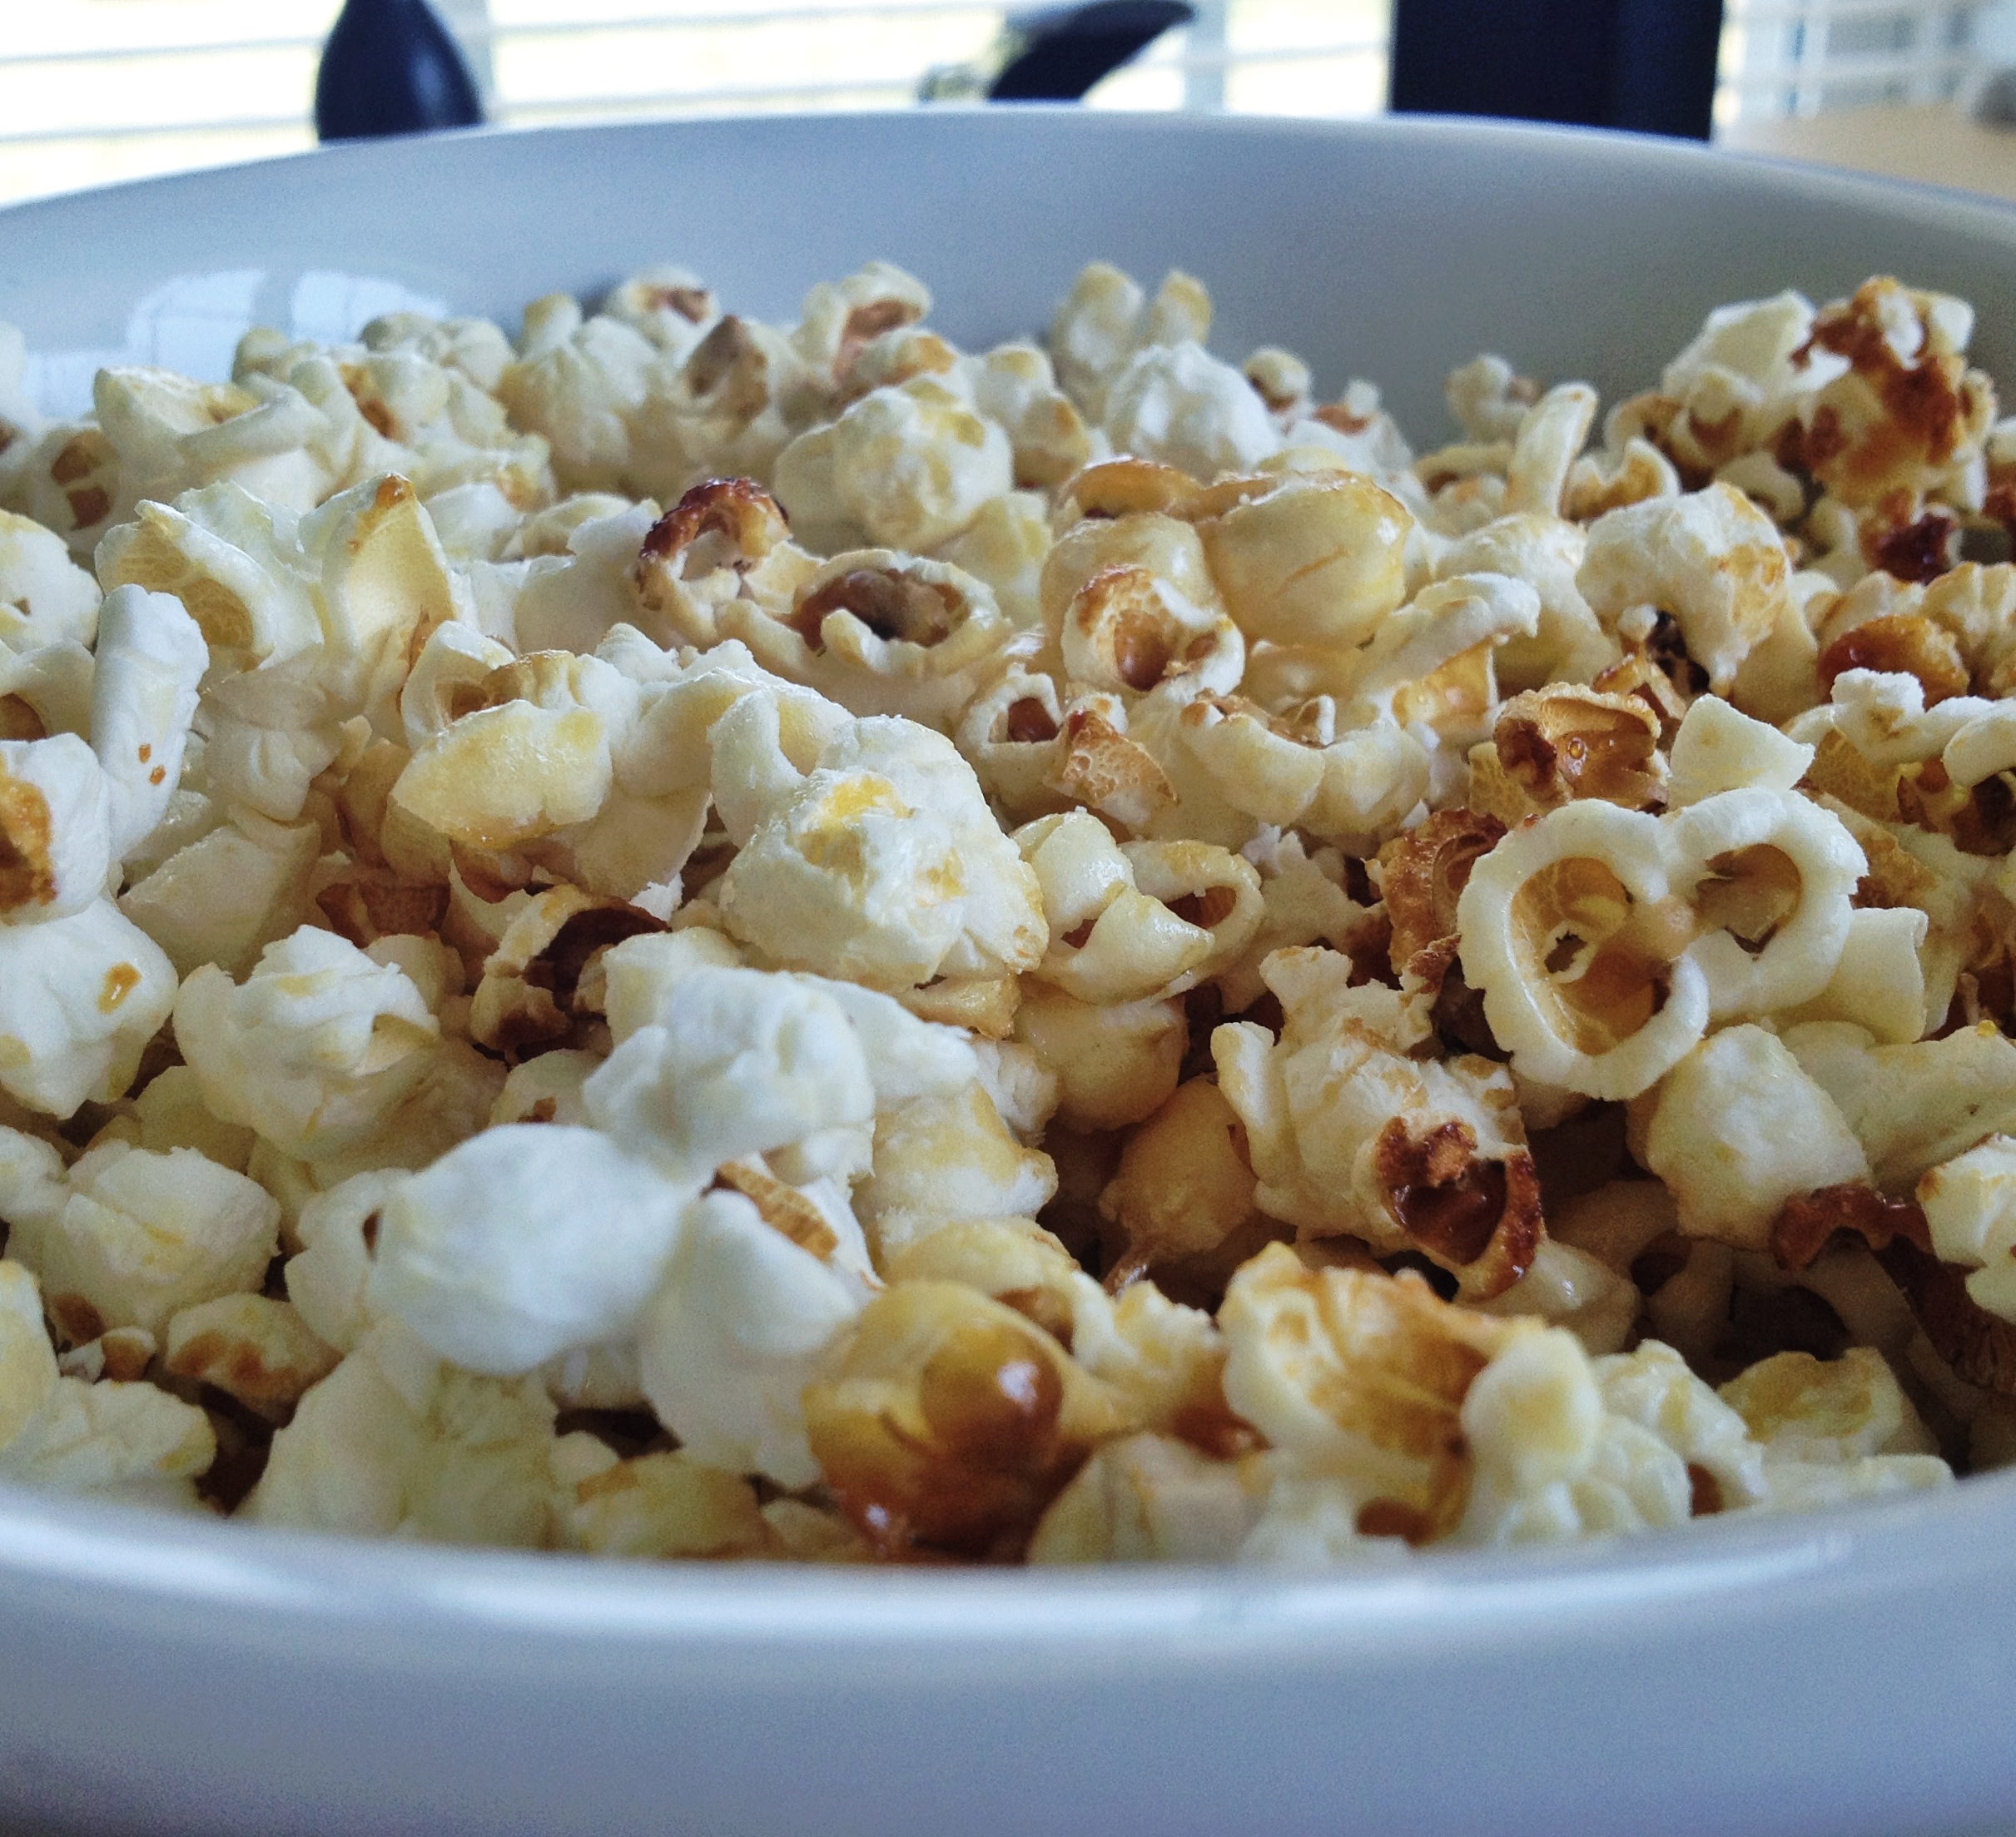
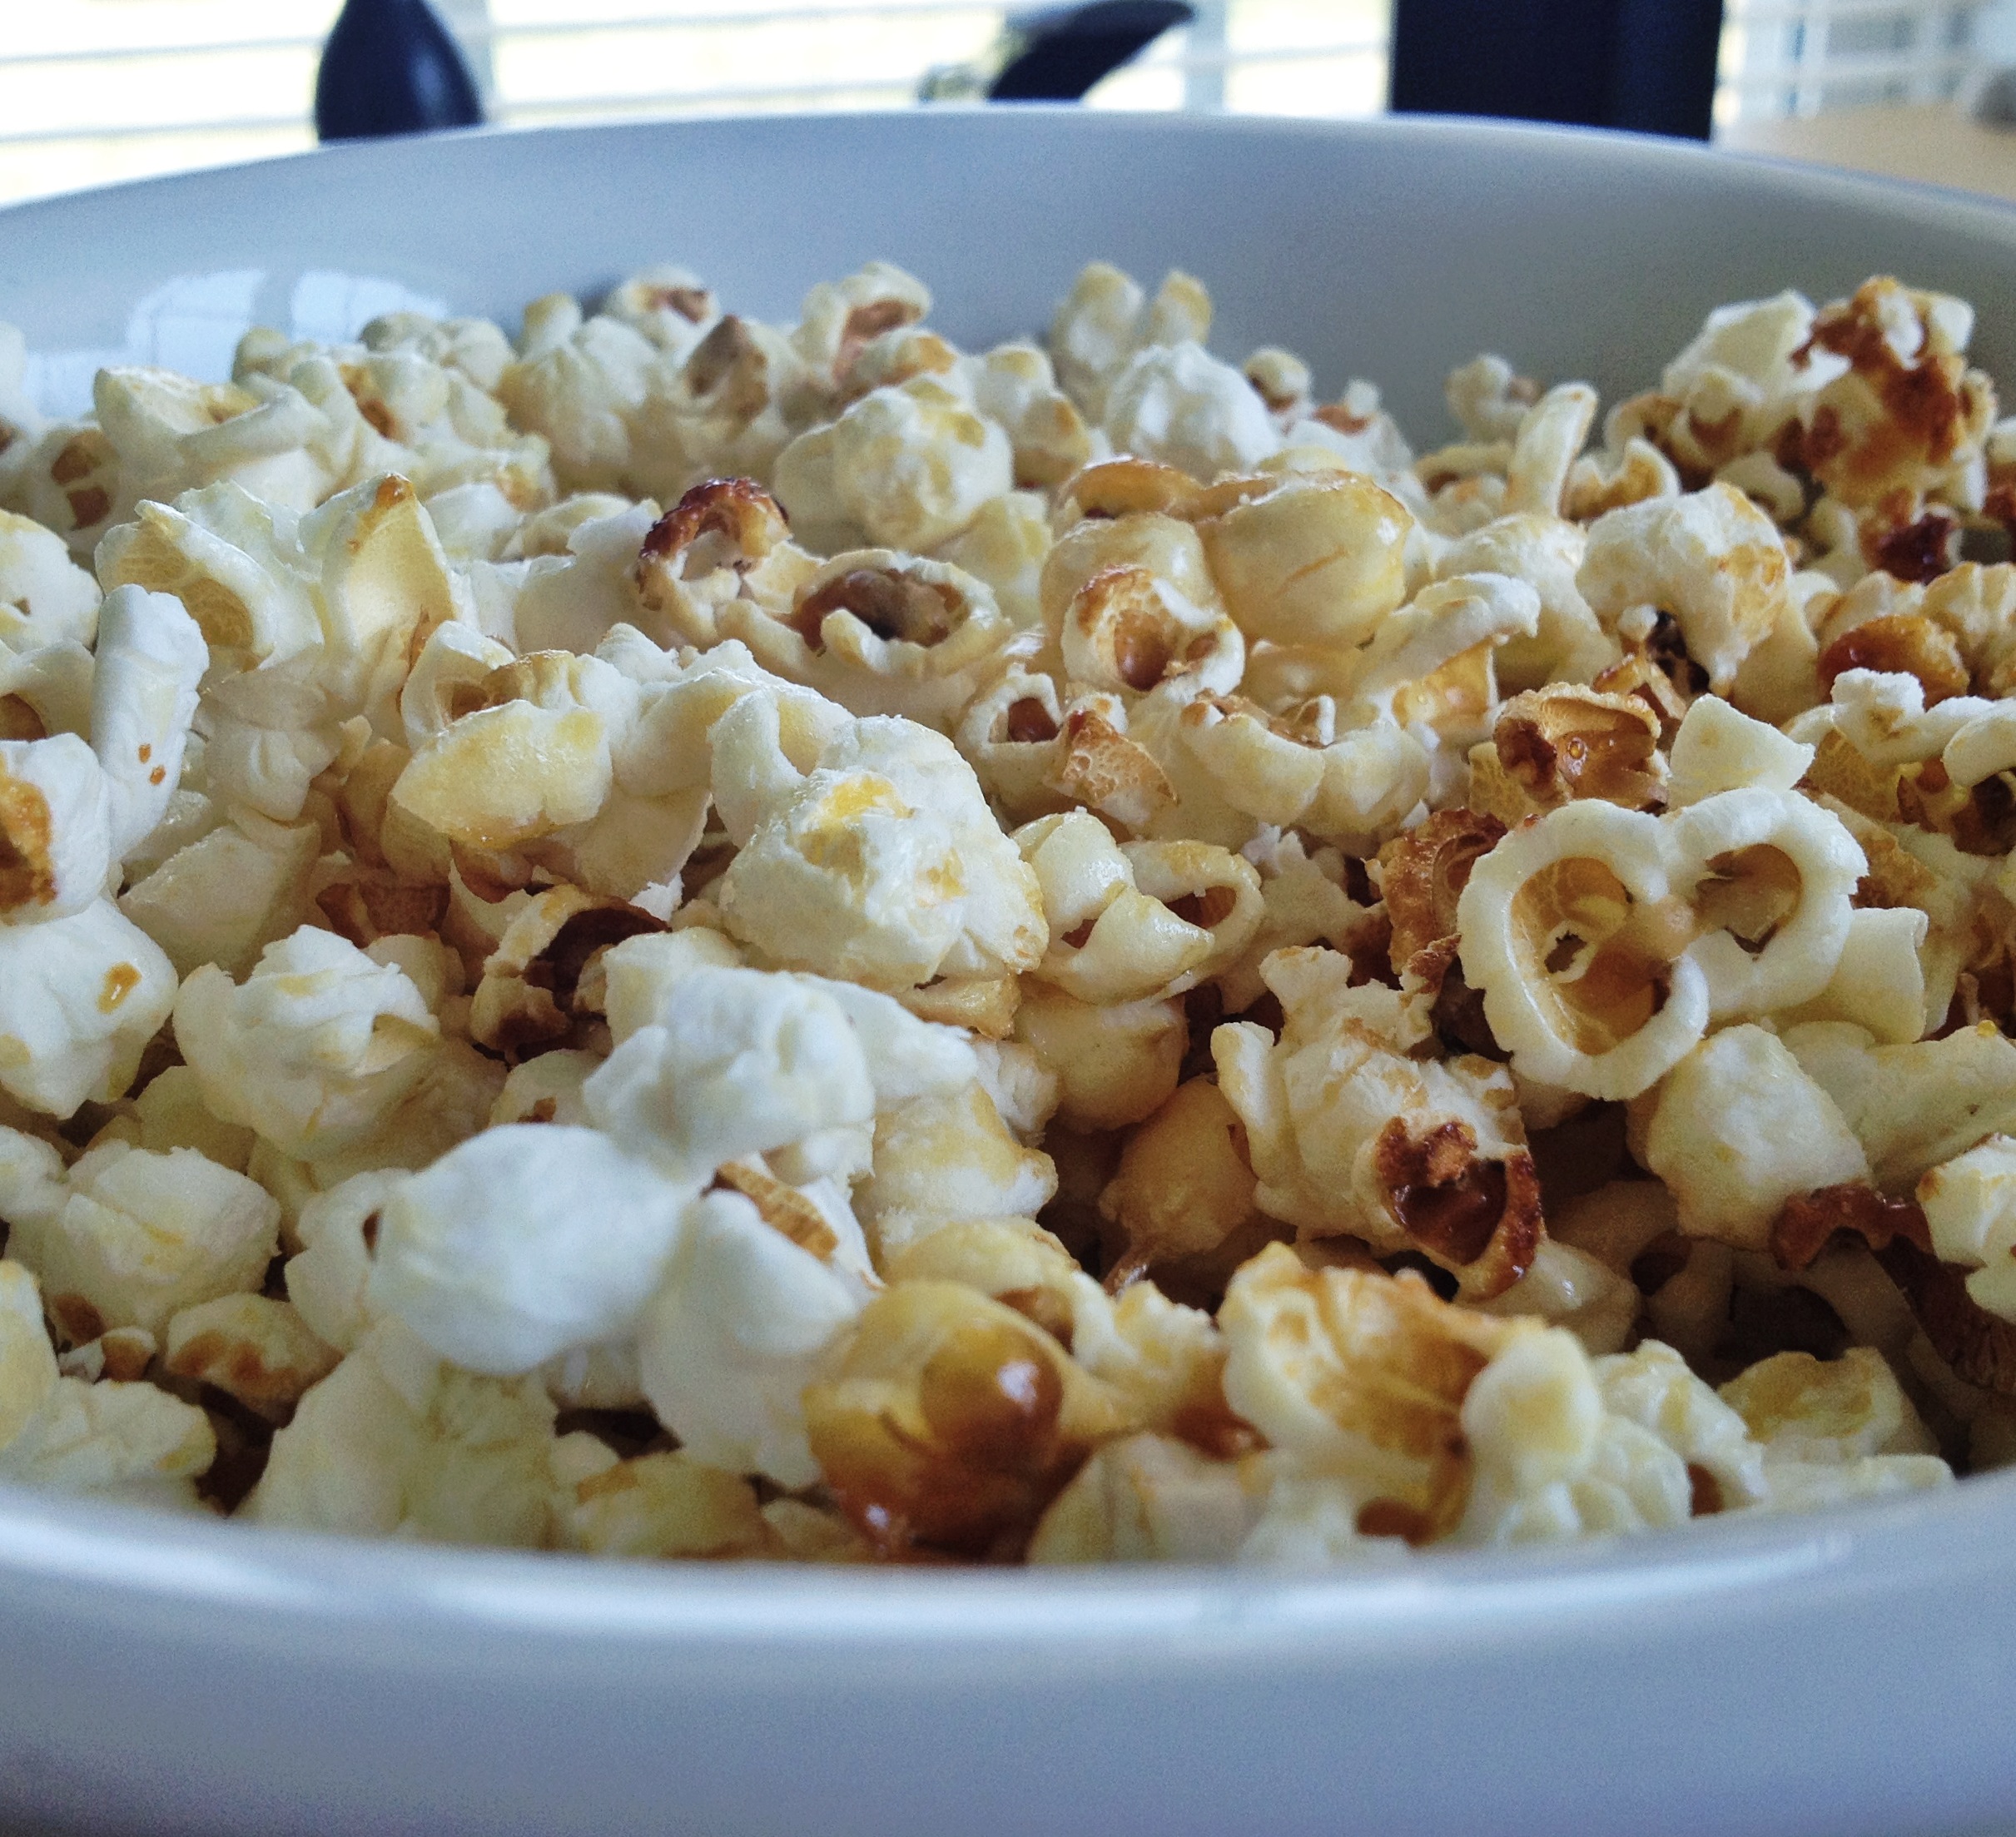
Don't hate me for sharing this with you. I've made it approximately 17 times since discovering the recipe a couple of weeks ago. Jared and I have been making microwave popcorn from plain kernels using this approach for ages, but now that we've discovered you can make it on the stove there's no turning back. It's a far superior method - especially when you add sugar to make it Kettle Corn!

Ingredients:

  • 1/4 cup vegetable oil
  • 1/2 cup popcorn kernels
  • 1/3 cup sugar
  • 3/4 teaspoon salt

Directions:

Heat the oil in a large pot over medium-high heat. (We use a deep non-stick pot with a heavy glass lid.) Add the popcorn and sugar. Give the kernels a quick stir and then cover with a lid. Once the popcorn starts popping, carefully pick the pot up and give it a quick shake every few seconds until the popping slows down, between 3-4 minutes. Remove immediately from the heat and pour the kettle corn into a large bowl. Sprinkle with salt and serve immediately. Do not make the mistake of removing the pot from heat without transferring to a bowl. Due to the high heat of the pot, if you don’t transfer the popcorn it will caramelize and perhaps burn. (Also, do not attempt to make a batch of this in a dutch oven. The original poster tried this and it caramelized too quickly and burned.)

(Note: if you're not a kettle corn fan, you can use this same recipe to make plain popcorn - just leave out the sugar. That's how Jared makes it, and once it's done he drizzles some melted butter on top.)

This recipe makes a good amount for 2 or 3 people to share, but you can halve everything for a single (albeit generous) serving. (Making a quarter of this recipe is probably a good "watching my weight" size.) Enjoy!

Recipe from Kitchen Explorers on PBS.com


chocolate chip perfection

nyt-chocolate-chip-cookies.jpg

If you're on Pinterest, you've likely seen a pin floating around for what is supposed to be "the BEST" chocolate chip cookie recipe. It was first published in the New York Times about 4 years ago, and has taken on near legendary status since then. (Fun fact about me: if you put the words the best in front of something, I will nearly always say back to you challenge accepted. Best mac 'n cheese, ice cream, cupcake, chicken parm? I'll be the judge of that, thank you very much.) So I decided to finally try out this famous recipe for myself last weekend, and I'm pleased to report that it very much lived up to the hype. The secret? You let the dough rest for at least 24 hours. This apparently enables the egg to fully saturate the dough and therefore the cookies bake more evenly, and well - perfectly.

In full disclosure, I'm a loyal fan of the chocolate chip cookie recipe on the back of the Tollhouse chip bag. It's a classic, and hard to beat in my opinion. But this recipe is like the adult version of the Tollhouse recipe... the Big to Tollhouse's Aidan. They're classier, more substantial, and worth the wait.

The part of the recipe that really blew my mind was this "Repeat with remaining dough, or reserve dough, refrigerated, for baking remaining batches the next day." You mean I can just make enough for myself and Jared? I don't have to make them all at once, inevitably taking the extras to work so that they can be enjoyed before going stale? Sorry, coworkers. They're all for me! (Okay, me and Jared.)

New York Times' Perfect Chocolate Chip Cookies

Time: 45 minutes (for 1 6-cookie batch), plus at least 24 hours’ chilling

Ingredients:

  • 2 cups minus 2 tablespoons (8 1/2 ounces) cake flour
  • 1 2/3 cups (8 1/2 ounces) bread flour
  • 1 1/4 teaspoons baking soda
  • 1 1/2 teaspoons baking powder
  • 1 1/2 teaspoons coarse salt
  • 2 1/2 sticks (1 1/4 cups) unsalted butter (or Vegan Buttery Sticks if making dairy-free)
  • 1 1/4 cups (10 ounces) light brown sugar
  • 1 cup plus 2 tablespoons (8 ounces) granulated sugar
  • 2 large eggs
  • 2 teaspoons natural vanilla extract
  • 1 1/4 pounds bittersweet chocolate disks or fèves, at least 60 percent cacao content (see note)
  • Sea salt.

Directions:

  1. Sift flours, baking soda, baking powder and salt into a bowl. Set aside.
  2. Using a mixer fitted with paddle attachment, cream butter and sugars together until very light, about 5 minutes. Add eggs, one at a time, mixing well after each addition. Stir in the vanilla. Reduce speed to low, add dry ingredients and mix until just combined, 5 to 10 seconds. Drop chocolate pieces in and incorporate them without breaking them. Press plastic wrap against dough and refrigerate for 24 to 36 hours. Dough may be used in batches, and can be refrigerated for up to 72 hours.
  3. When ready to bake, preheat oven to 350 degrees. Line a baking sheet with parchment paper or a nonstick baking mat. Set aside.
  4. Scoop 6 3 1/2-ounce mounds of dough (the size of generous golf balls) onto baking sheet, making sure to turn horizontally any chocolate pieces that are poking up; it will make for a more attractive cookie. Sprinkle lightly with sea salt and bake until golden brown but still soft, 18 to 20 minutes. Transfer sheet to a wire rack for 10 minutes, then slip cookies onto another rack to cool a bit more. Repeat with remaining dough, or reserve dough, refrigerated, for baking remaining batches the next day. Eat warm, with a big napkin.

Yield: 1 1/2 dozen 5-inch cookies.

Note: Disks are sold at Jacques Torres Chocolate; Valrhona fèves, oval-shaped chocolate pieces, are at Whole Foods.

Recipe from The New York Times

Homemade Soft Pretzel Bites

photo-121.jpg

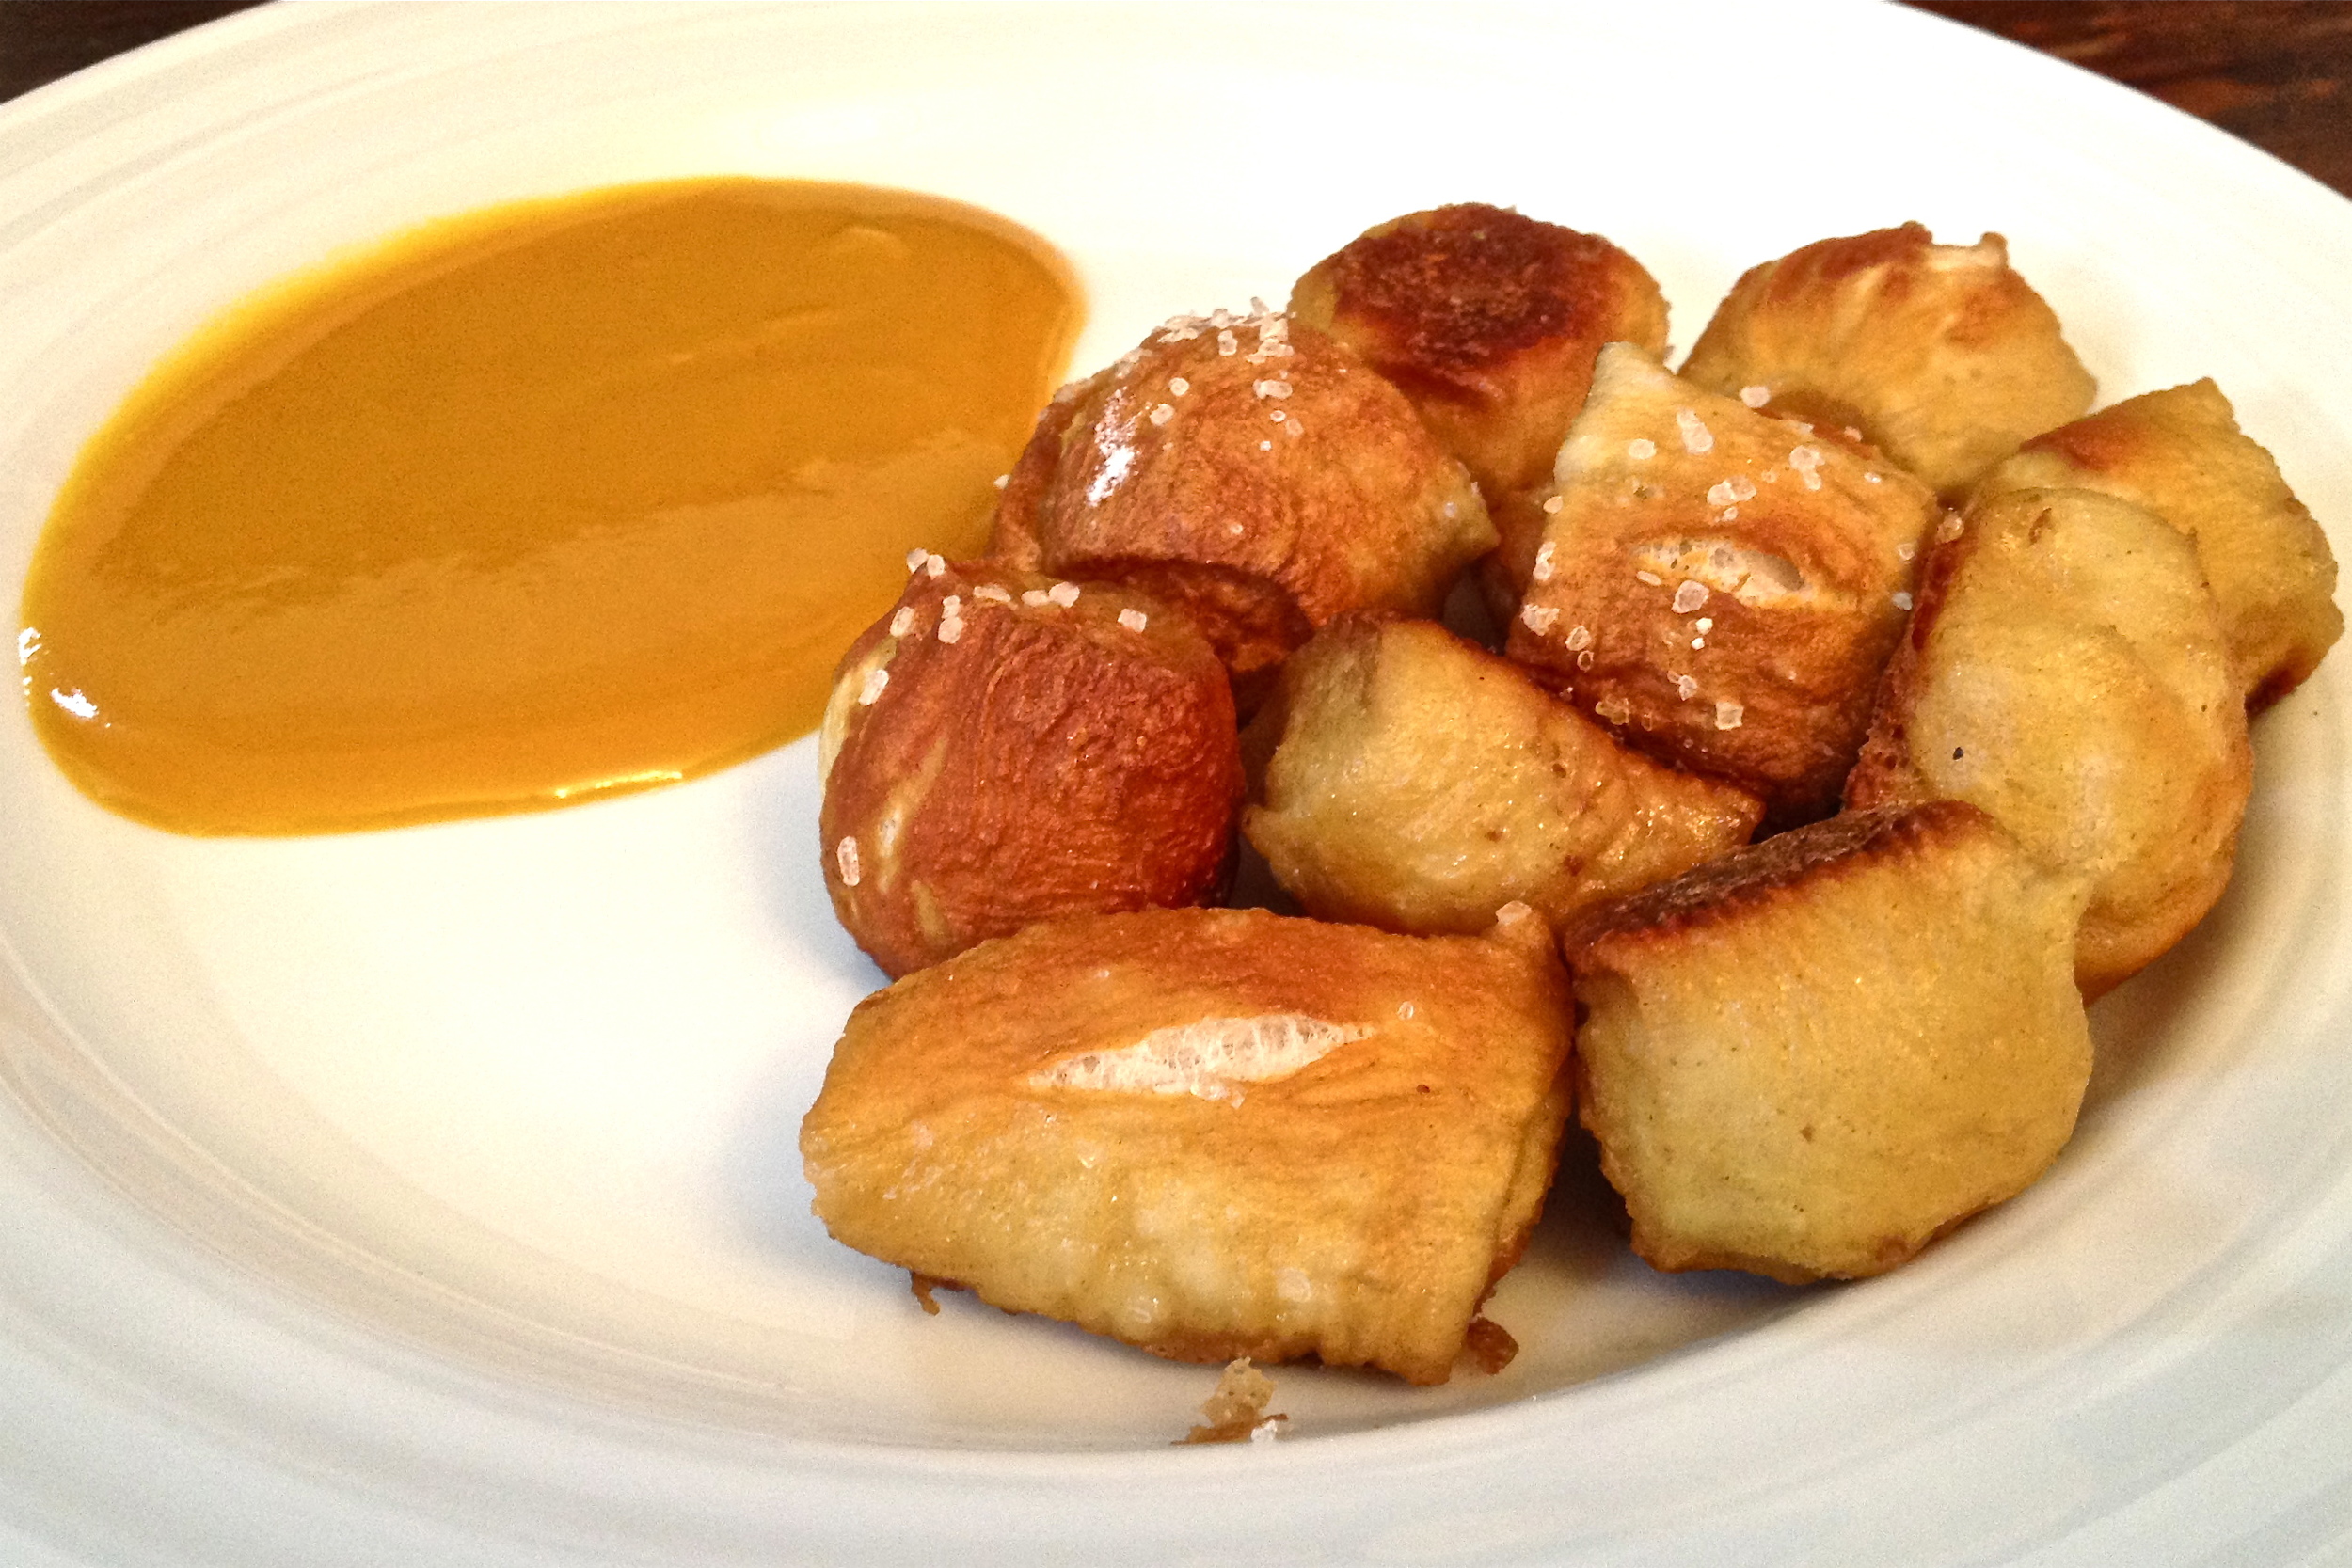
Jared has been searching for the perfect soft pretzel recipe for at least two years, and after combining a couple of recipes, he finally found it. Yes, my husband likes to do things like make us homemade soft pretzel bites on the weekend. He's kind of awesome. Anyway, these little puppies are perfect for a party, sports get together, or random Sunday. And I love them. Here's the recipe...

Ingredients:

  • 1 tablespoon yeast
  • 1 tablespoon sugar
  • 2 cups warm water
  • 1 cup flour
  • 4 cups flour , mixed with
  • 1 tablespoon salt , more flour if needed
  • 1 egg
  • 1 tablespoon water
  • coarse salt

Directions:

  1. In large bowl, stir yeast, sugar and warm water.
  2. Let rest til yeast is dissolved and is a little foamy.
  3. Stir in 1 cup flour. Then rest of flour mixed with the 1 Tbl salt.
  4. Knead on lightly floured surface til smooth.
  5. Place in oiled bowl, rolling around til all oiled. Cover and let rise till doubled in size.
  6. Divide dough into eight balls. Roll each into a 20-in. rope; cut into 1 inch pieces.
  7. In a saucepan, bring water and baking soda to a boil. Drop pretzels into boiling water, two at a time; boil for 10-15 seconds. Remove with a slotted spoon; drain on paper towels.
  8. Place pretzels on greased baking sheets. Bake at 425 degrees F for 8-10 minutes or until golden brown. Sprinkle with salt.

I prefer them with honey mustard, while Jared is more of a French's Yellow kind of guy. Either way, they're excellent plain, but even better with any kind of mustard. Enjoy!!

bunny butt cupcakes

photo-2.jpg

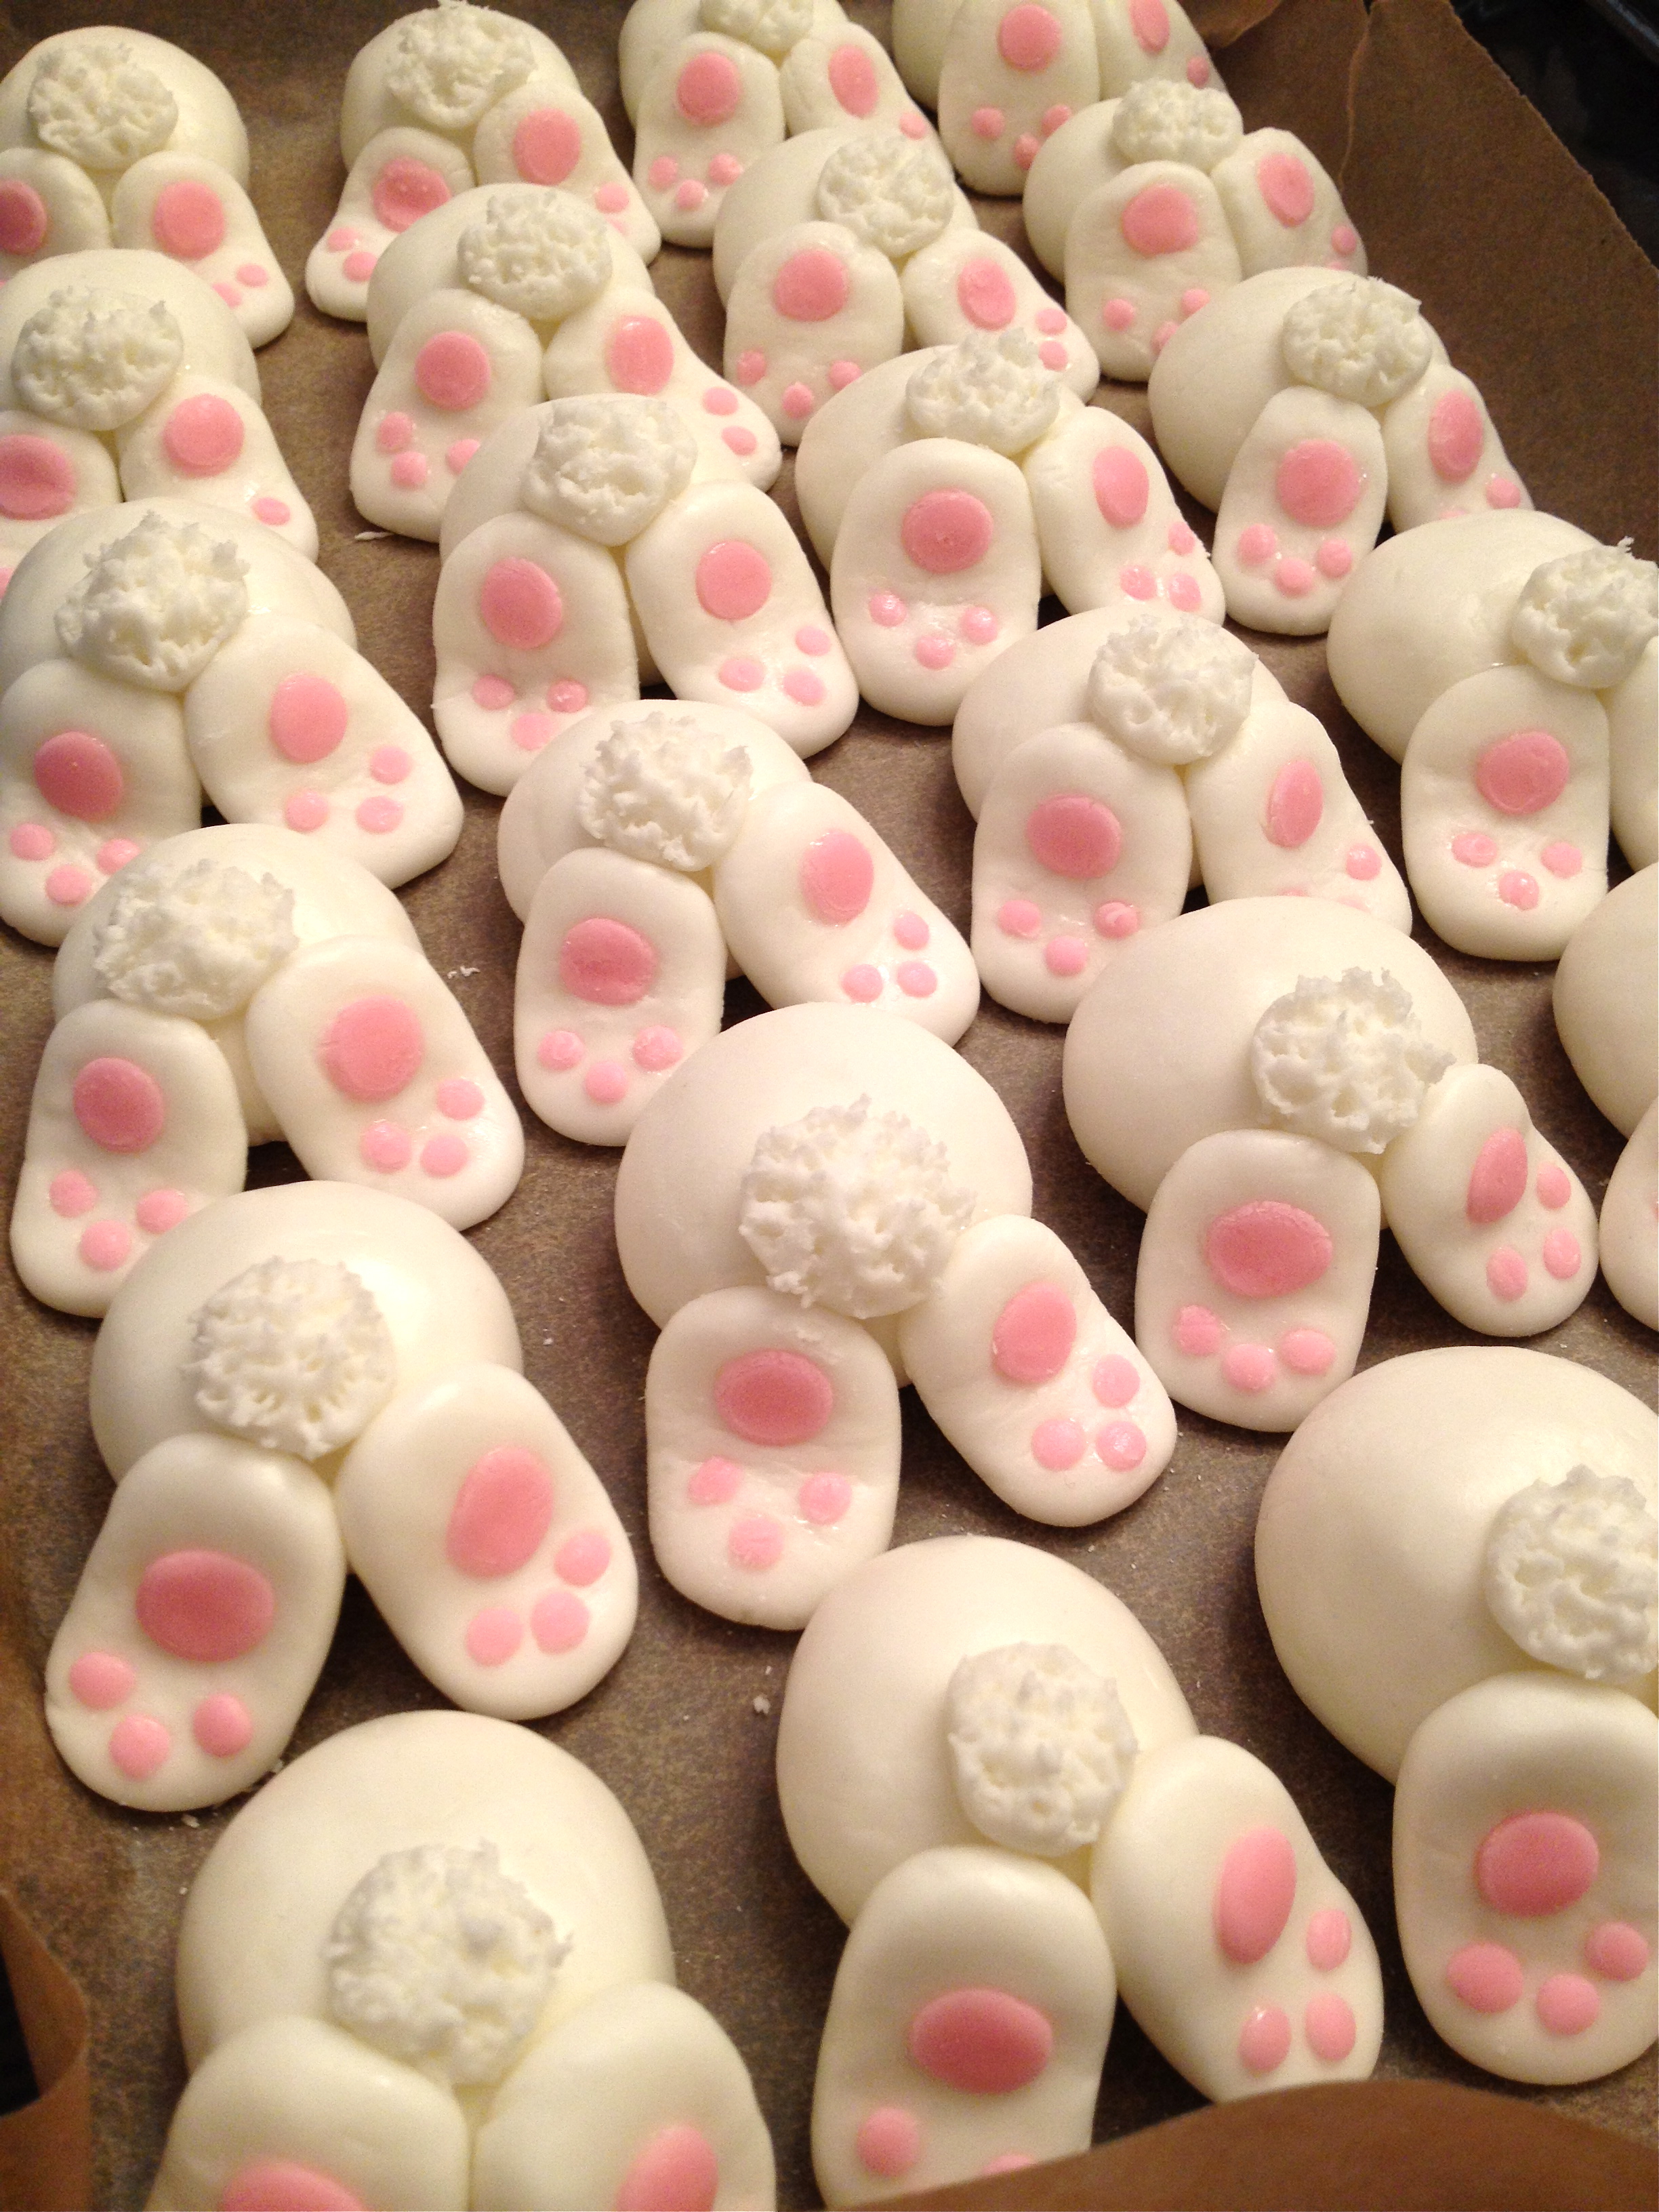
I'll be the first to admit, I may have overdone it a bit this Easter. :-) But if there's one thing you should know about me it's that when I get an idea to do something, there's pretty much nothing that will stop me from at least attempting it. (Do I need to remind you about the weekender bags?) So when I saw these little bunny butts on Pinterest I knew they needed to be on top of my Easter cupcakes. I mean, come on. They're so stinking cute. Yes, I was sick. Yes, Emma is in the middle of a major sleep regression and I don't remember the last time we got a good night's sleep. But these little tushes were calling me. I had to make them.

I followed the instructions on Hungry Happenings nearly exactly... she used modeling chocolate, but since I'm still off dairy, I used fondant. I followed this recipe to whip up some homemade marshmallow fondant, and was relieved to find it easier than I thought it would be. The only hiccup came when I ended up needing to transfer the mixture back into a glass bowl (from the mixer bowl) so I could microwave it a smidge more in order to get the last of the mini marshmallows to melt. I also used Crisco instead of butter, as several reviewers suggested.

The bunny butts were easy enough to assemble... just time consuming. I hadn't worked with fondant before, and it felt very similar to working with clay or play-doh.

Now all that was left was to make the actual cupcakes. I decided to make strawberry cupcakes but had to use box mix because it's dairy free and sooo much better than trying to make vegan cupcakes from scratch. I also used store-bought vanilla frosting for the same reason. I hate cheating, but given how much time went into making the bunny butts, I didn't feel too bad about it. Anyway, I dyed the frosting green with gel color and used Wilton's grass piping tip (#233) to make it look like the bunny butts were sitting on a bed of grass.

Oh look at those cute little tushes! Thankfully, they were just as tasty as they were cute (the cupcake part anyway... fondant is kinda meh.) I'd love to make them again with the modeling chocolate from the original recipe and with chocolate cake so it looks like dirt underneath the grass. How many days until next Easter? :-)

Funny enough, after all that hard work I decided I couldn't bear to toss the leftover green frosting, so I whipped up a half batch of Annie's Soft Frosted Sugar Cookies. (Don't judge me.) The verdict? Deeeelicious. Maybe even better than the grocery store bakery kind she was trying to replicate. I highly recommend them if you need to use up some frosting. Or if you want to make sure those last few pounds of pregnancy weight stay right where they are. These are really good for that. Trust me.

I hope you all had a wonderful Easter weekend!

easiest peanut butter cookies

I love a cookie that I can make with ingredients I already have on hand. Add to that a recipe that requires one bowl and takes 15 minutes from start to mouth, and I'm sold. Enter - the easiest peanut butter cookies ever. No flour, no butter, just peanut butter, two kinds of sugar, vanilla, baking soda, and an egg. They take only 10 minutes in the oven, and are ever so delicious served warm. (They're pretty good at room temperature, too, but it's just not the same.) Like pretty much every other peanut butter cookie recipe, these get crunchy after a day (fun fact - this is how my mom prefers them. What a weirdo.) So if you're more of a chewy fan, it's best to eat as many as possible the day you make them. Jared liked them so much he requested I make them again after Rocco ate the remainders of the first batch straight off the kitchen counter. I hope you enjoy them as much as my boys did!

Ingredients:

  • 1 cup peanut butter (see note)
  • 3/4 cup natural cane sugar
  • 1/4 cup brown sugar
  • 1 egg
  • 1 teaspoon baking soda
  • 1/2 teaspoon vanilla
  • additional sugar for rolling

Directions:

Preheat oven to 375 degrees°F.

Mix all the ingredients up in a bowl. Roll walnut-sized pieces into balls and roll balls in the additional sugar. Place on a parchment-lined baking sheet and flatten slightly with a fork in a crisscross pattern. Bake for 10 minutes. Remove and let cool before removing from baking sheet.

Note: Peanut butter comes in all kinds of configurations and the kind you choose will influence your outcome. Some peanut butters are very sweet, some have been hydrogenated, some have a whole lot more in them than peanuts! Then there is the chunky versus smooth debate. I used a natural chunky version (Safeway brand) for this recipe that wasn't too sweet although it did have added cane sugar in the ingredient list.

Recipe from The Kitchn

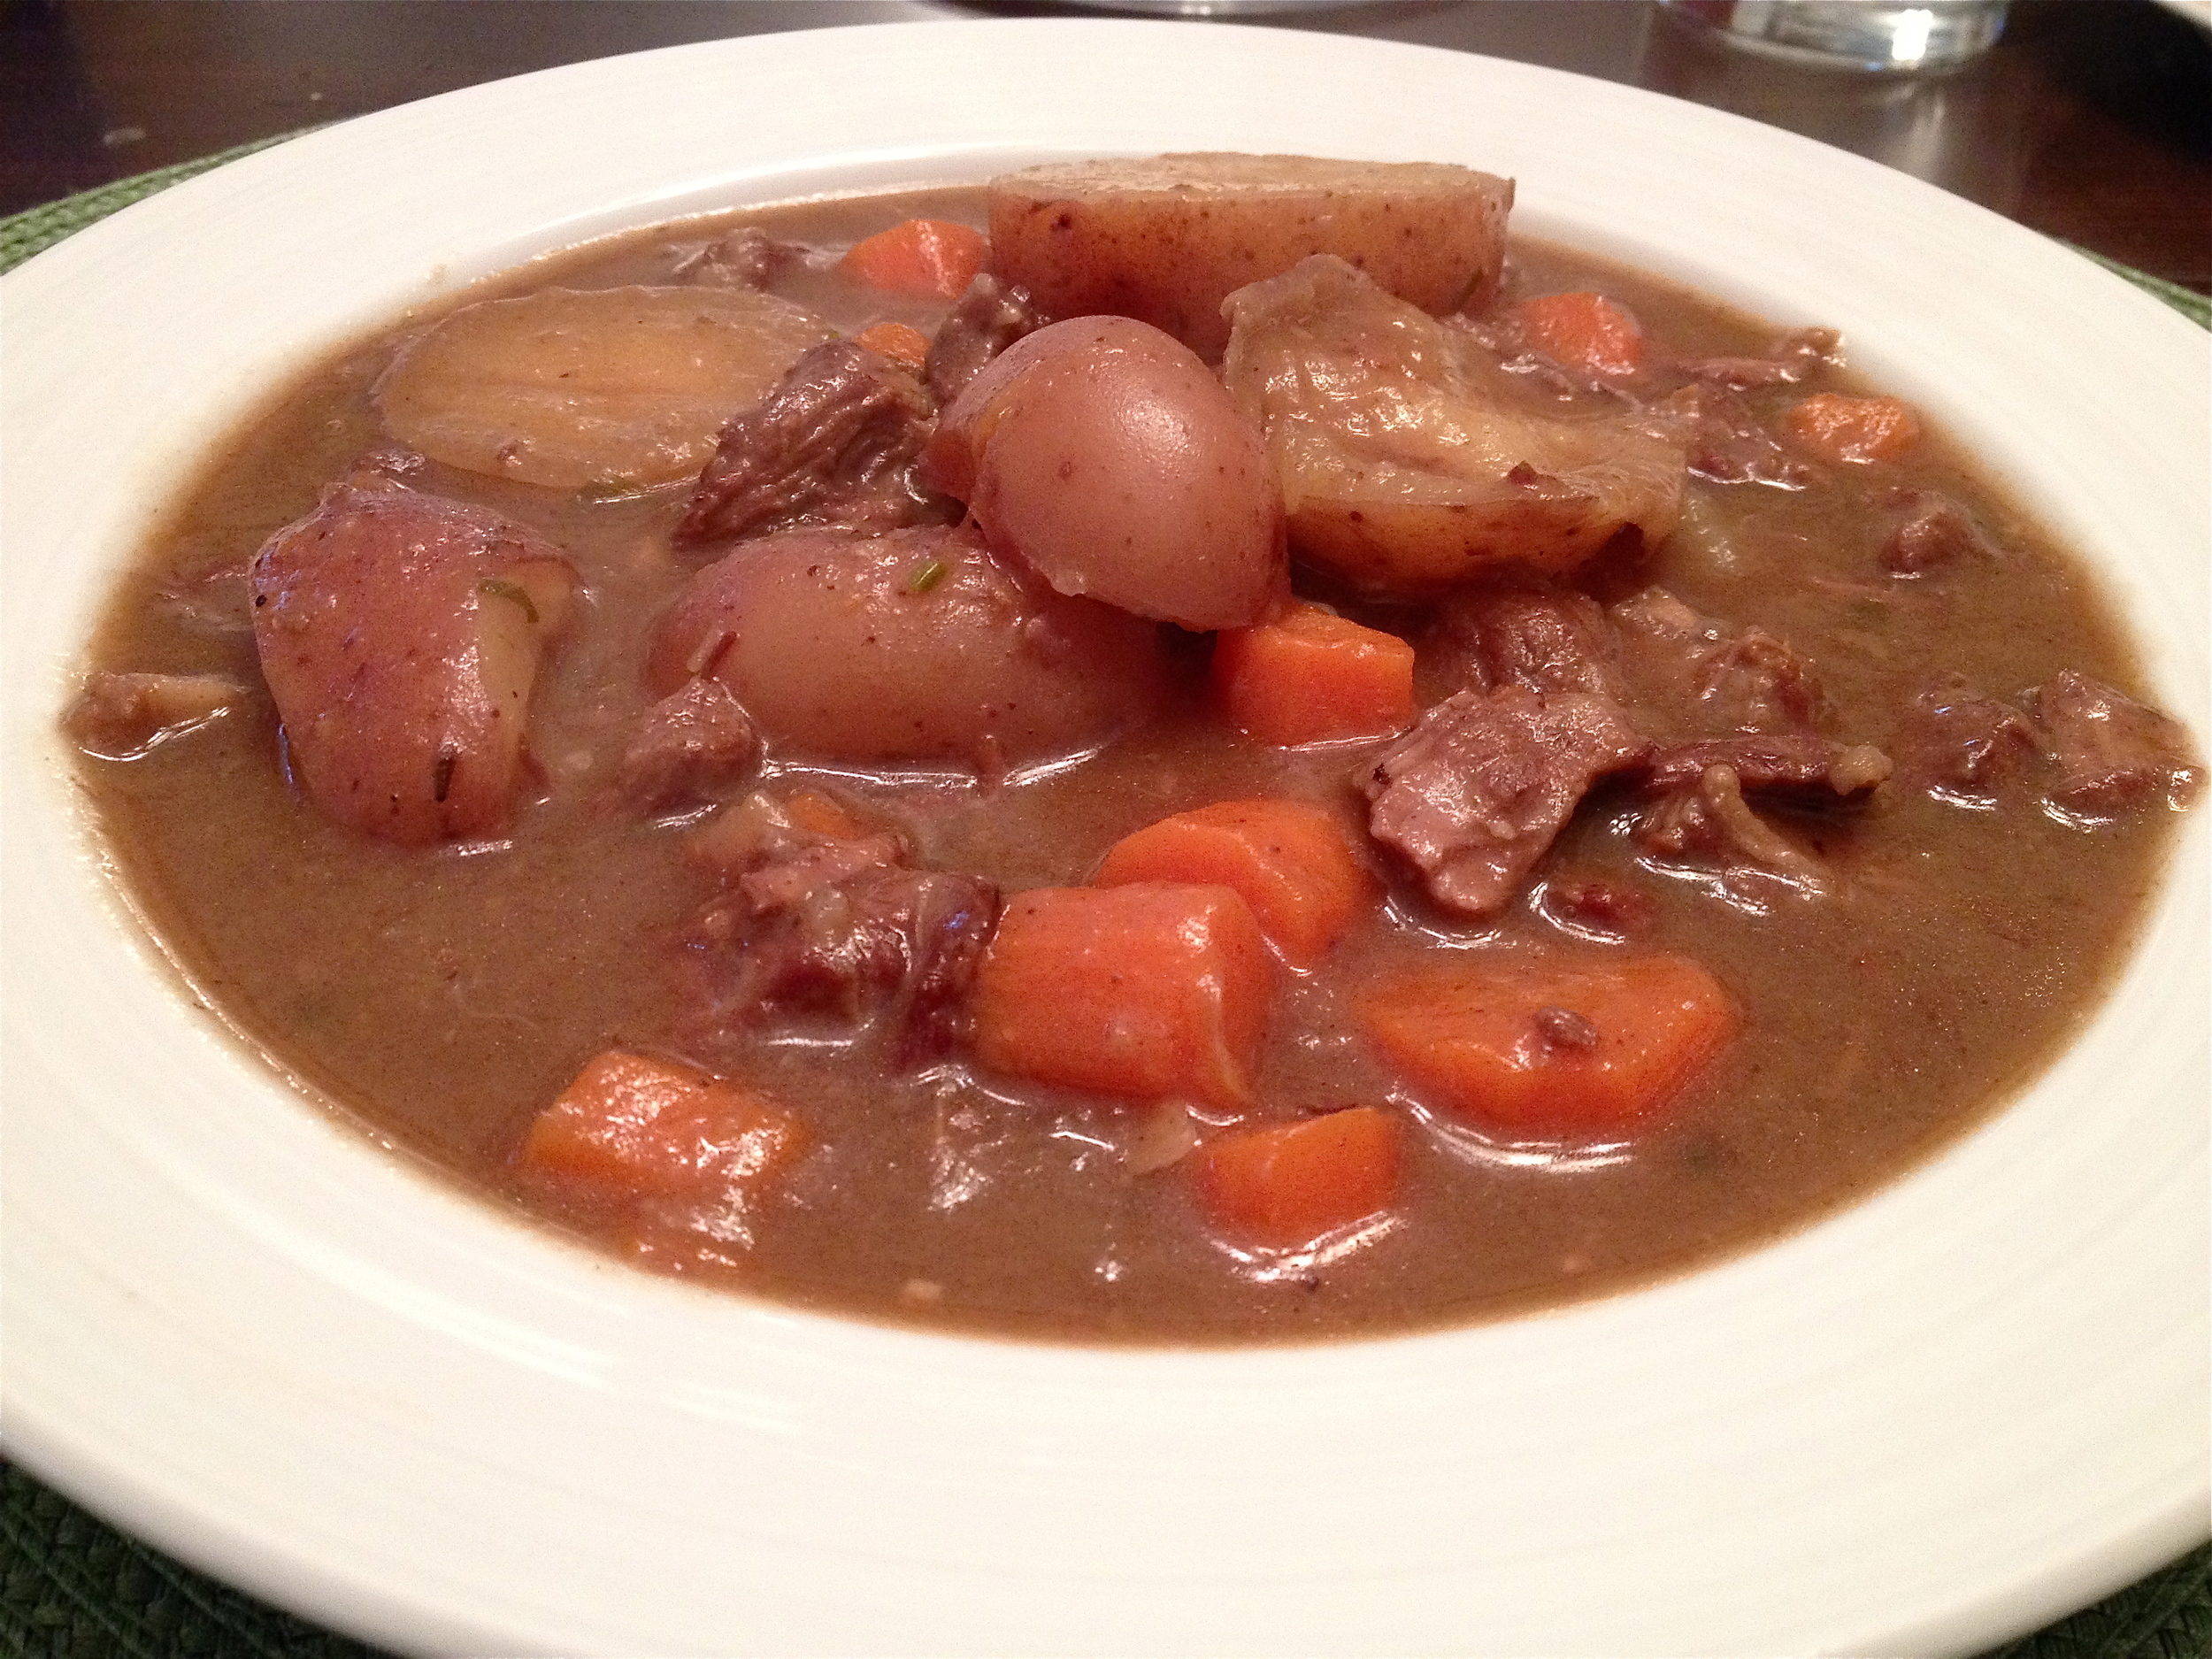
{made for dinner} Beef and Guinness Stew

photo-9.jpg

Given that it was St. Patrick's Day this weekend, we thought it fitting to make some Irish stew. Jared started making this several years ago after a trip to Ireland (one of many places one of us has been without the other that we want to go back to together). And this stew is stick to your bones wintery goodness. Perfect for the sun/rain/snow/hail all in the same day that is March in Portland... It's hearty, the meat is so tender, and the Guinness adds just the right amount of flavor. It's probably more of a weekend recipe, considering the time (but I promise it's worth it).

Slow Cooker Beef and Guinness Stew

Ingredients:

  • 3 lbs boneless beef chuck, trimmed, cut into 1 1/2 inch pieces
  • 1/2 cup flour
  • 1 tsp salt
  • 1/2 tsp freshly ground pepper
  • 1/4 cup vegetable oil
  • 1 large (14 ounces) yellow onion, coarsely chopped
  • 1 can (14.0 ounces) Guinness Draught beer or 1 3/4 cups Guinness Extra Stout
  • 4 cloves garlic, chopped
  • 1 can (14.5 ounces) beef broth
  • 1 tbsp chopped fresh parsley
  • 2 bay leaves
  • 2 small sprigs fresh thyme or 1/4 tsp dried
  • 1 lb small red boiling potatoes, halved
  • 3 carrots, peeled, cut into 1-inch chunks
Directions:

Pat the beef dry with paper towels. Combine the flour, salt and pepper in a shallow dish. Add the beef, toss to coat well with the flour. Reserve the remaining seasoned flour for later.

Heat the oil in a large non-stick skillet. Add the beef in batches in a single, uncrowded layer. Cook, turning, until browned on all sides, about 10 minutes per batch. Transfer to a slow-cooker. Add the onion to the skillet; cook until golden, about five minutes. Add the Guinness and garlic; boil one minute, scraping up the browned bits from the bottom of the pan. Add the mixture to the slow-cooker.

Add the broth, parsley, bay and thyme to the slow-cooker. Cover; cook on low until meat is almost tender, two-and-a-half to three hours. Sprinkle in the reserved seasoned flour; stir. Add potatoes and carrots. Cover, cook on high until tender, about one hour. Taste pan juices, adjust seasonings.

Enjoy!

(PS. One of the great joys as a parent is being able to dress your kid up in holiday appropriate attire. Yeah. Take that all my friends who posted on Facebook about their drunken, fancy-free St. Paddy's Day! Cute baby trumps your hangover any day. At least that's what I tell myself. Anyway, this might be my favorite so far...)

Hope you all had a great St. Patrick's Day!! :-)

the birthday boy

IMG_0173.jpg

Jared's 33rd birthday was a few weeks ago, and it was one of the best days we've had as a family in a long time. We decided to take it as a vacation day, keep Emma home from daycare, and just spend the day together. Little did Jared know that I'd planned out the whole day, and filled it with his very favorite foods. I also stayed up late the night before to decorate the house. Because every 33 year old guy needs a birthday banner. (Which I made with the amazing Silhouette Cameo he gave me for Christmas. Seriously, you need to get one.)

First up on the menu was bacon (of course) and homemade strawberry Pop Tarts. The bacon was delicious, as always, but the real hit was the Pop Tarts. They were sinfully good. (Definitely a special occasion breakfast, totally inappropriate for every day.) I would normally think to make this sort of thing with puff pastry, but this recipe called for refrigerated pie crust, which worked perfectly. It's the frosting that really takes them over the edge, though. They'd be a great weekend breakfast sans frosting, but what fun would that be?

Up next was Jared's guilty pleasure - Stove Top. The man could easily eat a whole box on his own, but thankfully I didn't have to witness that this birthday. I must say, it was a little strange having stuffing on a day other than Thanksgiving, but the processed goodness that is Stove Top didn't disappoint.

That afternoon we caught the "mommy and me" showing of The Muppets at the Kennedy School, where Jared got to enjoy his all time favorite snack food: movie theater popcorn with lots of butter. The Kennedy School is great because they have couches instead of theater seats, and the couches are far enough apart that we could set a blanket down in front of us and let Emma play while we watched the movie. Everybody wins.

For dinner, I went all out and made something I'd pinned for Jared many months ago - Chicken Parmesan Casserole. Jared has his own chicken parm recipe, but this claimed to be the end of regular chicken parm as we know it, and it absolutely lived up to the hype. Trust me on this one... just make it. As long as you have taste buds and like Italian food, you will not be disappointed.

And last but not least, we had Jared's favorite cupcakes for dessert - yellow box cake with chocolate frosting and sprinkles. In the age of fancy cupcakes with filling and piped frosting, there's something so wonderfully simple and nostalgic about these cupcakes.

And there you have it... 33 with a bang. Okay, not a bang - but a whole lot of yummy food and hopefully a great day for my better half (truly) and the best guy I know. :-) If you're trying to figure out something to do for your significant other's birthday this year, I highly recommend the whole playing hooky eating all your favorite foods approach. Jared ended up feeling special the whole day, not just when he opened his present, which is exactly what I wanted (and what he deserved!)

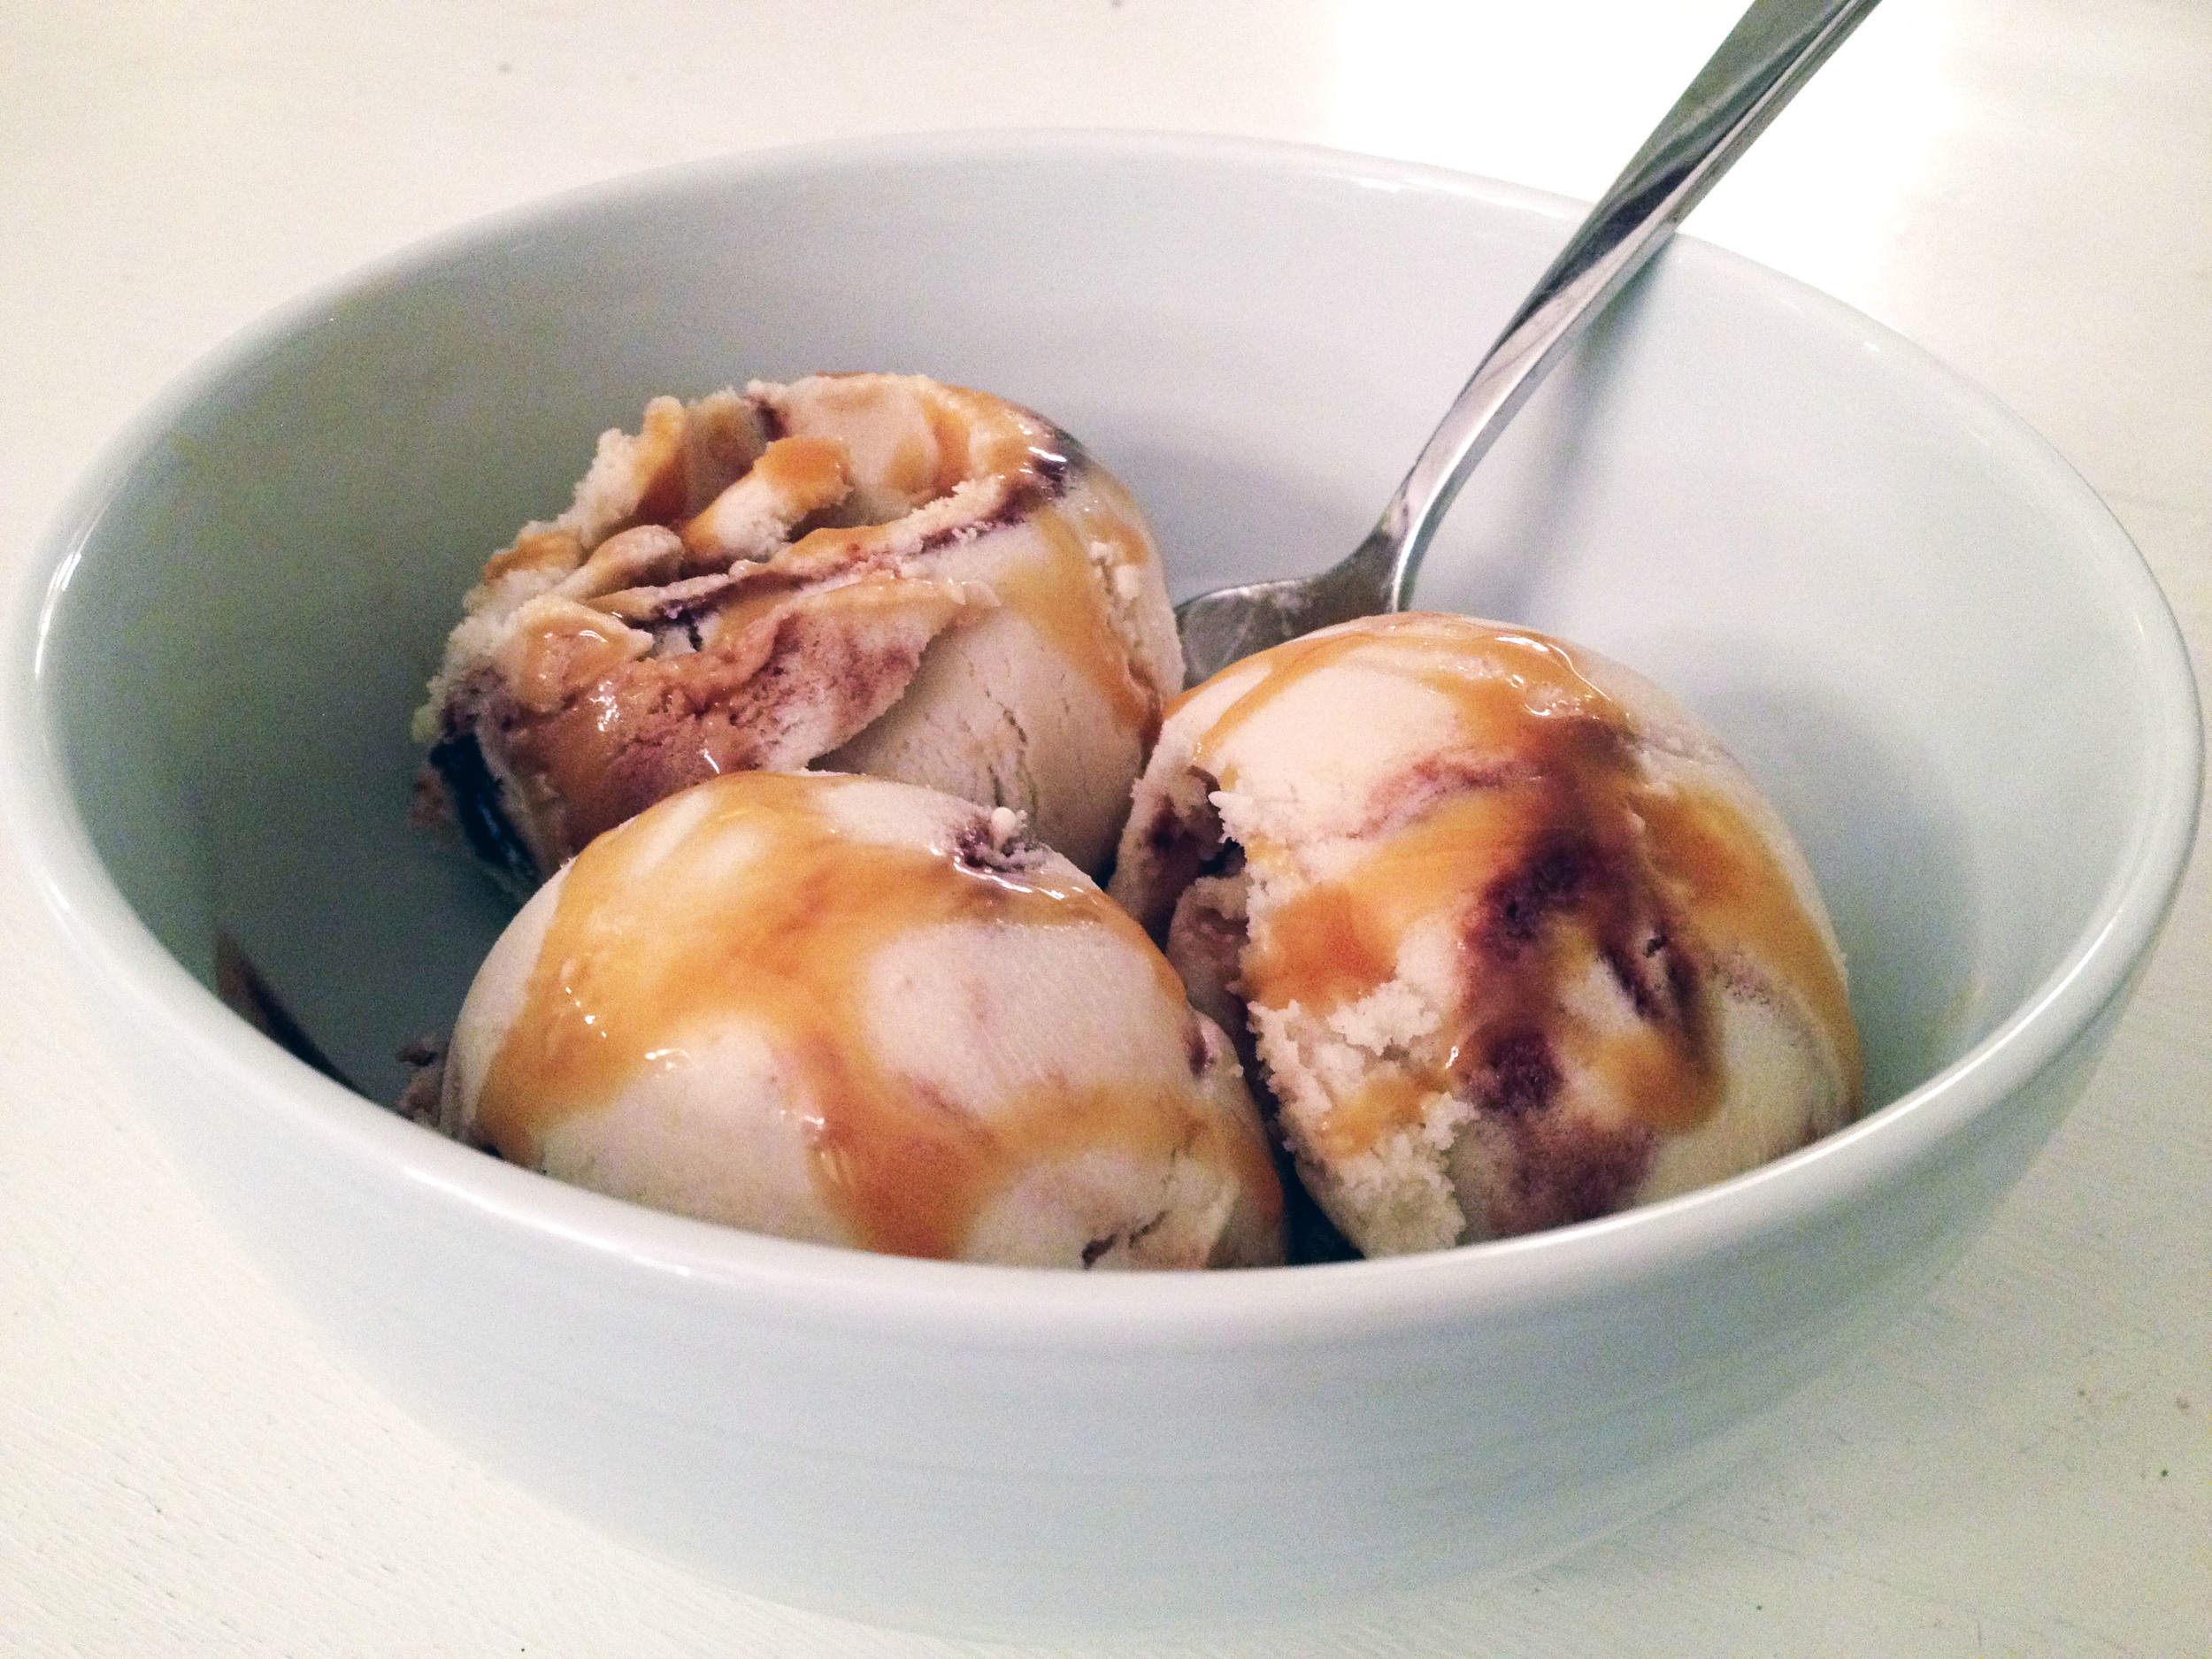
Coconut Ice Cream with Caramel and Fudge Ribbons

coconut-ice-cream-caramel-fudge.jpg

As I mentioned yesterday, the pièce de résistance of our Oscar Sunday was this Coconut Ice Cream with Caramel and Fudge Ribbons. It's easily one of the best ice creams I've ever made, and almost makes the lack of dairy in my life completely bearable. Oh, that's right - those three glorious gooey scoops have absolutely zero dairy. I concocted this recipe solely for the purpose of testing the limits of dairy free-dom... could there be such a thing as a dairy free ice cream I'd crave even after my dairy free days are behind me? Well, I'm happy to say I think I've found it. Here's how to make it...

Note that you don't have to make any of this dairy free. Just use regular heavy cream and butter where noted in the sauce ingredients. For the ice cream, make a regular vanilla ice cream base, substituting half the milk with coconut milk.

You'll need to make everything separately - the caramel sauce, the hot fudge sauce, and the coconut ice cream. Yes, it's a lot of steps, but both sauce recipes make way more than you'll need for the ice cream, so you could make the ice cream 3 or 4 more times and only have to make the sauces once. Or you could just grab a spoon and eat the leftover sauce right out of the jar. I won't judge. Either way, you'll need to start by making my faux heavy cream using a couple cans of coconut milk.

Coconut milk heavy cream substitute

Ingredients:

  • 2 cans of full fat coconut milk (I recommend Thai Kitchen brand)

Directions:

Open both cans of coconut milk and spoon the coconut fat ONLY (the thick white stuff at the top) into a medium size bowl. Then, add all of the liquid from one can and half of the liquid from the other can into the bowl. Whisk until smooth. Note that this will appear much thicker than regular heavy cream. That's okay. (I tried thinner - and even thinner than that - versions and this thickness worked best.)

Dairy Free Caramel Sauce

Ingredients:

  • 1 cup sugar
  • 1¼ cups coconut milk heavy cream substitute (or regular heavy cream if not making it dairy free)
  • ¼ tsp. coarse salt
  • ½ tsp. vanilla extract

Directions:

Spread the sugar in an even layer over the bottom of a large, heavy-bottomed saucepan. Place over medium-low heat, watching carefully. When the sugar begins to liquefy around the edges, use a heatproof spatula to gently stir it towards the center. Continue stirring very gently until all the sugar is melted, taking care not to over stir. Measure out the coconut milk heavy cream substitute in a liquid measuring cup and set aside. Once the caramel reaches a deep amber color, immediately remove the sauce pan from the heat. Carefully whisk in half of the coconut milk heavy cream substitute. The mixture will steam and bubble violently. Stir until the cream is well incorporated, then whisk in the remaining cream. Stir in the salt and the vanilla. If any sugar has hardened, place the saucepan over low heat and whisk until smooth.

Store in an airtight container in the refrigerator. If needed, it can be rewarmed in the microwave or in a saucepan over low heat.

If you're attempting this recipe, you really must read this post by David Lebovitz on making the perfect caramel. Even following his extremely helpful advice, it took me 3 tries to get the caramel just right. It's tricky, but it's so worth it.

Source: adapted from The Perfect Scoop by David Lebovitz

Dairy Free Hot Fudge Sauce

Ingredients:

  • 3/4 cup coconut milk heavy cream substitute (or regular heavy cream if not making it dairy free)
  • 1/4 cup packed dark brown sugar (if you don't have dark, just use light and add a teaspoon of molasses)
  • 1/4 cup unsweetened Dutch-process cocoa powder
  • 1/2 cup light corn syrup
  • 6 ounces bittersweet or semisweet chocolate, chopped
  • 1 tablespoon dairy free butter substitute (I like Earth Balance), cut into small pieces (or use regular salted butter if not making it dairy free)
  • 1/2 teaspoon vanilla extract

Directions:

Mix the cream, brown sugar, cocoa powder, and corn syrup in a large saucepan. Bring to a boil and cook stirring frequently, for 30 seconds.

Remove from the heat and add the chocolate and butter, stirring until melted and smooth. Stir in the vanilla. Serve warm.

(This sauce can be stored in the refrigerator for up to two weeks. Rewarm gently in the microwave or by stirring in a saucepan over very low heat)

Alright, with the special ingredients all prepped, you're ready to make the ice cream!

Coconut Ice Cream with Caramel and Hot Fudge Ribbons

Ingredients:

  • 2 14 oz. cans of full fat coconut milk (I like Thai Kitchen)
  • 4 eggs
  • 2 tbsp vanilla extract
  • 6 tbsp raw honey
  • Caramel sauce
  • Hot fudge sauce
  • ice cream maker

Directions:

Set up a double boiler by placing a heat proof bowl over a pot of simmering water (be sure it’s simmering and not a full rolling boil, as this will give you better control later). Add the coconut milk and vanilla extract to the bowl. Stirring fairly frequently, heat until the coconut milk is hot but not boiling.

Meanwhile, whisk the eggs well in a separate bowl. Once the coconut milk is hot, add a ladleful to the eggs while you’re whisking – you want to bring the eggs up to the temperature of the coconut milk without scrambling them. Add in another ladleful of hot coconut milk to the egg mixture while whisking. Take the now hot egg mixture and whisk it into the bowl of coconut milk on the double boiler.

Now, whisk constantly until the mixture thickens to a custard. This may take several minutes. If it’s getting too hot and starting to scramble, remove from the heat immediately but keep whisking, then return it to the double boiler. Once it has thickened to a custard, remove the bowl from the heat and let it cool.

Once the custard is cool enough for you to stick your finger in it and hold it there without burning, whisk in the raw honey. Put the custard base in the refrigerator for at least 6 hours (preferably overnight). Freeze in your ice cream machine per the manufacturer’s instructions.

Spoon a small amount of the ice cream into a large, sealable bowl. Then spread a small layer of the fudge sauce onto the ice cream. Spoon more of the ice cream into the bowl, then a layer of caramel, then more ice cream, etc. Keep going, working in layers until all of the ice cream is in the bowl. Now run a butter knife through the ice cream (I found a figure eight worked well, but use whatever motion you'd like - just make sure not to overmix!)

That's it! Okay, I know it seems like a lot of work. But, I promise it's worth it. Especially if you love ice cream but can't have dairy. And it's perfect for kids with dairy allergies who never get to enjoy fun stuff like caramel sauce and hot fudge. My heart aches for their deprived taste buds.

Please, please let me know if you make this or if you're thinking about attempting it and have any questions!

And the Oscar goes to...

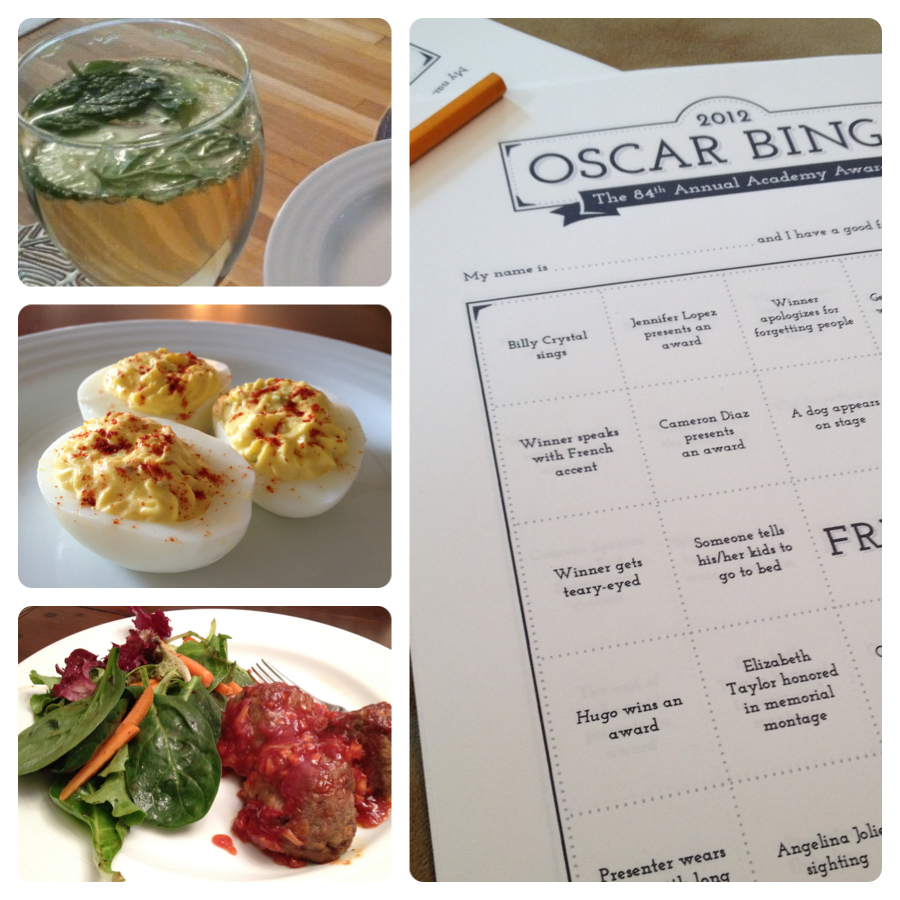
As I mentioned on Friday, I looove Oscar Sunday. It's like my Super Bowl. And this year I pulled out all the stops. (Well, all the stops I had the energy to pull.) My friend Ailsa came by, and she and Jared did their best to get on board with my enthusiasm. We had Oscar inspired food, and we even played Oscar Bingo (courtesy of How About Orange), which I highly recommend if you're trying to get people to sit through all 18 hours and 37 minutes of the Oscar telecast.

Ailsa started out our afternoon with some delicious elderflower champagne cocktails, which we figured covered the whole French contingent: Midnight in Paris, The Artist, and Hugo. I loved the combination of the St. Germain and mint in these cocktails. If you have a bottle of champagne leftover from a party, this would be a great way to jazz it up.

Then it was time to scarf down delicately eat a few traditional Southern Deviled Eggs, inspired by The Help. I don't know why deviled eggs get relegated to holidays and showers. They are entirely too delicious to only be eaten a few times a year.

For dinner we made Pioneer Woman's BBQ Comfort Meatballs (or Moneyballs... hey-o!) and they were everything PW promised they would be. Like little meatloaf balls of heaven. Make these for anything - Oscars, a potluck, Saturday snacktime. They'll be a hit. Unless you're a vegetarian.

For dessert... well, for dessert I really pulled out all the stops. I made Coconut Ice Cream with Caramel and Fudge Ribbons. I wanted to call it "Descending into Decadence" for the Descendants, but Jared rolled his eyes so many times at that name I figured I'd better drop it and let the coconut be homage enough. This was my own little concoction, so I was crossing everything I had that it would be good... and it was. Oh, holy hannah, it was good. Homemade caramel sauce, homemade hot fudge sauce, it was all worth it. The whole thing was dairy free, but it doesn't have to be. I'll be posting the recipe tomorrow so be sure to check back.

I hope you all enjoyed Oscar Sunday as much as I did! :-)

{made for dinner} black bean + butternut soup

bean-and-butternut-soup-2.jpg

I'd been excited to try this soup ever since I saw it on Sprouted Kitchen, and it definitely didn't disappoint. I loooove butternut squash (Jared less so, but he still liked the soup) and anything with homemade tortilla strips. Plus I've been trying to incorporate more veggies into our dinners and this is chock full of healthy stuff - but not so much that it tastes like tree bark. It's sort of a healthy version of winter comfort food, and a perfect rainy weeknight dinner.

Ingredients:

  • 1 Tbsp. coconut or extra virgin olive oil
  • 1 medium yellow onion, chopped
  • 3 cloves garlic, chopped
  • 1/2 a small head of cabbage, chopped (heaping 2 cups)
  • 3 cups cubed butternut squash (sweet potato would be good too)
  • 3 cups low sodium vegetable broth
  • 1 tsp. cumin
  • 1 tsp. cocoa powder
  • pinch of chipotle powder or cayenne pepper
  • 2 cups cooked, black beans (about one can, rinsed and drained)
  • salt to taste
  • avocado, for garnish (optional)
  • cilantro, for garnish (optional)

// tortilla crispies //

  • 3 corn tortillas
  • scant 1 tsp. extra virgin olive oil
  • 1/2 tsp. sea salt

In a heavy bottomed pot, warm the oil over medium heat. Add the chopped onion and saute until just beginning to brown, about 6-8 minutes. Add the garlic, cabbage, squash and broth. Turn the heat down to a gentle simmer, cover the pot and cook for about 15-20 minutes for the vegetables to cook. Add the spices and the beans and stir. Let everything continue to cook another ten minutes for the flavors to blend. Salt to taste. At this point, I did a few pulses with my immersion blender through the soup, because I wanted to thicken up the broth a bit. This is optional, but makes it seem a bit thicker. You could alternatively, run just a bit of the soup through a blender or food processor, and add it back in to the pot. OR a sprinkle of cornmeal will help thicken it as well.

For the tortilla crispies, preheat the oven to 375'. Stack them and slice into thin matchsticks. Spread on a baking sheet, dirzzle with the oil, sprinkle the salt and toss gently to coat. Spread them in a single layer on the baking sheet and bake for about 10-15 minutes until they are light brown and crispy, giving the pan a shake halfway through.

Garnish each both with some diced avocado, a handful of chopped cilantro and some of the tortilla crispies! (We only added the tortilla crispies, mostly out of laziness. I'm sure it's even more delicious with the extra garnishes.)

Recipe from the Sprouted Kitchen

coconut cookies & cream ice cream

I know this combination of flavors might seem a little strange - coconut and Oreos? But I promise you, it's delicious. This is one of the best ice creams I've ever made, and easily the best dairy free ice cream I've ever made (I've only made two, but the first one was pretty bleh.) If you like coconut (or if you're a nursing mama whose baby still can't tolerate real milk and have learned to embrace coconut), you really need to try this...

Ingredients:

  • 2 14 oz. cans of Thai Kitchen full fat coconut milk (brand matters here... I've tried other brands and they're not nearly as good)
  • 4 eggs
  • 2 tbsp vanilla extract
  • 6 tbsp raw honey
  • Oreos (I used about 15, but I like a lot of cookie in my cookies and cream)
  • ice cream maker

Directions:

Set up a double boiler by placing a heat proof bowl over a pot of simmering water (be sure it's simmering and not a full rolling boil, as this will give you better control later). Add the coconut milk and vanilla extract to the bowl. Stirring fairly frequently, heat until the coconut milk is hot but not boiling.

Meanwhile, whisk the eggs well in a separate bowl. Once the coconut milk is hot, add a ladleful to the eggs while you're whisking - you want to bring the eggs up to the temperature of the coconut milk without scrambling them. Add in another ladleful of hot coconut milk to the egg mixture while whisking. Take the now hot egg mixture and whisk it into the bowl of coconut milk on the double boiler.

Now, whisk constantly until the mixture thickens to a custard. This may take several minutes. If it's getting too hot and starting to scramble, remove from the heat immediately but keep whisking, then return it to the double boiler. Once it has thickened to a custard, remove the bowl from the heat and let it cool.

Once the custard is cool enough for you to stick your finger in it and hold it there without burning, whisk in the raw honey. Put the custard base in the refrigerator for at least 6 hours (preferably overnight). Freeze in your ice cream machine per the manufacturer's instructions, adding in the Oreo cookie chunks once the mixture has started to freeze a bit.

Straight out of the machine this ice cream has a creamy soft serve texture. If you store it in the freezer for later, just let it sit at room temperature for about 10 minutes before eating to let it soften up a little bit.

Recipe adapted from Caveman Food

cherry hand pies

Jared and I had a fairly low-key Valentine's Day this year - we had our big date night last Saturday and didn't want to push our luck. So we exchanged cards, had a lovely dinner of pork marsala, and I made these...

Cherry hand pies!! They were so delicious. We nearly burned our mouths eating them because we got too impatient waiting for them to cool. I followed this recipe but halved it to make 4 hand pies. I also added a little glaze to the tops of 2 of them... it was Valentine's Day after all.

They made a perfect Valentine's Day dessert. Jared requested that I make them again next year... and this weekend, and tomorrow.

deep fried oreos (please forgive me)

I hope you all had a wonderful Super Bowl Sunday! I was pretty underwhelmed both by the game and the commercials, but thankfully the food was fantastic. Jared made some delicious wings, and for dessert - since we already had the fryer out - I made some deep fried Oreos. (We actually bought our deep fryer for the sole purpose of frying food for the Super Bowl a few years ago.) Now, before you judge, do not underestimate the perfection that is the deep fried Oreo. I know, I know - it sounds gluttonous and wrong in so many ways, but it's really so insanely good. I'm a fan of regular Oreos, but something happens to them in the frying process that takes them to a whole new level. You bite into the golden crispy dough and hit this warm cakey center of Oreo wonderment... it's so soft and pillowy and yes it's everything that's wrong with America in a single bite, but put that out of your mind and just appreciate the American ingenuity that went into creating something so delicious. Everything in moderation, right? Right! Okay, so here's how we make them...

Ingredients:

  • Double Stuf Oreos (you're frying the thing anyway, might as well go Double Stuf!)
  • Pancake mix (I use Bisquick)
  • Whatever you need to make 1 batch of pancake batter according to the instructions on the box
  • Deep fryer
  • Lots of oil (we use vegetable)
  • Powdered sugar

Directions

  1. Heat the oil to 375 degrees
  2. Make the pancake batter according to the instructions on the box
  3. Dip a few Oreos into the batter (I do 3 at a time) and cover them on all sides
  4. Make sure the basket in your fryer is completely submerged
  5. Take the Oreos out of the batter one by one and drop them into the oil (I use metal skewers to pinch the Oreos as I take them out of the batter and into the oil... I find this results in the least amount of batter coming off of the Oreo during this process)
  6. Fry the Oreos for 1-2 minutes per side, until each side is a nice golden brown
  7. Remove from the oil and place onto paper towels
  8. Sprinkle powered sugar over top (do not skip this, it's not nearly as good without it!) and serve hot

Confession... one of the Oreos in the photo is actually a Thin Mint. I had what I thought was a genius idea to deep fry a few Thin Mints - you know, since we were frying things - and I'm sad to report that they were a bit of a bust. The batter didn't cling to the cookie very well, and the cookie didn't soften when fried like the Oreos do. Verdict: Plain old Thin Mints with milk are still the way to go.

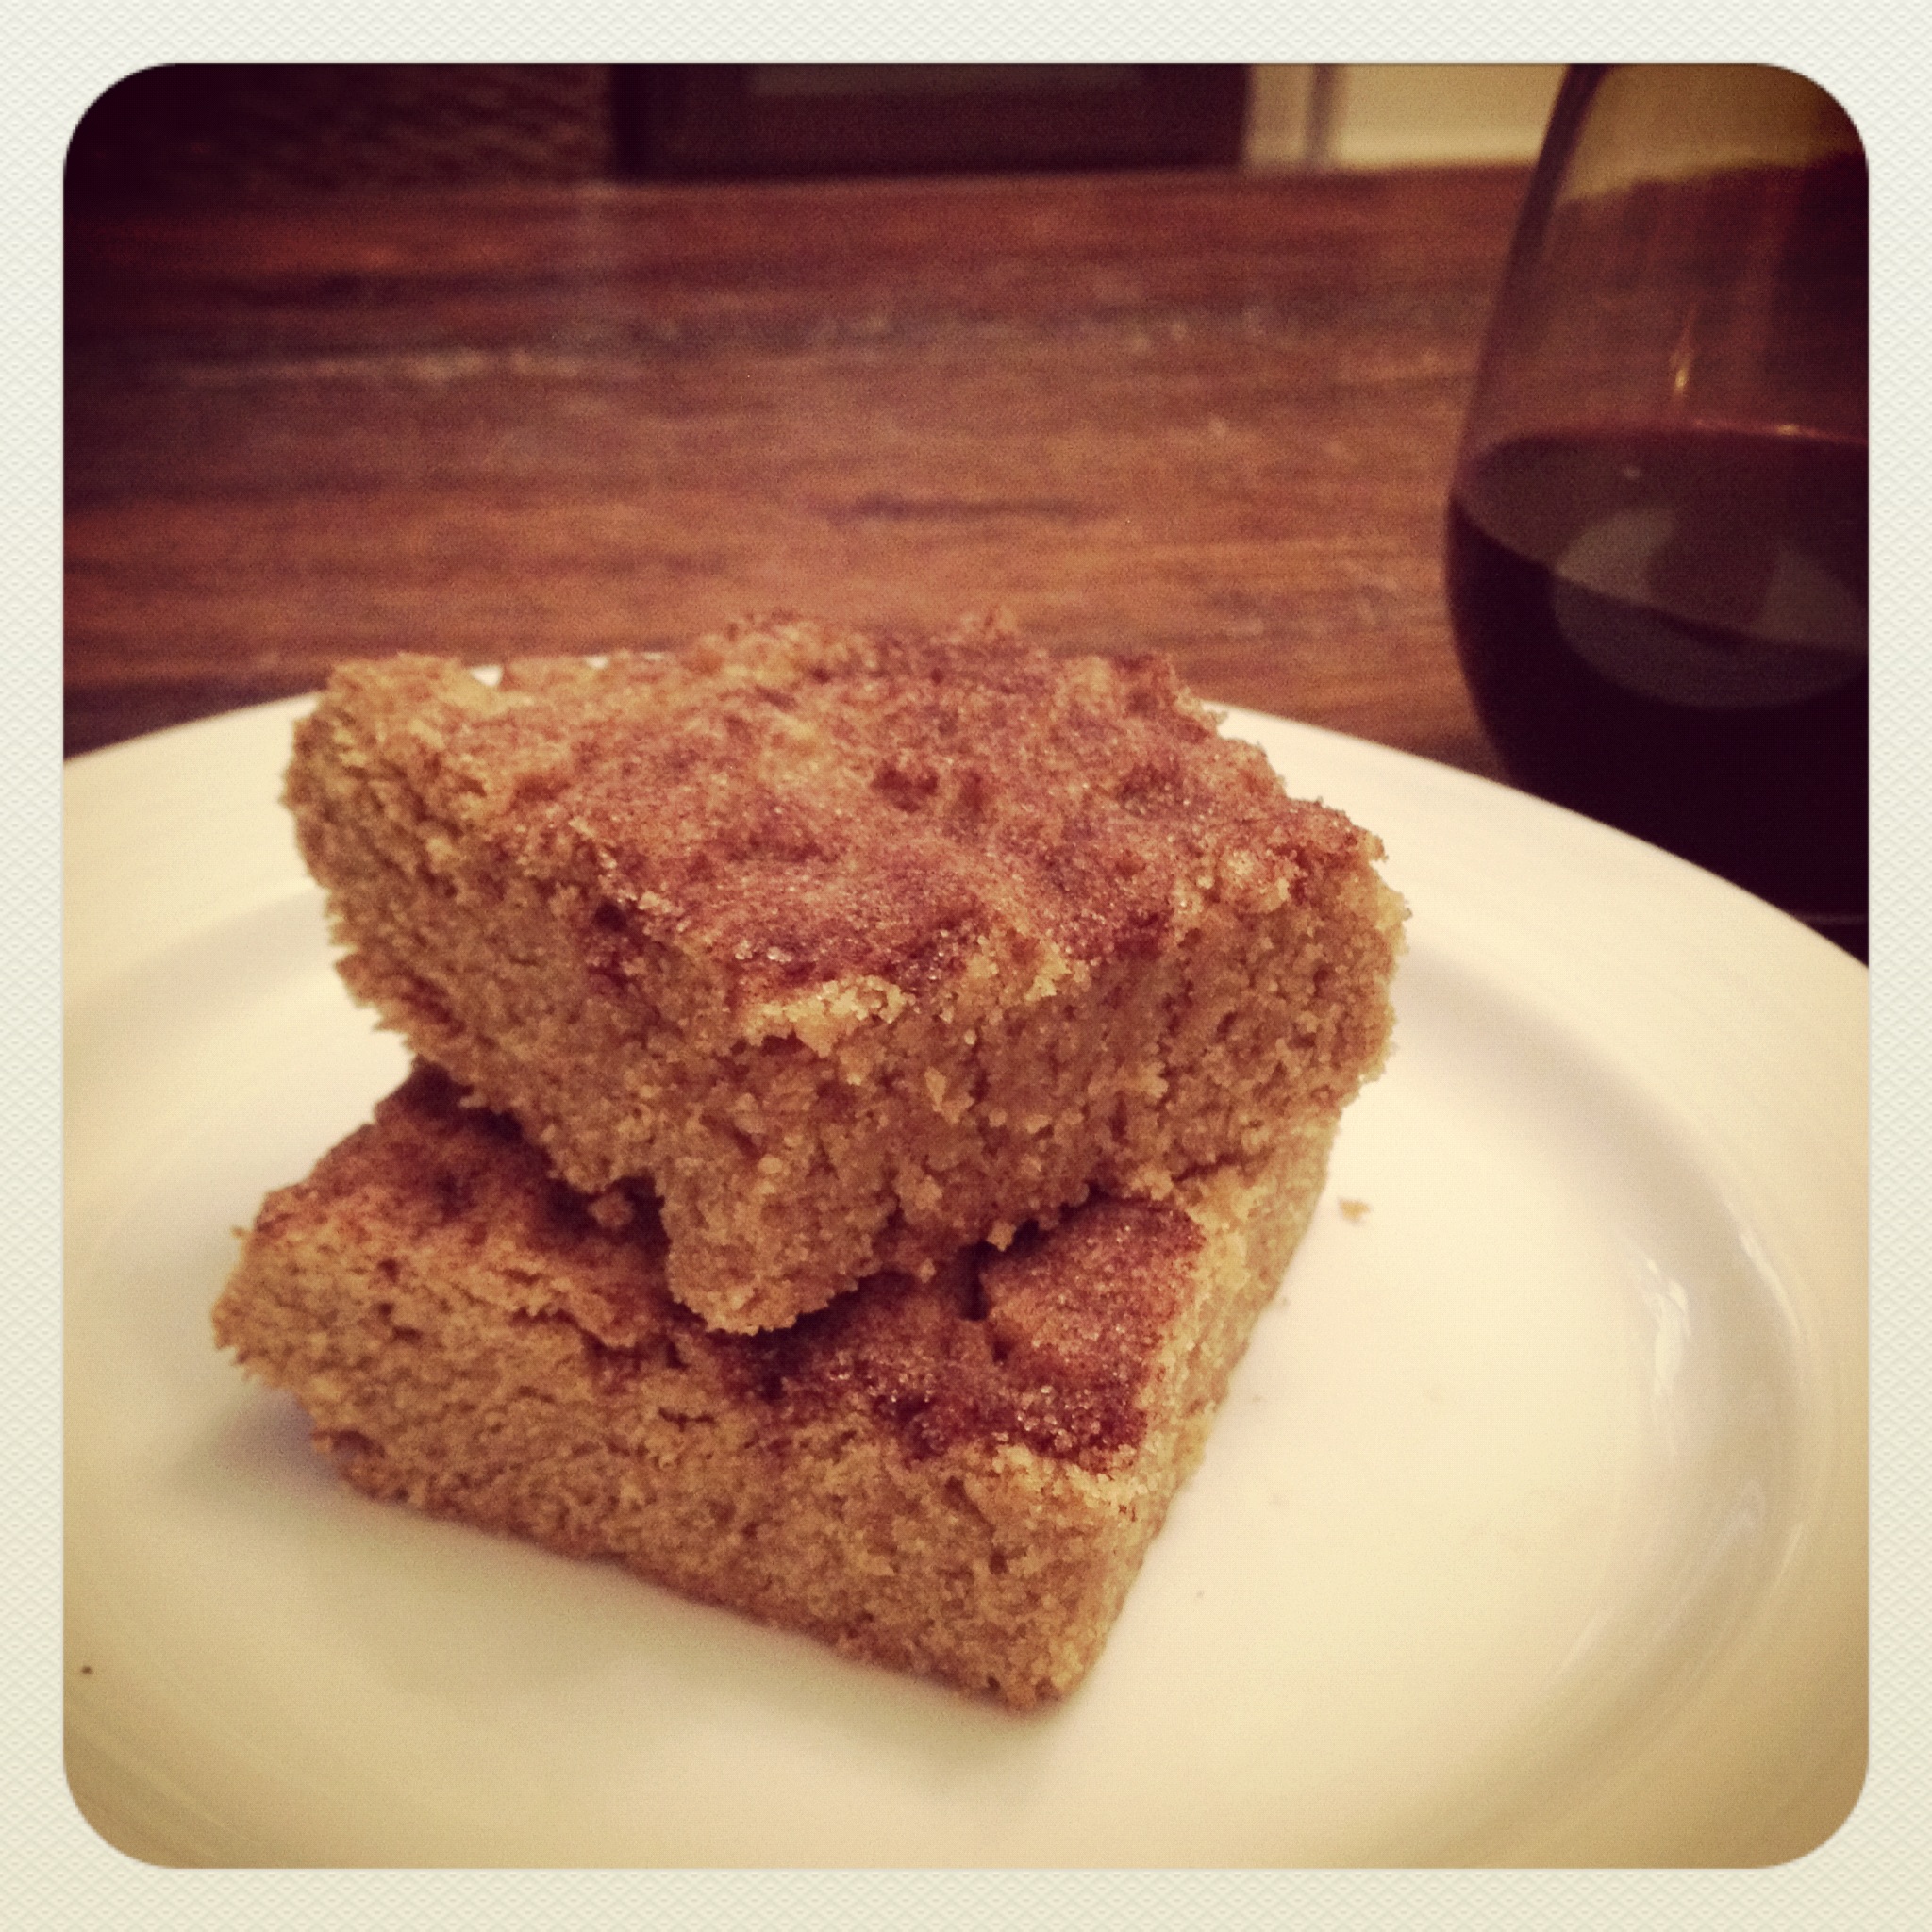
Snickerdoodle Blondies

I was craving something sweet this weekend (when am I not) so I whipped up these Snickerdoodle Blondies I found on Pinterest. I made them dairy free, but I'm sure they'd be even better with real butter. The flavor was more savory than sweet because of the cinnamon and nutmeg, but they made for a great rainy winter night dessert. Here's the recipe:

Ingredients

  • 2-2/3 Cups All-Purpose Flour
  • 2 Teaspoons Baking Powder
  • 3 Teaspoons Ground Cinnamon, divided
  • 1/4 Teaspoon Ground Nutmeg
  • 1/2 Teaspoon Salt
  • 2 Cups Packed Dark Brown Sugar
  • 1 Cup butter, at room temperature (or use a dairy-free butter substitute)
  • 2 Large Eggs, at room temperature
  • 1 Tablespoon Real Vanilla Extract
  • 2 Tablespoons Sugar

Instructions

  1. Preheat your oven to 350ºF and lightly grease a 9×13 inch pan.
  2. In a medium-sized bowl, combine the flour, baking powder, 1 teaspoon of the cinnamon, nutmeg and salt and set aside.
  3. In large bowl, beat together butter and brown sugar until well combined.
  4. Add the eggs and vanilla, and beat until smooth.
  5. Stir in the flour mixture until well blended.
  6. Spread the batter evenly in your prepared pan (I lightly greased a spatula for easy stick-free spreading).
  7. Combine the 2 tablespoons of sugar and the remaining 2 teaspoons of cinnamon in a small dish. Evenly sprinkle the mixture atop the blondie batter (it may seem like a lot, but go for it).
  8. Bake the blondies for 25 to 30 minutes or until the surface springs back when gently pressed. They will be firmer and raised around the edges, sinking in the middle. No worries, this is okay.
  9. Let the blondies cool in the pan completely before cutting.

Recipe from Go Dairy Free

{made for dinner} Pesto Linguine with Green Beans & Artichoke Hearts

This caught my eye on Pinterest because it uses an ingredient we hardly ever cook with - green beans. And I'm happy to report it was deeeelicious. The artichokes added a nice saltiness, and the green beans gave it a great crunch. It's an easy weeknight dinner, and definitely makes the binder.

Ingredients:

  • 1 package fresh linguini
  • 1 1/4 cups fresh green beans, cut in half
  • 1 container of basil pesto (or make your own)
  • 3/4 cup artichoke hearts, quartered
  • Pinch of ground black pepper
  • 2 tbsp freshly shredded parmesan
  • Fresh basil sprigs (optional)

Directions:

Prepare pasta according to package directions, cooking green beans with pasta; drain. Transfer pasta and beans to large serving bowl; toss with pesto, artichoke hearts and pepper. Sprinkle with cheese. Garnish with basil.

Recipe courtesy of NestleUSA

{made for dinner} homemade french fries

photo-4.jpg

Well, homemade fries AND burgers, but who cares about burgers when there are FRENCH FRIES?!? Not me, and hopefully not you. I was inspired to make these after the Pioneer Woman posted her version a couple of weeks ago. We try not to bust out the deep fryer very often, but I just couldn't help myself when I saw that crispy golden goodness (I may have drooled a little). We cross referenced PW's approach with our main man Alton Brown's recipe and here's what we came up with...

Ingredients:

  • 1 Russet potato (plenty of fries for 2 people)
  • Lots of vegetable oil (any cooking oil will do, but safflower oil is supposedly the best)

Directions:

Cut the potato into fries (we aimed for 1/2 in. thickness). Soak the fries in cold water for at least an hour - the longer the better. (Do not skip the soaking part!) Drain potatoes thoroughly, removing any excess water.

When oil reaches 320 degrees, submerge the potatoes in the oil. Working in small batches, fry for 3 to 5 minutes until they are pale and floppy. Remove from oil, drain, and cool to room temperature.

Increase the temperature of the oil to 375 degrees. Re-immerse fries and cook until crisp and golden brown, about 3 to 5 minutes. Remove and drain on roasting rack. Season with kosher salt while hot and hold in a 200 degree oven until ready to eat.

Enjoy!