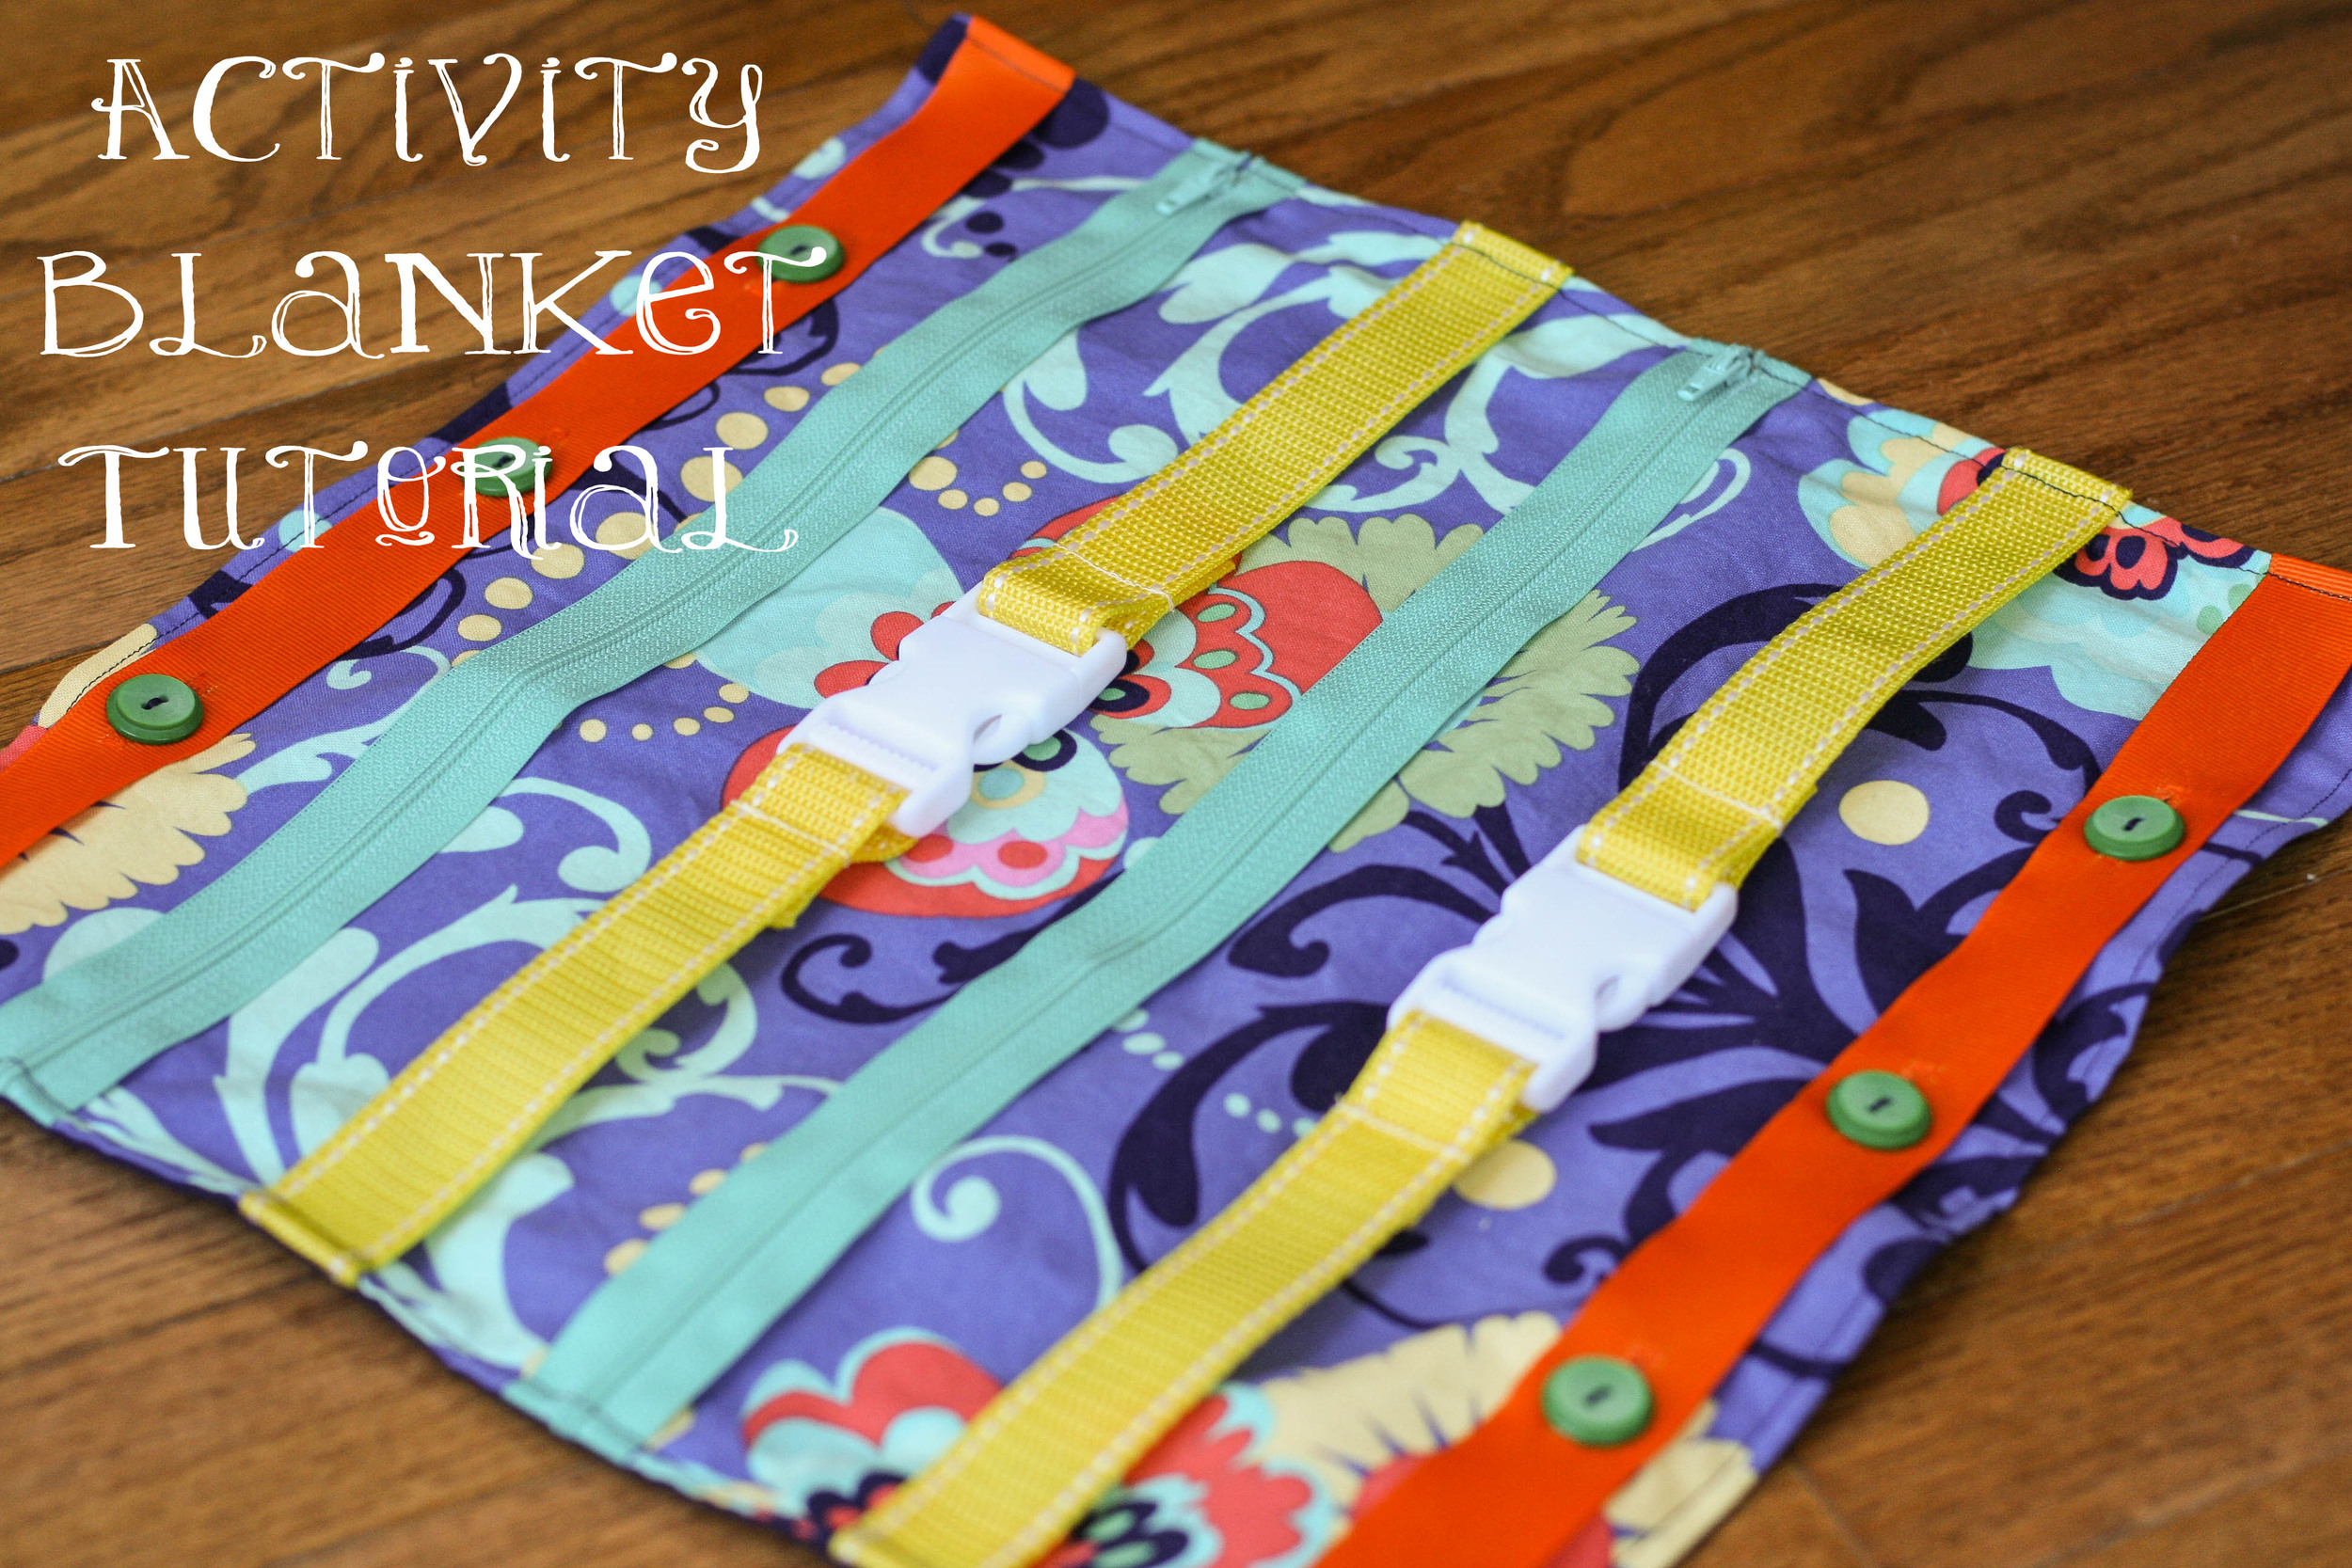
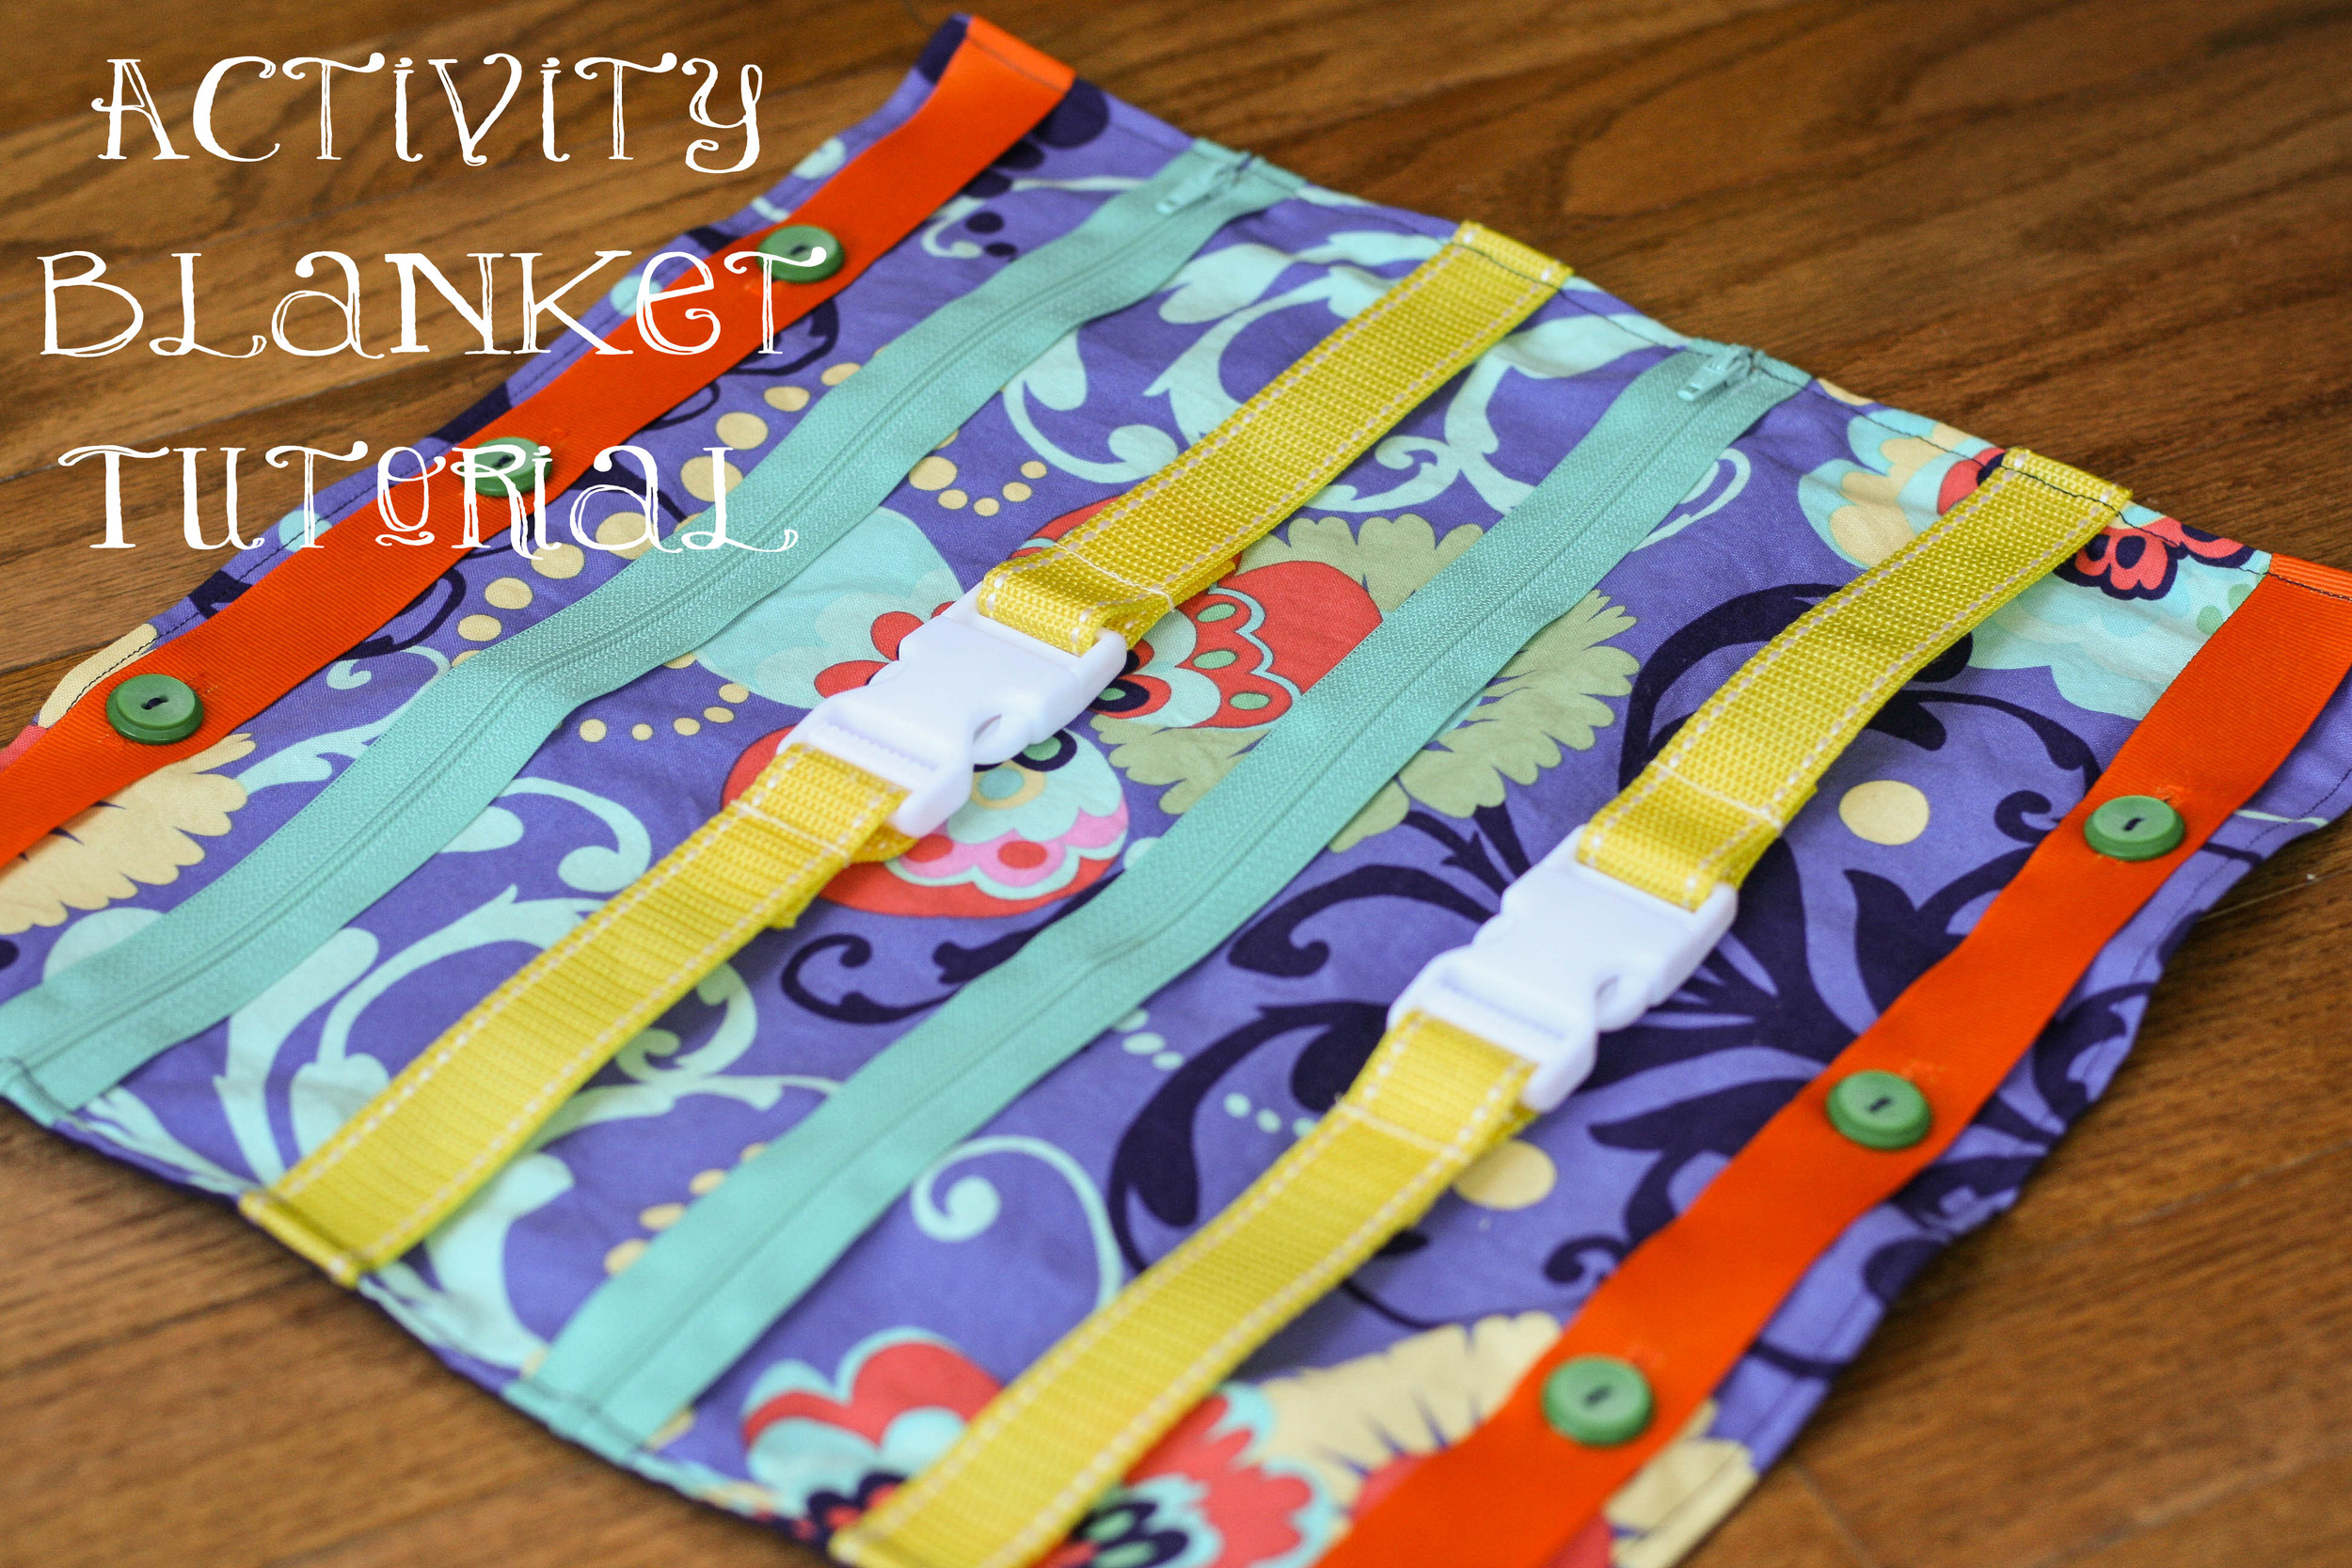
Emma has been obsessed with clips and zippers lately, so I thought I'd make her a little activity blanket so she could clip and unzip to her heart's content. (I can't even tell you how good it felt to bust out my sewing machine for the first time in months.) And, it was so simple to make that I actually made it during naptime on Sunday afternoon. Plus I used scrap fabric, and I love any project that puts even a little dent in my stash.
If you're just learning how to sew, this is a great beginner project because aside from the button holes it's just a bunch of straight stitches. And there's no need to be intimidated by button holes... most newer machines do all the work for you!
Here's what you'll need to make your own:
Materials:
- Two 15.5 x 15.5 in. squares of fabric
- Two 15.5 in. pieces of grosgrain (or similar thick ribbon)
- Four 6 in. pieces of nylon webbing (or similar thick webbing, ribbon, straps, etc.)
- Two 14 in. zippers
- Two plastic buckles/clips
- Buttons (at least 6)
- Lighter (yes, you read that right!)
- Coordinating thread
Directions:
Create your clip "activities" by sewing your 6 in. pieces of nylon webbing to each end of the buckle. Now here's the fun part - use a lighter to seal the cut ends of the webbing. Yes, it's a little sad that the most badass my life gets these days is taking a lighter to some frayed edges, but I take what I can get. :) Besides, it really is the best and quickest way to make sure your ends don't fray.
Next, lay out your "activities" on your front fabric to get the spacing right. I just eyeballed mine, leaving about an inch and a half between activities.
Pin only the zippers in place and remove the rest of the activities.
Sew your zippers into place.
Set the blanket aside for now and grab the ribbon for your button activities. Mark the spots for your button holes at 4", 7.5", and 11".
Sew your button holes. I used 1" buttons for this, and wouldn't go any smaller. (Note, if you use grosgrain and have some fraying when you open your button holes, use your trusty lighter to carefully seal the edges.)
Next, lay your activities out on the front fabric again, pin and baste into place.
Then, grab your back fabric and pin it to the front fabric, right sides together. Sew together using a 1/2" seam, leaving a 4-5" opening at the bottom.
Press your seams open, then turn the blanket right side out and sew a 1/4" topstitch around the perimeter.
Last but not least, sew on your buttons. I chose to sew mine on at the very end because I'm paranoid about Emma being able to get them off, creating a potential choking hazard. I figured two layers of fabric would be a sturdier hold.
And once all the buttons attached, you're done!
Emma is loving it so far, and I'm excited to see how her interest in it changes as she becomes better at manipulating each activity.
Let me know if you make one, and leave a comment if you have any questions!


