activity blanket tutorial

activity-blanket-tutorial.jpg

Emma has been obsessed with clips and zippers lately, so I thought I'd make her a little activity blanket so she could clip and unzip to her heart's content. (I can't even tell you how good it felt to bust out my sewing machine for the first time in months.) And, it was so simple to make that I actually made it during naptime on Sunday afternoon. Plus I used scrap fabric, and I love any project that puts even a little dent in my stash.

If you're just learning how to sew, this is a great beginner project because aside from the button holes it's just a bunch of straight stitches. And there's no need to be intimidated by button holes... most newer machines do all the work for you!

Here's what you'll need to make your own:

Materials:

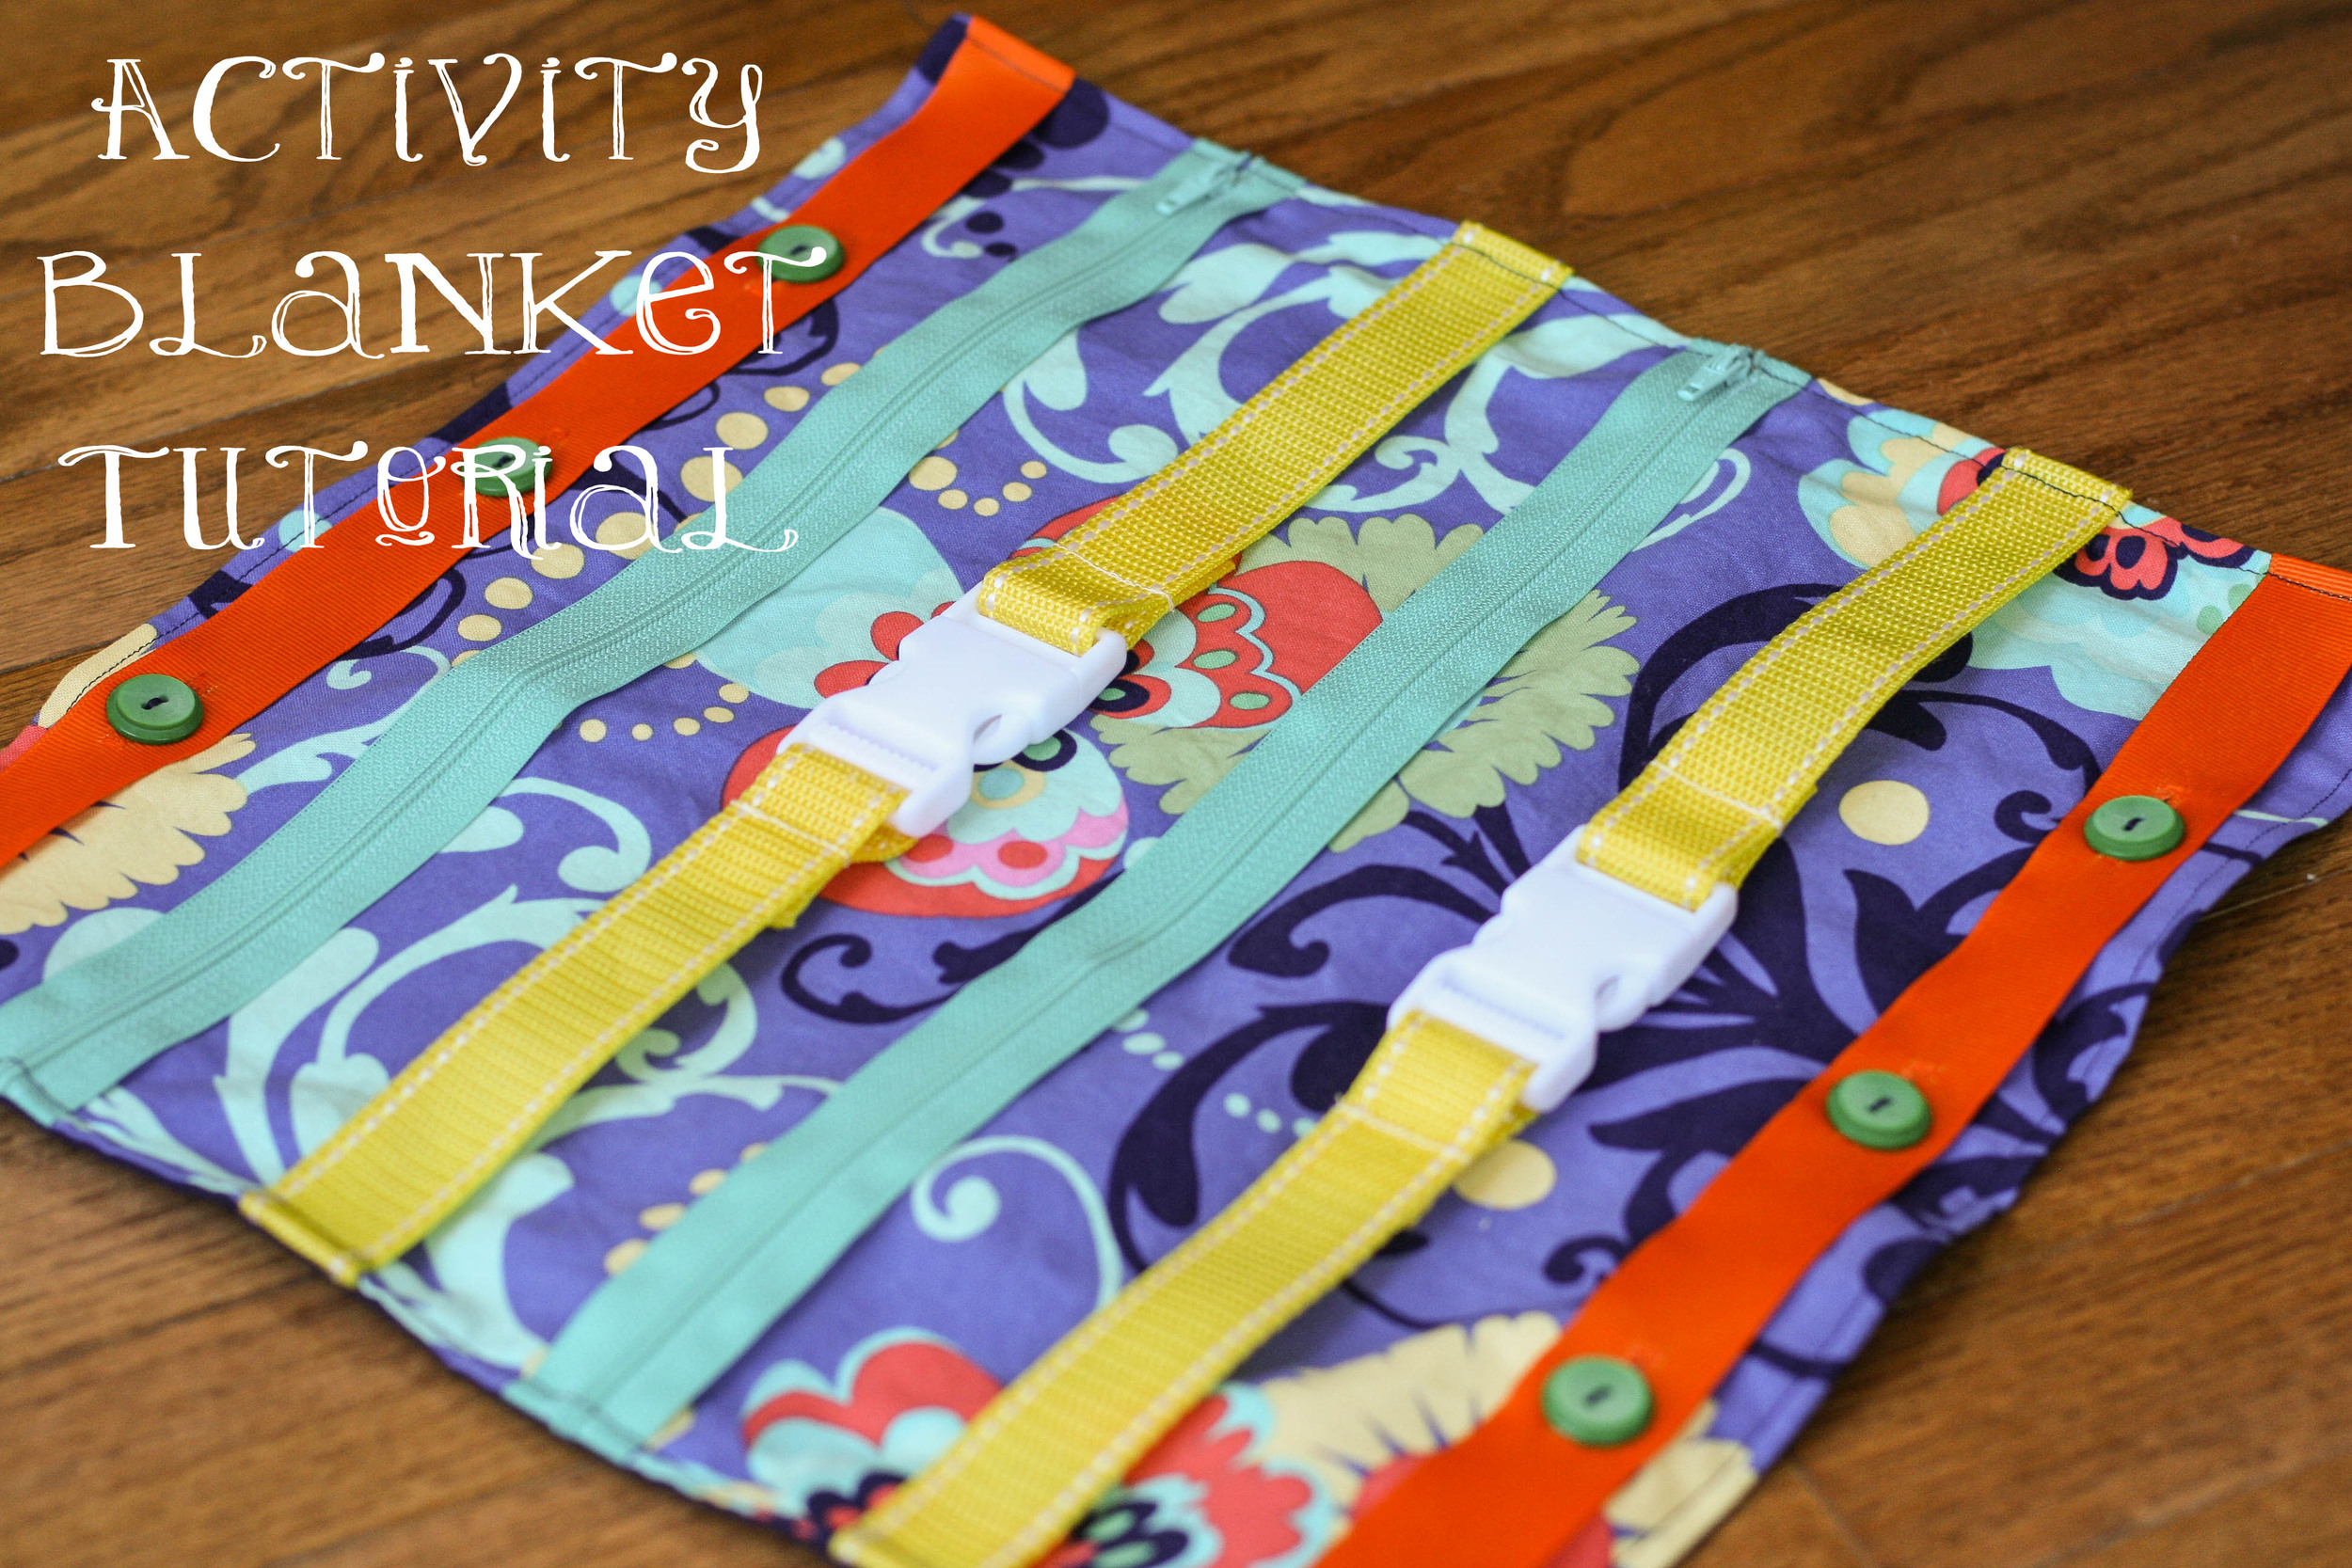
  • Two 15.5 x 15.5 in. squares of fabric
  • Two 15.5 in. pieces of grosgrain (or similar thick ribbon)
  • Four 6 in. pieces of nylon webbing (or similar thick webbing, ribbon, straps, etc.)
  • Two 14 in. zippers
  • Two plastic buckles/clips
  • Buttons (at least 6)
  • Lighter (yes, you read that right!)
  • Coordinating thread

Directions:

Create your clip "activities" by sewing your 6 in. pieces of nylon webbing to each end of the buckle. Now here's the fun part - use a lighter to seal the cut ends of the webbing. Yes, it's a little sad that the most badass my life gets these days is taking a lighter to some frayed edges, but I take what I can get. :) Besides, it really is the best and quickest way to make sure your ends don't fray.

Next, lay out your "activities" on your front fabric to get the spacing right. I just eyeballed mine, leaving about an inch and a half between activities.

Pin only the zippers in place and remove the rest of the activities.

Sew your zippers into place.

Set the blanket aside for now and grab the ribbon for your button activities. Mark the spots for your button holes at 4", 7.5", and 11".

Sew your button holes. I used 1" buttons for this, and wouldn't go any smaller. (Note, if you use grosgrain and have some fraying when you open your button holes, use your trusty lighter to carefully seal the edges.)

Next, lay your activities out on the front fabric again, pin and baste into place.

Then, grab your back fabric and pin it to the front fabric, right sides together. Sew together using a 1/2" seam, leaving a 4-5" opening at the bottom.

Press your seams open, then turn the blanket right side out and sew a 1/4" topstitch around the perimeter.

Last but not least, sew on your buttons. I chose to sew mine on at the very end because I'm paranoid about Emma being able to get them off, creating a potential choking hazard. I figured two layers of fabric would be a sturdier hold.

And once all the buttons attached, you're done!

Emma is loving it so far, and I'm excited to see how her interest in it changes as she becomes better at manipulating each activity.

Let me know if you make one, and leave a comment if you have any questions!

{craft the catalog} West Elm Shadow Fossil Leaf Pillow Covers

I immediately fell in love with these pillows when I saw them in the West Elm catalog. They seemed so unique and I love the go-with-anything grays. But I have a hard time spending a lot of money on throw pillows, so I got to wondering if I could DIY something similar using a fake fern as a stencil. The result? Well, see for yourself...

I love them! And I hope you do, too. Plus, hello... less than half the cost! Here's what you'll need to recreate the look.

Supplies:

  • 1 1/2 yds fabric (heavy weight cotton)
  • 2 shades of gray paint (I used Folk Art Steel Gray and Medium Gray)
  • 2 fake ferns (I got mine in a bunch from Michaels)
  • 18x18 pillow insert
  • 12x16 pillow insert

Start by cutting your fabric... you'll need:

  • 1 piece that's 18.5x18.5
  • 2 pieces that are 18.5x12.25
  • 1 piece that's 12.5x16.5
  • 2 pieces that are 12.5x11.25
Then lay out some trash bags to protect whatever you're working on, and paint your first fern the lighter shade of gray. You can use whatever you want to paint the fern... I found a foam brush worked pretty well. Try to get good coverage with your paint, and make sure to get the stem.

Then stamp the 18.5x18.5 and 12.5x16.5 pieces of fabric. Press firmly, but don't worry about any imperfections. This isn't supposed to look perfect.

Wait a few minutes (not several, just a few... if the paint dries on the fern it will peel off when you go to re-stamp) and re-stamp over what you just did with the same paint color. I found that double stamping made it look much better. Again, try to line it up but it doesn't have to be perfect. Then repeat with your darker paint color. The West Elm pillows have the darker gray layered over the lighter gray, but I tried that and it just looked like I screwed up. So this was my alternative.

Let the fabric dry overnight, then heatset with a dry iron. Use your other fabric pieces to sew a basic envelope pillow. I won't bore you with a tutorial since there are already several good ones online. I particularly like this one.

Here's how they look in their final resting place... our bedroom!

Let me know if you have any questions about the tutorial! I hope you guys are liking these DIYs. I have one more planned out for now and am looking for more, so let me know if you see anything you think is ripe for knocking off. :-)

{christmas crafts} car seat blankets

Believe it or not, I managed to sew more than just Emma's dress this Christmas. Kind of a new/working mom miracle, I'd say. I started out making this car seat blanket for Emma...

I followed this very easy tutorial, and while the instructions recommend using Minky or fleece, I just couldn't find any that really appealed to me. Most of the stuff for girls is pink or purple, and I wanted something that would coordinate with Emma's red car seat. That's when Aneela Hoey's Little Apples collection caught my eye and when I saw this adorable red and aqua quilted fabric - forget about it. I was done for. It might be my favorite fabric I've ever worked with. Look at the little retro school clothes! I die.

Anyway, by using the quilted fabric all I had to do was cut the fabric and sew on the bias tape. Easy peasy. Here's what it looks like opened up...

And here's Emma all snug and cozy...

As soon as I made one for Emma, I knew I had to make one for my adorable little nephew, Zachary. And it's a good thing I did, because as soon as we got to Virginia for the holidays my sister went on and on about how great Emma's car seat blanket was, and how I need to make one for Zachary asap. I hedged and was like "oh, if only I had time." She definitely didn't think she was getting one. So she was pretty stoked when this jungle themed bundle of warmth was waiting for Zach under the Christmas tree...

As much as I love the Little Apples fabric I used for Emma's blanket, the fleece/flannel combo I used for Zach's actually works a bit better than the quilted fabric because it's not so stiff. If you're making this for a younger/smaller babe, I definitely recommend the fleece/Minky/flannel recommendation from the tutorial... it'll be a lot easier to fold down around baby's face.

I sadly didn't get any pics of Zach all wrapped up in his blanket, so you'll just have to take my word for it that he looks super cute in it. :-)