Happy Teacher Appreciation Week + a free printable

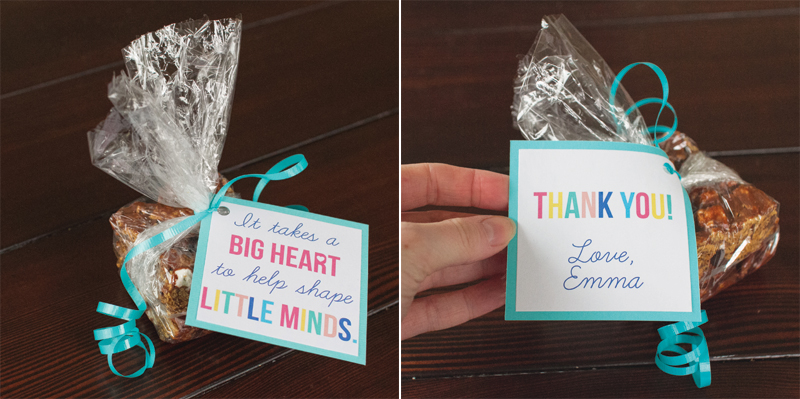
teacherappreciationtag1x1 Happy Teacher Appreciation Week! I whipped up these gift tags last night for Emma's teacher's gifts and thought I'd share. You can download a 3x3 of the above front and back tags HERE.

Here's what ours ended up looking like:

teacherappreciationtag1x1

(Yep, those would be Golden Grahams S'Mores bars. Super easy to make and even better than regular Rice Krispie Treats.)

Huge thanks to all the teachers out there who do an immensely important job for a fraction of what you deserve to get paid. Your students may not always appreciate you, but please know that us parents are forever grateful for what you're doing for our kids. So thanks!!! :)

{craft the catalog} West Elm Shadow Fossil Leaf Pillow Covers

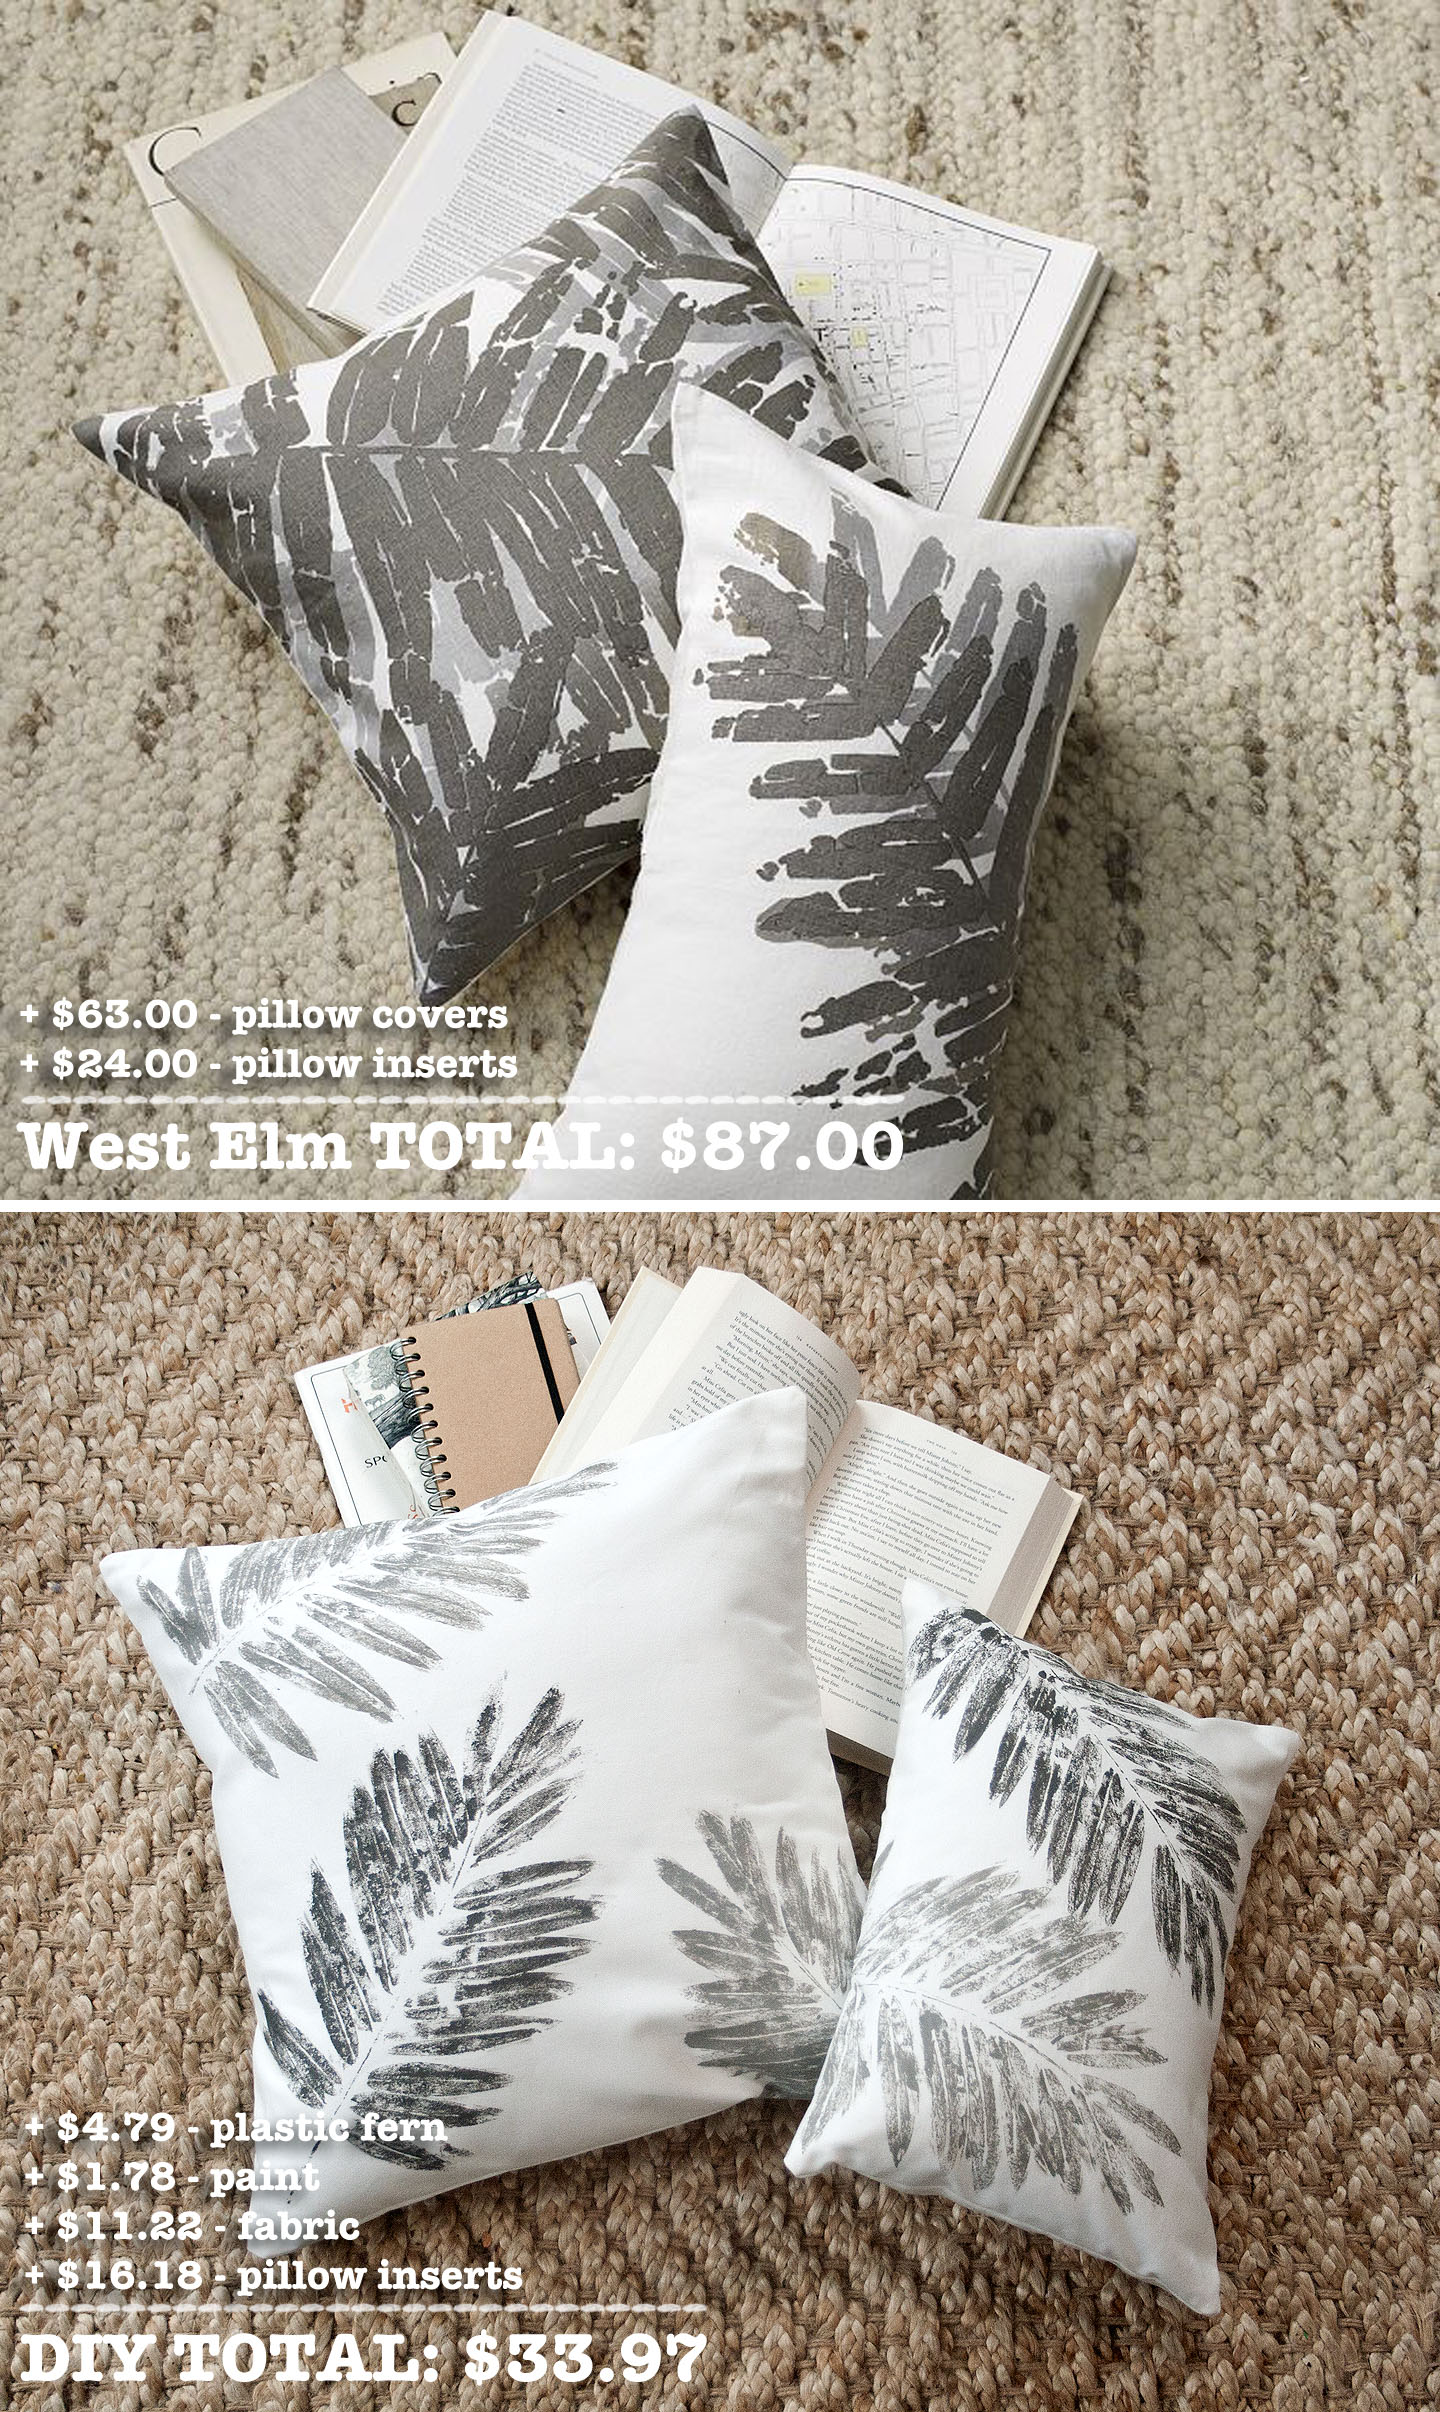
I immediately fell in love with these pillows when I saw them in the West Elm catalog. They seemed so unique and I love the go-with-anything grays. But I have a hard time spending a lot of money on throw pillows, so I got to wondering if I could DIY something similar using a fake fern as a stencil. The result? Well, see for yourself...

I love them! And I hope you do, too. Plus, hello... less than half the cost! Here's what you'll need to recreate the look.

Supplies:

  • 1 1/2 yds fabric (heavy weight cotton)
  • 2 shades of gray paint (I used Folk Art Steel Gray and Medium Gray)
  • 2 fake ferns (I got mine in a bunch from Michaels)
  • 18x18 pillow insert
  • 12x16 pillow insert

Start by cutting your fabric... you'll need:

  • 1 piece that's 18.5x18.5
  • 2 pieces that are 18.5x12.25
  • 1 piece that's 12.5x16.5
  • 2 pieces that are 12.5x11.25
Then lay out some trash bags to protect whatever you're working on, and paint your first fern the lighter shade of gray. You can use whatever you want to paint the fern... I found a foam brush worked pretty well. Try to get good coverage with your paint, and make sure to get the stem.

Then stamp the 18.5x18.5 and 12.5x16.5 pieces of fabric. Press firmly, but don't worry about any imperfections. This isn't supposed to look perfect.

Wait a few minutes (not several, just a few... if the paint dries on the fern it will peel off when you go to re-stamp) and re-stamp over what you just did with the same paint color. I found that double stamping made it look much better. Again, try to line it up but it doesn't have to be perfect. Then repeat with your darker paint color. The West Elm pillows have the darker gray layered over the lighter gray, but I tried that and it just looked like I screwed up. So this was my alternative.

Let the fabric dry overnight, then heatset with a dry iron. Use your other fabric pieces to sew a basic envelope pillow. I won't bore you with a tutorial since there are already several good ones online. I particularly like this one.

Here's how they look in their final resting place... our bedroom!

Let me know if you have any questions about the tutorial! I hope you guys are liking these DIYs. I have one more planned out for now and am looking for more, so let me know if you see anything you think is ripe for knocking off. :-)

{nursery progress} paper circle mobile tutorial

paper-circle-mobile7.jpg

Here's the how-to for the paper circle mobile I made for our daughter's nursery... (similar ones sell for upwards of $50 on Etsy, but you can achieve the same look for much much less.)

What you'll need:

  • 2 12" long 1/4" dowels
  • Drill and very narrow drill bit
  • Fishing wire
  • 12 jump rings
  • Needle nose pliers
  • Clear beads (I used CraftDesigner faceted beads in crystal)
  • Pencil
  • Permanent marker
  • Needle or pin
  • 3 shades of the same color cardstock (this is to achieve a gradient effect... you could use all 1 color or multiple colors if you prefer.)
  • 1.5" circle punch
  • Hot glue gun
  • Screw hook

1) Prepare your dowels. Using a pencil, make a mark at 1.5", 3", and 4.5" from each end of the dowel so that you end up with 6 marks on each dowel. Then make a mark a 1/4" from the end of each dowel, and drill a very small hole (big enough for the wire to go through, but not so big that the bead will go through.)

2) Punch out your circles. You'll need 108 circles - 9 circles for each string, 3 of each color on each string.

3) Poke holes in your circles using a needle or pin.

4) Cut your fishing wire. You'll need 12 pieces of wire, approximately 24" long - don't worry about them being exact because you'll cut the ends once you're done putting on the circles and beads.

5) Prepare the jump rings. Using your needle nose pliers, stretch out a jump ring so that it's wide enough to fit onto the dowel. Then tie on a piece of the fishing wire and knot it, trimming the excess of the short end.  Repeat for the other 11 jump rings.

6) Place the jump rings along the marks on the dowels. Use your needle nose pliers to close the jump rings around the dowel.

7) Mark your fishing wire. Once the fishing wire is knotted onto the jump rings, take your permanent marker and make a mark every 2 inches from the knot on the jump ring.  Make 9 marks on each string.

8 ) String your circles and beads. Starting with the darkest shade of your paper circles, string one of your pieces of fishing wire through the pin hole in the paper circle. Then take a clear bead and knot the fishing wire around it at the mark closest to the dowel/jump ring. Repeat for the other 8 circles - circle, bead, circle, bead, etc. - going from your darkest to lightest shades of circles. Cut the excess wire after the last bead.  Repeat for the other 11 pieces of fishing wire.

9) Attach your dowels. Use a hot glue gun to attach the dowels together, crossing one over the other.

10) Hang your mobile. Cut 4 generous lengths of fishing wire, and knot one end of each piece of wire around a clear bead, cutting the excess of the short end. Slip each piece of wire through the holes you drilled at the ends of your dowels, so that the bead stops underneath the dowel preventing the wire from slipping through. Screw your screw hook into the ceiling where you want the mobile to hang (use a drywall screw if needed.) Once you determine how high or low you want your mobile to hang from the ceiling, tie the four pieces of wire into a knot and loop the knot onto the screw hook.

That's it!  Comment or email if you have any questions. There are a lot of variations you could do (like drilling holes and using beads to hang the strings instead of jump rings) so don't feel like you have to stick to the steps exactly.  This is just what worked for me.  Happy mobile-ing!

{nursery progress} DIY song lyric prints

IMG_5669_edited-1.jpg

One of the easiest ways I knew I could save money in the nursery was by making my own art prints.  We knew there were a couple song lyrics we especially wanted to use, so all I had to do was figure out the right fonts and colors.  I used PowerPoint (it's not just for presentations, people!) to design each print, and framed them in Ikea frames.

(Fonts: Eras Light ITC and Marketing Script)

I've always loved the song Golden Slumbers, which is good because it gets stuck in my head every time I'm in the nursery. I can't wait to play it for our daughter.

(Font: Yesterday Again)

Jared and I first heard Murder in the City at Bumbershoot back in 2007 (you can see that exact performance of it right here), and immediately fell in love with it. Shortly after Scott Avett had his baby girl, he changed one of the lyrics to "make sure my daughter knows I loved her, make sure her mother knows the same" - so when we found out we were having a girl, the song became even more special for us.  The lyric in this print is the last line of the song, and we hope that someday those words mean as much to our daughter as they mean to us.

Here are links to download the prints (for personal use only, please):

[dm]6[/dm]

[dm]7[/dm]

Email or comment if you want the PowerPoint files so you can change the fonts and/or colors.

Heather & Alex's table numbers

IMG_4140-copy.jpg

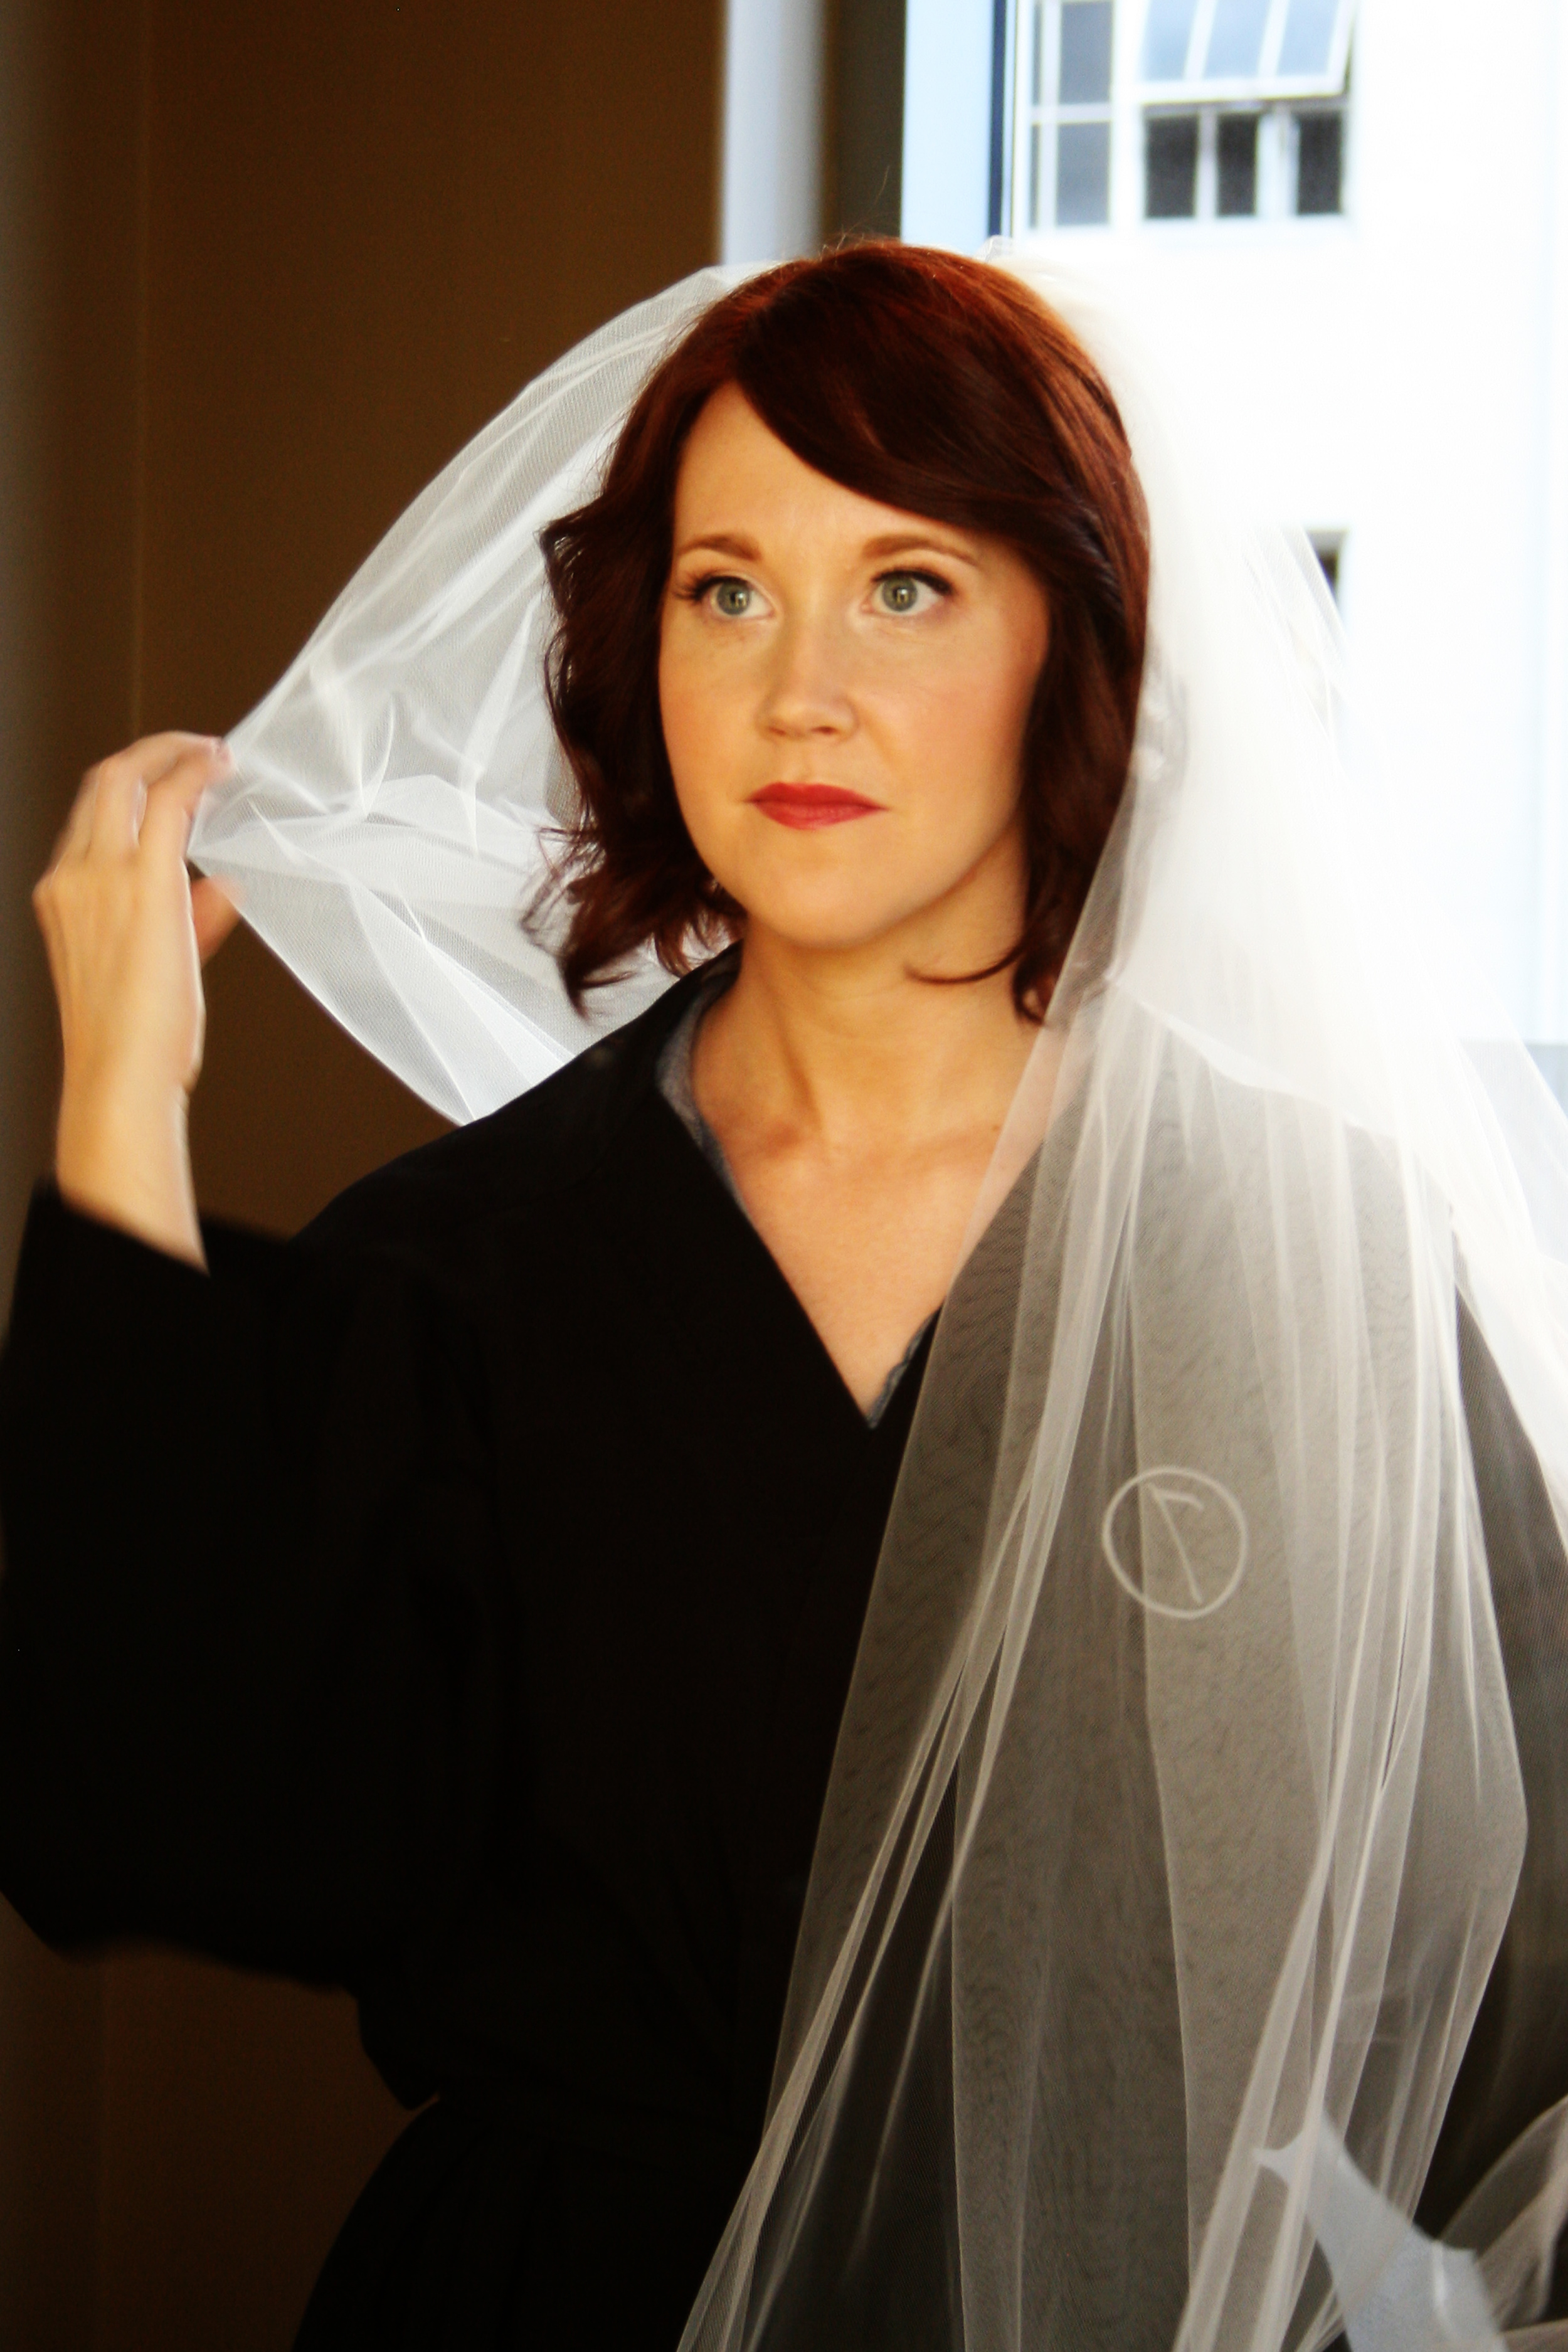
I mentioned last week that my dear friend, Heather, was getting married... well I'm happy to report that the wedding was perfect. I know I'm biased, but she was one of the most stunning brides I've ever seen!

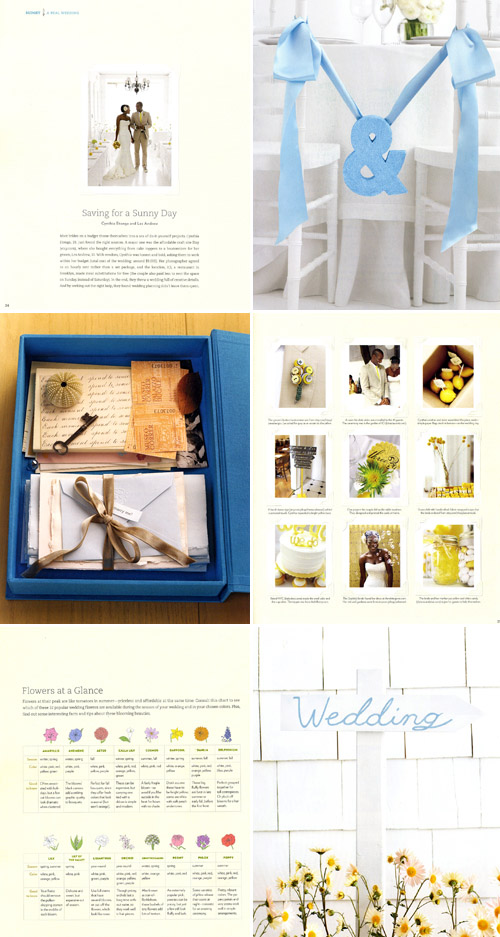
See?  GORGEOUS!  She and Alex are such a great couple and I was so honored to be a part of their big day.  In addition to being a bridesmaid, I also had the pleasure of making a small design contribution to their reception.  Heather came to me several months ago saying that she'd seen the perfect table numbers in Real Simple Weddings but couldn't find a good picture online to show me.  My natural curiosity has led me to be somewhat of a master Googler and I love a good searching challenge.  This was the link she sent me that had the page from the magazine:


The table numbers she wanted are the center pic in the cluster of 9 on the right... kinda hard to see, right?  BUT, I noticed that if I hovered over the picture there was a photo credit for Angelica Glass.  So I went to her website and - voila!

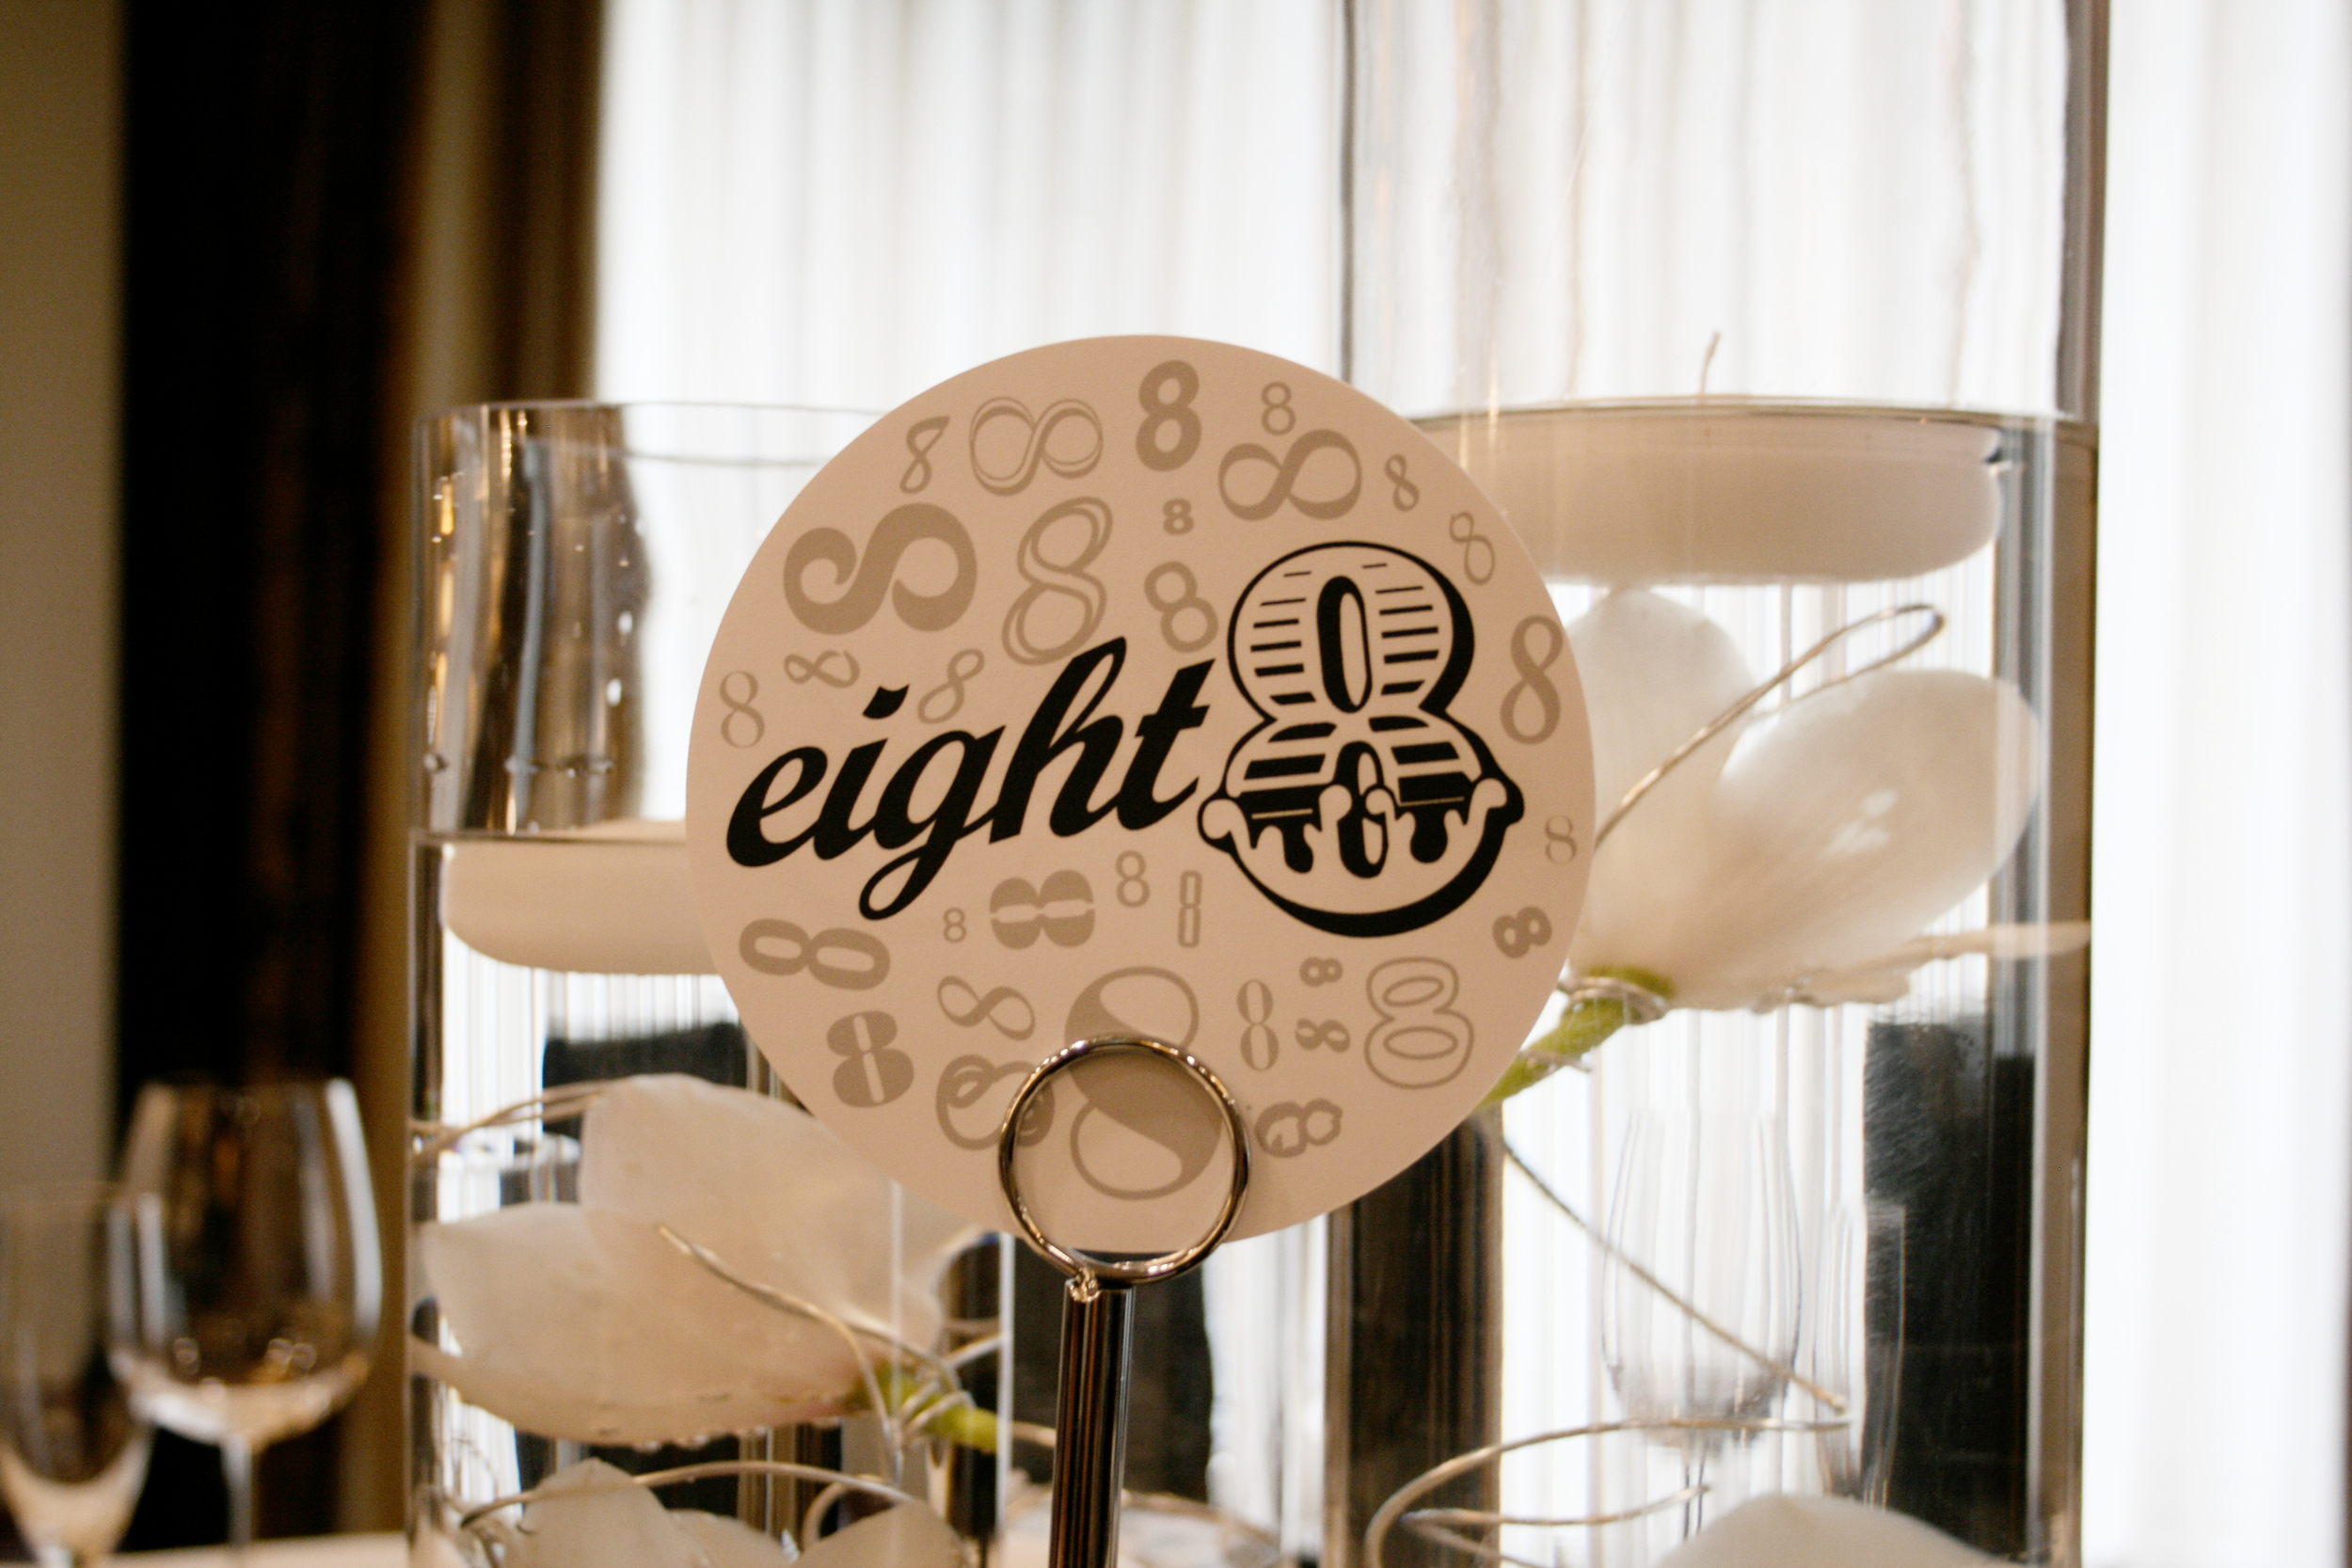
Heather and Alex were having a black & white wedding, so I set out trying to replicate the table numbers using black and gray ink on white cardstock.  (I decided to use a clean edge for the circles instead of scalloped because I felt it matched the style of their wedding a bit better.)  I was able to find the exact font used for the primary numbers: Cast Iron, available for free from DaFont.  I used PowerPoint to create the design (I'm telling you, people, it's for more than just presenting!) and sent it off to Heather and Alex for their thoughts...

They loved it!  I was so relieved.  I designed the rest and printed them at home on medium weight cardstock using my highest quality printer and ink settings.  Thankfully, our friend Sarah had this super handy circle cutter so they were pretty easy to cut out.  I cut out two of each number and used Zots to glue them back to back (so you could see the number no matter where you were sitting at the table.)  Here's how they looked!:

How amazing are those flowers, by the way???  Apparently Alex came up with that idea.  Pretty impressive!  If you're making your own table numbers and want to try this style (or tweak it to make it your own) here's the download for my PowerPoint file, complete with table numbers 1-9, and instructions for putting them together.  Enjoy, and please let me know if you end up using them!  I'd love to see pictures of how they turn out!

[dm]5[/dm]

PS... you'll need PowerPoint to be able to open the file, though it might work in Keynote.  You'll also need to download Cast Iron from Dafont if you want to use that font.

Supplies:

  • Medium weight cardstock
  • Home printer (or you can take them to a print shop)
  • Circle cutter
  • Double sided tape or Zots
  • Stand with photo/paper clip (the hotel provided Heather with these, but you could probably find them at a craft store or Target)

Instructions:

  1. Print out 2 of each table number using the highest quality settings your printer will allow.  I recommend printing test pages on regular paper before trying it with your cardstock.  Play around with the ink settings if you feel it's drying too dull.  Make sure it's set to heavy or a slower drying time (depends on your printer.)
  2. Cut out the table numbers using a circle cutter, making sure to cut just inside the border.
  3. Attach two of the same table numbers back to back using double sided tape, Zots, or similar.  Repeat until all of the table numbers are attached.
  4. Stick the table numbers in the stands, and you're done!

Have fun, and please let me know if you have any questions about using or downloading the file!


sink skirt storage solution

My friend Angela (mom to the beautiful Mirabel, wearer of this while nursing) came to me late last year with a bathroom sink dilemma.  (And yes, that means it's taken me an inexcusably long time to write about this particular project.)  She sent me this picture of her rather wide sink with no built in storage.  She wanted to be able to store extra toilet paper and such underneath, but wanted it hidden.

Her idea was to attach a sink skirt to the bottom ledge of the tile, but after weeks of searching she couldn't find one that would work.  So she very sweetly asked me to help her out.  I wasn't very familiar with sink skirt construction, so I found a few sink skirt tutorials online and used this as my base (with a few tweaks.)

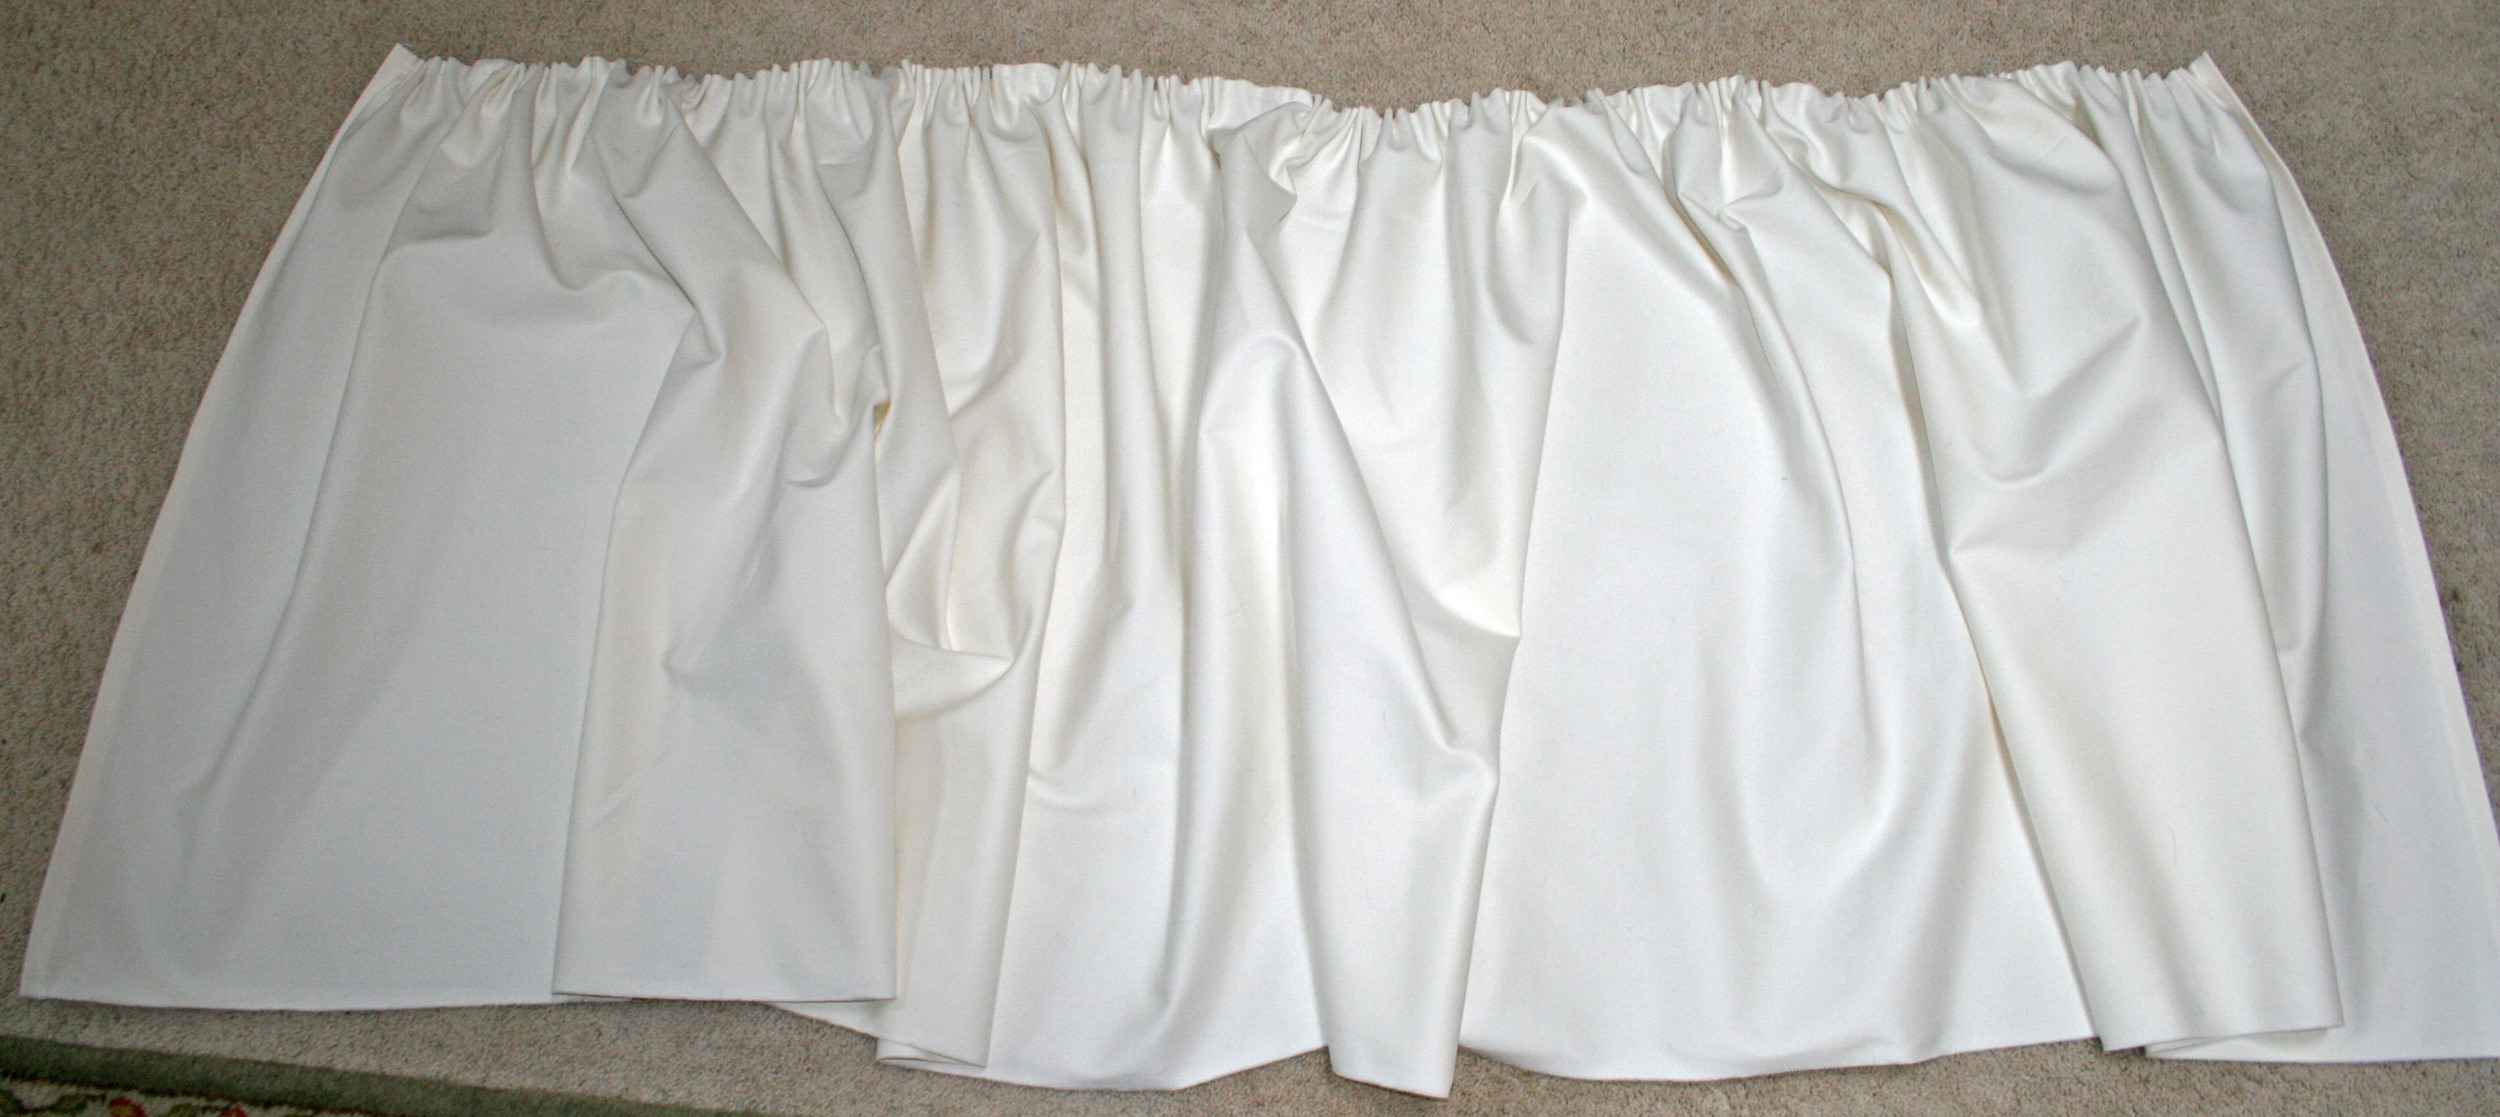
The measurements of Angela's sink are 28" x 60", so I used a 30" x 122" (double the width, plus 1" extra on each side) piece of heavyweight cotton twill fabric.  I also cut a 6" x 61" strip for a top cuff.  More on that later, but the primary reason I strayed from the tutorial here is because I planned to use Sew On and Sticky Back Velcro to attach the skirt to the sink.  I felt like regular sticky velcro wouldn't be strong enough to hold up the weight of the skirt, and the sew & stick seemed like a great solution.

Once all my fabric was cut and thoroughly lint rolled (trying to keep dog hair off of a 10 ft piece of cream colored fabric is a losing battle) I started hemming the sides with a 1/2" double fold hem, and then the bottom.  Then it was time to baste.  The fabric was not liking my attempts to machine baste, so - starting in the middle of the skirt and working my way out on each side - I hand basted two rows about an 1/8" apart.   Then I gathered the skirt until it reached a width of 60".

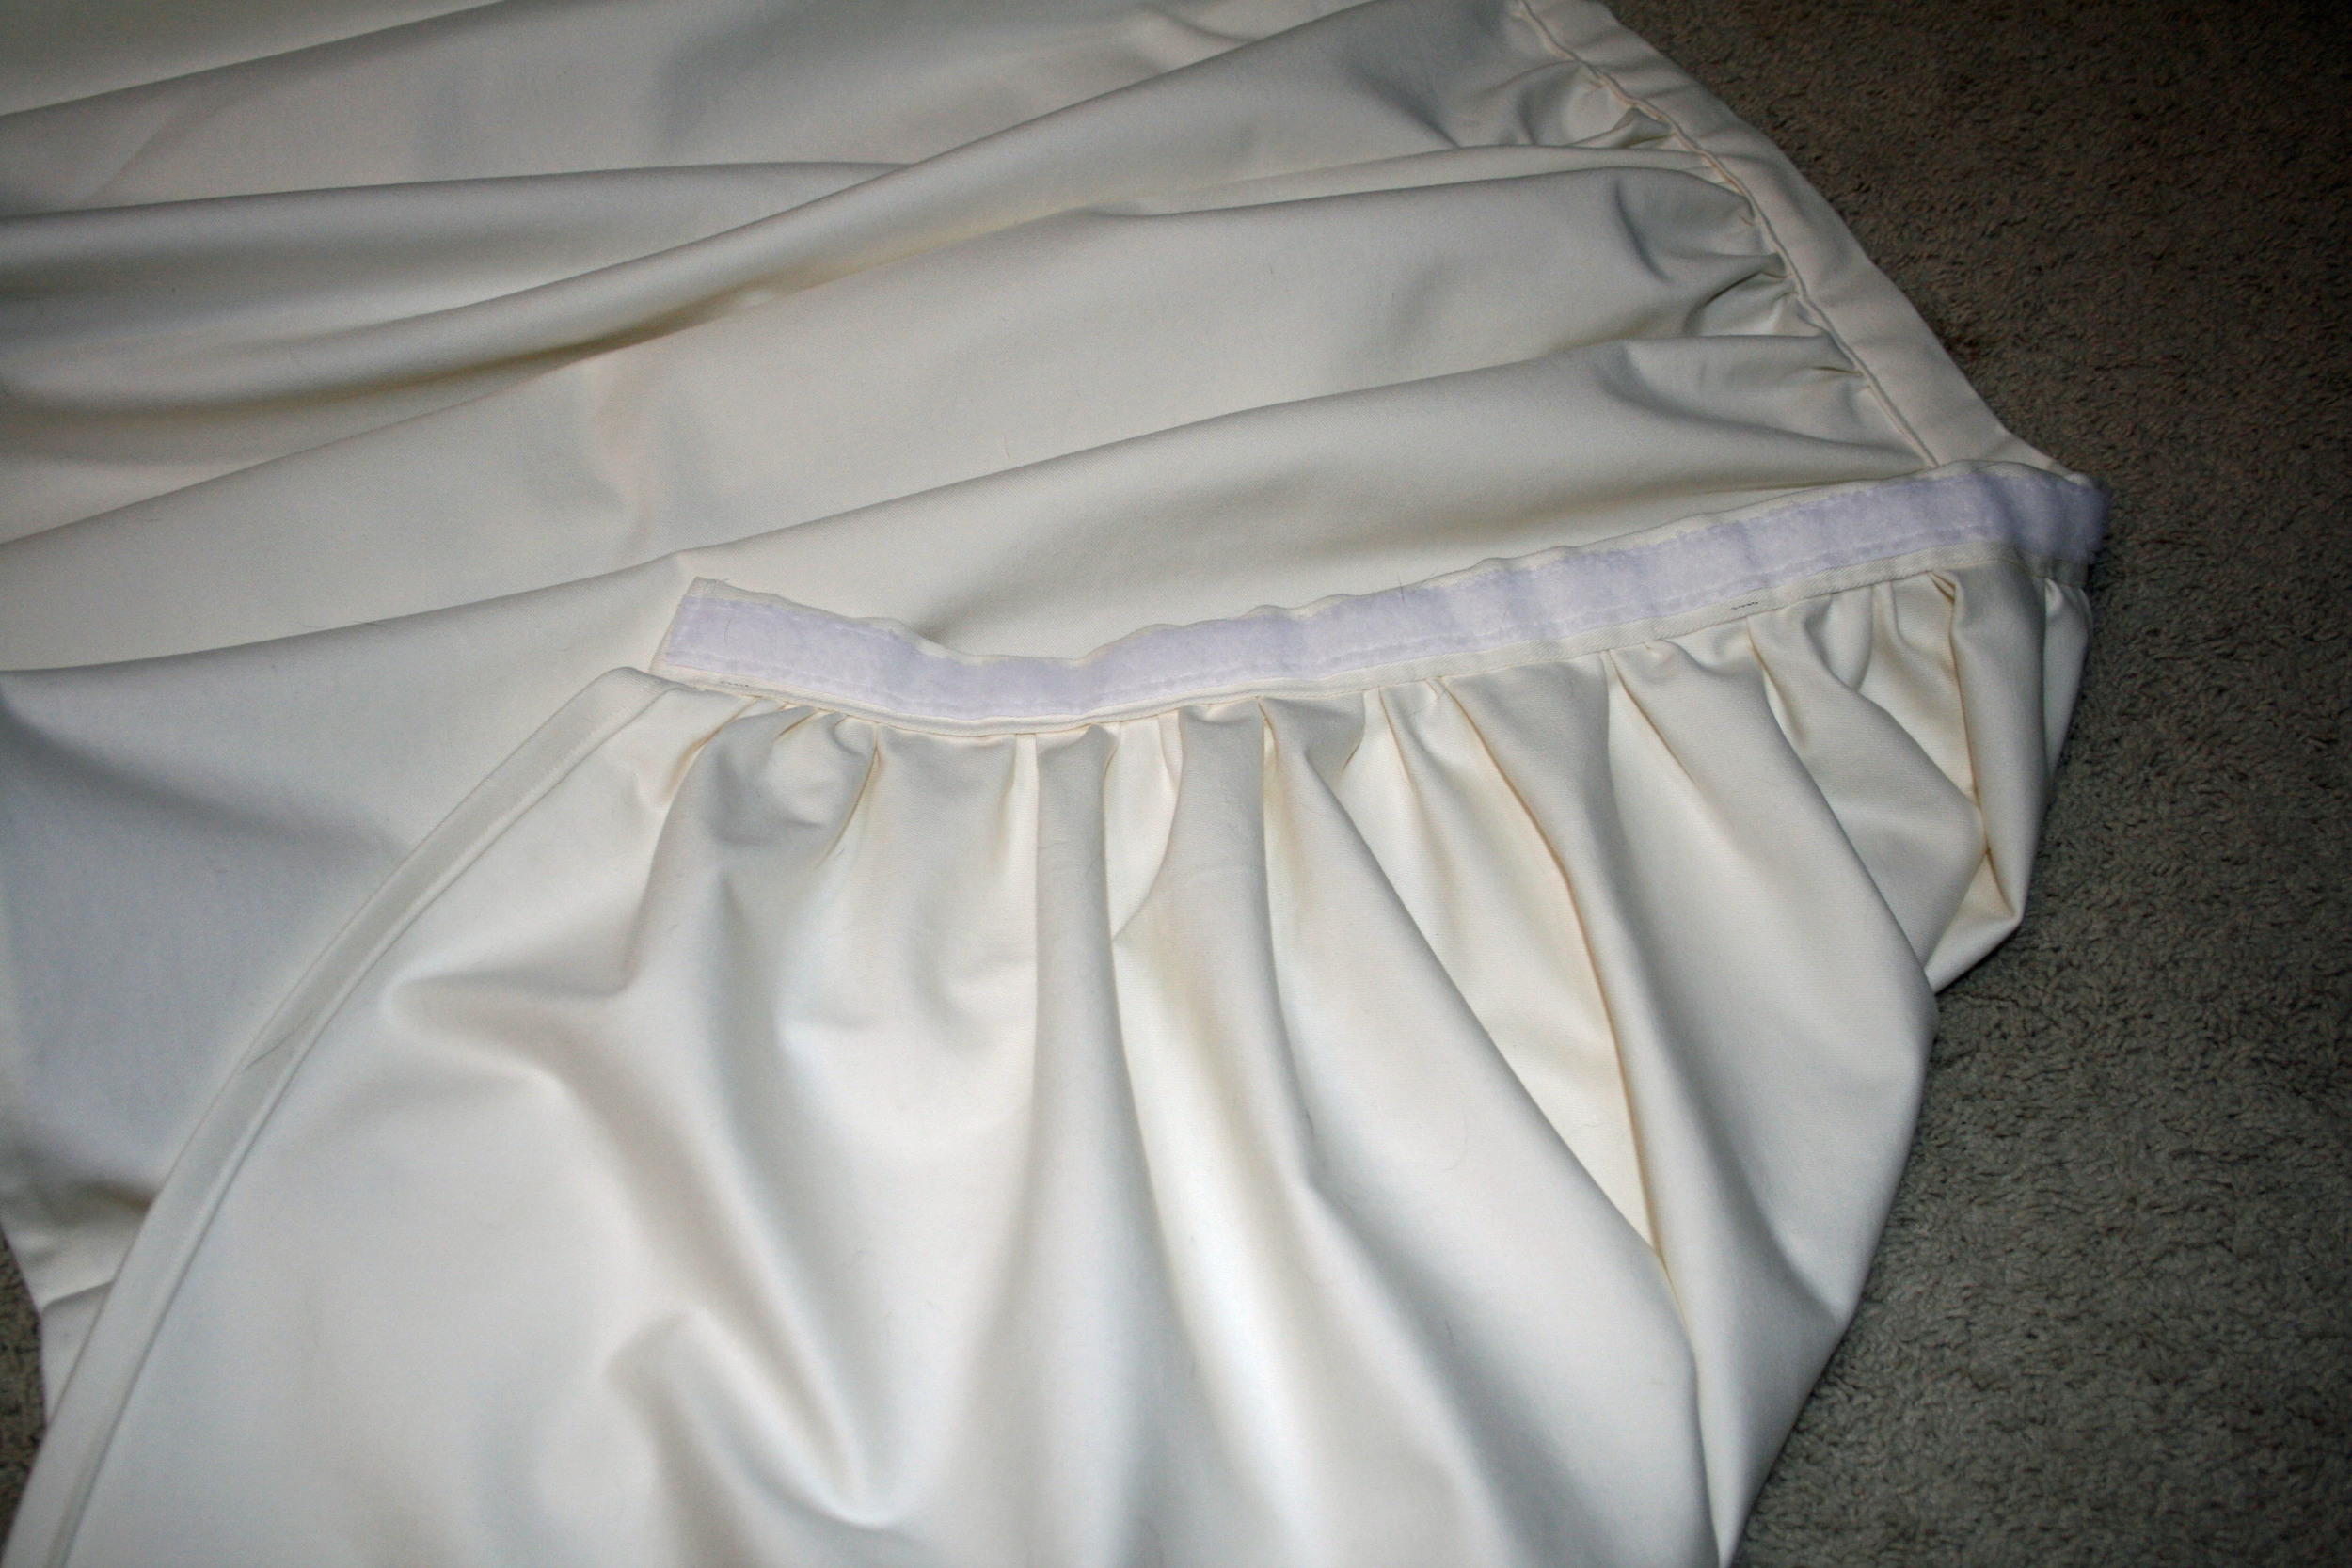
Now back to that cuff... I took the 6" x 61" piece,  folded in a 1/2" on each short side, and pressed.  Then I folded the whole thing in half lengthwise and pressed.  I folded each long side in toward the center crease and pressed so that the cuff was 1.5".   Then it was time to attach the velcro.

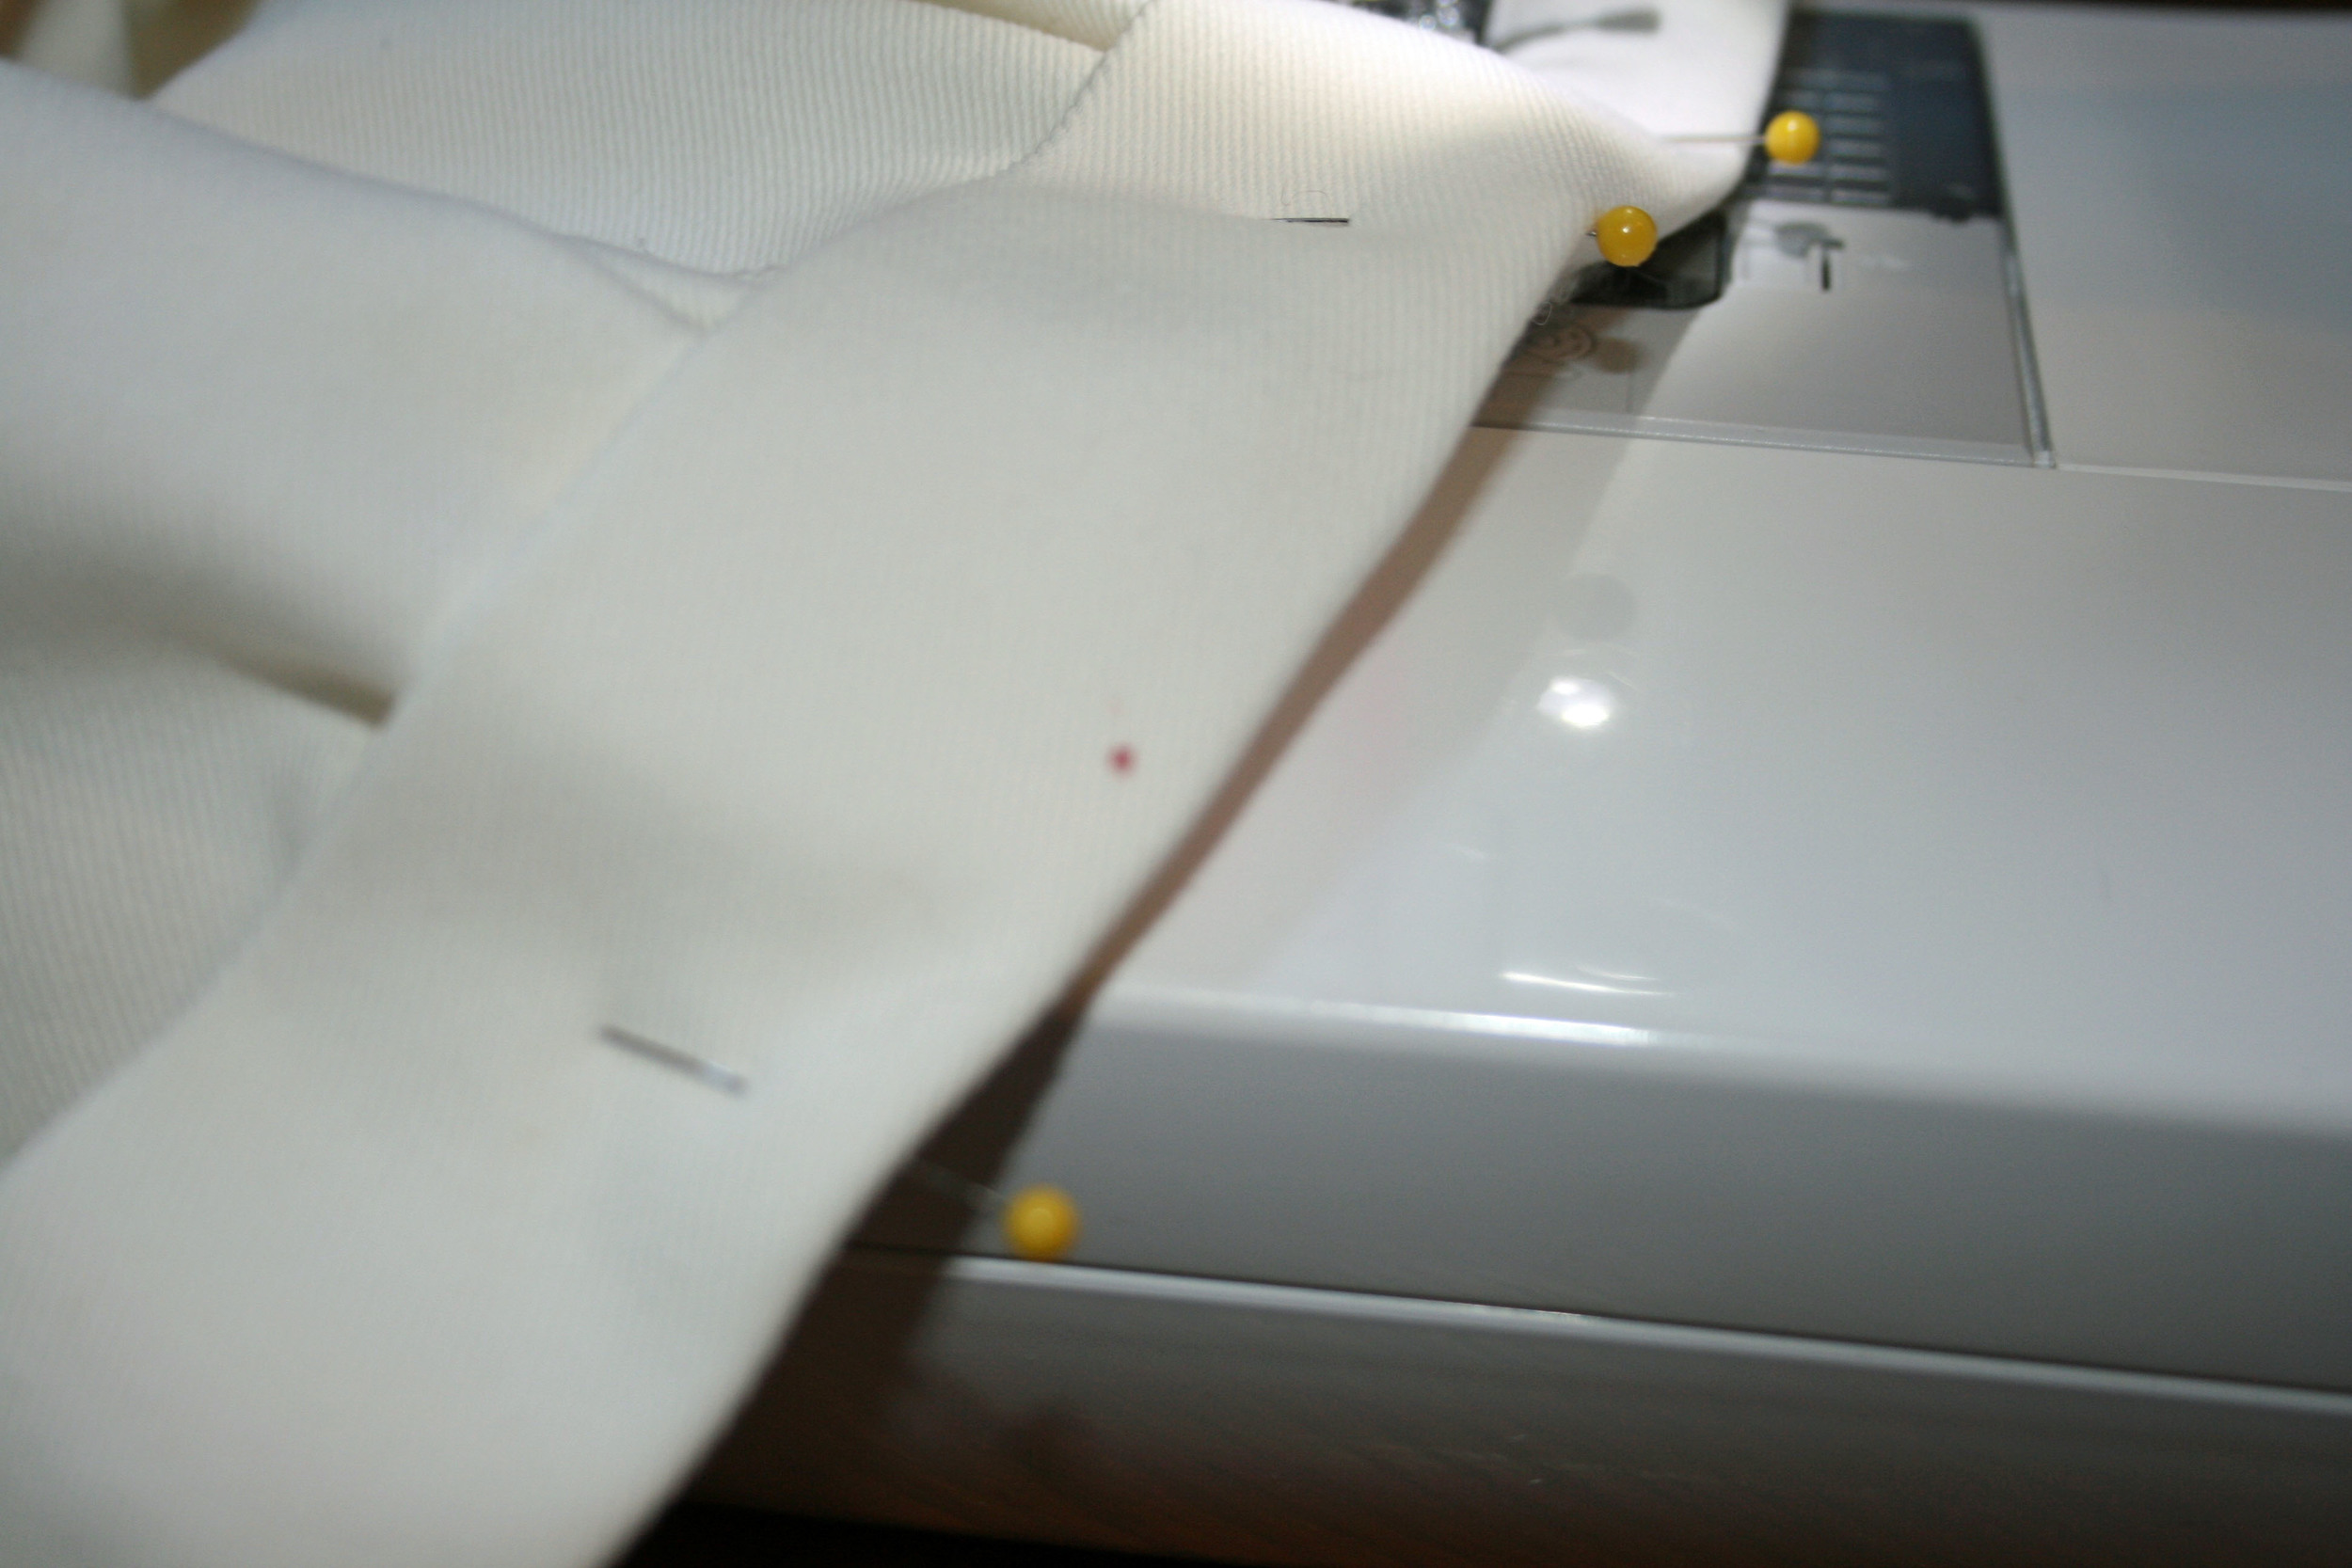
Once the velcro was attached, I was ready to sew the cuff onto the skirt.  5 feet of pinning later...

You see that little out of focus red dot on the cuff?  Yeah, that's blood.  My blood.  Because I'm a klutz.  Especially when it comes to pinning.  When I was making the Weekender Bags my arms looked like I had taken up kitten wrestling.  It wasn't pretty.

Excuse me for a minute while I tout the magic of the Tide Go pen.  If you don't already have one in your sewing kit, go get one.  Immediately.  I used it on the blood spot and - voila!  You can see the resulting wet spot in the picture above, but it left no evidence of my clumsiness once it dried.  Blood, people.  It got out blood.  Don't ask me how.  Just go get one.

Anyway, I attached the cuff with a 1/8" seam (or 1 and 3/8", depending on how you're looking at it), closed up the ends (also using a 1/8" seam) and the sink skirt was done!

I finally got to see the sink skirt in action when I went home to VA in April, and was relieved to see that it's working out exactly as Angela had hoped!  Her solution was brilliant, and I'm happy I was able to help her out.  I may have to make one now for MY bathroom!

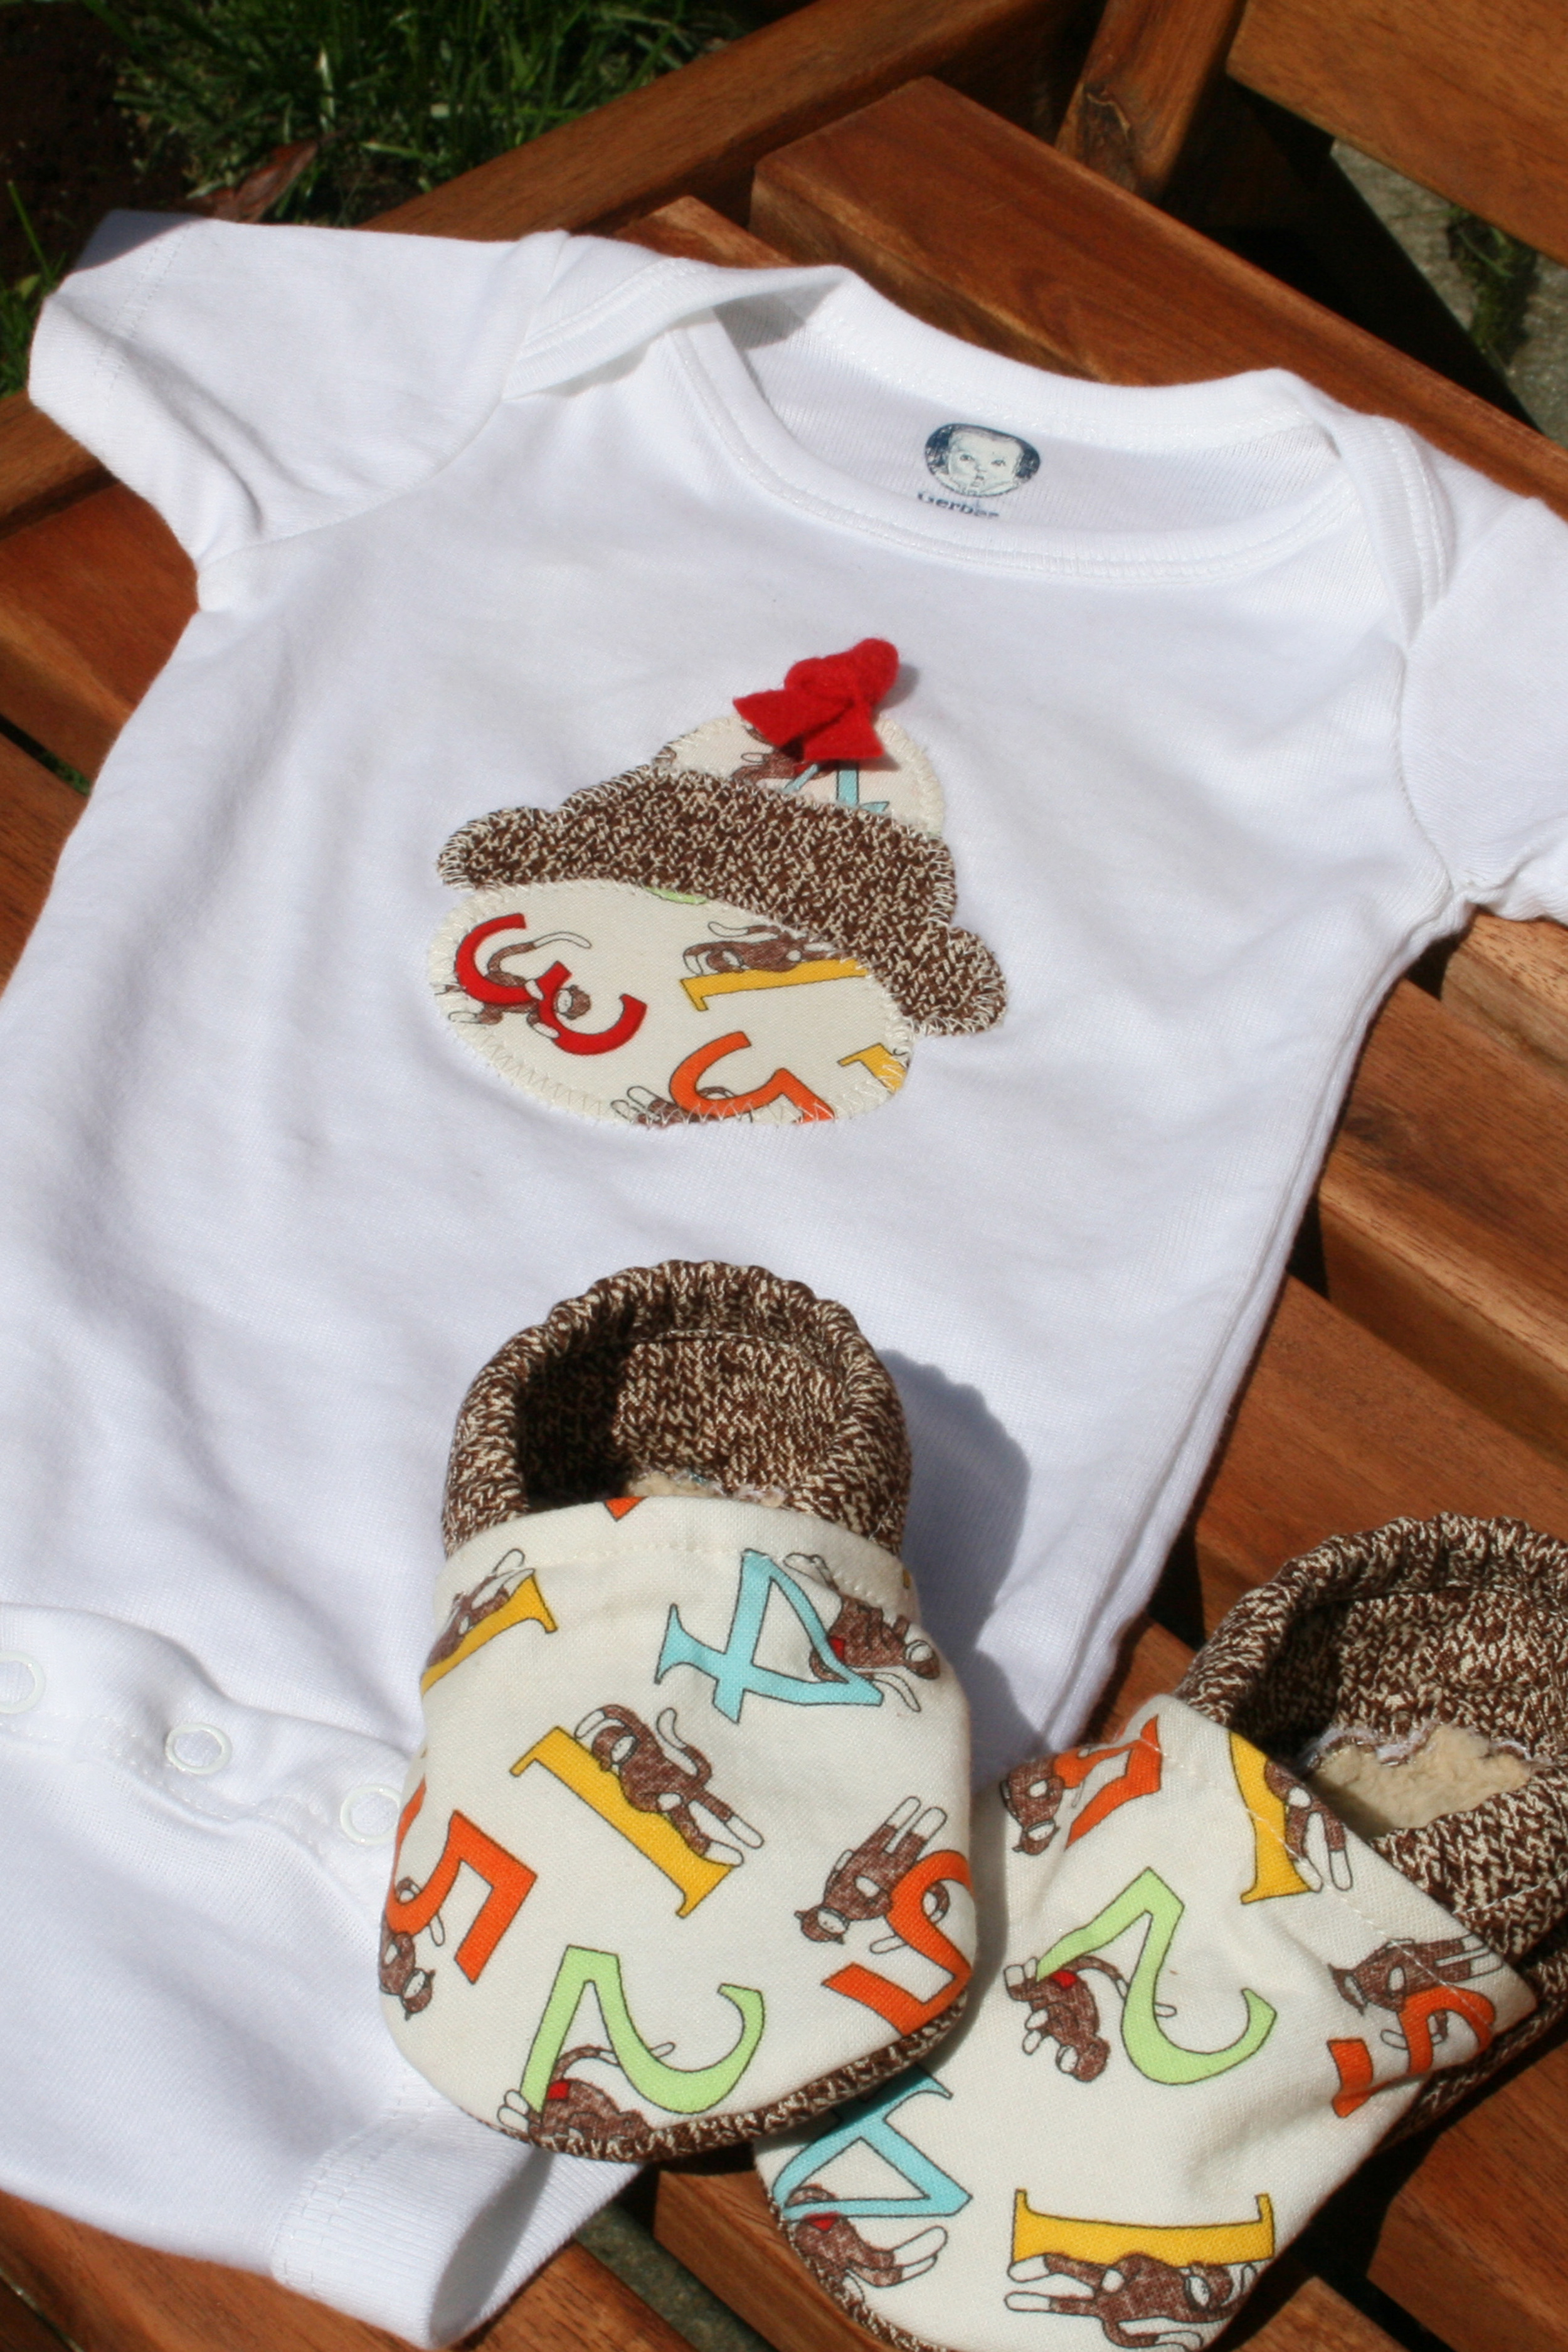
Sock Monkey onesie gift set & tutorial!

I’m at a point in my life where it seems like most of my girlfriends are either pregnant or just had babies, and as a result I’ve become slightly obsessed with making baby gifts for them.  I started making applique onesies when Lindsey (awesome mama and best friend extraordinaire) was pregnant with her son, Will, last year.  The necktie tutorial on Crap I’ve Made got me hooked and from there I started making my own applique designs.  What I love about applique onesies is that they’re quick, a great way to use up fabric scraps, and there are endless design possibilities.

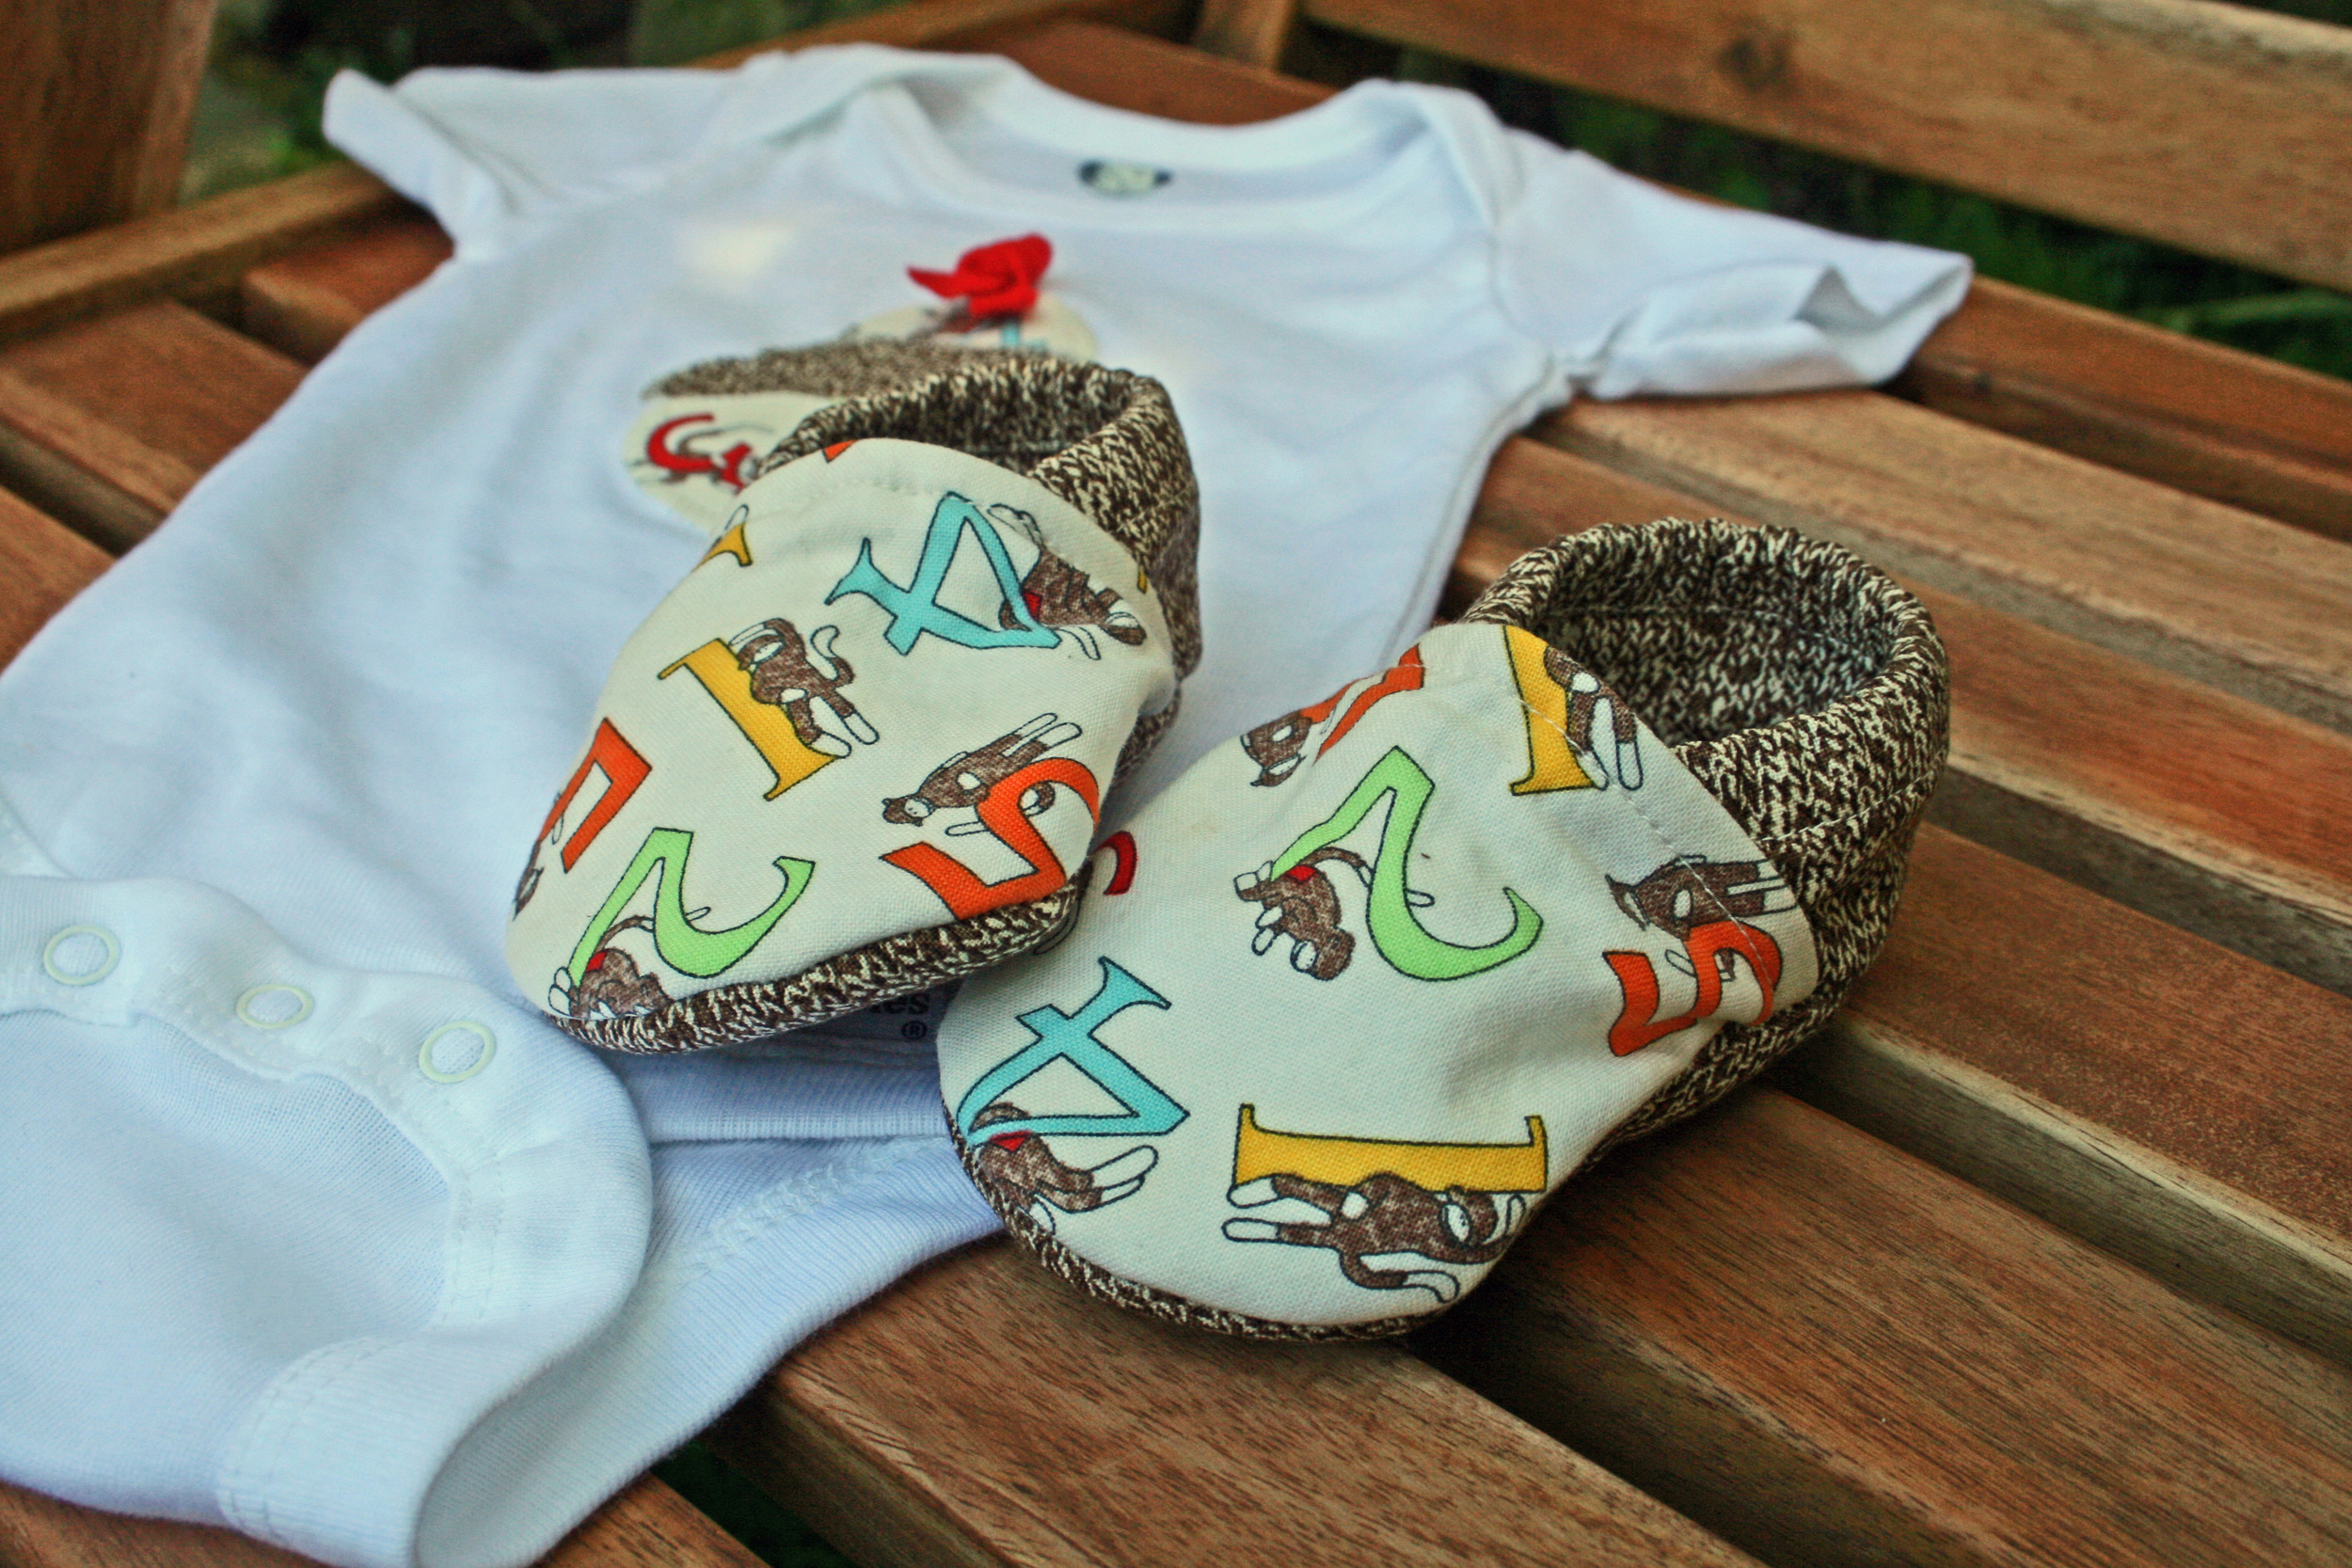
When deciding what to make for two of my girlfriends who are due this summer, I knew I wanted to try to use up some of my leftover Sock Monkey fabric so I created a Sock Monkey applique design using Microsoft PowerPoint (a program I use daily at work, but have recently started experimenting with for sewing and design projects).  You've probably noticed by now that I have a hard time stopping at just one baby gift, so when I came across this tutorial for cloth baby shoes, the Sock Monkey gift set was born.  They’re both having boys, but I think the set works for either a boy or a girl.

The cloth shoes were a little tricky to work with due to their small size and all the layers of fabric and interfacing, but - like most baby stuff - they were pretty quick to make.  It probably took me longer to cut out all the pattern pieces than it did to actually sew them together.  One thing I'd recommend is to play around with the length/tension of the elastic because if it's too tight it makes the tops of the shoes bunch up.  If you're attaching a little ribbon or button to the tops then this won't matter so much, but it can look a little wonky if you're leaving them bare.

Okay, now on to the exciting part...

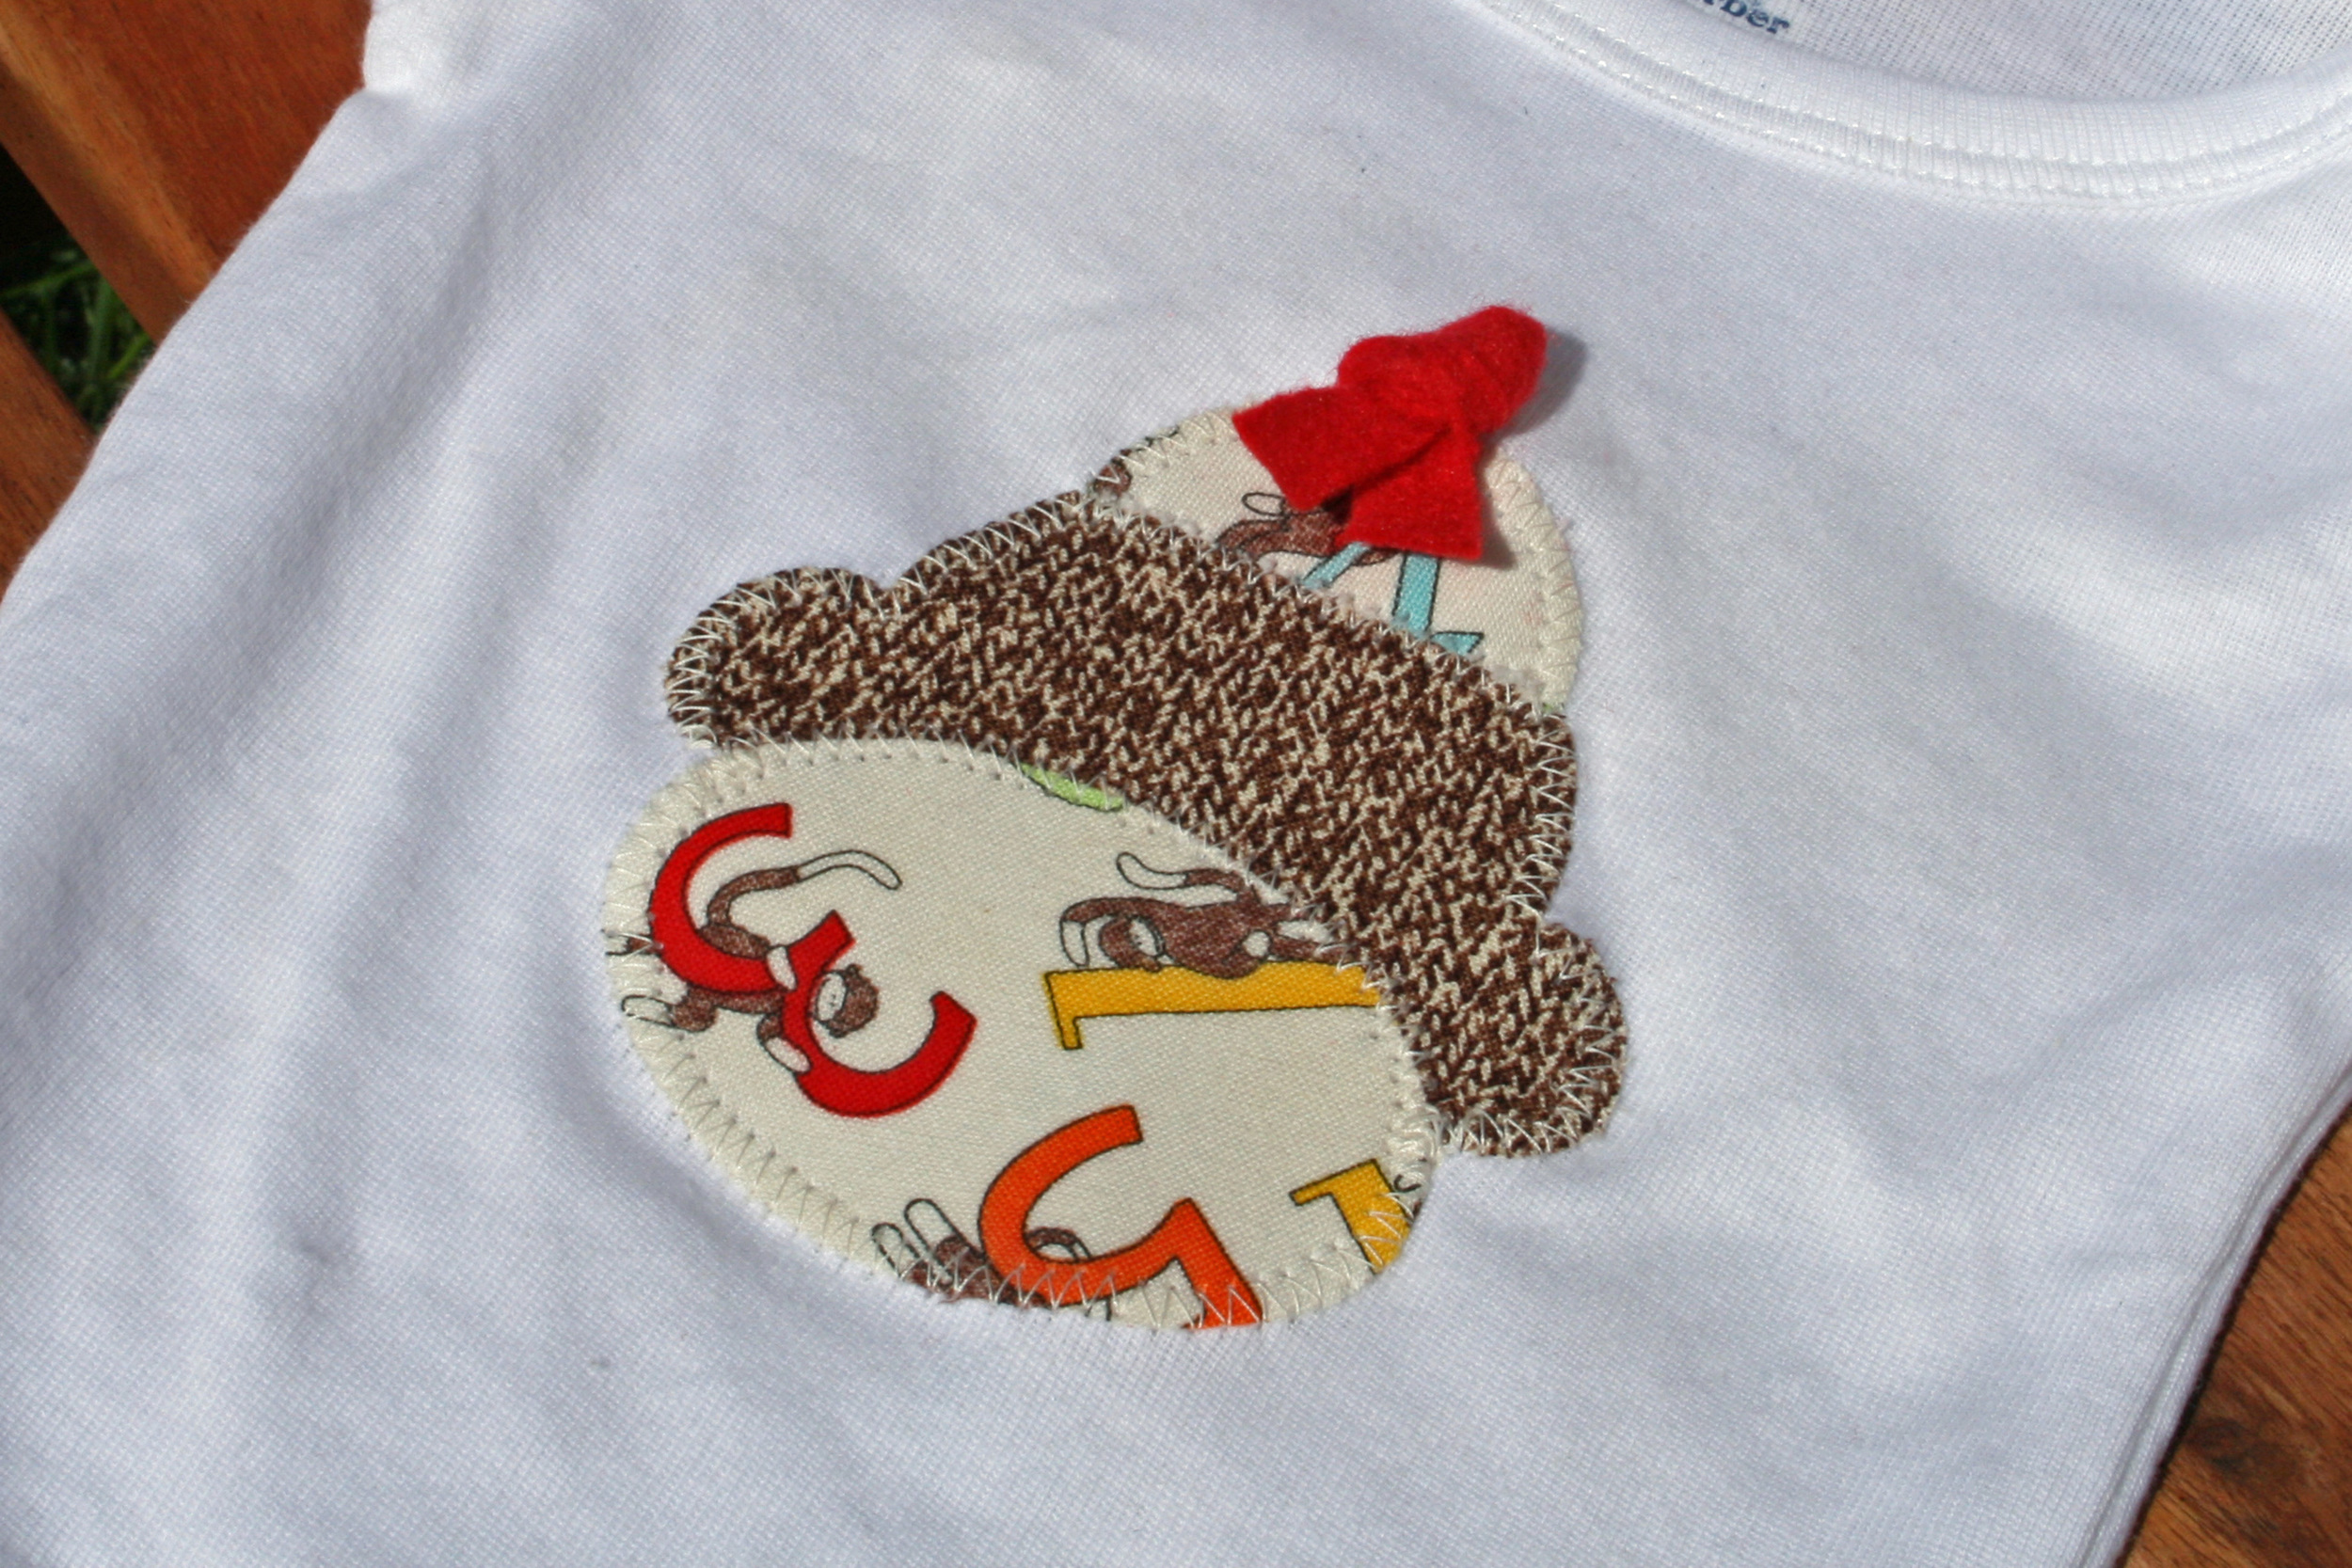
I'm so thrilled with how the Sock Monkey onesie design turned out that I decided to make it into my very first Made by Bird tutorial!  Click here to download the PDF pattern: [dm]4[/dm](The materials list and instructions are in the PDF and located below, but you'll need to download the PDF to get the pattern pieces.)

Here are the materials you'll need to make the onesie (or tee if your tot is a little older):

  • Baby bodysuit or tee
  • Sock Monkey pattern (see PDF download)
  • 4"x4” piece of cream colored Sock Monkey fabric by Moda
  • 3"x4” piece of brown sock texture Sock Monkey fabric by Moda
  • ½"x4” strip of red felt, ribbon, or fabric
  • Wonder Under
  • Thread
  • Sewing machine
  • Hand sewing or embroidery needle

And here are the instructions:

  1. Prewash your garment and fabric scraps in hot water.  Prewash the red strip for the hat in the warmest water your material can tolerate.  The goal here is to prevent any future bleeding when you wash the finished onesie or tee.
  2. Fuse Wonder Under to the wrong side of your fabric scraps (reference the Wonder Under packaging for fusing instructions.)
  3. Print the sock monkey pattern pieces found on page 2 of the PDF pattern.
  4. Trace the hat and mouth pieces onto the Wonder Under paper backing fused to your cream colored Sock Monkey fabric, and trace the face piece onto the backing fused to your brown sock texture Sock Monkey fabric.
  5. Cut out all three pieces and line them up on your onesie or tee.  The top of the hat should be about 3-4” down from the neckline.
  6. Fuse the pieces to your onesie or tee.
  7. Zig-zag stitch around the perimeter of each piece.  Be sure to remove the flat bed attachment on your machine so you can easily slip the onesie or tee around the base.
  8. Fold the red strip for the hat in half and knot the top.
  9. Hand sew the knot to the onesie using embroidery floss or strong thread. You’ll want to make sure it’s very securely attached to the onesie or tee.

If you have any questions or comments, please leave them in the comments section below.  I'd probably pass out from excitement if anyone sent me pictures of their finished onesies, but since this is my first tutorial, any type feedback you have would be greatly appreciated.  :-)

DIY sewing labels!

Ack!  My very own "made by bird" labels!  I know I shouldn't be so excited about such a little thing... but I am.  I really really am.  As I mentioned in my last post, I added these to the baby shower gifts I gave my friend Angela.  I've been experimenting with labels for a while now, and these are by far my favorite.  I tried the printing on fabric approach and while I was super impressed with printed fabric in general, I wasn't crazy about the finished labels.  They were too stiff for my liking and the Fray Chek was still visible once it dried.  On a whim, I tried using iron-on transfer paper and twill tape and it worked soooo much better than I thought it would.  Here are the steps I followed:

  1. Design the labels in the program of your choice.  (I actually used PowerPoint for mine.)  Just remember to flip the image before you print.
  2. Cut out the label from the transfer paper (I only cut as many as I needed for the gifts so I didn't have to worry about losing a bunch of tiny little pieces of paper.)
  3. Cut as close to the design as possible.
  4. Decide how you're going to attach the label to your item.  If you want a loop (as pictured above), fold the twill tape in half leaving a 1/4 inch or 1/2 inch extra so you can sew the label into your seam.  If you want them "flat," leave a 1/2 inch extra on each side of your label design so you can fold the ends in a 1/4 inch and attach the label to your item using a zig-zag stitch.  (I used the latter approach for the burp cloths, but forgot to take a picture.  I'll be sure to add an example to this post the next time I sew the labels on that way.)
  5. Transfer the label design to the twill tape (following the instructions that came with your iron-on transfer paper)
  6. Here's the important part: only let the label cool for a few seconds before peel off the backing paper.  I think this really helps reduce the visibility of the film the iron-on paper leaves on your labels.
  7. Attach the label to your item as indicated in step 4, and you're done!

word game wedding programs

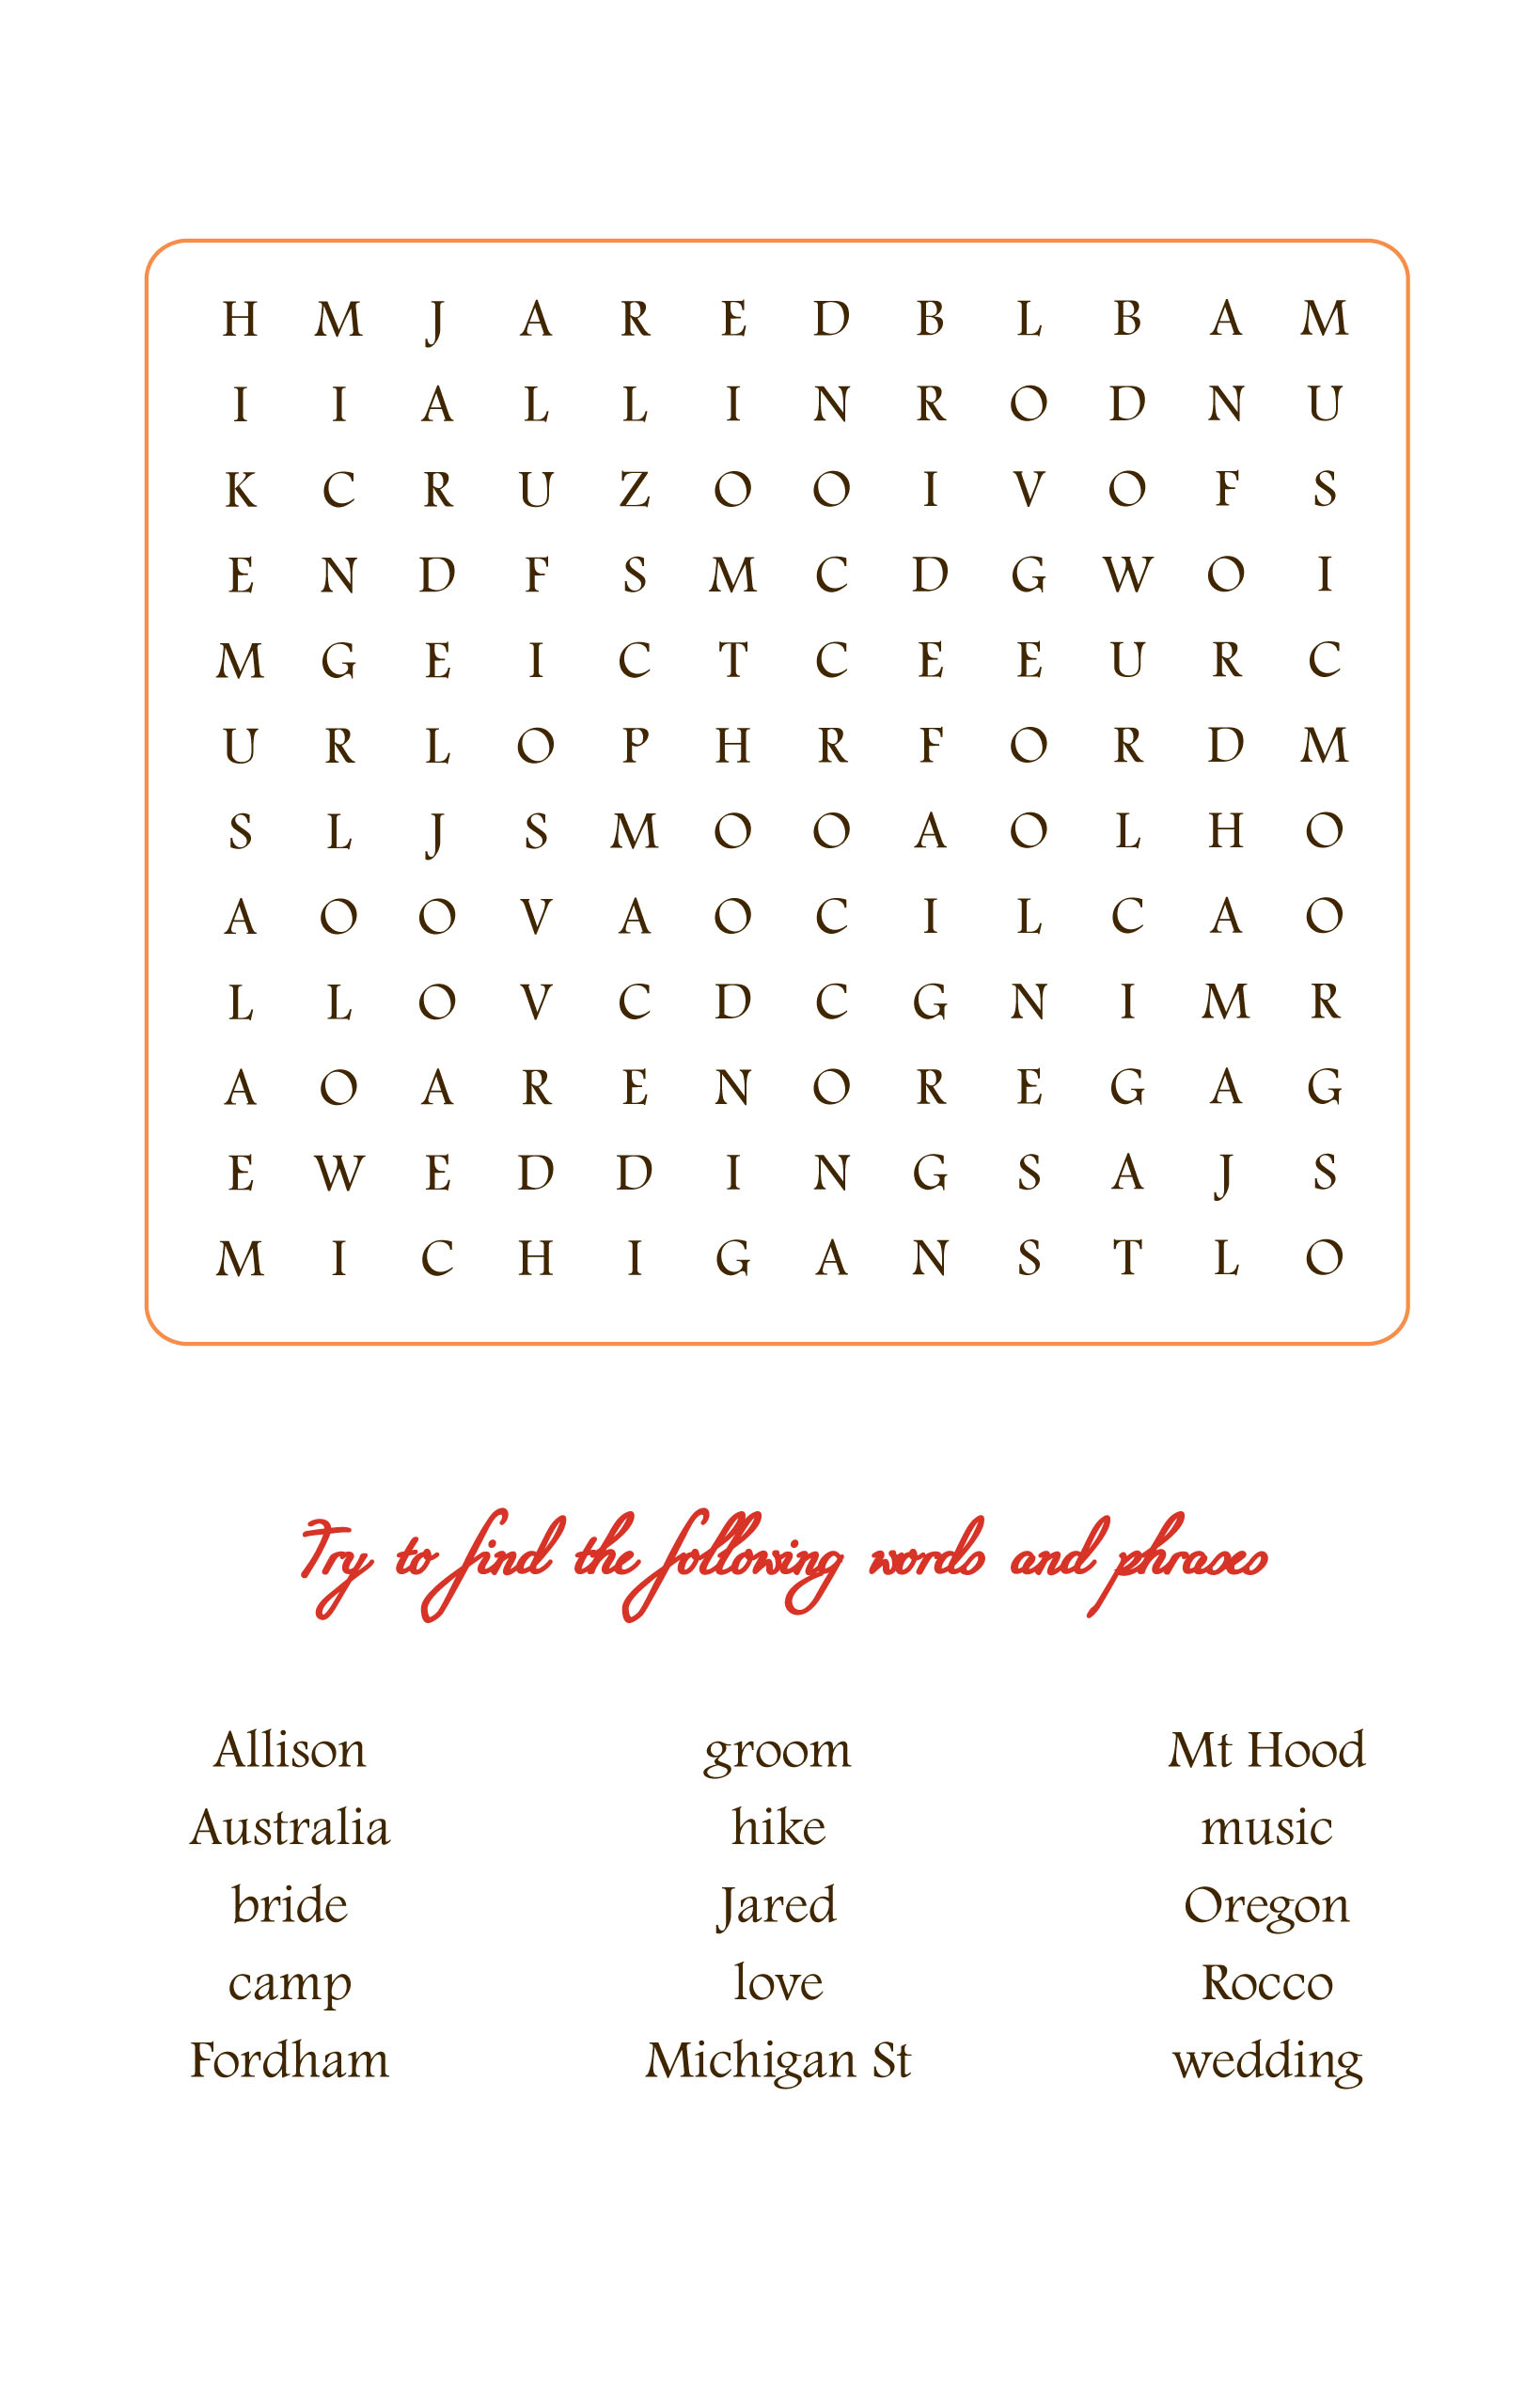
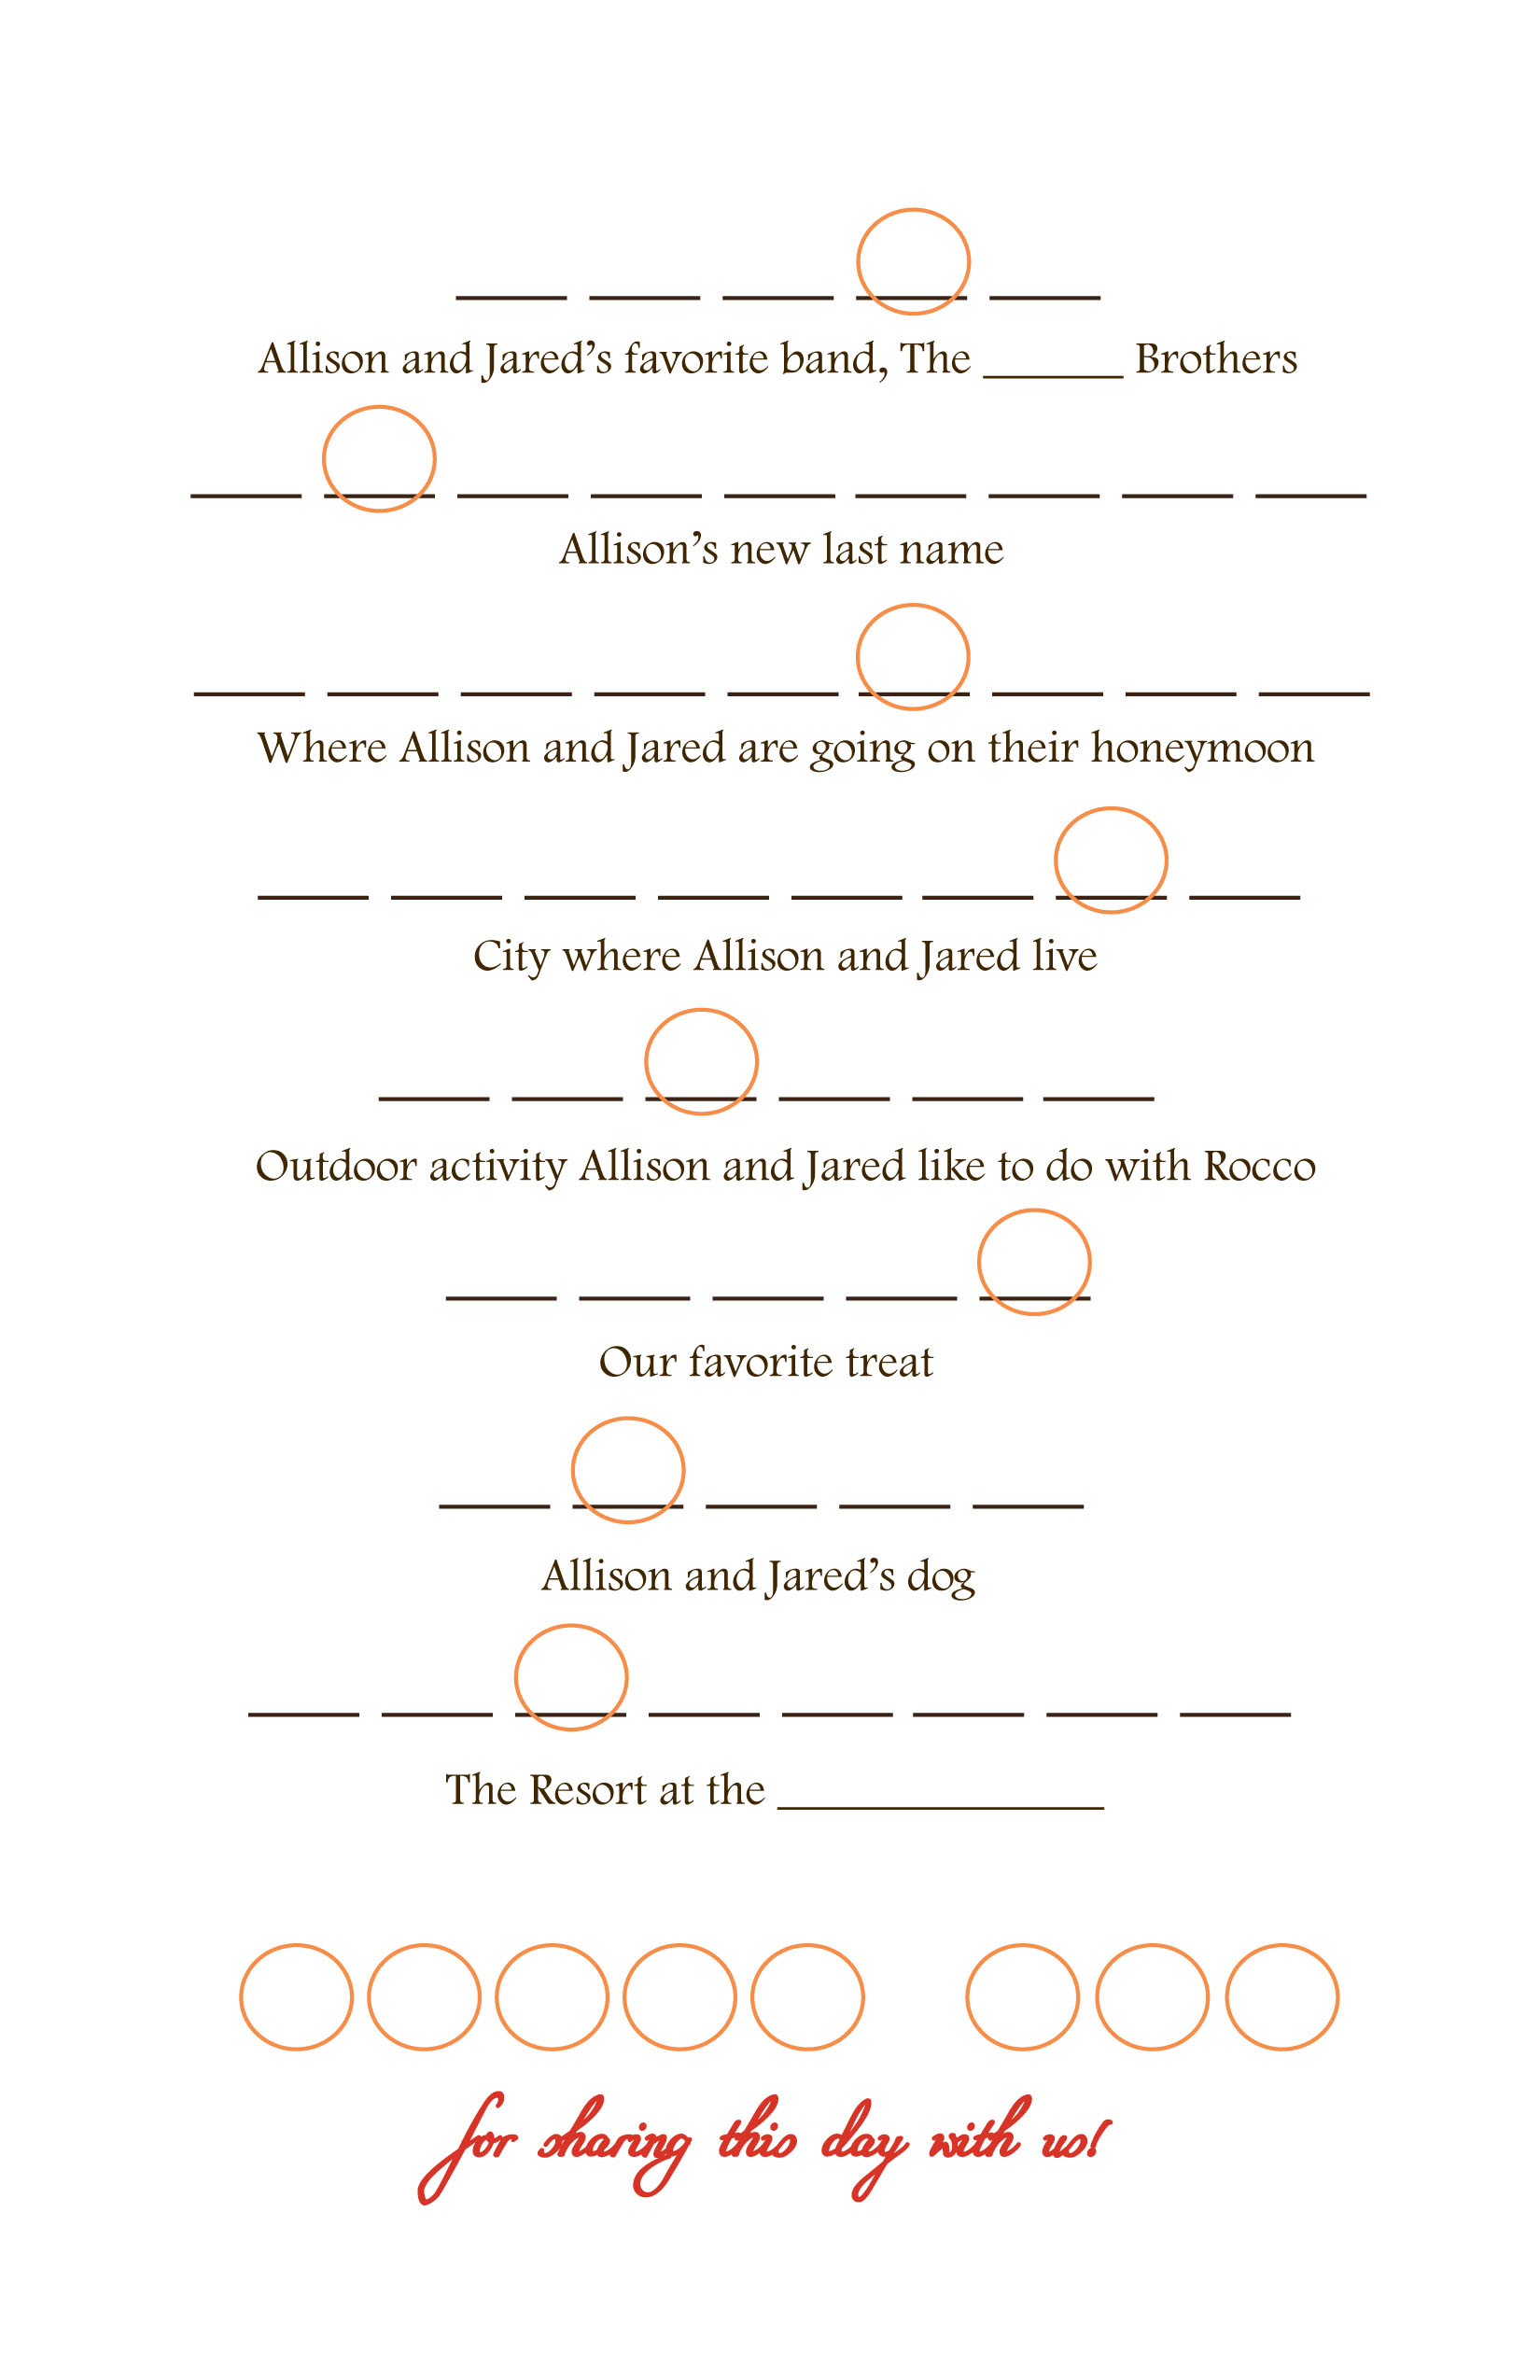
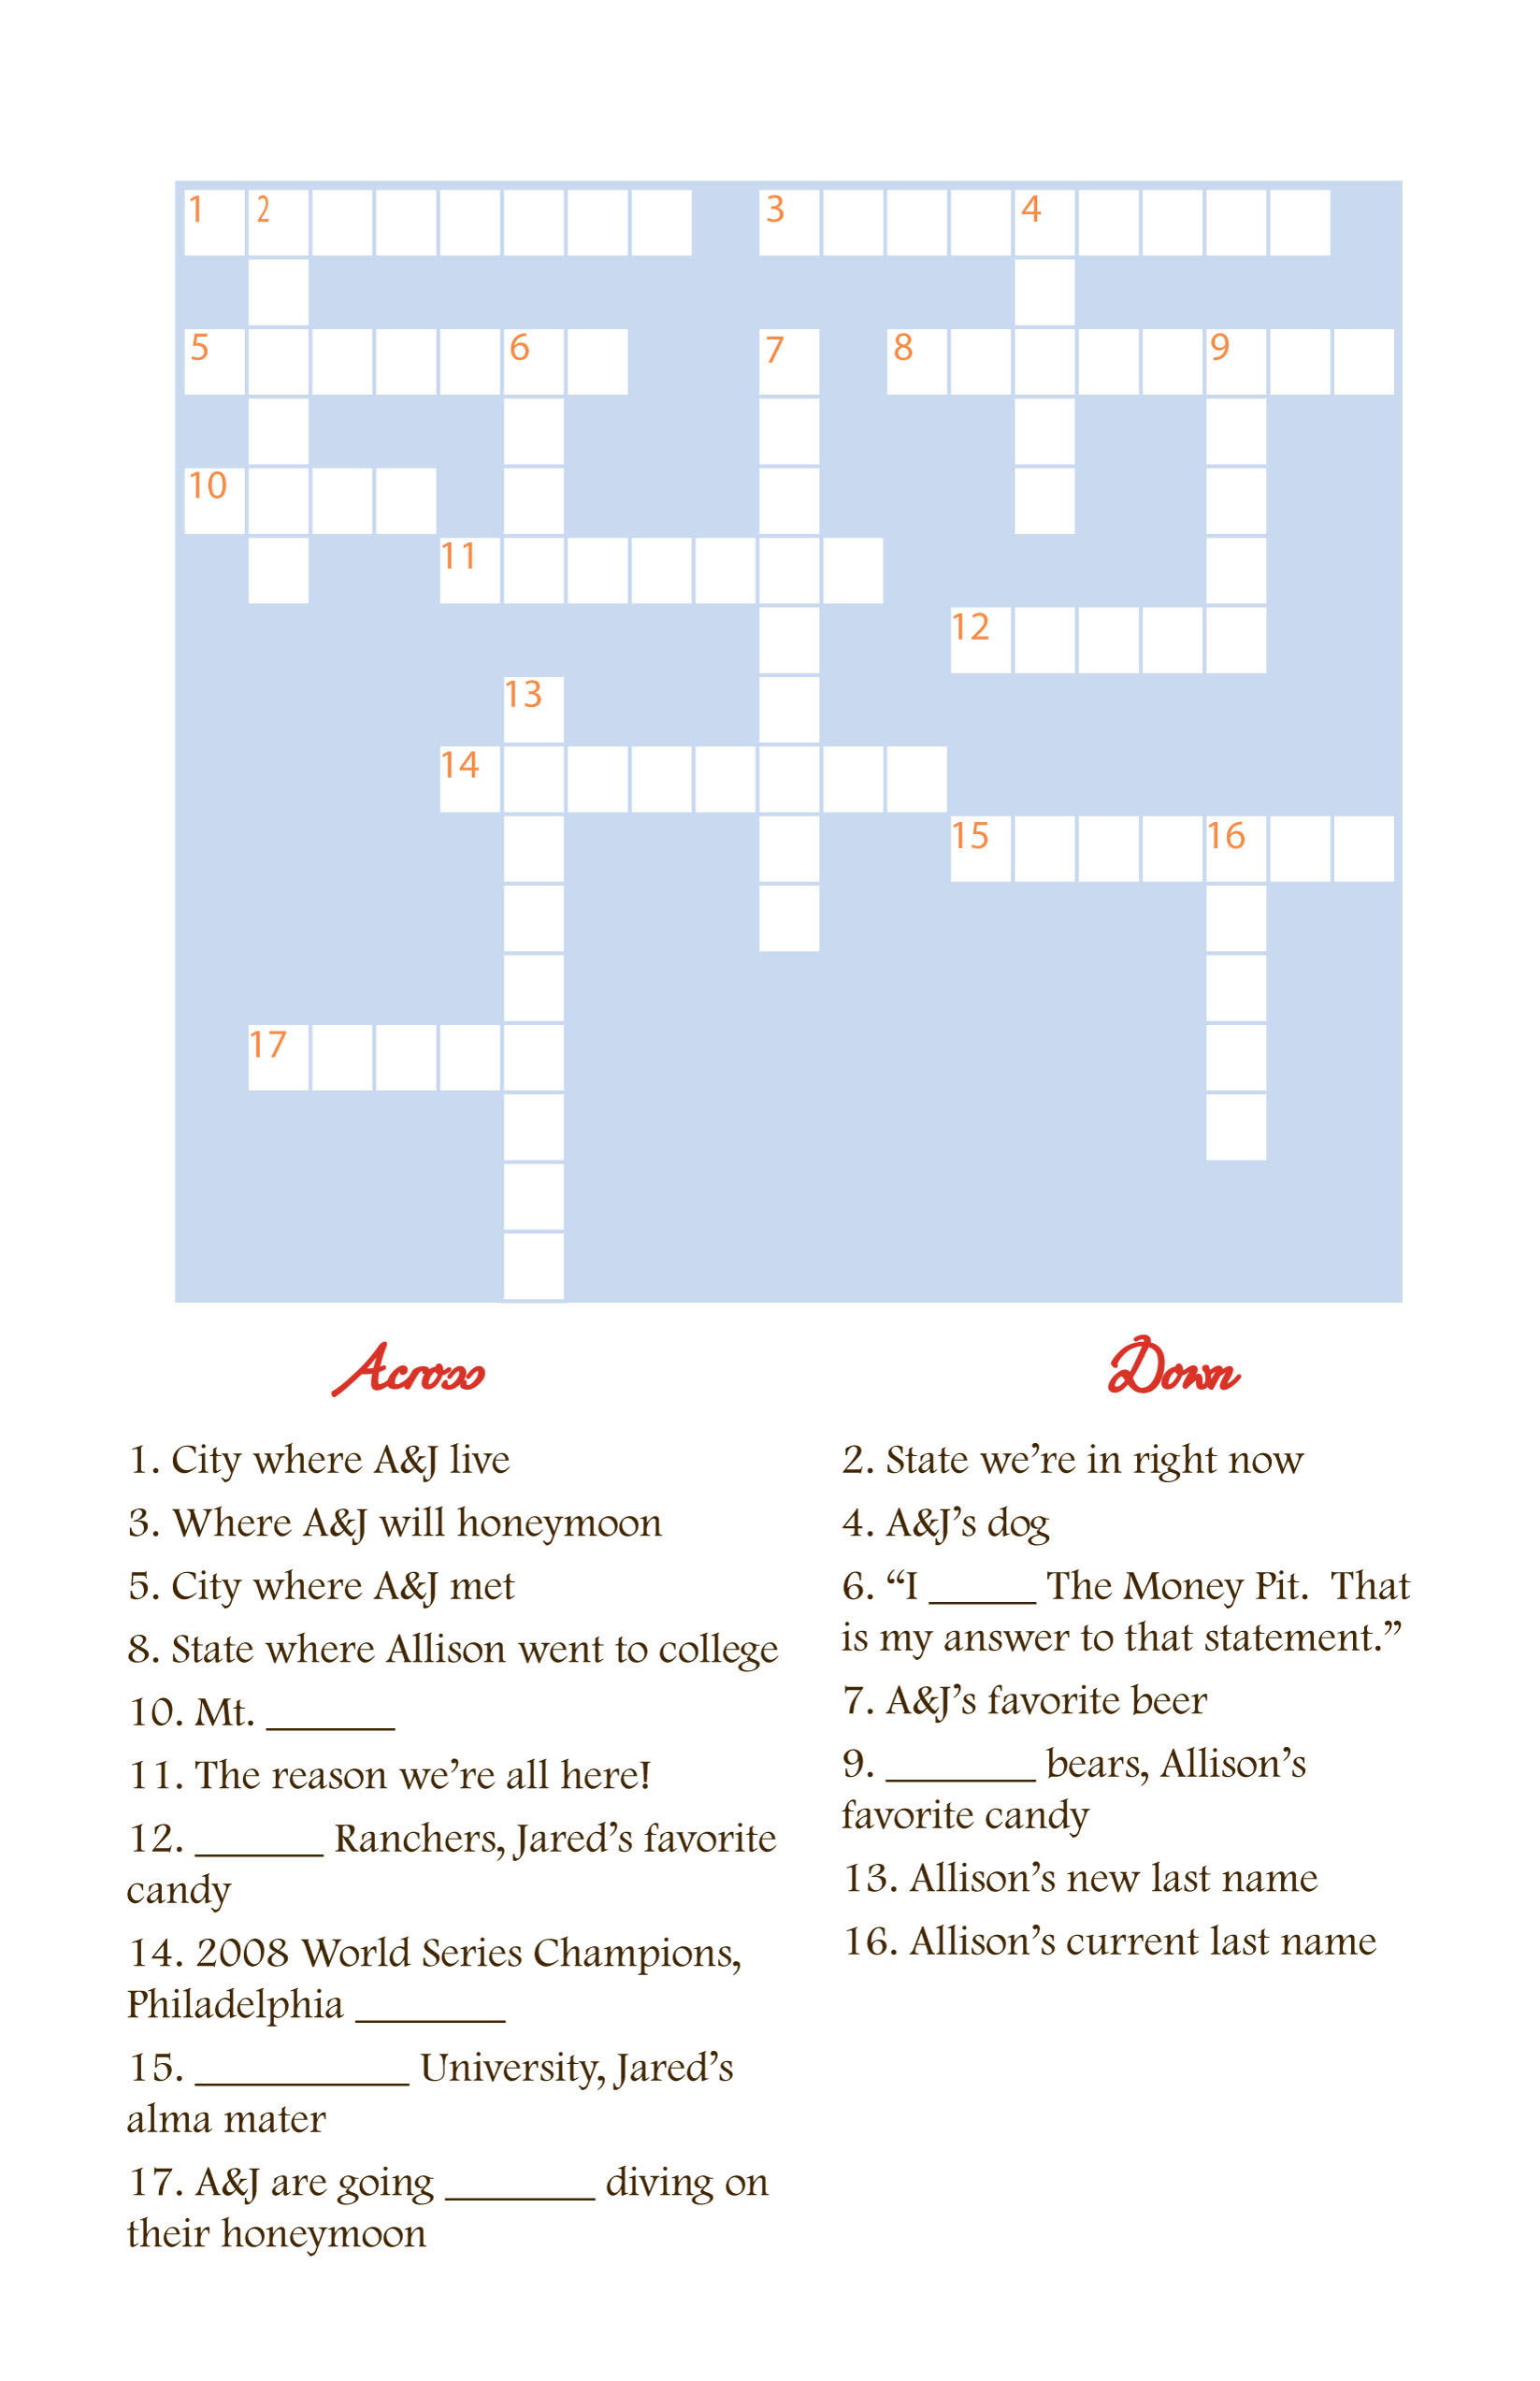
The moment I saw these DIY programs at Della Stella, I knew I wanted to replicate them for our wedding.  I loved the idea of giving guests something to do while they wait for the ceremony to start, and my inner word nerd got a little geeked out at the idea of our own personalized word games.  Jared created all three games – a crossword, word search, and a fill-in-the-blank – and I used Illustrator to design the 3 versions of the program:

We got the programs printed at Kinkos on Letter sized cardstock, then folded them in half so that the final size was A9.  I was in the midst of Weekender Bag insanity, but Jared was a huge help and did ALL of the assembly for the programs, including drilling holes in all the pencils and craft sticks.  We followed all the assembly steps on Della Stella’s tutorial and couldn’t be happier with how the programs turned out.

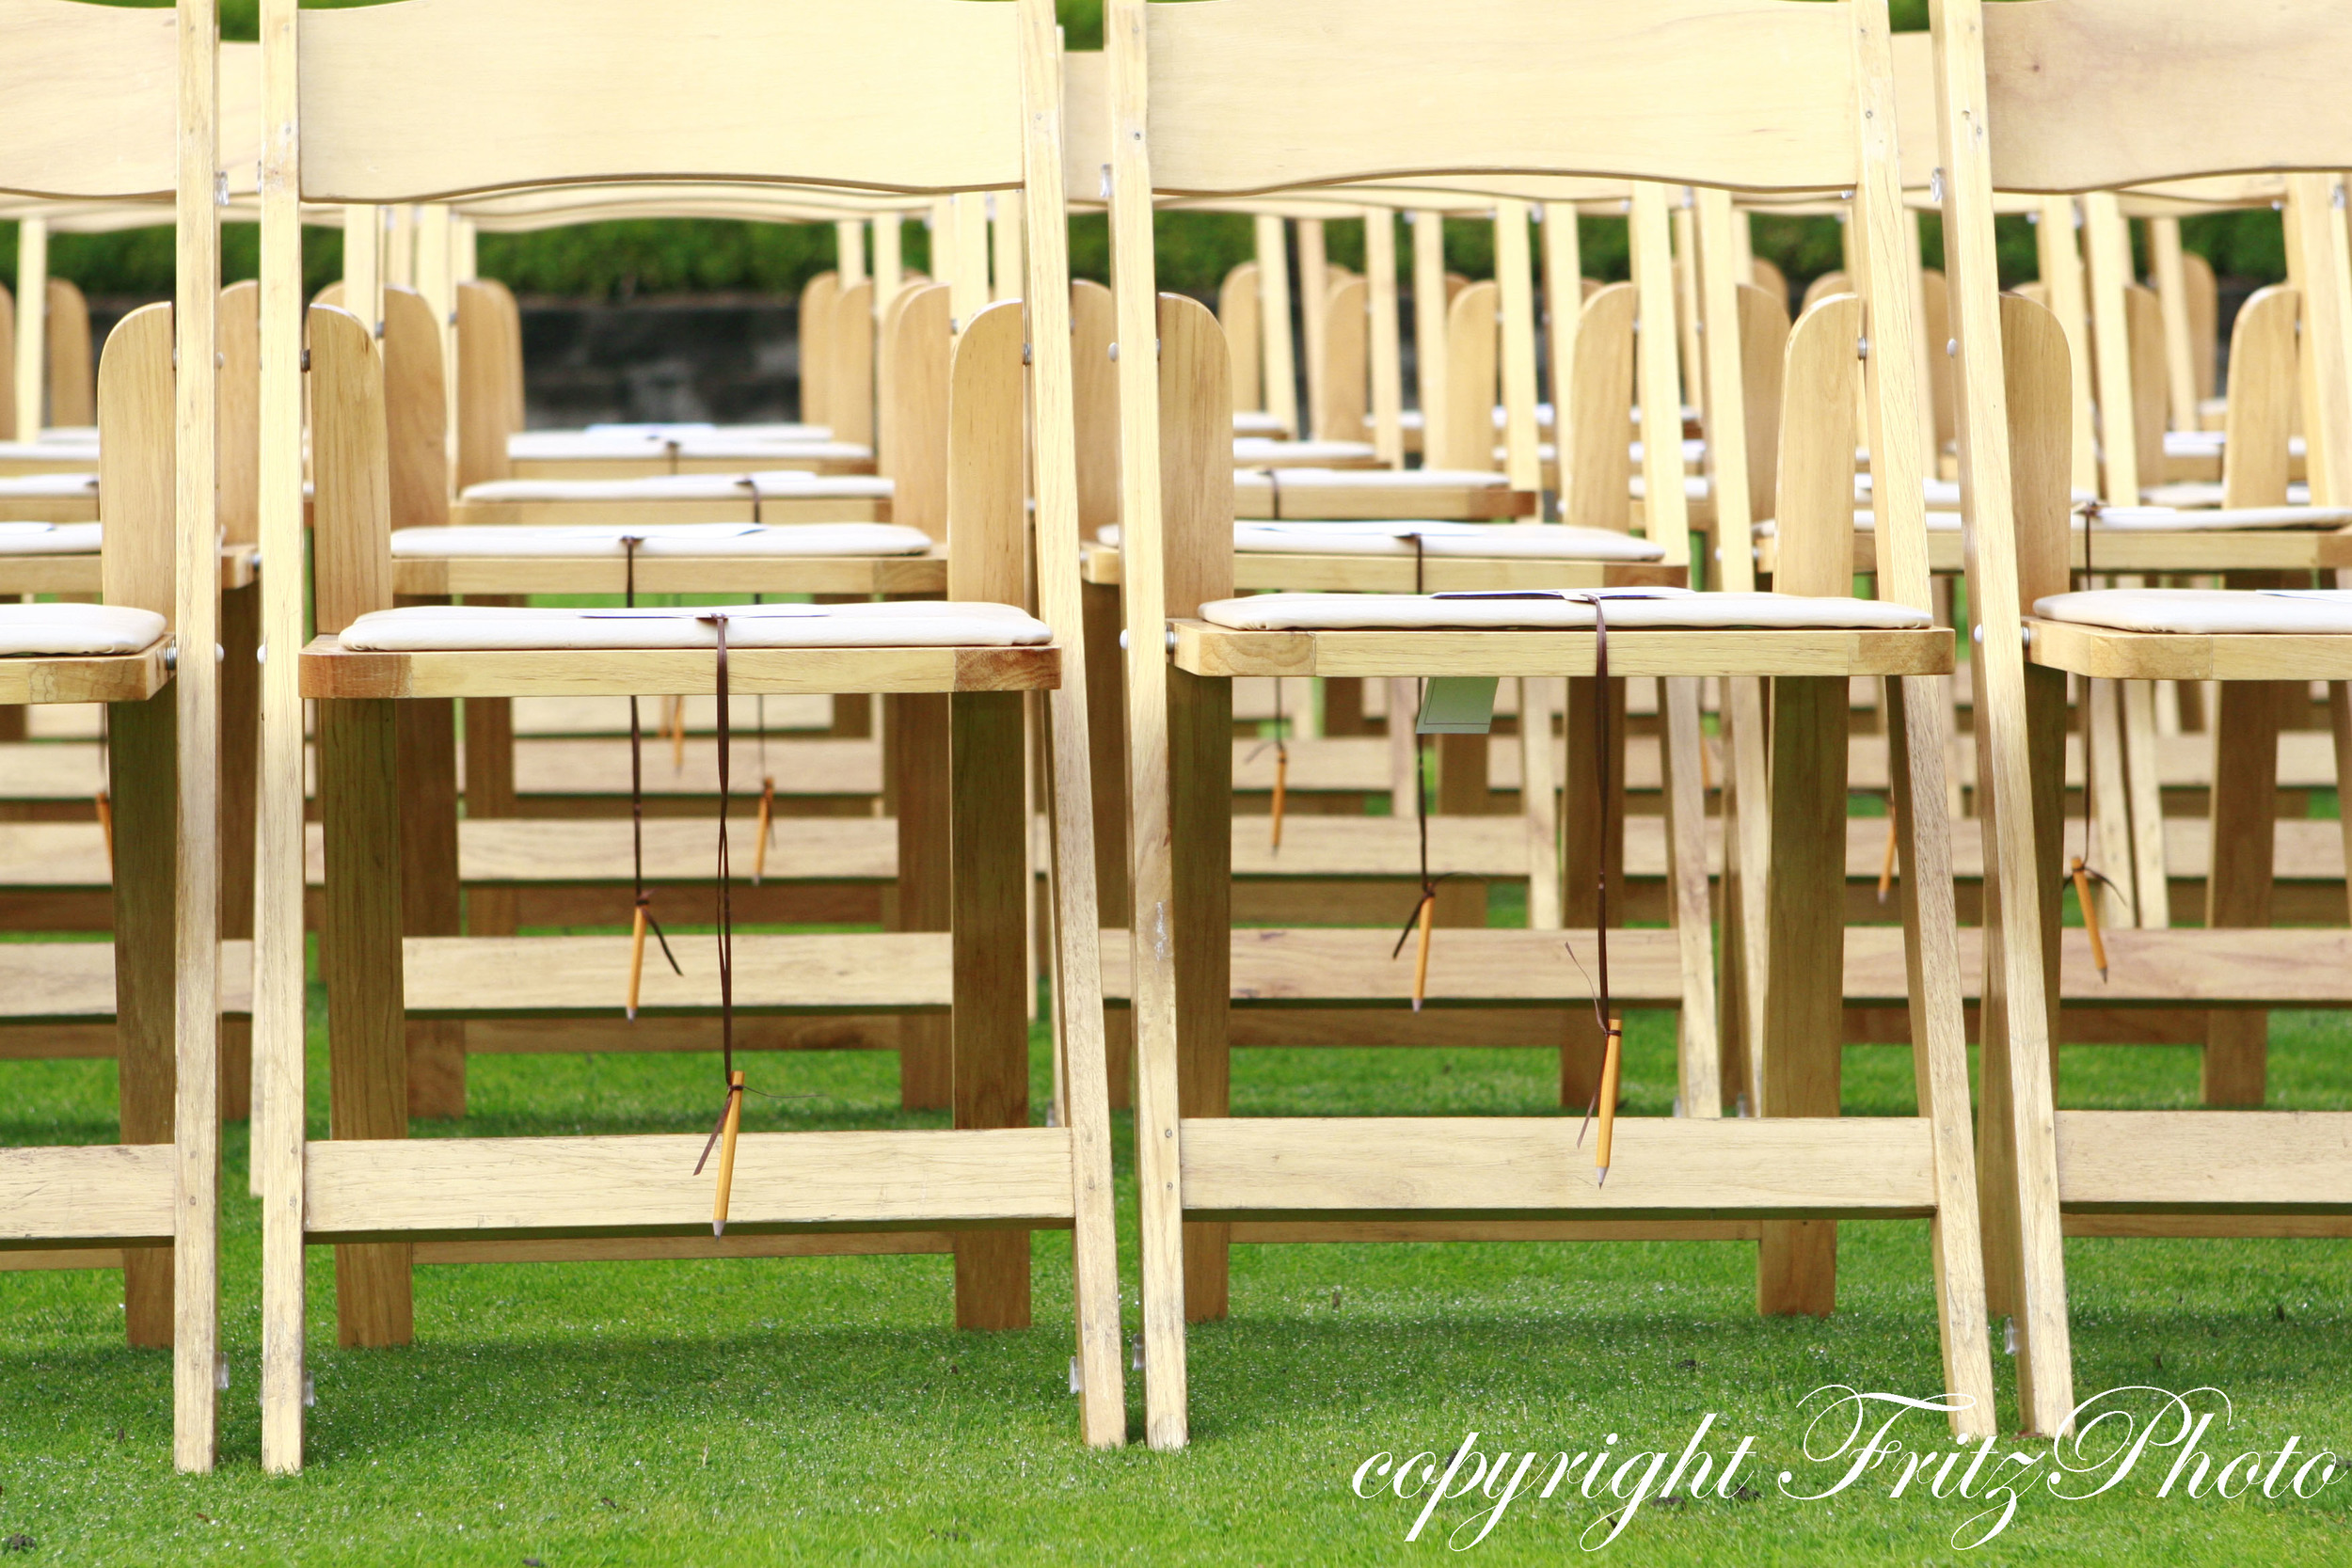
The resort staff placed the programs on our guests’ chairs before the ceremony, which we felt would be easier than setting up a separate table or having our poor ushers deal with keeping all the pencils untangled.  The feedback from our guests was great!  Thanks so much to Della Stella and her brilliant tutorial!!

(In other exciting wedding news, my and Jared's wedding was the featured Real Wedding on Perfect Wedding Guide today!  Check it out here.)

***UPDATE!*** My wedding program word games are now available for download.  Click on the link below to start downloading the set of 3 templates.  (Note: You'll need to have Adobe Illustrator to open and use the files.)

***NEW UPDATE*** The download link seems to be hit or miss for people. If you have trouble just post your request in the comments and I'll email you the files.

DOWNLOAD HERE.

A few things to know about the templates:

  • The front of my programs aren't included in the templates because they were created using stock vectors that I purchased from iStockPhoto.com.
  • The answer to the word jumble is Thank You.
  • The crossword puzzle is a grid, so if you need to "move" any words, just color or uncolor the cells.

Thanks so much for all the compliments!  Let me know if you end up using the templates for your programs.  I'd love to see them!!

stocking stitchery

Among the many things Jared and I purchased last year for our first official Christmas at home together were these cute little felt stockings from Joann's.  Having always had personalized stockings growing up, the white stitching on the front of the stocking begged for matching embroidered names on the cuffs.  I've been fascinated by Jenny Hart's amazing embroidery ever since Sublime Stitching, and couldn't wait to get started on my first project. I experimented with a few different ways to get the outline of our names onto the stockings and found the easiest was to do the following:

  1. Use WordArt in Microsoft Word or Illustrator to type out the names in an outlined font.  Be sure to type the names from last letter to first so they read left to right when you transfer them to your project. Lastly, view the names at 100% to make sure they'll be the right size.
  2. Print out the names on regular computer paper.  Place a sheet of tracing paper over your print out and trace the outlines using a transfer pencil.  Make sure you use a pencil color that will be easily hidden underneath your stitches.  I used a white transfer pencil and it worked great.
  3. Transfer the names to your project using a dry iron.  If your project is oddly shaped and won't lay flat, it's helpful to pin the tracing paper down before ironing.

I used white embroidery floss and split-stitch around each of the letters.  Here's how they turned out:

For Jared

For me

For the pups

Happy little family stockings :-)