{nursery progress} the baby quilt


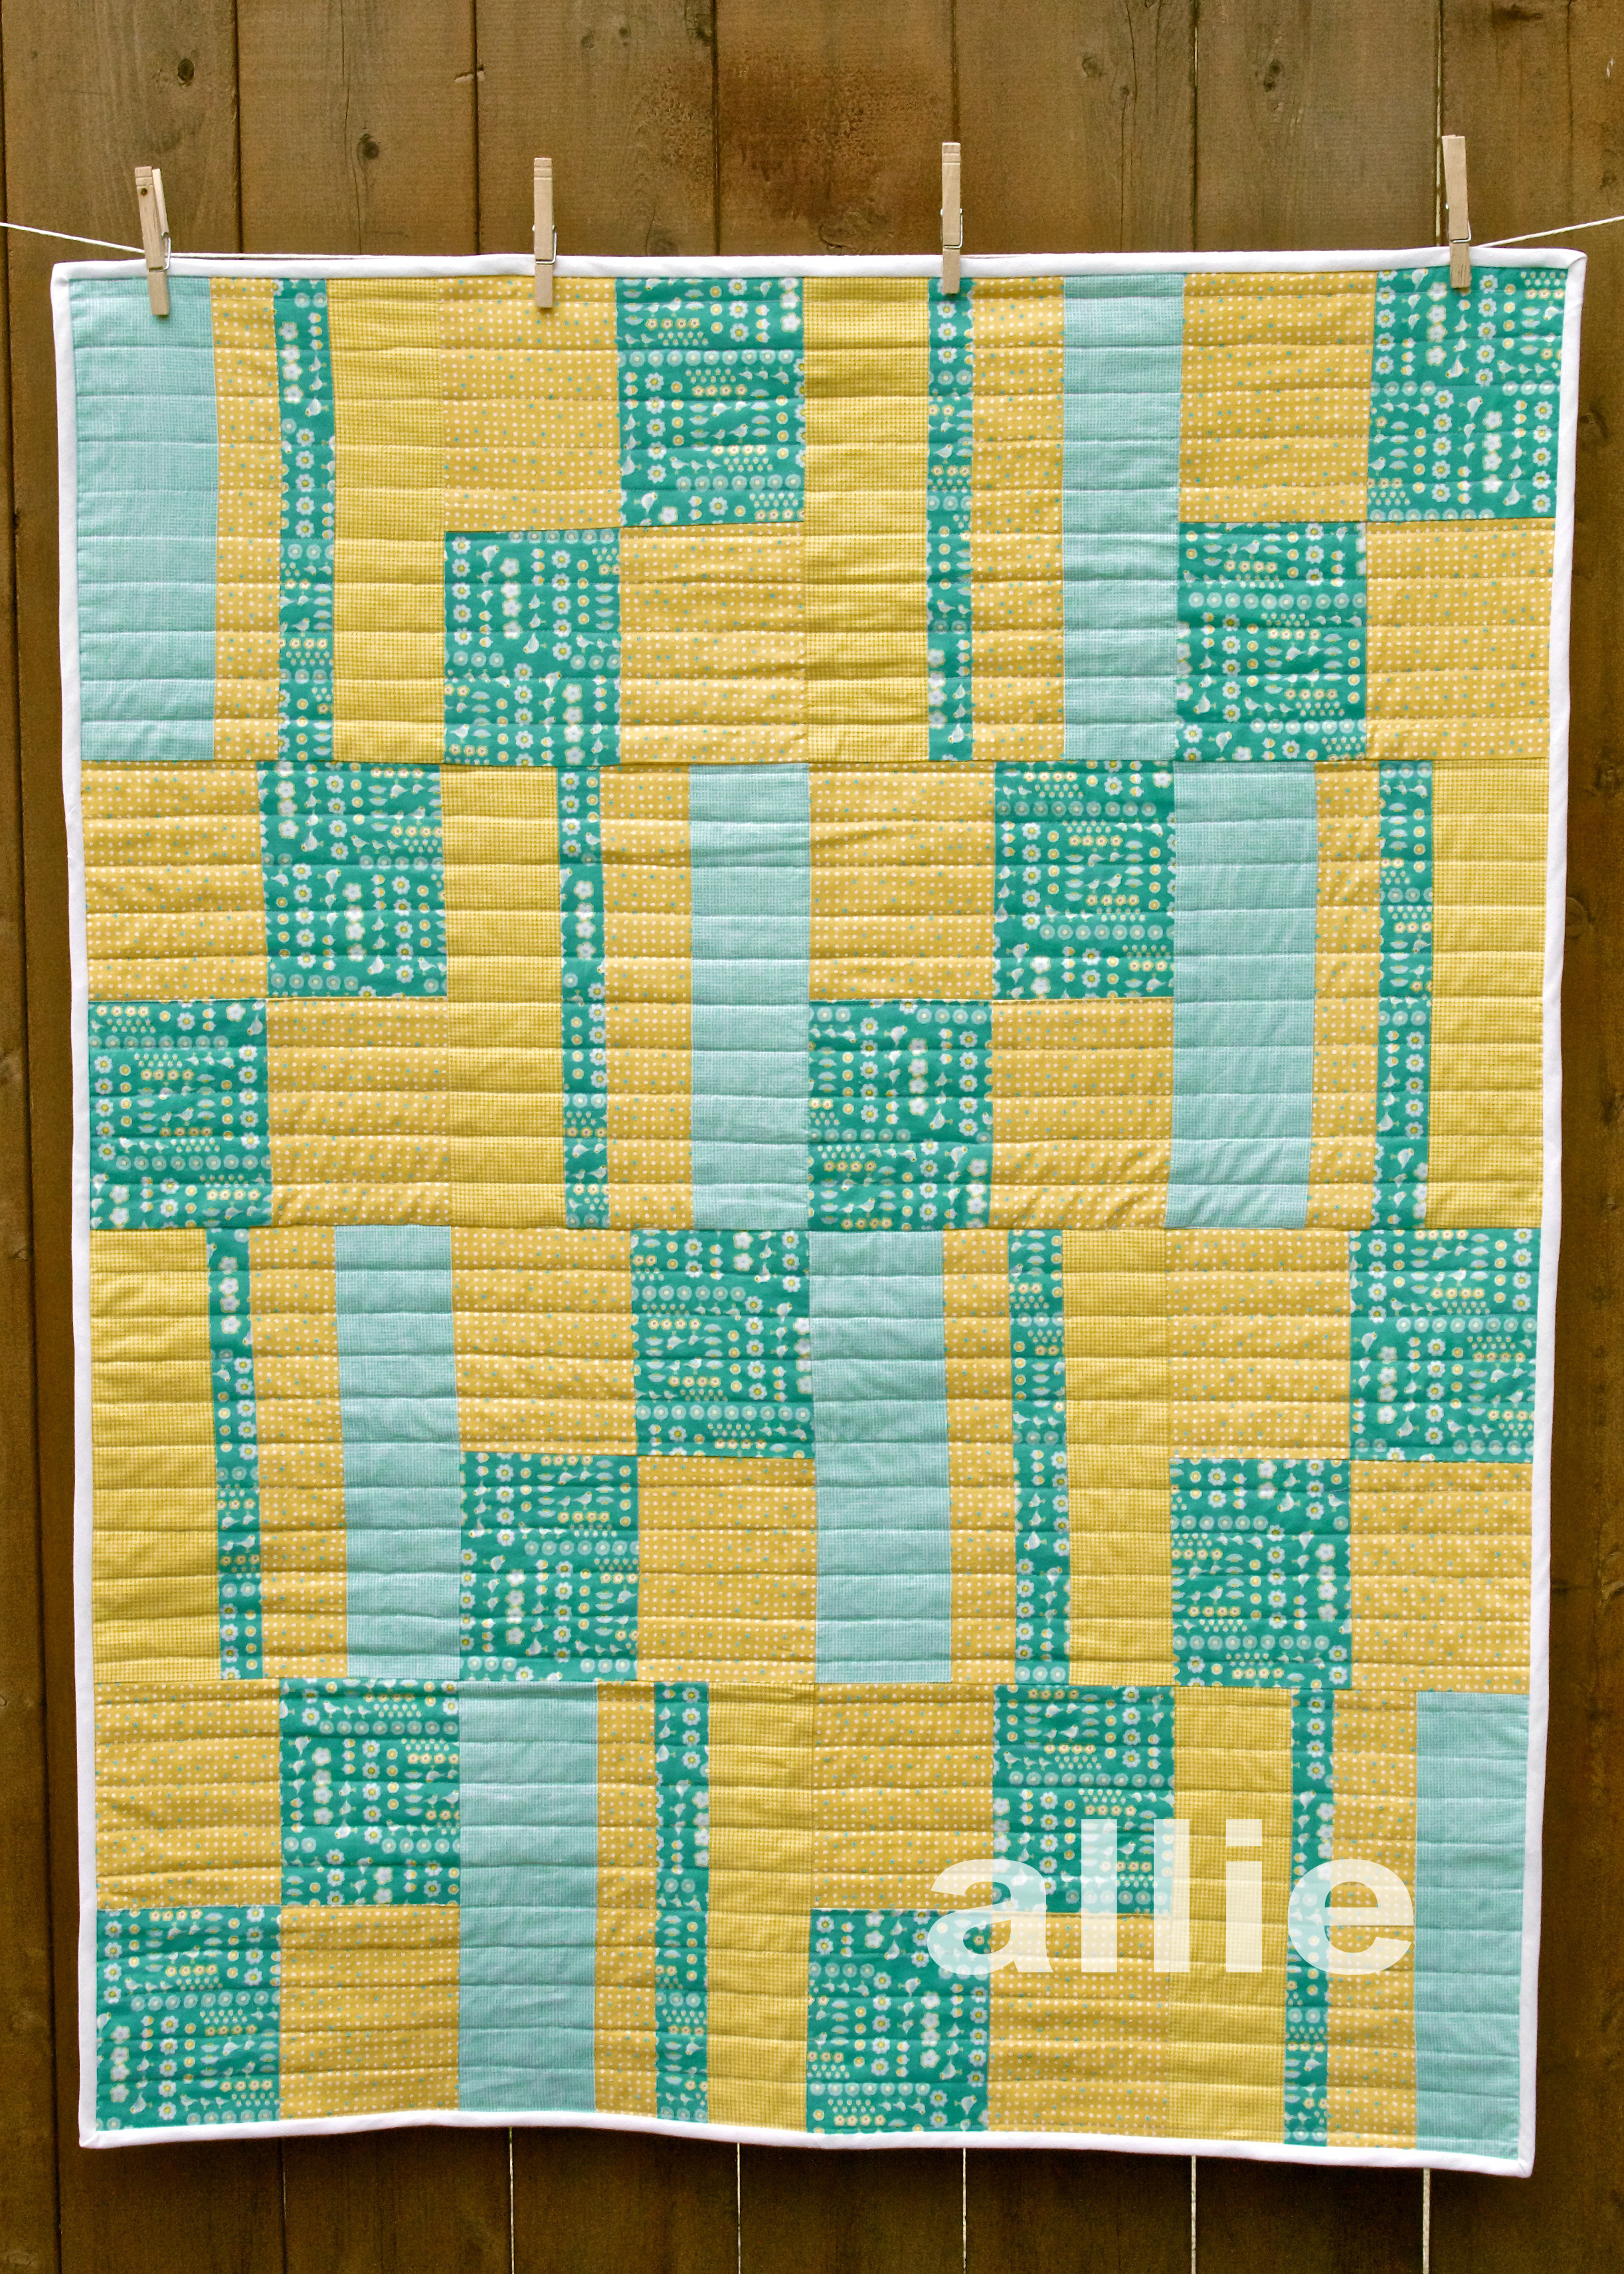
The baby quilt is DONE!  It took me a little over a week, which honestly wasn't as long as I thought it would take. I'm not sure why I was always so intimidated about quilting... I think it's the whole culture of it.  Or at least the culture I always saw at the fabric store - middle aged to elderly women scouring for batiks and taking forever at the cutting counter with their 1/4 yard cuts of 100 different fabrics. It just seemed like it wasn't for me. But I was determined to make a quilt for my little girl and when I started piecing it together I was delighted to discover that I actually really like quilting. It's like putting together a pretty puzzle... kinda nerdy, kinda artistic, definitely challenging, and all the sewing is in straight lines! What's not to love? And the more I googled for tips and inspiration, the more I realized that there's a whole new generation of quilters making really amazing, fun, modern quilts. I might be hooked.

Okay, enough babbling... here's how things went down with my first quilt.  I started with Amy Butler's Patchwork Crib/Playtime Quilt pattern from her Little Stitches for Little Ones book, and made some small deviations along the way. She laid out a specific order for piecing the blocks together, but I reordered things so that the blue and yellow would be alternated. I also used a straight-line approach for the quilting instead of stitch-in-the-ditch like AB used in the pattern.

I used 2 1/2" bias strips for the binding instead of the 3 1/4" specified in the pattern, because that's what worked with the attachment I had for my bias tape maker.  The pattern was pretty weak on instructions for doing the binding, but thankfully this tutorial and this tutorial saved me.

The last step to finishing the quilt was to applique our baby's name to the bottom right corner.  I used the same approach described here and hand embroidered the letters with white embroidery thread.  It pretty much makes the whole quilt so I'm sad I can't show you pics until after she's born (we're keeping the name a secret).  So until then, here's a not-nearly-as-cute idea of how it looks (thanks Photoshop!):

Oh, and here are the fabrics I used: the yellow checks and blue checks are both City Weekend by Liesl Gibson for Oliver + S for Moda, and the yellow and blue dots and blue with white birds are both Hideaway by Lauren + Jessi Jung for Moda.

Now that I've gotten over my quilt-phobia, I'm already planning my next quilt!  The fabric arrived last week, but I have a lot of other sewing to get done for the nursery before I can dive back into quilt land.  Next up... the ottoman.


nursery progress: the design plan

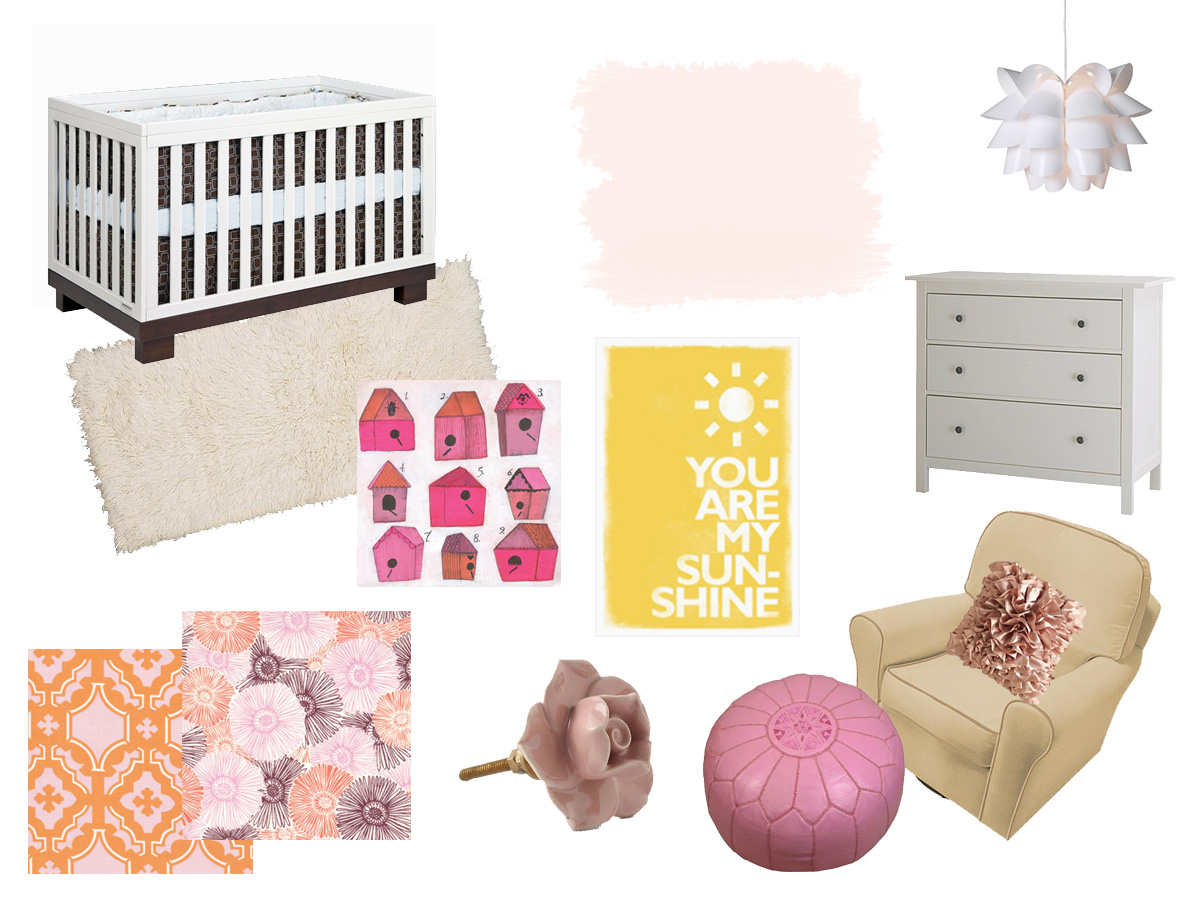
Before we found out the baby's gender, I thought I had my mind pretty made up about the direction I wanted to go in for the nursery if it was a girl. (I didn't really have a clue for the boy, so from a design perspective it was rather convenient that the baby turned out to be a girl.) I never ever thought I'd be a pink nursery kind of person, but when I saw this color palette I was a convert. It was the right combination of feminine, fun, pretty, and vintage. I just had to sell Jared on the idea. So I created two mood boards: one with the pink palette and one with a cute yellow/aqua palette I'd seen on one of the baby design blogs I subscribe to. The plan was to make the pink palette so good that he just had to go for it, and make the yellow/aqua palette just so-so. Hey, I never said I was going to be totally objective about this process. :-) Here's the pink mood board I came up with:

Here's the thing. I liked it, but didn't love it. I had a much harder time than I thought I would finding the right fabrics and accessories, and I'm still not 100% thrilled with what I ended up with. It's cute and girly, but it just didn't come together as well as I had hoped.

So then I moved on to creating the yellow/aqua mood board:

And you know what? I completely fell in love with this room. Creating this mood board was fun, unlike the stress I felt trying to create the pink one. It was so easy to find great fabrics, art, and accessories to bring the room to life - which gave me hope that actually shopping for all that stuff would be a breeze. And I really liked the feel of it once it was all done - it's so sweet and cheerful - girly without being too obvious about it.

So I sent the mood boards to Jared for his thoughts, not telling him which one I liked better. He genuinely liked them both, but said there was something about the yellow/aqua room that sold it for him. Phew!

Now that the design was done I went back to the budget worksheet I'd put together to see if we could really have the nursery of our (okay, my) dreams on a $1500 budget. Thankfully, with a good amount of DIYing and a bit of repurposing, it's actually possible. Here's the plan:

To buy:

  • Crib
  • Mattress
  • Dresser
  • Rug
  • Light
  • Sheers
  • Cornice kit
  • Hardware (the Anthro hardware is a bit of a splurge, but it's one of those elements that really makes the room for me)
  • Bookshelves
  • 3 Frames
  • Hot air balloon print
  • Slide out bins for the closet floor

To DIY/sew:

  • Painting the walls, ceiling, trim, Poang, bookshelves, and built-ins
  • Fabric covered 7" cornice for the window
  • 2 changing pad covers
  • Crib/play quilt (Amy Butler pattern from Little Stitches for Little Ones)
  • Gum Drop Ottoman
  • Padded arm rests for the Poang
  • Toss pillow for the Poang
  • Paper circles mobile
  • 2 DIY art prints

So yeah, kinda a lot in the DIY column. I'm desperately going to try to get at least the quilt and ottoman done before the end of my 2nd trimester. The other DIY projects are on the easier side and I can enlist help for those if need be.

We've already gotten the first step of the nursery makeover done - bringing in an electrician to install a light switch for the overhead light (fumbling to find that little chain the middle of the night just wasn't going to happen, plus we feel like having a switch that dims is going to come in very handy) and adding another outlet to the wall where the window is. (For the record, the electrical work was not included in the $1500 budget because we felt like it was something the room needed regardless of what we used it for.)

The next step is paint! Luckily, Jared's "never painting another room in this house ever again" vow is no match for the love he has for his pregnant wife and beautiful unborn daughter, so we'll be tackling the painting together. I'll try to post pics of our progress along the way, so stay tuned...

amy butler's short pleated aprons

As late as last summer I was still secretly hoping to do a 100% handmade Christmas... yyyyyeah, that didn't really work out. But I did manage to make a couple things for my sister and mom - well 2 of the same thing: Amy Butler's Short Pleated Aprons from her In Stitches book.

If you're thinking about tackling this pattern, I can assure you it's about as easy as Amy Butler gets. You can make each apron in only a few hours (I'm pretty sure the pressing took longer than the actual sewing,) and all you need is thread and a yard and a half of fabric - no special notions - which is very rare for an Amy Butler pattern.

Here's a close up of the waist band, pocket, and towel loop:

And here are the beautiful recipients!

(FYI, in case you're curious... I used Midwest Modern Fresh Poppies and an unknown Westminster fabric for my sister's apron, and Daisy Chain Clematis for my mom's apron.)

baby shower gift set

My dear friend Angela is expecting her first baby any minute now, and I was lucky enough to be home in Virginia for her shower a couple weeks ago.  About a month before the shower I started searching the web for gift ideas and settled on a nursing cover / burp cloth combo set.   (I'm not one for going completely off-registry, so Jared and I also got her the breast pump and pump car charger she'd been wanting... yes I know, a bit of an accidentally awkward theme gift.)  Angela doesn't know if she's having a boy or girl (I'm in awe of her will power), and I had a stash of Amy Butler's Morning Glory fabric so... voila:

The nursing cover tutorial couldn't have been easier.  As you can see I opted to use one fabric (I also skipped the optional pocket.. shhhhh.)

I went a little off-tutorial for the burp cloths, though not intentionally.  The tutorial makes it very clear that you should cut your fabric to the size of each pre-washed cloth diaper, as each one is different and very rarely 18" long.  So what did I do?  I cut each strip 18" inches long!  Brilliant.  I didn't have enough fabric left over to cut new strips, so I added the ribbon trim to the top and bottom of the strips (instead of down the sides) to hide the shortages.  They still look pretty cute, though.  Right?  (Yes, in my humble-completely-biased-opinion.)

I added a very special little touch to this gift set...

...but more on that later.  :)

Amy Butler's Wide-Leg Lounge Pants... finally!

I've been wanting to make Amy Butler's Wide-Leg Lounge Pants ever since I got In Stitches. They might actually be the reason I got the book in the first place. So along with the gifts for Lindsey and David, I threw the lounge pants onto my Christmas craft list.  For the primary fabric I chose Midwest Modern 2 Happy Dots in Ice, and for the cuff I chose Belle Kashmir in duck egg.  (Thank you, Amy Butler, for making your fabric collections coordinate so nicely with one another!) The pattern was easy enough to follow, though I varied from the instructions a bit:

  • I didn't have freezer paper, so I used printer paper by taping the sheets together and cutting them to size.
  • I used cotton twill tape for the drawstring.
  • I added 5 inch cuffs in a coordinating fabric.

Here are the finished pants...

the first batch of christmas crafts

My ability to blog about this first batch of Christmas crafts sadly means my short trip to Michigan to visit my best friend, Lindsey, has already come and gone. (All you girls lucky enough to live in the same town as your best friend - stop reading this, go over to her house and give her a big fat hug, because you are very very fortunate!) I have a small tendency to spoil Lindsey, especially since the birth of her son Will, so I tried to scale back this year and focus more on craft than cost. Will's presents were easy - Amy Butler's Little Stitches provided plenty of inspiration and baby clothes are so small they require very little fabric. I decided on the Kimono PJ pants and used Moda's Funky Monkey fabric in Sock Blue, Cream Counting Monkeys and Brown Sock Texture (for the cuffs.)

I used leftover fabric from the pants to applique coordinating onesies:

Here are the finished sets:

A couple tips for these pants... 1) Use 3/4 inch wide elastic or make the casing for the elastic a little bigger because the 1 inch elastic was a really tight fit. 2) Make the pants about 1-2 sizes larger than you think you'll need. Will is 5 months, a bit small for his age, and just started wearing 6-9 mos. clothes. I thought I'd be safe making the pants size 6-9 mos. but they were pretty snug around his diaper. They'll be fine for him for only another month or so, which is why I'll be making him 2 more pairs in a bigger size.

For Lindsey I aimed for a combination of pampered and practical. I'd been dying for an excuse to pick up Amy Butler's new Love collection, and thought it would be perfect to use for a little library tote since Lindsey's a regular at the Berkley Public Library. I used Lotta Jansdotter's Simple Tote pattern as a starting point, and added lining using some leftover fabric from Lindsey's Weekender Bag.

This bag was super easy to make and the lining added a nice finished look to the original pattern. I used the bag as gift wrapping and threw in some Philosophy Amazing Grace bath products (the pamper part), and the Exhale: Core Fusion - Pilates Plus DVD (the practical part.) Lindsey loves working out but as a new mom doesn't have a ton of time, so the 10 minute workouts on this DVD are a great solution.

More Christmas crafts to come... :-)

4 Weekender Bags in 4 weeks

I've had a lot of overly-ambitious crafting ideas in my life, but this one was beyond insane - with only a month to go until my wedding I would make EACH of my bridesmaids the (infamous) Weekender Bag by Amy Butler.  That worked out to 4 bags in 4 weeks.  Of course I got my heart set on the idea before I searched the blogosphere and discovered that this was a beast of a pattern.  But, I was determined.  The first bag took me about 2 weeks (with my bachelorette party in Vail squeezed in there) and by the time it was done I was dreading the fact that I had 3 more to go.  It was everything other bloggers said it would be, and then some.  No tears, but a heck of a lot of ripped seams.  The whole process was so exhausting that the only pictures I took were with my phone!  (I promise, this is the last project I'll post with such crappy pics.)

Anyway, here's bag #1:

The second bag was SOOO much easier than the first one.  In fact, if you're attempting to make this bag, I definitely recommend making two - just so you can remember the whole thing fondly and enjoy the satisfaction of feeling like there's no pattern you can't handle.  Here's bag #2:

And bag #3:

Finally, (and trust me, it was a BIG, WONDERFUL, HAPPY finally) bag #4:

It was all worth it in the end:

Here's my advice should you decide to embark on your own Weekender Bag adventure...

Scour the blogosphere for all the hints, tips, and pictures you can find.  The tips from other bloggers that I found most useful were:

1) Use seam tape when making the prepared cording instead of sewing the seam closed. I tried it both ways and the seam tape actually creates a much cleaner look and you don't have to worry about making sure the seam is hidden when you sew the cording to the exterior panels.

2) Add interior pockets. The pattern doesn't come with any, and it's such a big bag having interior pockets is a really nice addition. I added a small zipper pocket (tutorial here), and used the large exterior pocket pattern piece to create two additional pockets inside (cut 2 extra pockets when you do your initial cutting, sew wrong sides together, then attach it to the lining by basting the sides and bottom, and sewing a seam up the middle to create two pockets.) You'll have more than enough fabric leftover to make the pockets, so don't worry about having to buy extra yardage.

3) A lot of blog posts indicated that there was no such thing as a 30" non-separating zipper. There is. I got this one and it was neutral enough to use for all 4 of my bags (you really can't see the zipper much once it's done anyway.) You might want to add a little zipper pull, though, because the zipper takes a bit of breaking in, especially on such a big bag.

4) Many of the blog posts below (and in general) were written before Amy Butler revised the pattern to improve upon her first version. If you buy the pattern now, it should have a lot of the tips and work-arounds already included (such as using Peltex instead of Timtex.)

5) The cutting for this bag takes a LONG time. Be prepared to devote most of your first day to getting everything cut. (You won't feel like doing anything but kicking back with a nice big glass of wine once you're done with this part.)

Here are the blog posts I found most helpful (i.e. couldn't have made it through the first bag without them):

http://miss-behave.de/2009/02/weekender-travel-bag/

http://www.amyalamode.com/blog/2008/09/14/second-times-a-charm-orchristmas-in-september/

http://hiuma.blogspot.com/2008/10/first-big-project-weekender-bag.html

http://craftoholic.blogspot.com/2006/05/my-weekender-bag.html

http://knitlint.wordpress.com/2007/07/14/finished-object-amy-butler-weekender-bag/