For Eloise, The Warrior

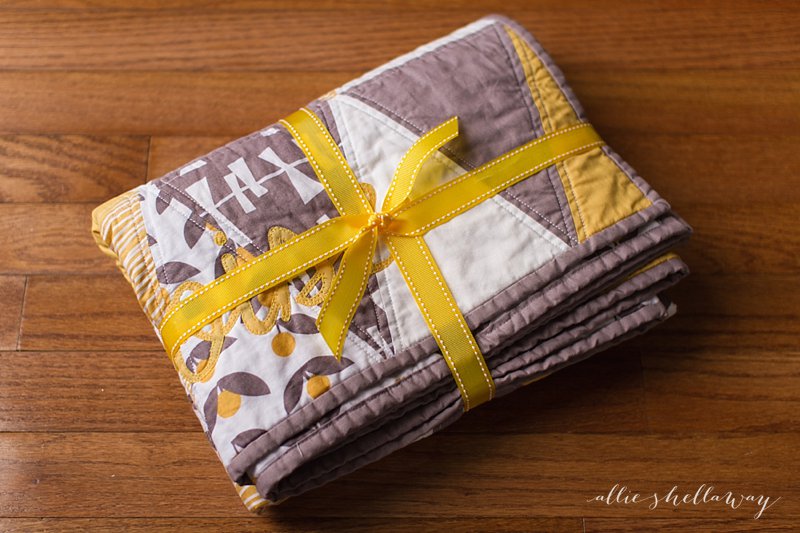
I'm putting a very special package in the mail today... 2013-08-18_0001

Yes, that's right... sometimes I still sew. I'm actually doing a lot of sewing lately, but this particular project was at the top of my priority list. One of my best friends, Heather, recently had her first baby. It was a difficult pregnancy and while it was expected that she would go into early labor, going into labor at 26 weeks wasn't exactly something you can prepare for. Her baby girl stayed put for a couple more weeks, but decided she couldn't wait any longer to meet her awesome parents and made her grand entrance at 28 weeks.

Early.

Scary early.

She was so tiny, but man was she a fighter. From day one, that much was clear. And that's why her parents named her Eloise - which means "warrior." I've honestly never heard of a more amazing premie... aside from being small and needing to develop a bit longer, she had zero serious complications and has been home for a few weeks now.

I was actually hoping to have this done by the time she got home, but let's be honest, I'm rarely ever that on top of things. Anyway, here it is... a special quilt for a very special baby girl. I hope it brings her comfort in those rare moments when she's not feeling so strong.

2013-08-18_0005

2013-08-18_0004

2013-08-18_0003

2013-08-18_0002

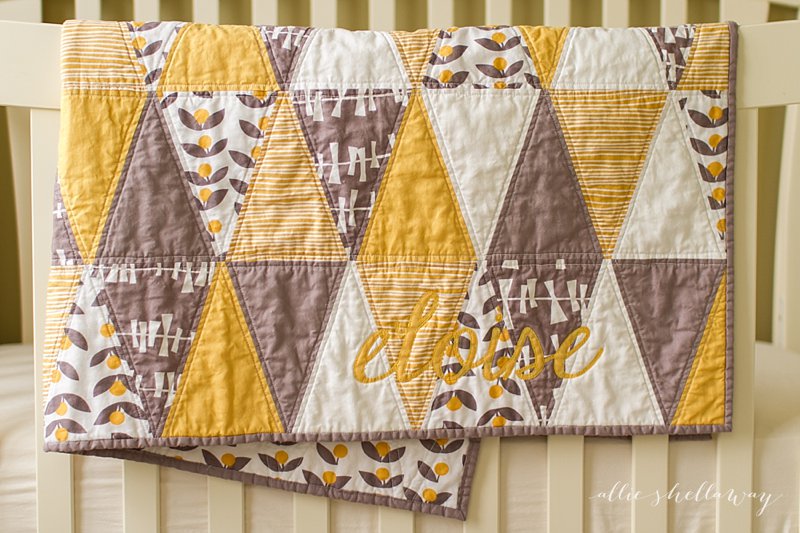
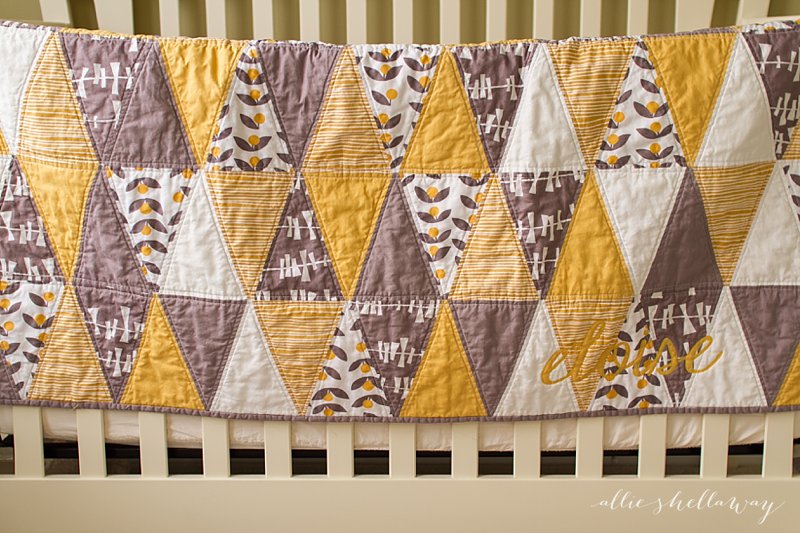
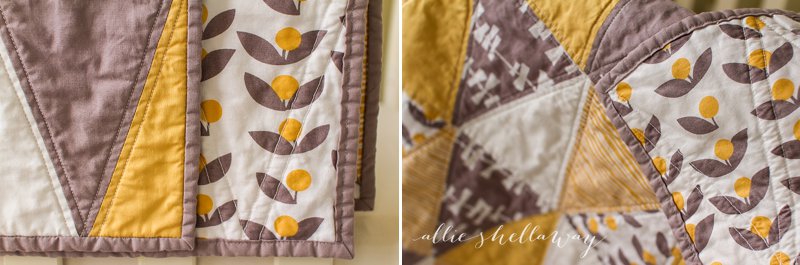
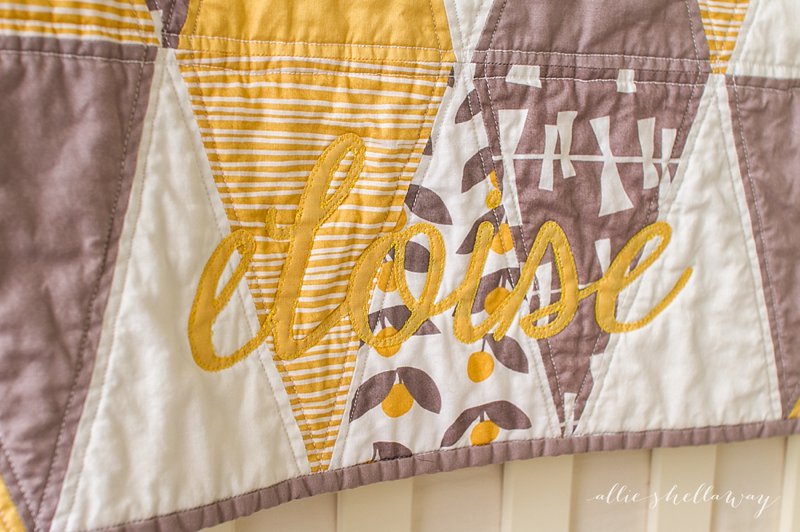
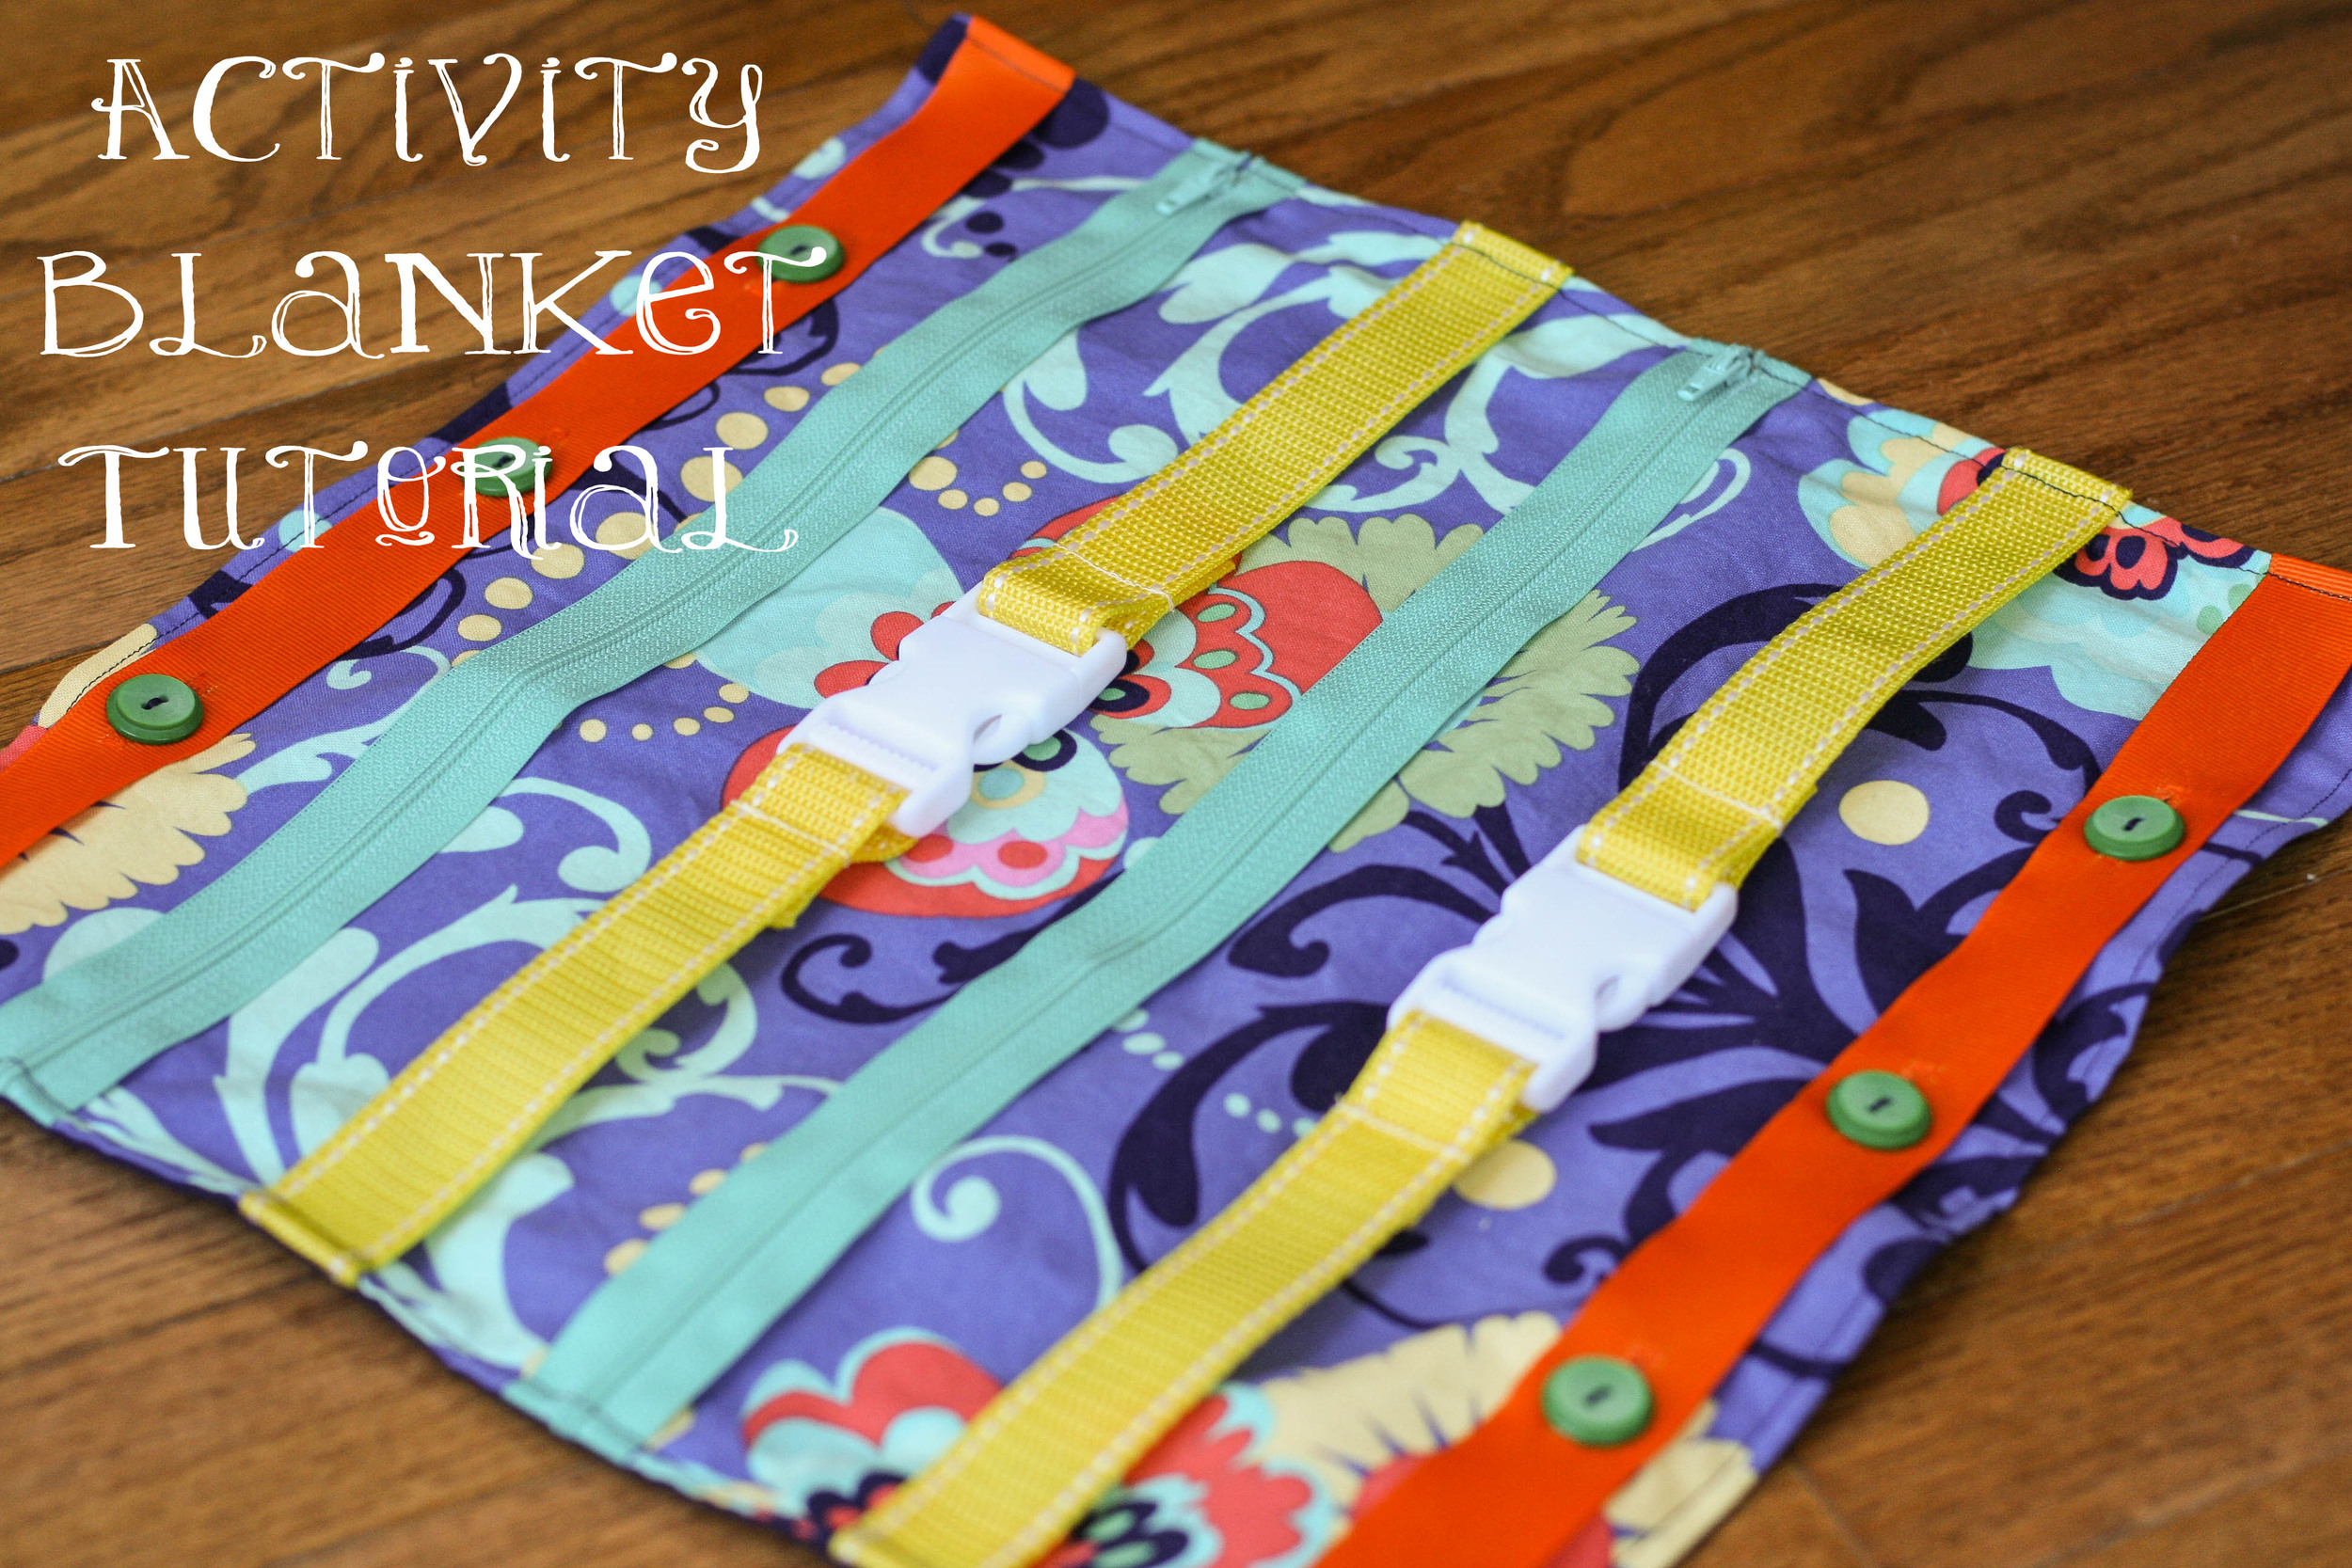
(For those that are curious, I used this tutorial as my starting point, and the fabric is Lotta Jansdotter's Glimma collection. The font is Janda Elegant Handwriting, and I used a narrow zig-zag stitch to applique it to the quilt. I also used a machine binding technique for the first time, thanks to this tutorial. I think I prefer finishing the binding by hand, but machine binding is definitely a huge timesaver.)

Lil' Red

Happy Halloween! Well, first I hope everyone is safe, sound, with power, cell service, etc. Second, Happy Halloween! I'm so glad the kids around here will still get to go trick or treating tonight. Emma's still a little young for that, but I made her a costume anyway because we all know I just couldn't help myself.

I used Simplicity 1774, red fleece for the cape, and blue gingham for the dress. The pattern could not have been easier, especially with fleece because that meant I didn't have to line the cape. I did add some topstitching to give it a more finished look. And I used buttons to fasten the shoulder straps instead of hook and loop tape. Mostly because I forgot to buy hook and loop tape.

We were late getting out the door this morning, so this was the best I could get. (Note to self, learn how to use my Speedlight. That grain is killing me!) What you can't see here are the adorable new white chucks I got her to go with her costume, which of course are her favorite part.

Have a happy, safe, and sugar-filled Halloween, everyone!

Zachary's 1st Birthday!

This past Sunday was my sweet nephew's 1st birthday, and I was so excited to do the decorations for his party. Zachary looooves monkeys so my sister naturally went with a monkey theme. I busted out my Silhouette and got to work...

Our super talented cousin Emily made all the baked goods, and I added the name cards, wrappers, and toppers. I purchased a set of monkey clip art for the graphics and custom Silhouette shapes. I used the leftover dots from cutting the cupcake wrappers as confetti.

I got this super tall palm tree from Party City to display photos from Zach's first year. The bananas are a Silhouette shape and I used the Xyron to make them into stickers.

Happy Birthday, Zachary!!! :-)

PS... I'm trying out some new photo layouts from Pugly Pixel, and really liking them. The best part is they're FREE! Gotta love the Internet.

activity blanket tutorial

activity-blanket-tutorial.jpg

Emma has been obsessed with clips and zippers lately, so I thought I'd make her a little activity blanket so she could clip and unzip to her heart's content. (I can't even tell you how good it felt to bust out my sewing machine for the first time in months.) And, it was so simple to make that I actually made it during naptime on Sunday afternoon. Plus I used scrap fabric, and I love any project that puts even a little dent in my stash.

If you're just learning how to sew, this is a great beginner project because aside from the button holes it's just a bunch of straight stitches. And there's no need to be intimidated by button holes... most newer machines do all the work for you!

Here's what you'll need to make your own:

Materials:

  • Two 15.5 x 15.5 in. squares of fabric
  • Two 15.5 in. pieces of grosgrain (or similar thick ribbon)
  • Four 6 in. pieces of nylon webbing (or similar thick webbing, ribbon, straps, etc.)
  • Two 14 in. zippers
  • Two plastic buckles/clips
  • Buttons (at least 6)
  • Lighter (yes, you read that right!)
  • Coordinating thread

Directions:

Create your clip "activities" by sewing your 6 in. pieces of nylon webbing to each end of the buckle. Now here's the fun part - use a lighter to seal the cut ends of the webbing. Yes, it's a little sad that the most badass my life gets these days is taking a lighter to some frayed edges, but I take what I can get. :) Besides, it really is the best and quickest way to make sure your ends don't fray.

Next, lay out your "activities" on your front fabric to get the spacing right. I just eyeballed mine, leaving about an inch and a half between activities.

Pin only the zippers in place and remove the rest of the activities.

Sew your zippers into place.

Set the blanket aside for now and grab the ribbon for your button activities. Mark the spots for your button holes at 4", 7.5", and 11".

Sew your button holes. I used 1" buttons for this, and wouldn't go any smaller. (Note, if you use grosgrain and have some fraying when you open your button holes, use your trusty lighter to carefully seal the edges.)

Next, lay your activities out on the front fabric again, pin and baste into place.

Then, grab your back fabric and pin it to the front fabric, right sides together. Sew together using a 1/2" seam, leaving a 4-5" opening at the bottom.

Press your seams open, then turn the blanket right side out and sew a 1/4" topstitch around the perimeter.

Last but not least, sew on your buttons. I chose to sew mine on at the very end because I'm paranoid about Emma being able to get them off, creating a potential choking hazard. I figured two layers of fabric would be a sturdier hold.

And once all the buttons attached, you're done!

Emma is loving it so far, and I'm excited to see how her interest in it changes as she becomes better at manipulating each activity.

Let me know if you make one, and leave a comment if you have any questions!

watch her grow

Emma's approaching an age where she might actually stand still long enough for us to mark her height on a growth chart, so I've been scouring the Internet looking for just the right one. I want something that has a clean look and that can be easily moved to our next home in a couple of years. Here are my favorites:

 This one is a little more than I want to spend, but I love how fun and unique it is.

This one is simple and cute, and would be really easy to DIY.

Measure Me Stick from Studio 1am

This is my favorite among the wooden ruler variety, but I'm still not sure it's the best fit for our decor.

Embroidered growth chart on Apartment Therapy

This one is easily my favorite of the bunch... I have plenty of scrap fabric I could use, and it has both an heirloom and modern feel to it. It's nice enough to keep out if we want, but can also be easily rolled up if we want to keep it stored. I'm determined to make it before the end of the year. Or at least before Emma's like 5 feet tall. :-)

{nursery progress} paper circle mobile tutorial

paper-circle-mobile7.jpg

Here's the how-to for the paper circle mobile I made for our daughter's nursery... (similar ones sell for upwards of $50 on Etsy, but you can achieve the same look for much much less.)

What you'll need:

  • 2 12" long 1/4" dowels
  • Drill and very narrow drill bit
  • Fishing wire
  • 12 jump rings
  • Needle nose pliers
  • Clear beads (I used CraftDesigner faceted beads in crystal)
  • Pencil
  • Permanent marker
  • Needle or pin
  • 3 shades of the same color cardstock (this is to achieve a gradient effect... you could use all 1 color or multiple colors if you prefer.)
  • 1.5" circle punch
  • Hot glue gun
  • Screw hook

1) Prepare your dowels. Using a pencil, make a mark at 1.5", 3", and 4.5" from each end of the dowel so that you end up with 6 marks on each dowel. Then make a mark a 1/4" from the end of each dowel, and drill a very small hole (big enough for the wire to go through, but not so big that the bead will go through.)

2) Punch out your circles. You'll need 108 circles - 9 circles for each string, 3 of each color on each string.

3) Poke holes in your circles using a needle or pin.

4) Cut your fishing wire. You'll need 12 pieces of wire, approximately 24" long - don't worry about them being exact because you'll cut the ends once you're done putting on the circles and beads.

5) Prepare the jump rings. Using your needle nose pliers, stretch out a jump ring so that it's wide enough to fit onto the dowel. Then tie on a piece of the fishing wire and knot it, trimming the excess of the short end.  Repeat for the other 11 jump rings.

6) Place the jump rings along the marks on the dowels. Use your needle nose pliers to close the jump rings around the dowel.

7) Mark your fishing wire. Once the fishing wire is knotted onto the jump rings, take your permanent marker and make a mark every 2 inches from the knot on the jump ring.  Make 9 marks on each string.

8 ) String your circles and beads. Starting with the darkest shade of your paper circles, string one of your pieces of fishing wire through the pin hole in the paper circle. Then take a clear bead and knot the fishing wire around it at the mark closest to the dowel/jump ring. Repeat for the other 8 circles - circle, bead, circle, bead, etc. - going from your darkest to lightest shades of circles. Cut the excess wire after the last bead.  Repeat for the other 11 pieces of fishing wire.

9) Attach your dowels. Use a hot glue gun to attach the dowels together, crossing one over the other.

10) Hang your mobile. Cut 4 generous lengths of fishing wire, and knot one end of each piece of wire around a clear bead, cutting the excess of the short end. Slip each piece of wire through the holes you drilled at the ends of your dowels, so that the bead stops underneath the dowel preventing the wire from slipping through. Screw your screw hook into the ceiling where you want the mobile to hang (use a drywall screw if needed.) Once you determine how high or low you want your mobile to hang from the ceiling, tie the four pieces of wire into a knot and loop the knot onto the screw hook.

That's it!  Comment or email if you have any questions. There are a lot of variations you could do (like drilling holes and using beads to hang the strings instead of jump rings) so don't feel like you have to stick to the steps exactly.  This is just what worked for me.  Happy mobile-ing!

{nursery progress} DIY song lyric prints

IMG_5669_edited-1.jpg

One of the easiest ways I knew I could save money in the nursery was by making my own art prints.  We knew there were a couple song lyrics we especially wanted to use, so all I had to do was figure out the right fonts and colors.  I used PowerPoint (it's not just for presentations, people!) to design each print, and framed them in Ikea frames.

(Fonts: Eras Light ITC and Marketing Script)

I've always loved the song Golden Slumbers, which is good because it gets stuck in my head every time I'm in the nursery. I can't wait to play it for our daughter.

(Font: Yesterday Again)

Jared and I first heard Murder in the City at Bumbershoot back in 2007 (you can see that exact performance of it right here), and immediately fell in love with it. Shortly after Scott Avett had his baby girl, he changed one of the lyrics to "make sure my daughter knows I loved her, make sure her mother knows the same" - so when we found out we were having a girl, the song became even more special for us.  The lyric in this print is the last line of the song, and we hope that someday those words mean as much to our daughter as they mean to us.

Here are links to download the prints (for personal use only, please):

[dm]6[/dm]

[dm]7[/dm]

Email or comment if you want the PowerPoint files so you can change the fonts and/or colors.

{nursery progress} a tale of two mobiles

IMG_54411.jpg

Yes, you read that correctly... I ended up making not one, but two mobiles for the nursery. If you'll remember, I started out with the idea to DIY a mobile like the one I had in my mood board:

But then my friend, Rachael, sent me the link for this bird mobile tutorial and I decided to make that one instead.  Here's how it turned out:

I was so so happy with how it looked, especially once I hung it over the crib - but the idea of that original mobile kept nagging at me.  I love a good challenge, and finding a way to DIY something I saw selling on Etsy for $80 was just my kind of challenge.  So... much to my husband's dismay, I decided to make a second mobile for the nursery.  I had no idea where I'd put this one - if it would replace the bird one, if I'd end up with two mobiles, if I'd junk it altogether after punching out a gazillion little circles.  Luckily, by the time I finished it late one Sunday night, I was completely smitten.  It was so fun and cheery... just looking at it made me smile.  I knew I had to find a home for it in the nursery.  So over the changing table it went...

Here's a close up:

I used 3 shades of yellow paper to get a gradient effect, fishing line, clear beads, wooden dowels, and jump rings.  The whole thing cost me maybe $15.  I'm hoping to get a tutorial posted for it next week so stay tuned!

{nursery progress} paint!

It took us 1 coat of primer, 3 coats of wall paint, and 2 coats of ceiling paint - but the painting is finally done!  As a reminder, here's how it looked before:

And here's how it looks now!

We covered every inch of that room with paint - the walls, the built-ins, the trim, the window, the ceiling, and even that old door.  Before we started I had tested some pretty big patches of a couple different colors on each wall, so I was pretty sure the color we picked would work out - but there's always that moment of panic after you get the first coat on when it's too late to turn back and you're still a couple coats away from being able to see the finished product.  But thankfully it's exactly what I'd envisioned - a rarity in the life of a DIYer.  (PS... the paint is Acro Pure No-VOC from Miller Paint in "Teal Treat" #0712.  The white paint is also No-VOC in a semi-gloss finish... they apparently don't recommend water-based paint for trim because it doesn't spread as well, but we used a soft bristled brush and it worked out great.)

You'll notice that the old door is still there... we realized that a new door would also need a new frame and that was just way more than we were ready to take on.  So we sanded the old door so that it actually closes, and I even managed to fix the mortise lock so we don't have to replace that either.  We're going to leave the glass uncovered for now, but I'll probably add a little curtain for it down the road.

Oh, and here's a close-up of the new hardware on the built-ins:

I'm kind of obsessed.

I can't even tell you how happy I am to have the painting done... not only because it means we can get the furniture, but because having to scoot around on the floor painting baseboards while you're nearly 6 months pregnant really really sucks.  Not exactly painless, but totally worth it.

nursery progress: the starting point

And so it begins... now that we know the gender of our little one I - uh, we - can finally get started on figuring out what her room will look like!  Our goal is to do the whole nursery for $1500 (there are a couple of smaller things we're registering for like crib sheets and a changing pad, but the vast majority we're planning to get ourselves.) Here's a little idea of what we're starting with:

The nursery is pretty small (I'd estimate 7x10 ft) so having a built in dresser is a nice plus.  What the closet lacks in height it makes up for in depth, which means lots of hidden storage in the back of the closet for seasonal items, bigger toys, and all the other stuff I'm told babies accumulate in droves. The wall to the left is where the changing table will go. We opted for more of a multitasker dresser instead of a traditional changing table in hopes that we can use it in her room long after she's in diapers.

To the left of this window is where the glider/rocker will go.  Despite how great and comfortable they're supposed to be, I just can't get past the look of traditional gliders.  So I'm going to try to use one of the two Ikea Poangs we already have. I'm planning to paint the wood on the chair the same color as the trim and add padded arm rests for additional comfort while nursing.  I've heard mixed things about using Poangs as gliders, but since we already have one I figure I might as well give it a shot. If you see me driving around town with a newborn this summer frantically trying to find the holy grail that is the affordable, modern, comfortable glider, you'll know the Poang was a bust.

This is the wall where the crib will go (parallel to the short wall.)  And that is the door that we will sadly be replacing.  I love the little glass window, but the door itself is old and loud (not great for middle of the night check-ins) and the knob and lock are totally busted.  I could replace the knob and lock, but then I'm back to the same polished brass mortise lock issue from last year and since I can't be using stripping agents and spray paint while pregnant, it's just a whole lot easier to replace the door with a new one and a standard knob. We plan to donate the door to the Rebuilding Center so hopefully someone else will give it the love it deserves.

Up next... the design plan!