I'm back...

Sorry it's been so long since my last post! Here's a little recap of what I've been up to: (1) Hawaii: The hubs and I just got back from our 1 year anniversary trip to Maui. (A year? Already?? Where has the time gone?!?) I'm so excited to tell you all about it. We had an amazing time and did and saw so much that I could write an entire post for each day we were there. Soooo... that's exactly what I'm going to do over the next week or so. Stay tuned.

(2) Etsy shop status: Alright, so September was a little crazier than I anticipated and October's shaping up to be the same. I have a wedding this weekend (see below), a memorial service next weekend, a work party and another wedding the weekend after that, maybe an off weekend, and then the annual cabin trip. Sprinkle in a few shows and a full-time job, and I'm looking at some very sewing-filled weeknights this month. So given all of that, the plan is to launch on 11/7. There. It's in writing. Dealines are good. Not at all stressful or panic inducing. Nope. Uh uh. 38 days. Holy moly. Breathe, Allie. Breathe...

(3) Hesse & Haase - the end of an era: I'm writing this from the train headed up to Seattle for the wedding of one of my dearest girlfriends in the whole world, Heather. Heather and I moved to Seattle around the same time 4 and a half years ago, and were introduced by a mutual friend we both knew from Michigan (she grew up there, I went to school there.) We bonded immediately over our love for good music and bad 80s movies (Teen Witch, anyone?), and a general dislike for stupid girls and crappy ex-boyfriends. We were both recently out of relationships at the time and filled our nights and weekends making the most of our mid-20s singledom. We moved on to new relationships, me with Jared, Heather with what we like to call a GGBB - good guy, bad boyfriend. Thankfully that ended, and Heather met a super great guy named Alex. He completely adores her, and gets her even when she's at her worst. He balances her in a way I've never seen any other guy be able to do. He's the kind of guy you hope your girlfriend ends up with, so I couldn't be happier that they're getting married. It's bittersweet that the Hesse & Haase era has come to an end. Shellaway & Contreras, though happier and blissfully more mature, doesn't quite have the same ring to it... but hey, no matter what - we will always go dancing.

it's all happening...

With my Etsy shop launch only a few weeks away, I've been hunkered down in my basement most nights churning out bag after bag (okay, and catching up on Project Runway and Sarah's House.) I'm really excited about how the designs and fabric combinations are coming together, and wanted to give you a little preview...

The first bag I'll be selling is actually what inspired this whole crazy Etsy shop idea. I've always been a take-your-lunch-to-work kind of girl, and spent years trying to find a good lunch bag. The insulated kind you find at Target left a lot to be desired from a style standpoint, and though seemingly large from the outside - my various tupperware containers never seemed to fit. So like most working women who take their lunch, I resorted to using small shopping bags (Sephora worked the best for me.) The size was perfect, but they would inevitably wear out after a few weeks of use. I needed a fabric lunch bag that was the same size and shape of my favorite small shopping bags... so after years of searching, I finally just I made one myself. I originally made the bags using oil cloth, but decided to switch to fabric for my Etsy shop because I wanted them to be a bit more eco-friendly.

(Please try to ignore my dirty windows... I keep hoping they'll magically clean themselves and it shockingly never happens.) The bags are the size of a small department store shopper, and I'll be selling them in 3 different fabric options. (All fabrics are by Amy Butler, because I love her and I couldn't imagine cheating on her for my very first collection.) To make them nice and sturdy, I used home decorator weight fabric backed by an extra firm stabilizer. I also took a trick I learned from making the Weekender Bags and added a bottom insert to the bag to help it keep its form when it's loaded up with leftovers. Finally, the bags are lined with a coordinating solid fabric to give them a nice finished look.

I've been using the Lunch Tote prototype as my lunch bag for a few months now and am very pleased with how it's held up. It's been through the wash a few times and all I've needed was a hot iron to get it back to its original shape. (Btw, each bag will ship with washing instructions, and I'll have them up on the blog for reference.)

And now for my next act...

The second bag I'll be selling was also born out of necessity. Being a fairly eco-conscious person, I try very hard to avoid using disposable (especially plastic) bags. We always have reusable shopping bags when we go to the grocery store, Home Depot, and other big box stores, but they're not practical to keep in your purse for unplanned shopping trips (i.e. the pharmacy, "accidental" Anthro excursions, etc.) Usually if I find myself at the checkout counter without a reusable bag, I'll jam as much as possible into my purse and carry the rest by hand. In addition to looking a little ridiculous, there are times when this just isn't practical and I have to get one of those dang dreaded disposable bags. This is promptly followed by self-loathing and fears of being lectured and guilted out of money by the annoyingly eager Greenpeace canvassers that occupy nearly every corner in downtown Portland. Anyway, you get the point... I needed a reusable shopper big enough to hold the contents of a standard $60 Target trip, and that I could fold or roll up so it's small enough to keep in my purse. Voila... my Roll Up Shopping Tote.

Like the Lunch Totes, this bag will also come in 3 different Amy Butler fabric options. It has a sling shoulder strap, and a wrap sewn into the back with a velcro closure for when you need it stowed away. To reduce the bulk when the bag is rolled up, there's no lining... instead I used French seams. This type of seam basically encases the original seam so that no raw edges are exposed and fraying doesn't become an issue. The Shopping Tote is also machine washable.

Though over 2 ft in length - once rolled up, the bag is smaller than a CD. All you do to roll it up is fold the shoulder strap down toward the bottom of the bag, do a length-wise tri-fold using the width of the wrap as your guide, then roll up from the bottom, pull the wrap around the rolled bag, and fasten the velcro. It was surprisingly easy to do... I didn't even need to lay it out on a table first. (Along with the washing instructions for this bag, I'll include a diagram for how to roll it up. I feel like it's pretty intuitive, but I realize I'm also a little biased.)

Next steps... oh, about a million. I'm still aiming for an end of September / beginning of October launch, but I'll post an exact date once I have it pinned down (no pun intended, I swear.) Stay tuned!

swept away

When I think about the songs that have meant the most to me in my life, Swept Away tops the list. I make no claims about it being a brilliant song, or even my favorite Avett Brothers song, but it will always hold a special place in my heart.

Swept Away was one of the first Avett Brothers songs that I really fell in love with – it had no personal meaning for me at the time, it was just a very sweet and honest love song. The kind of song that’s very hard to not be touched by. But it took on new meaning after Jared and I started dating. We had been very close friends for about a year and a half, so we thankfully got to bypass all the getting to you know you awkwardness of new relationships. He’d seen me at my worst and vice versa. It didn’t take long for either of us to realize that what we shared was very different from what we’d experienced in past relationships (i.e. drama, frustration, self-doubt… the general BS that comes along with staying with the wrong person for way too long.) We never had to question how we felt about each other… the love we came to share was something I could trust in completely. It’s why when people ask me how I knew Jared was “the one,” I always reply: I just knew.

About 6 months after we began dating, a lot of things started changing for us… Jared got a job in Portland and had to move there without me until I could find a new job and join him. Neither of us wanted to leave Seattle (we didn’t know at the time how much we’d end up loving Portland) and we didn’t know how long we’d have to live in different cities. Around that time, Jared and I were riding in the car together and Swept Away came on. This wasn't anything out of the ordinary since The Avett Brothers dominate our iPods, but this particular song hit us differently that day… we both kinda looked at each other, and from that point on, it was our song. Maybe because it put into words what we were unable to:

“Well life is ever changing but I will always find a constant and comfort in your love…”

Swept Away would come to be a big part of some of the most important days of my life. It was playing when I walked down the stairs of our house to find rose petals, the biggest vase of roses I'd ever seen, and then Jared down on one knee asking me to marry him. And it was playing 9 months later when Jared and I had our first dance at our wedding.

This past Monday, The Avett Brothers were in town to play a last minute benefit show (for the Terra Nova Community Farm) at the Crystal Ballroom. The Avetts' Ballroom shows are pretty legendary (to this day, their 2nd night at the Ballroom last year is without question the best show I've ever seen), and on top of that Langhorne Slim and Black Prairie were opening and they only planned to release 500 tickets. Not surprisingly, the announcement lured in hardcore fans from across the country.

The morning of the show they recorded a short live performance at Kink.fm that we were fortunate enough to win tickets to. We got a chance to meet them after the performance and while I was a speechless goof, my wonderful husband managed to mention to them that Swept Away was our wedding song, which prompted me out of my stupor long enough to ask them to play it that night. (It would be our 10th Avett Brothers show, and we had yet to see them play it live.)

Later that night, they started in on the 18th song of what was an already unbelievable, fan wishlist filled set, and I couldn't believe my ears. They were actually playing it. There we were, standing in the front row, finally getting to see them play this song that meant so much to us. For the entire length of the song I stood there filled with gratitude, disbelief, and love... love for Jared, love for this song, this band, this night. And when we thanked them after the show Seth said "Aw, we were hoping you guys were here to hear it. We played it for you." Even typing that just now I still can't believe it all went down the way it did.

It's hard to put into words how special this show was... the crowd was filled with diehard fans, and they knew it. They played every song as though it was a thank you to the fans... fans that loved them long before they were on a major label and getting radio play, when they were just 3 guys and sometimes a cellist, playing without a setlist, breaking strings and screaming out country tunes. If I had to pick any show from the last 3 years to see them play Swept Away at, this would have been it. It was a perfect night, and I’m so grateful to have been there.

Click here to watch The Avett Brothers performing Swept Away at the Crystal Ballroom on 8.30.10.

basil lime sorbet

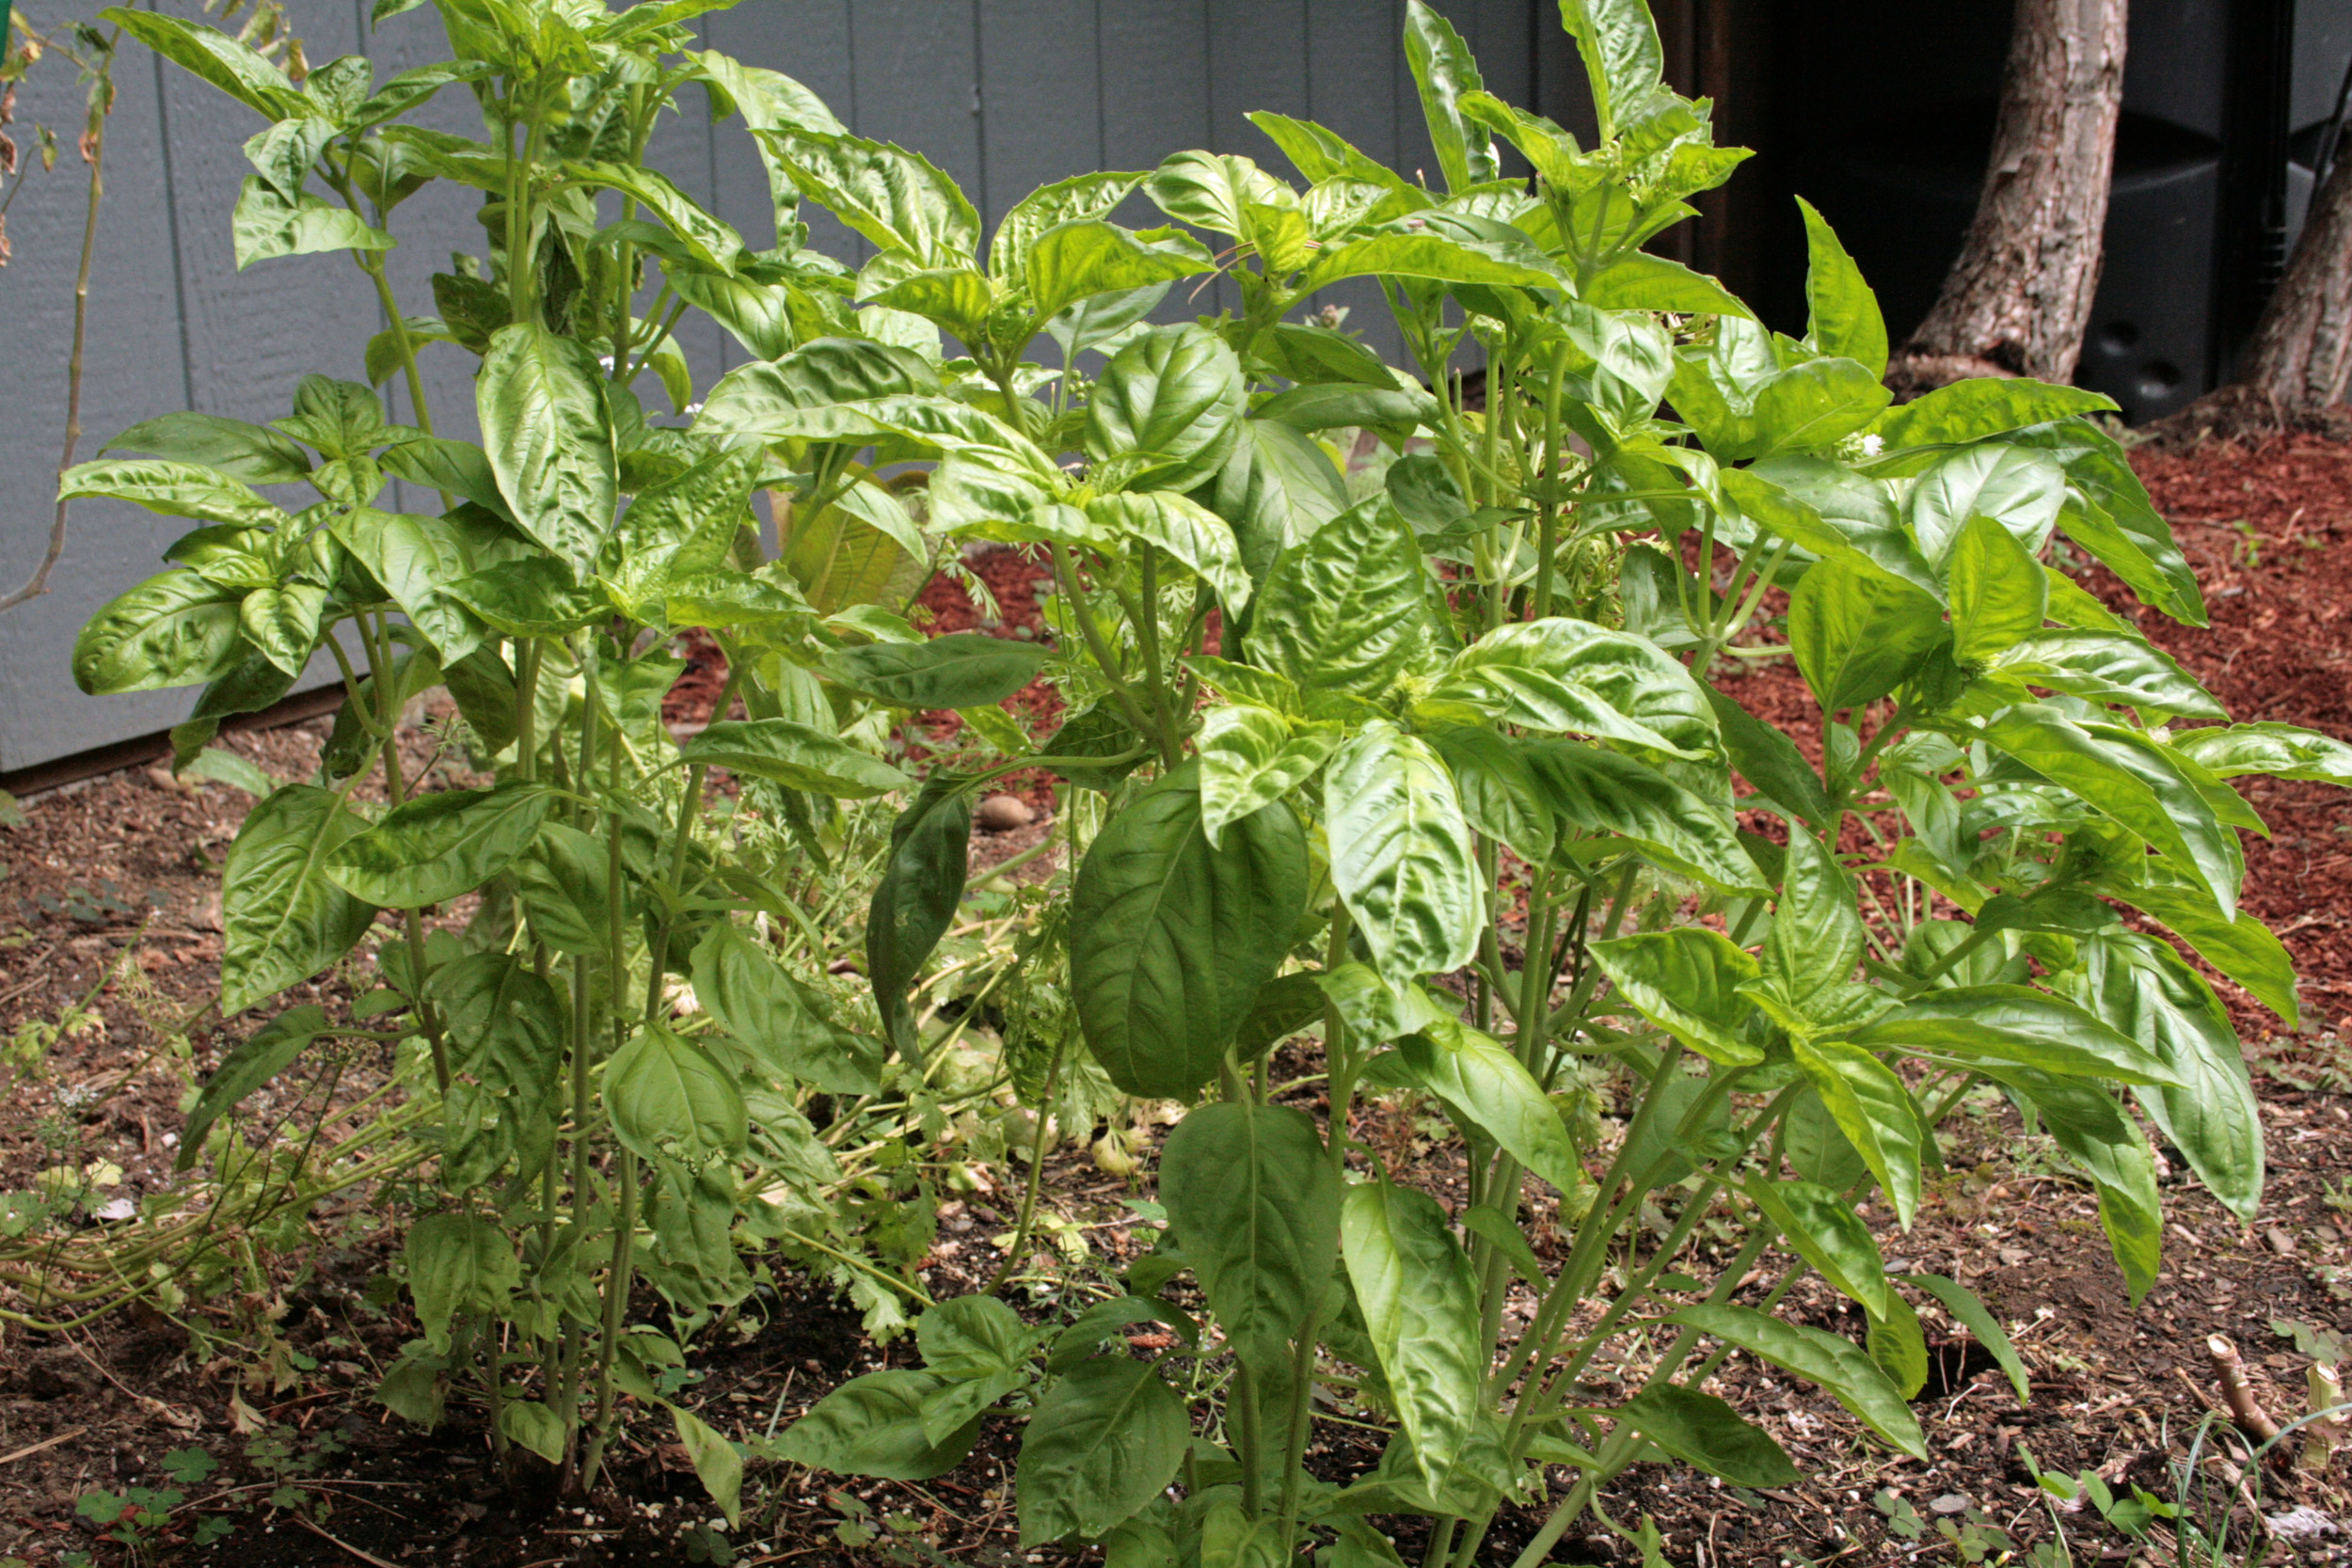
After a cold spring during which most of our veggies and herbs died, our basil has made quite the comeback over the past couple of months. It's basically a basil bush now. We've made a variety of pastas, pestos, and caprese salads, but we can't seem to make a dent in it. So I got a little excited when I came across a recipe for basil lime sorbet. It sounded a bit strange, but I figured it was worth a shot. I'll take any excuse I can get to make sorbet, ice cream, or really anything that calls for a large amount of sugar.

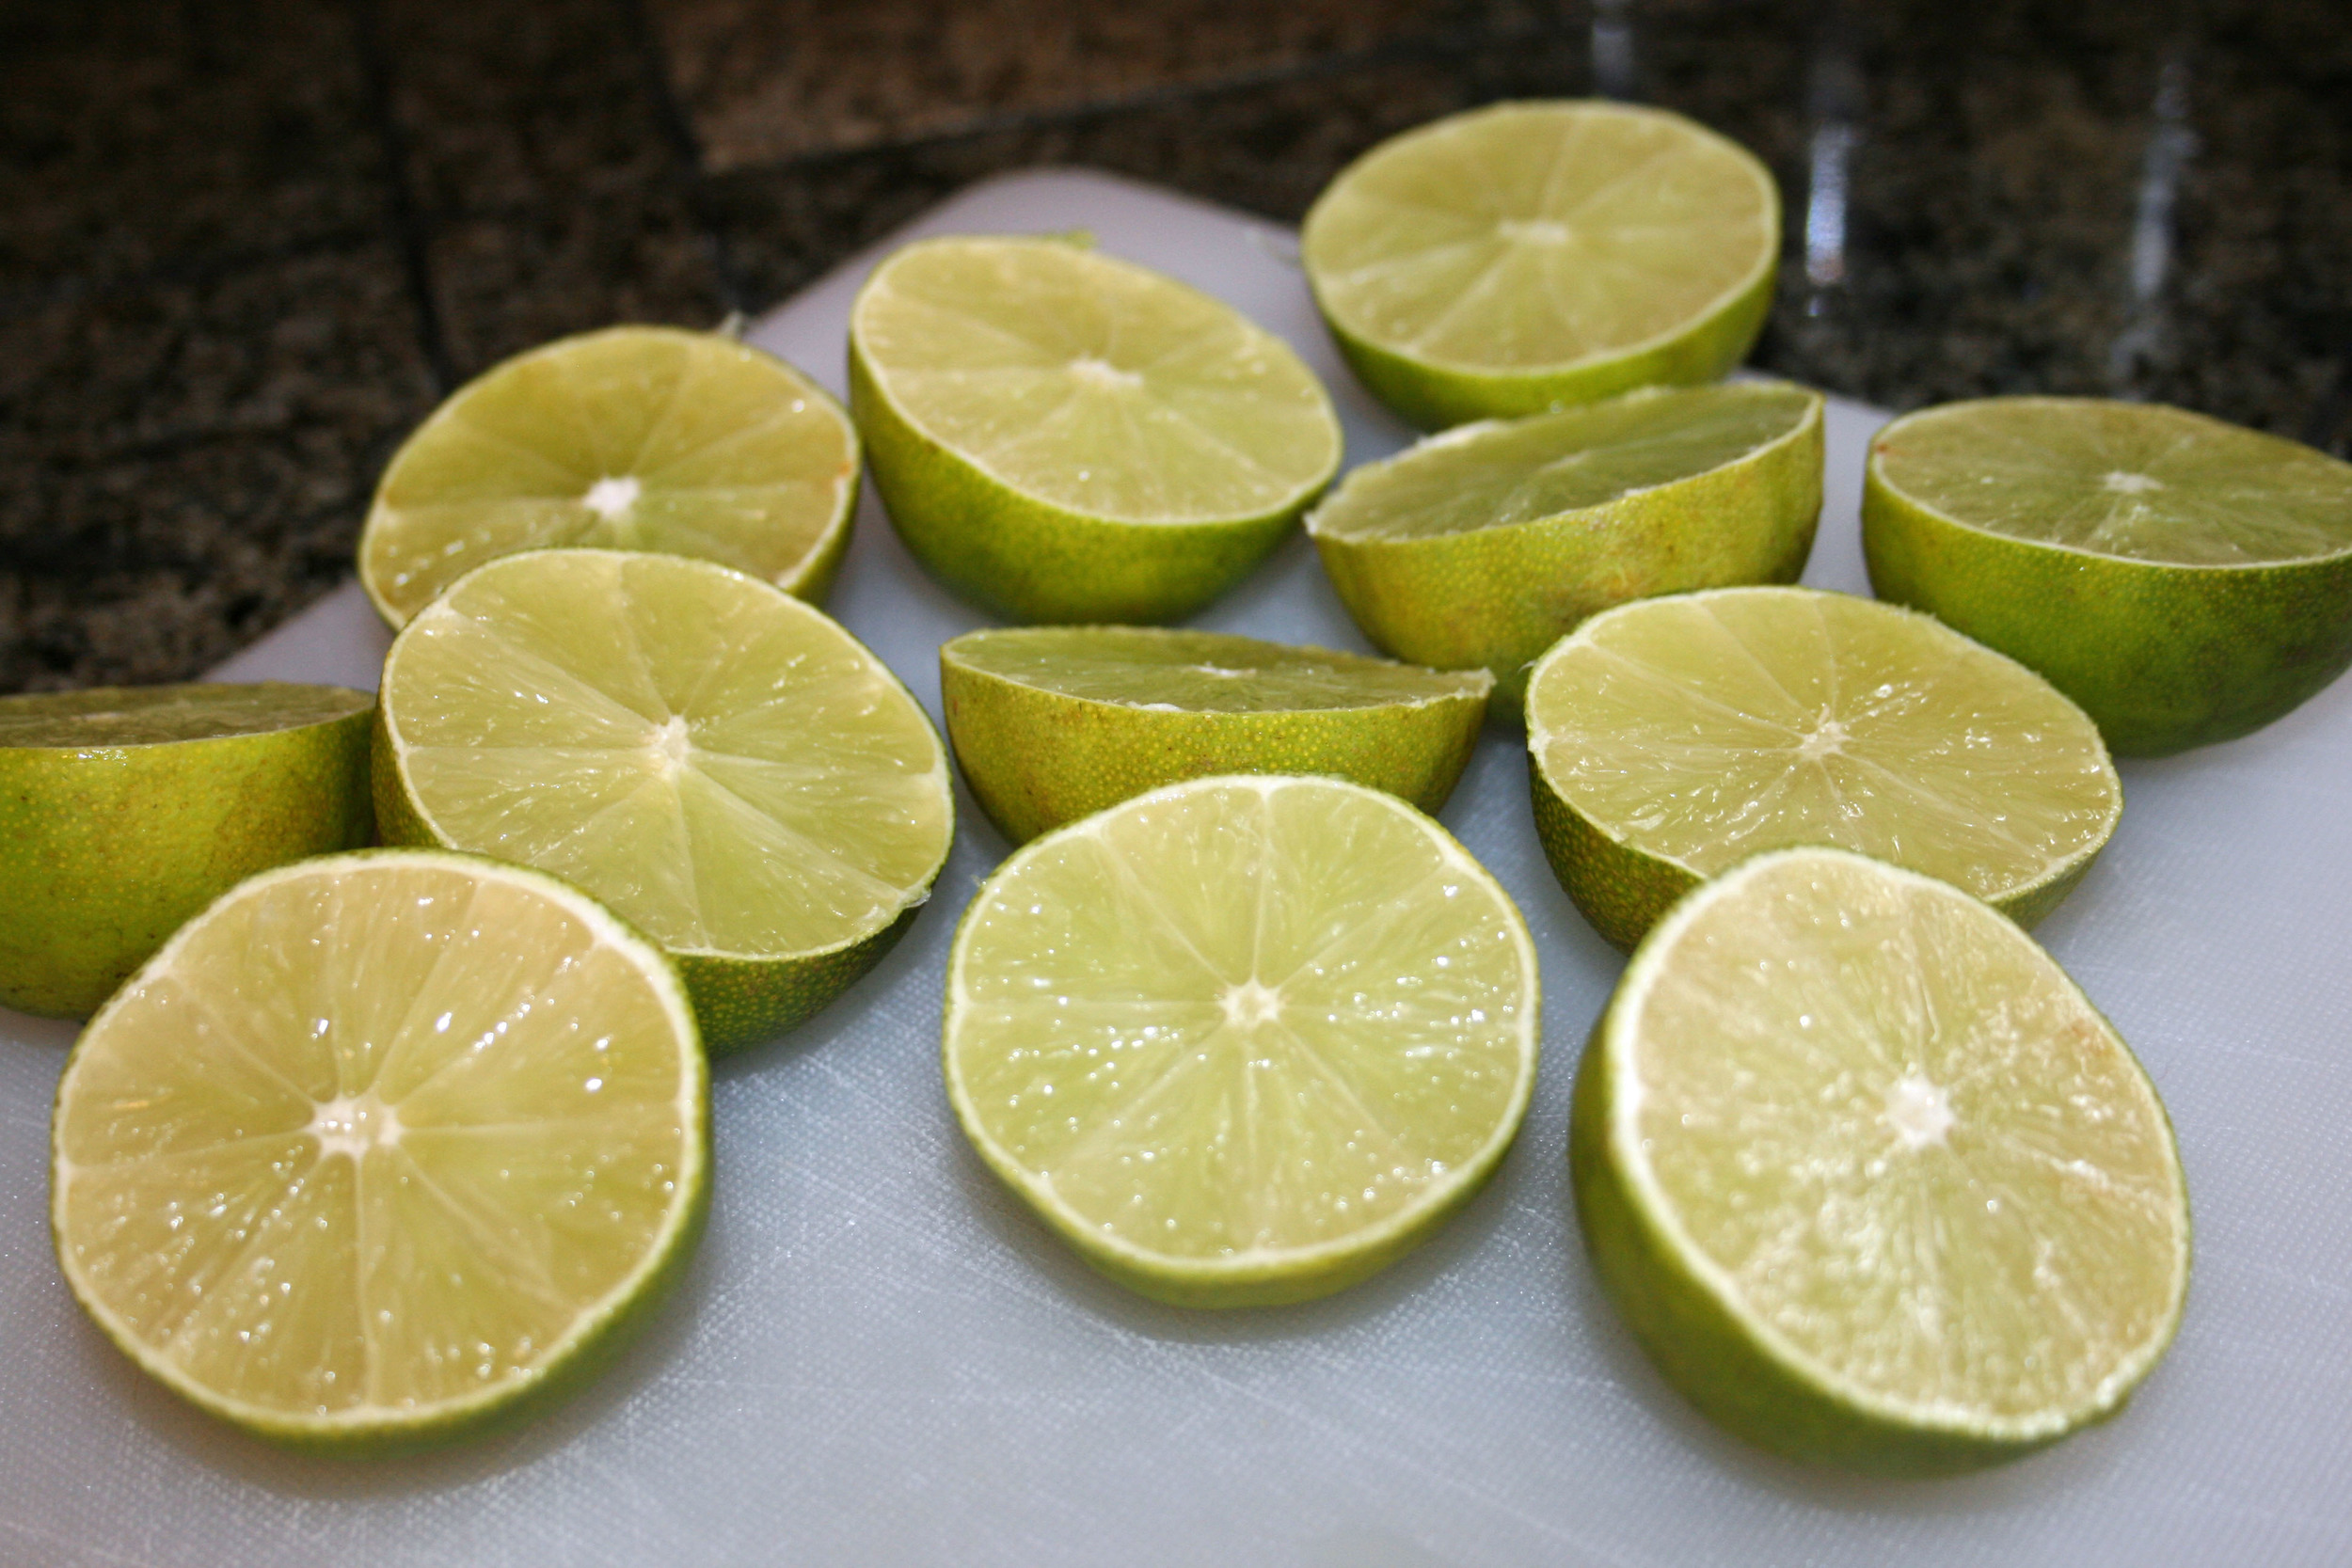
I decided to double the recipe to use up even more basil, so it took about 9 small organic limes to get 1 1/2 cups of fresh lime juice.

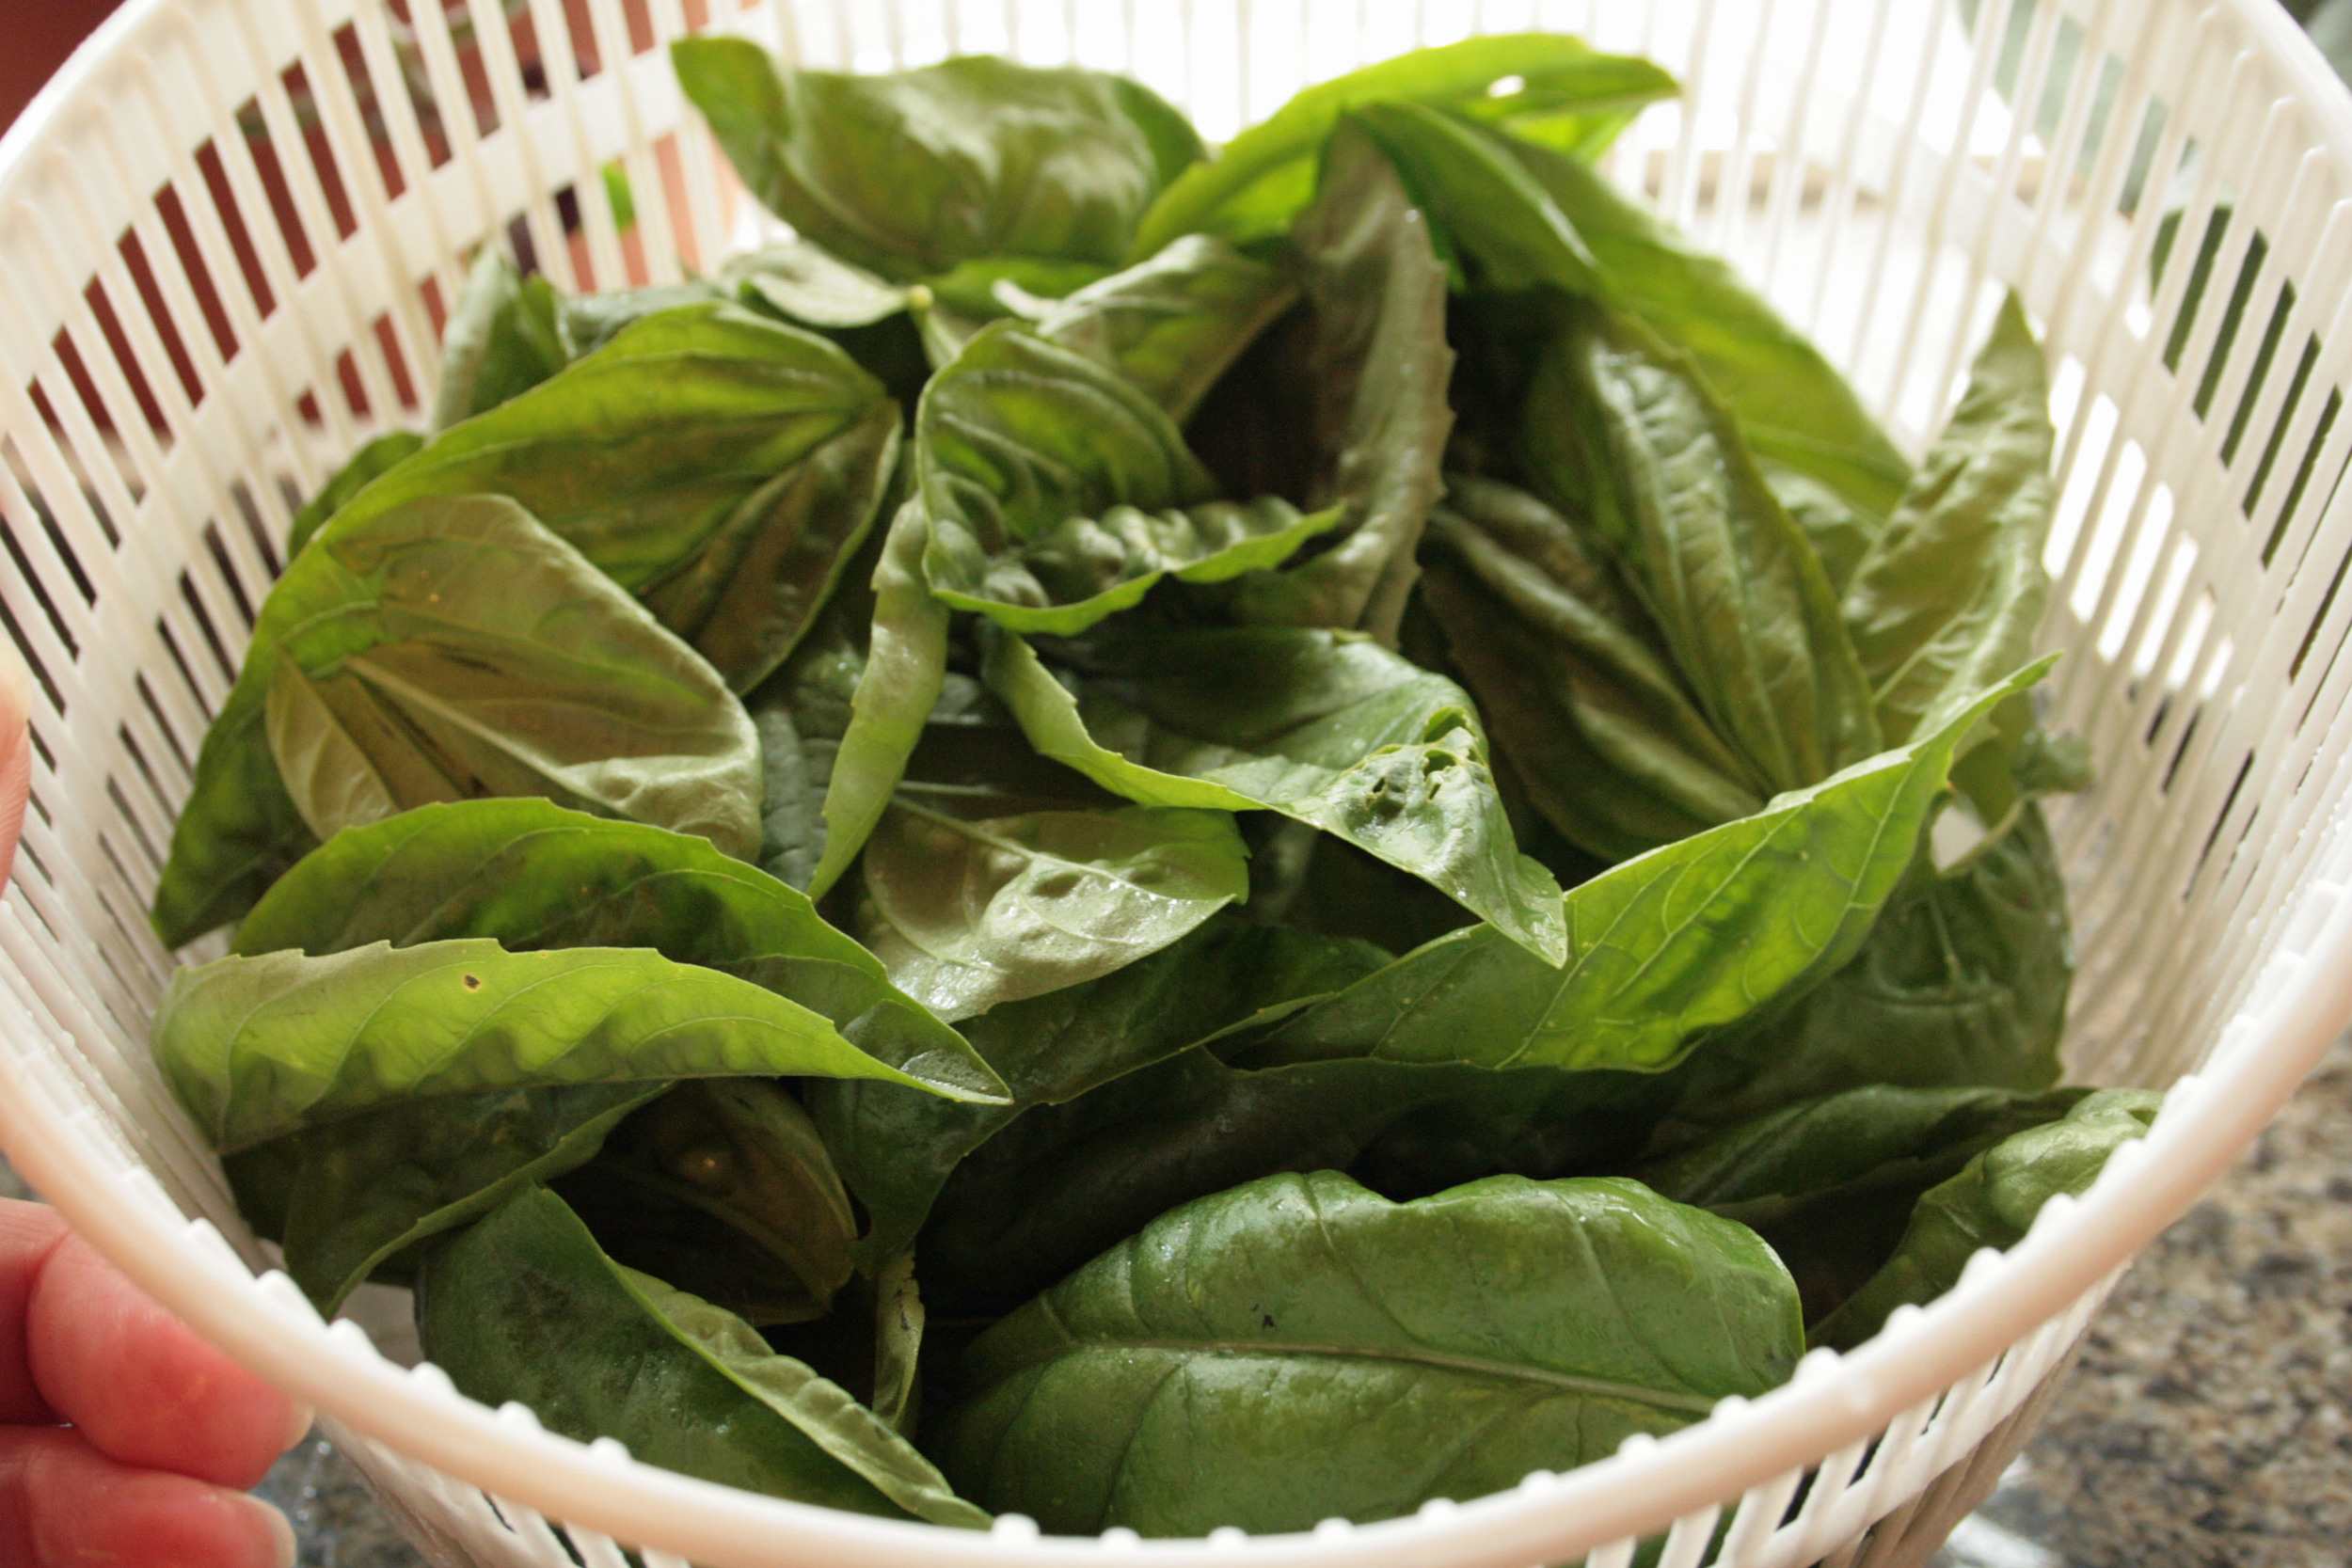
Our basil leaves were bigger than what we normally get from the store, but I didn't want to deviate from the recipe on the first try so I used the full 40 leaves (recipe x 2).

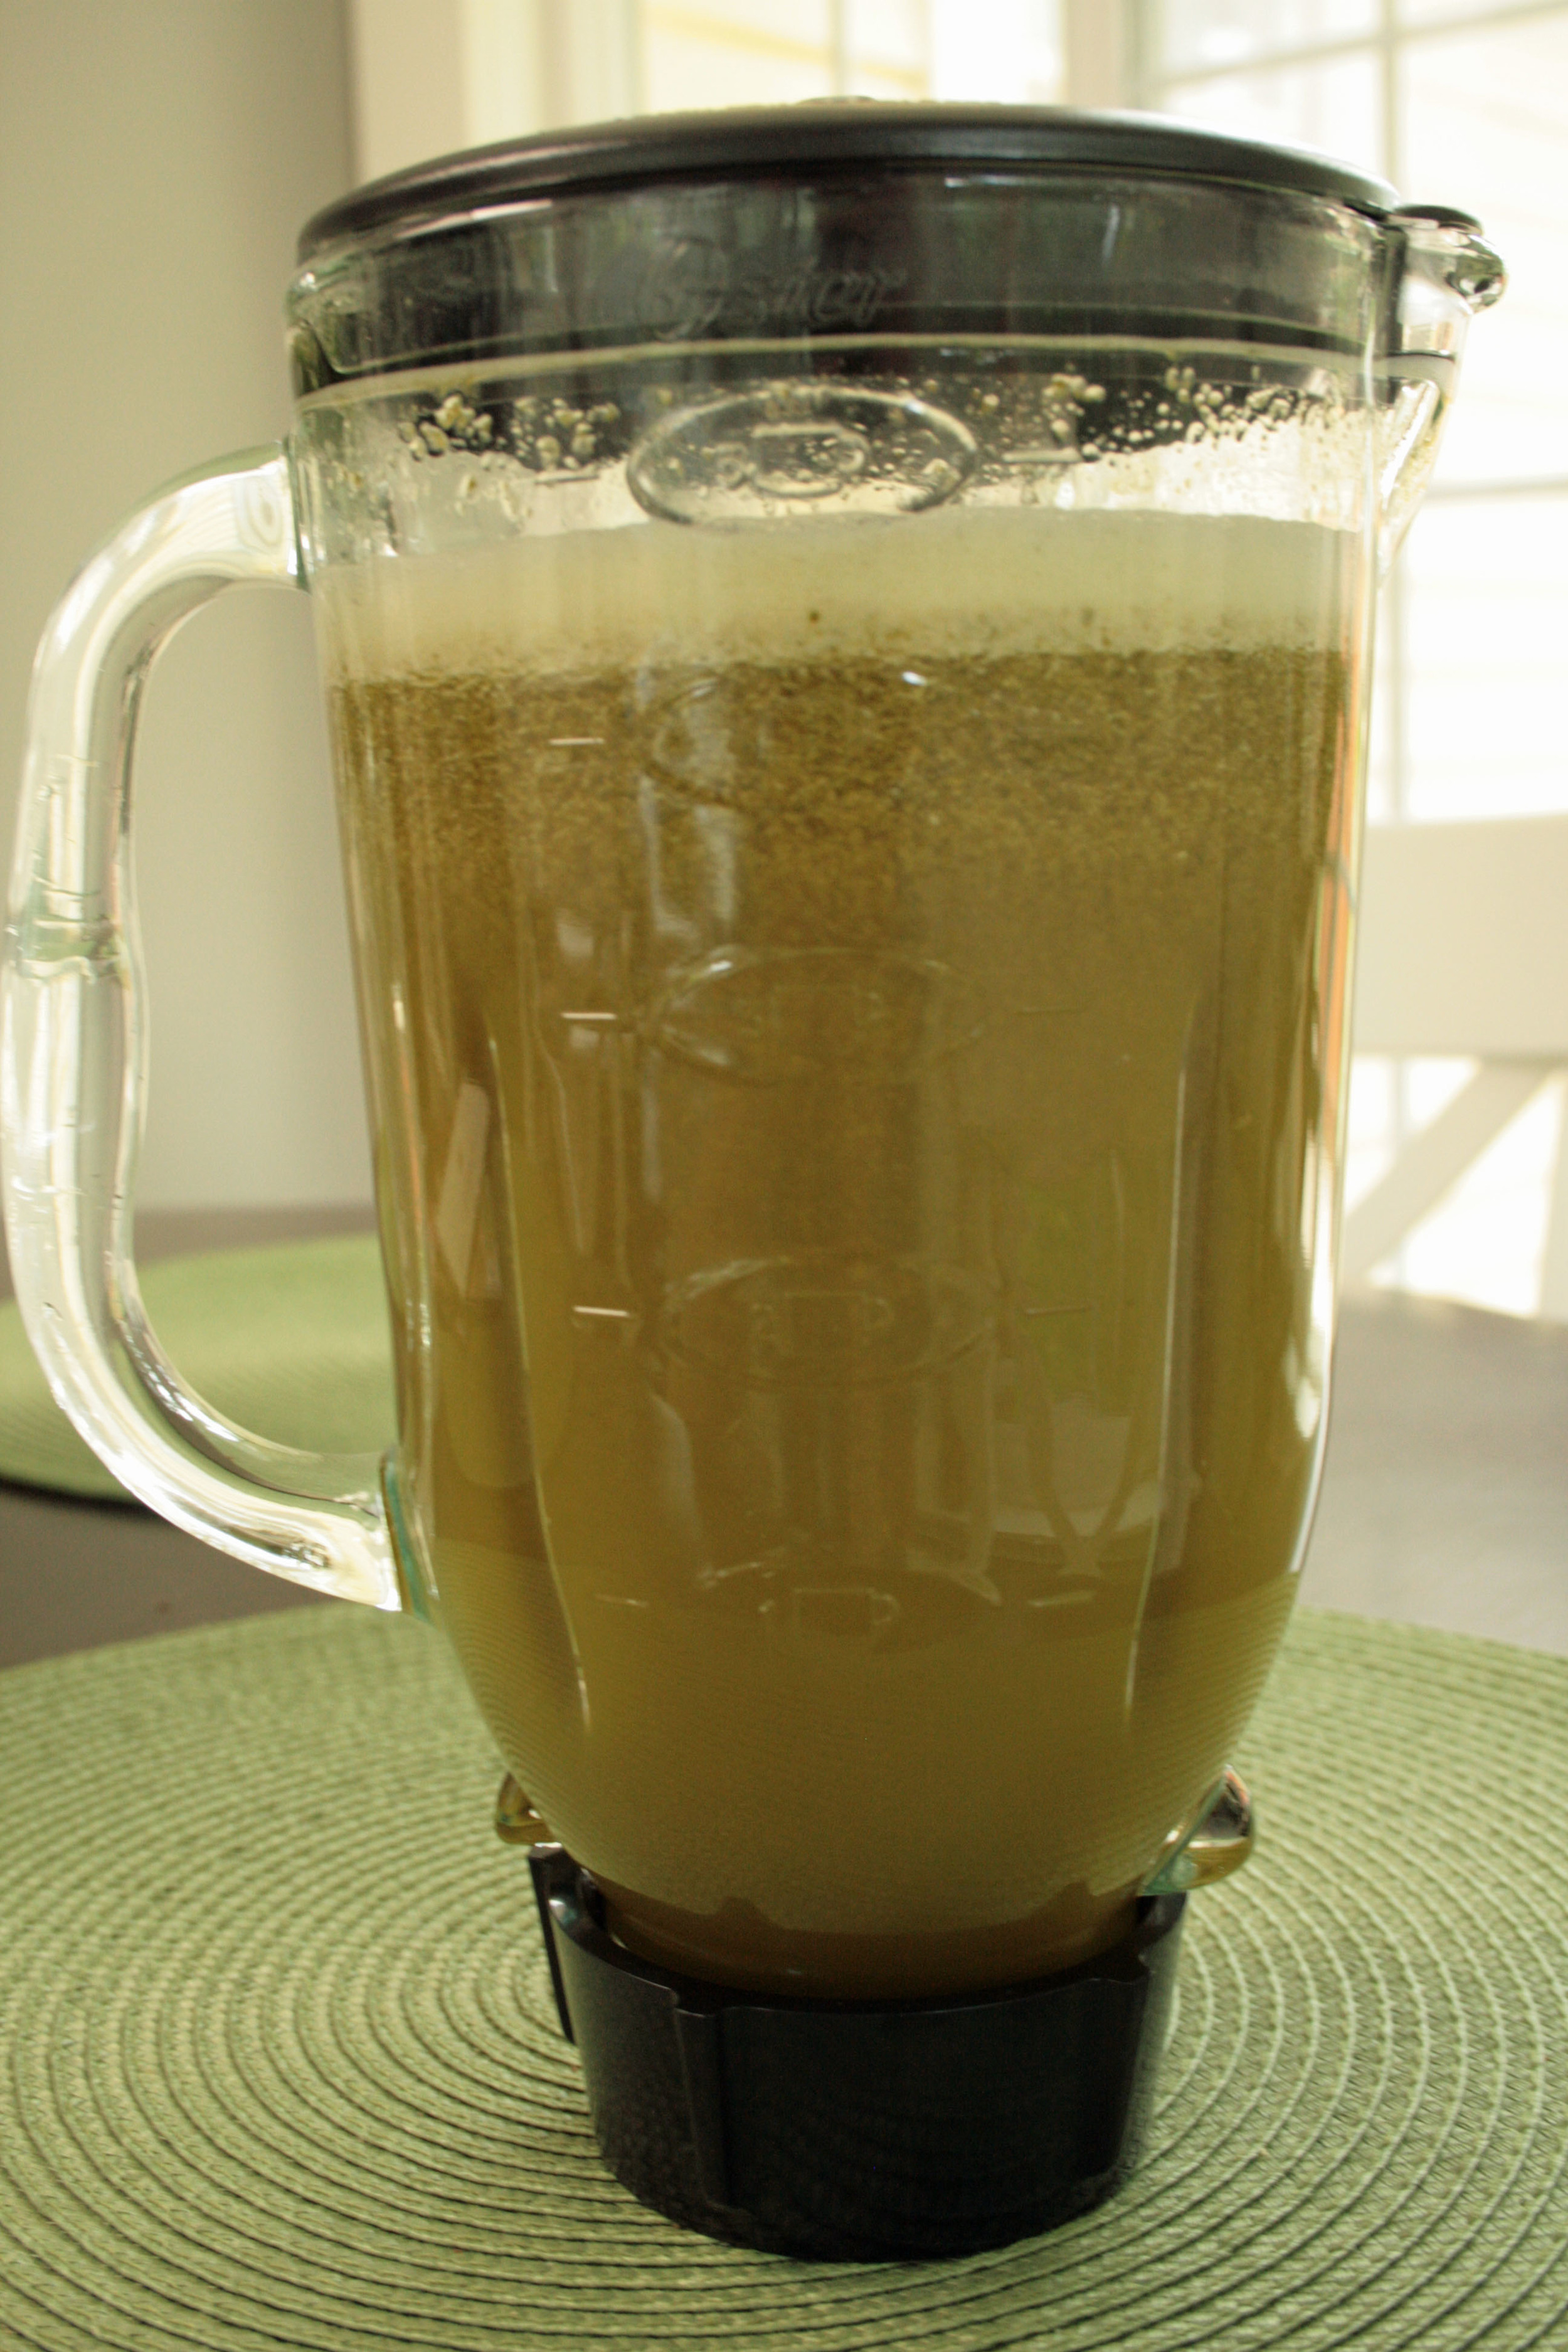
I started to get a little concerned about the end result after blending all the ingredients together.  The color was similar to mushy peas.

But the taste was interesting... and not in a bad way.  So I stuck with it.  After the blending I had to stray from the recipe because I wanted to use my ice cream maker instead of the freeze and chop method they suggested.  I let the mixture sit out on the counter for 30 minutes to let it cool a bit, then covered it and put it in the fridge until the temperature reached 40 degrees.  Once it reached the right temp, I put it in the ice cream maker and let it churn for about 25 minutes.  Then I scraped it into a bowl, covered the sorbet with wax paper, and put the air-tight cover on.  I stuck it in the freezer to finish hardening for a few hours, then it was time to try it out...

So here's the thing about this sorbet... despite it's strange color - it's good.  It might be really good.  If it was part of a prix fixe meal at a fancy Italian restaurant I'd probably be really impressed.  The basil and lime were surprisingly complimentary, and it was a great way to use up a ton of basil.  But it's not something I'm going to crave - which is probably a good thing considering we're going to Hawaii in a few weeks.  It's kind of like Red Vines.  It's really close to what you want (Twizzlers), but it doesn't quite hit the spot.  It leaves you wishing you'd saved those calories for the treat you really wanted (in this case a huge honkin' bowl of chocolate gelato.)  But the recipe gets great reviews on AllRecipes.com, so maybe you'll love it.  If you have your own basil bush in your backyard, or you just really love basil, give it a try...

Basil Lime Sorbet

Ingredients:

  • 1 cup sugar
  • 1 cup water
  • 3/4 cup fresh lime juice
  • 20 fresh basil leaves, minced

Method:

1) Make a simple syrup by bringing the sugar and water to a boil in a small saucepan; allow to boil 1 minute; remove from heat.

2) Combine the syrup, lime juice, and basil in a blender; puree.

3) Pour the mixture into a container and cover; store in freezer until completely frozen, about 2 hours.

4) Break the frozen mixture into pieces and place in the blender; blend until smooth. Return to the container and cover. Store in freezer until ready to serve.

OR, if you're going to use an ice cream maker...

3) Pour the mixture into a container and set it on the counter to cool for 30 minutes.  Then cover and place in the refrigerator until the mixture reaches 40 degrees or colder.

4) Pour the mixture into your ice cream maker and churn according to the machine's instructions.  Scrape into an air-tight container, cover with wax paper and then the bowl cover, and place in the freezer for at least an hour to let it harden.

the secret to perfect hash browns

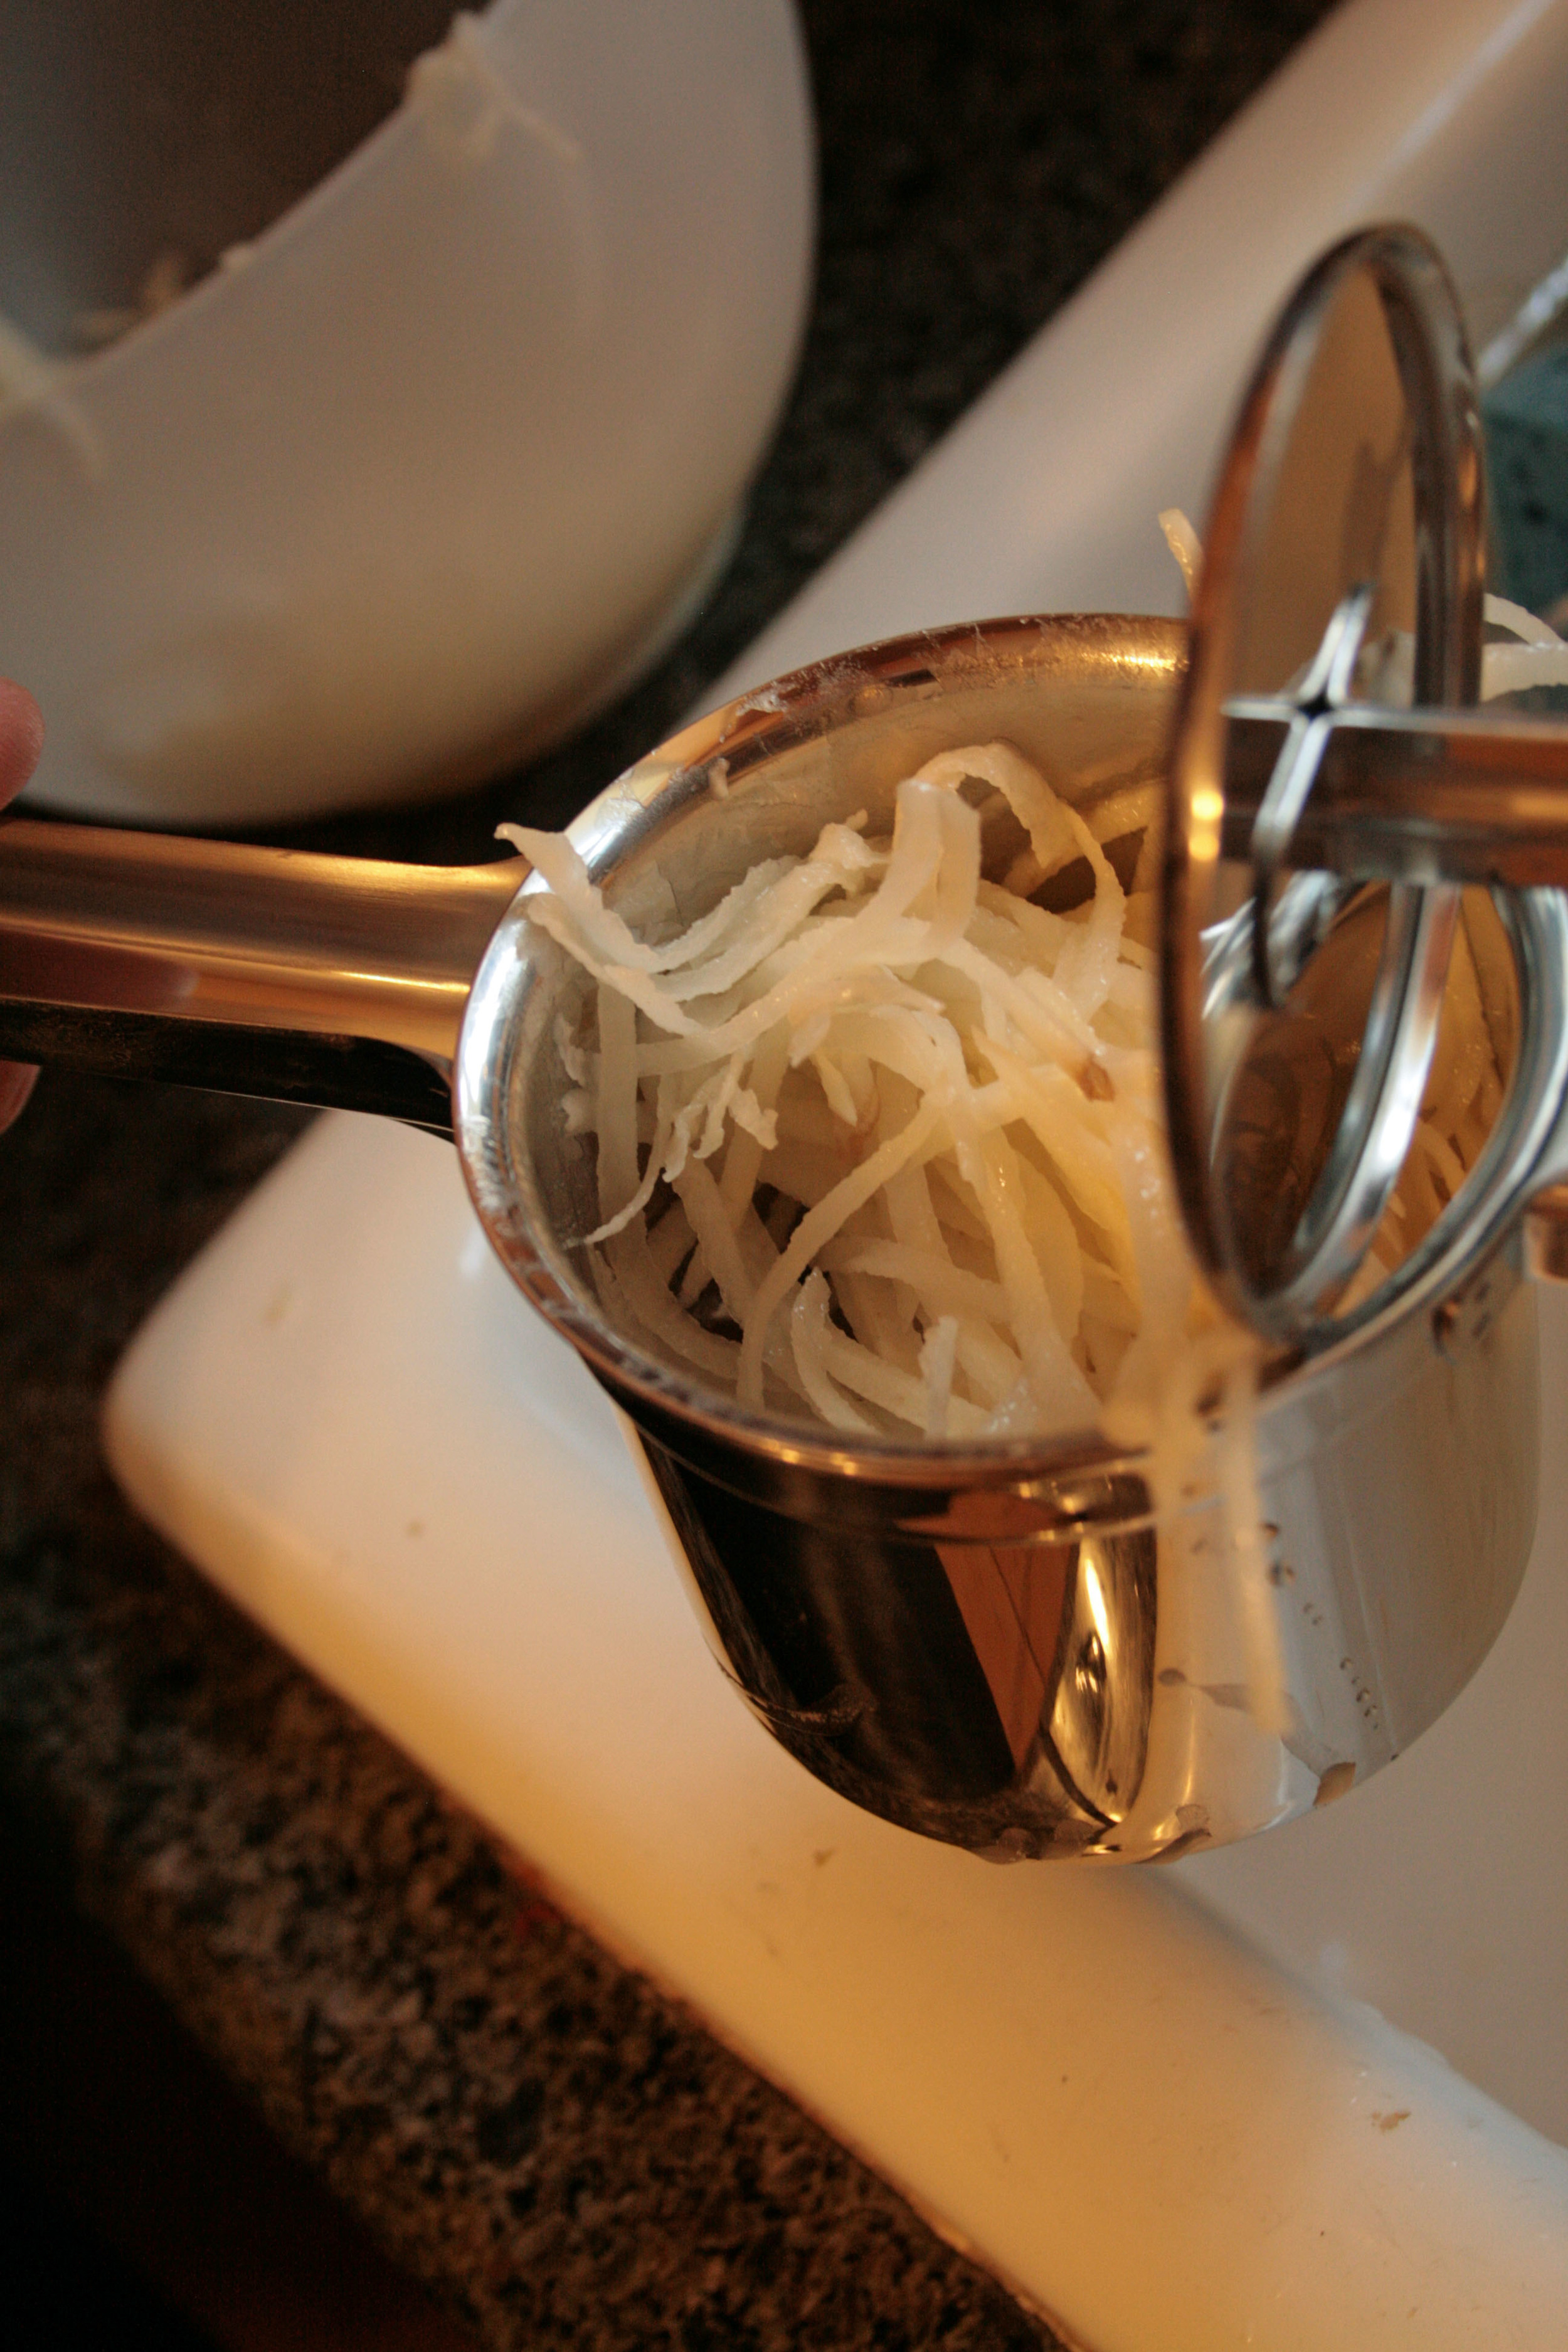
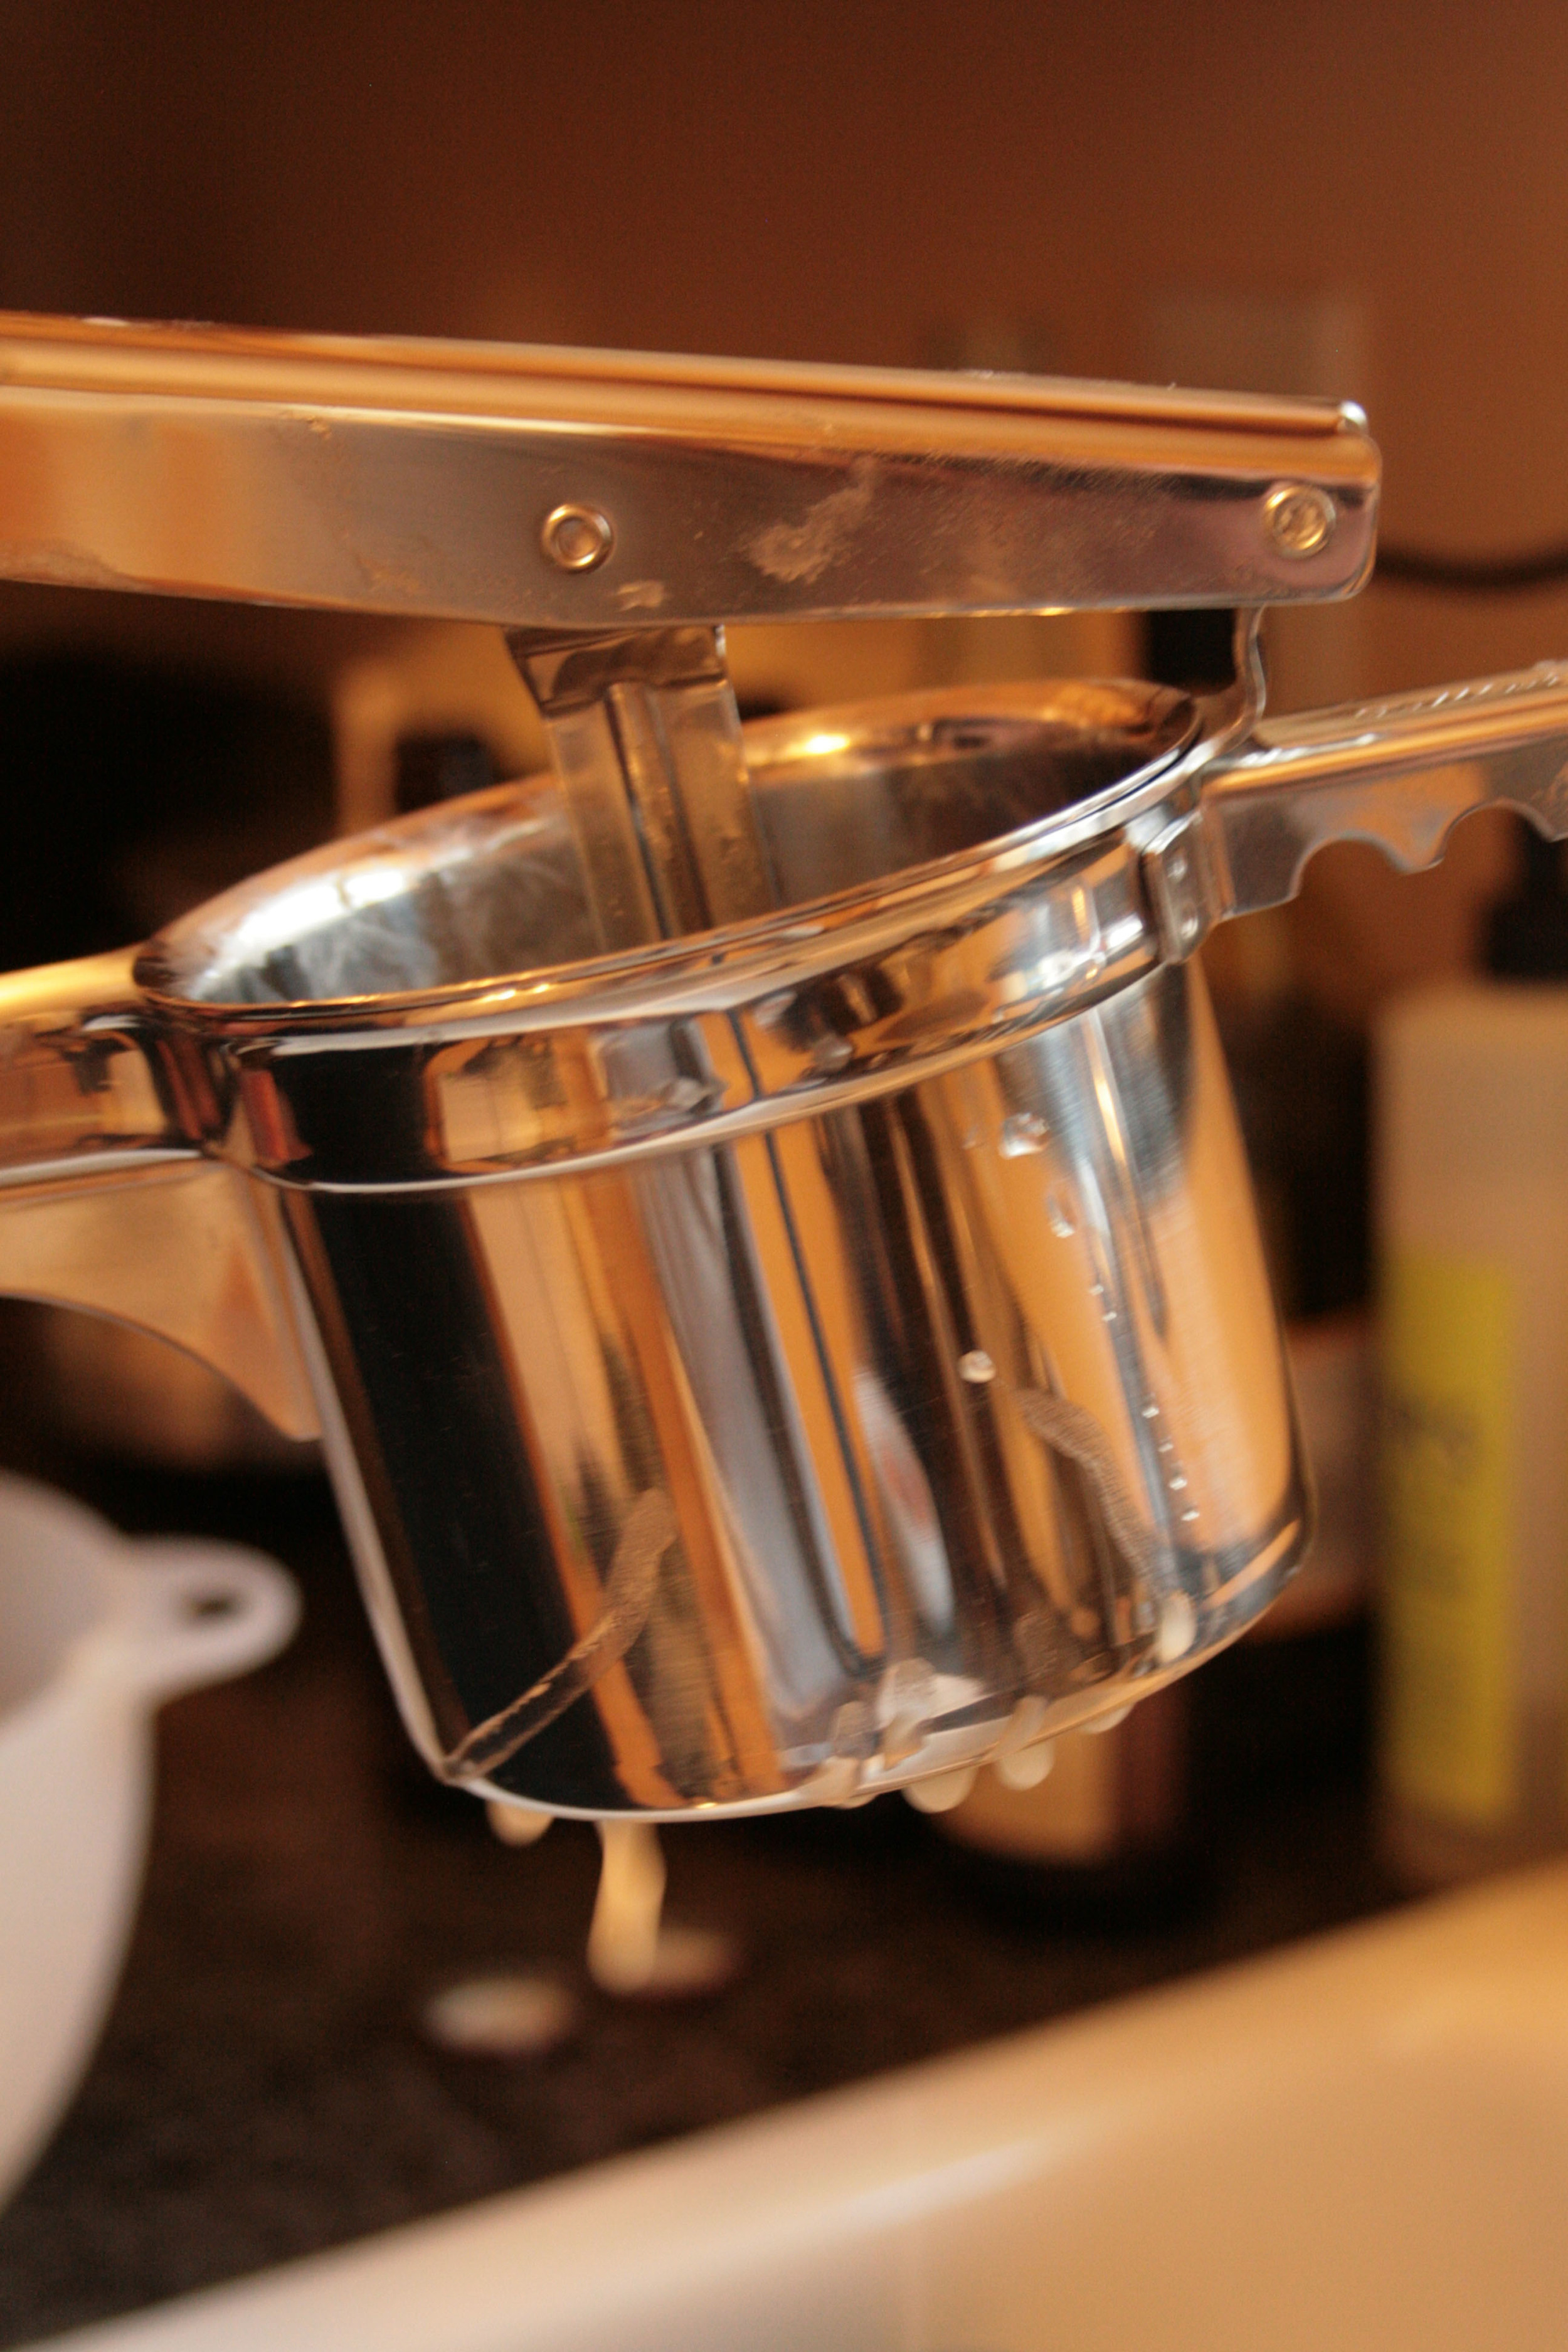
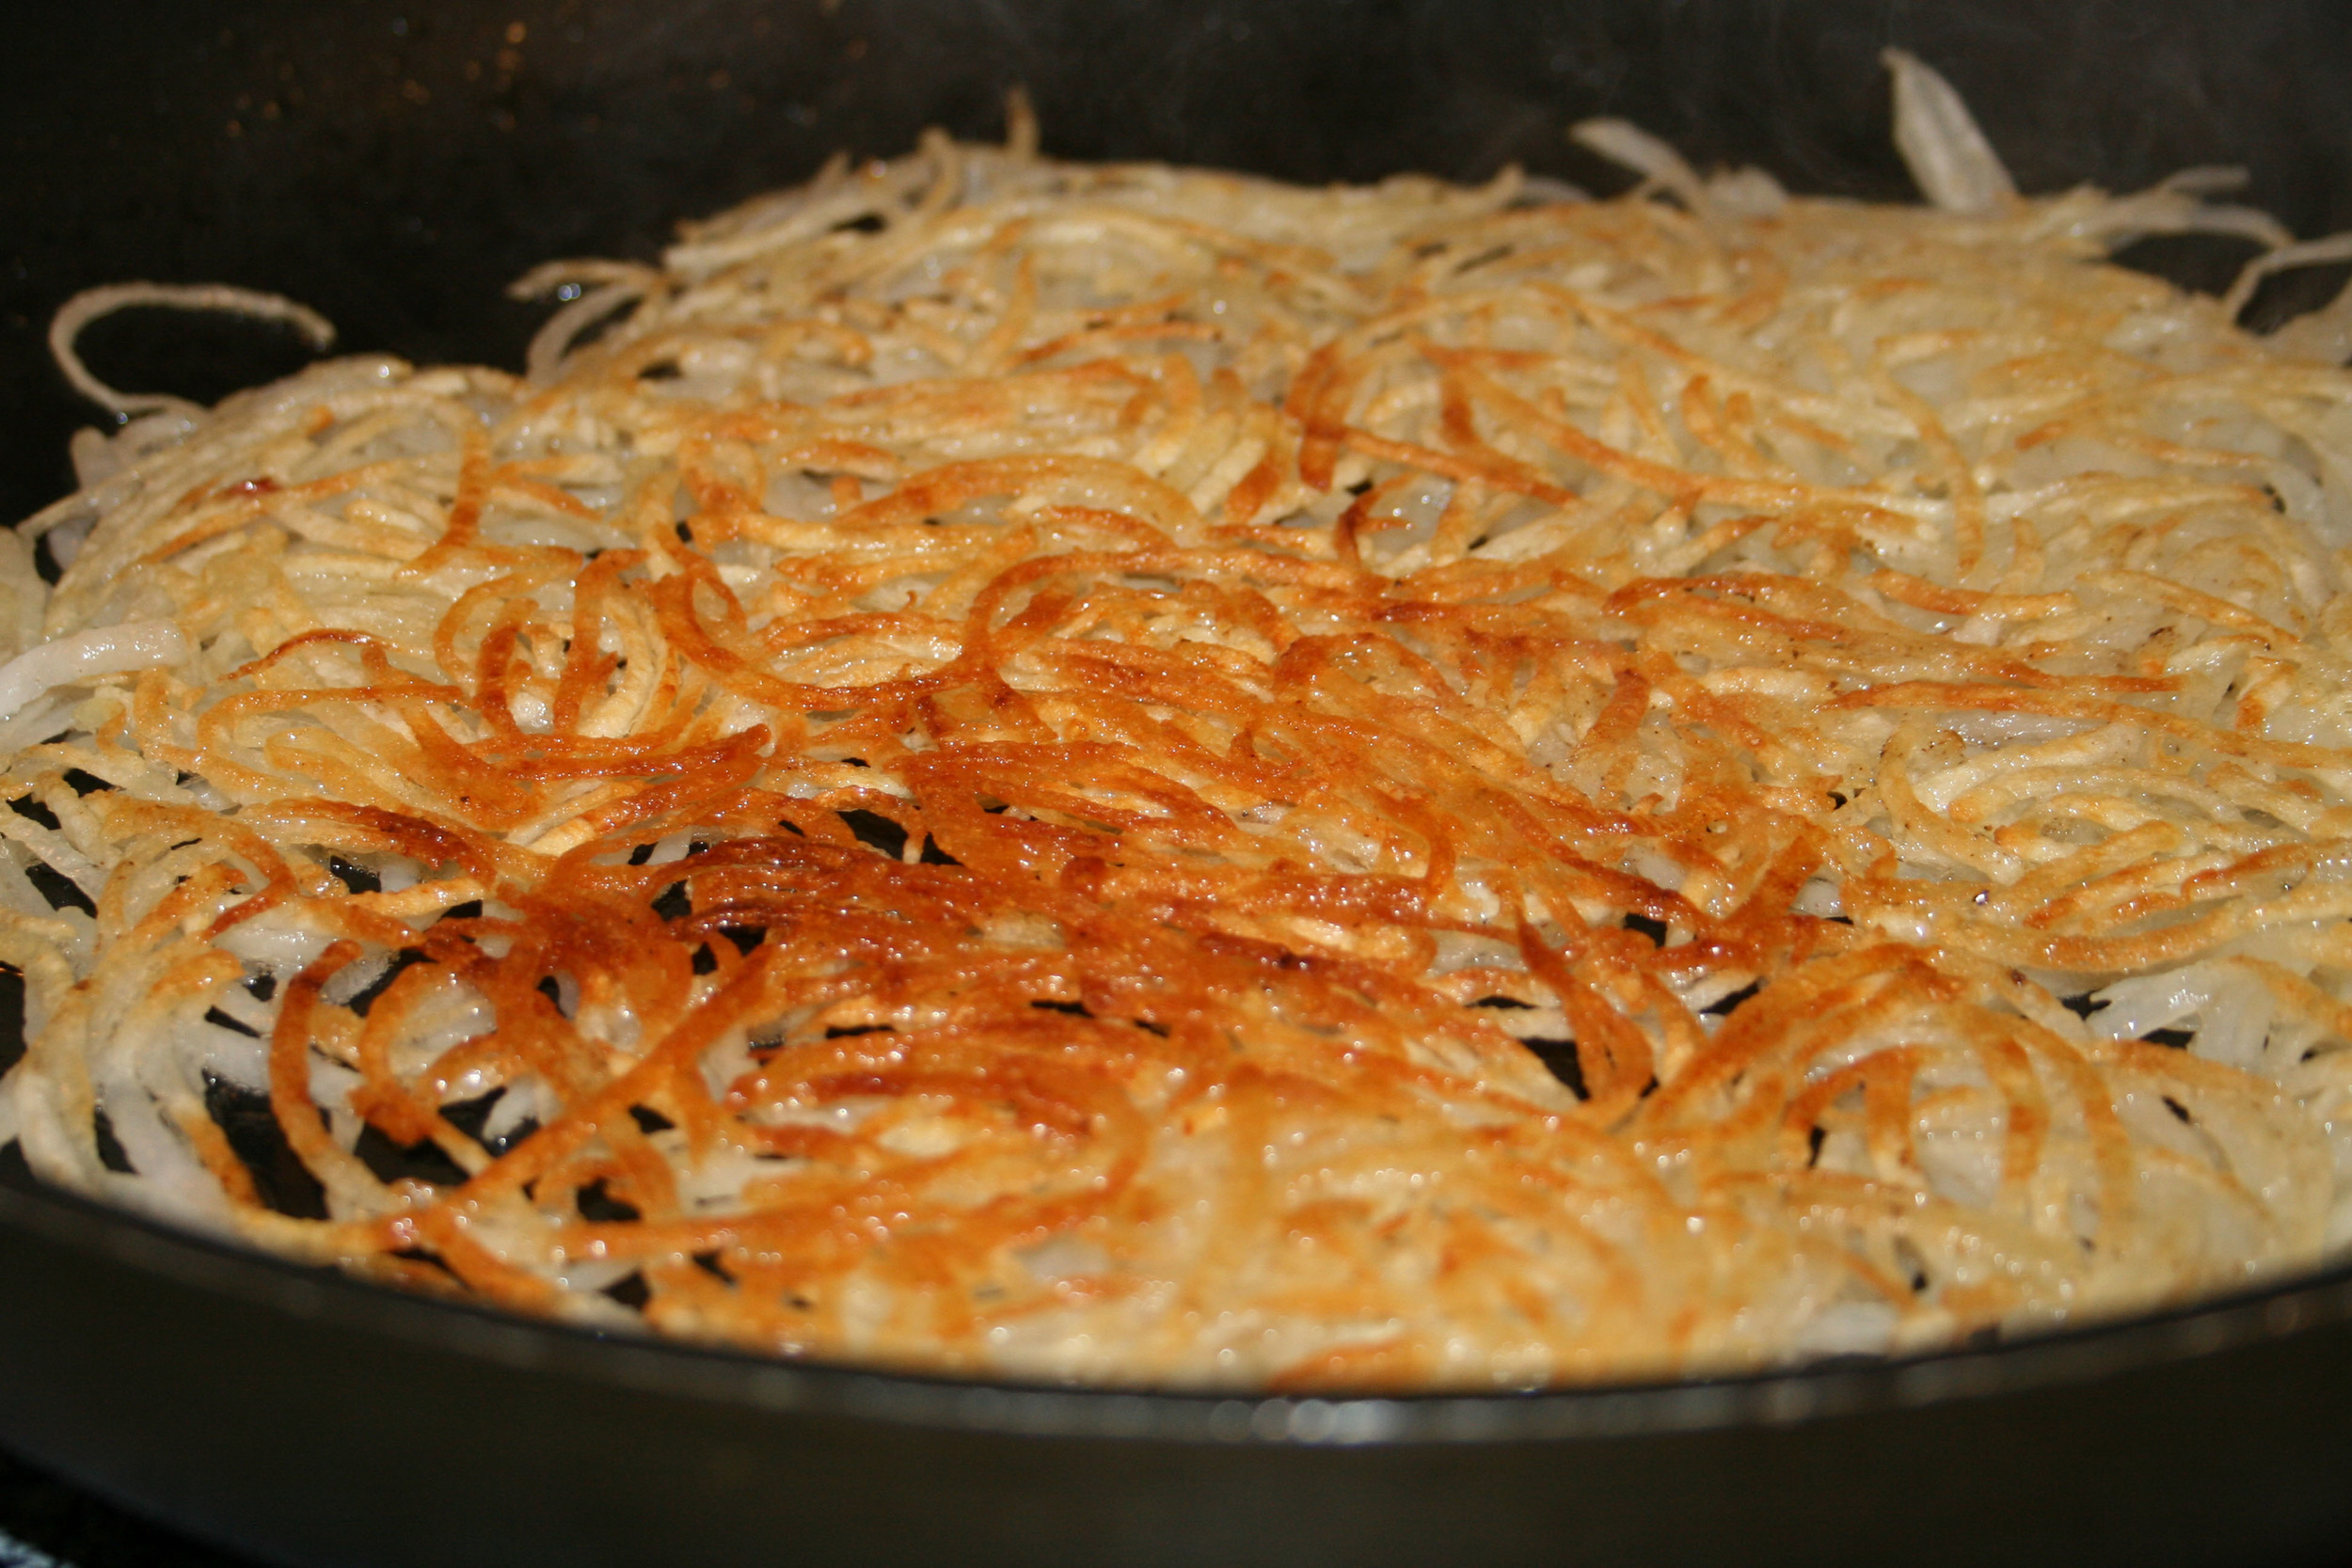
My husband is a bit of a hash brown connoisseur. Perfect hash browns to him are golden and crispy on top, light and buttery underneath. These hash browns exist at Dockside here in Portland. (Don't be fooled by the dive bar atmosphere... the breakfast is delicious.) But we could never get them to turn out right at home. They always congealed and turned grayish and kinda chewy. Tasty in a weird way, but not quite right. Then we came across this recipe that said the only way to get them perfect is to use a potato ricer to squeeze all of the moisture from the shredded potatoes. Now, Alton Brown taught us to never buy a kitchen gadget that can only do one thing (a rule that likely saved our wedding registry and subsequently our kitchen drawers.) But the idea of being able to make perfect hash browns at home was so tempting! Thankfully we came across a recipe in a recent Food Network Magazine that said you needed a potato ricer to make homemade gnocchi. Hash browns AND homemade gnocchi! Even AB would understand. So we caved and bought the Cuisipro potato ricer. (There are less expensive models, but all the reviews I read said that the quality of this one made it worth the extra money.) I'm happy to report that we tested it out this past Sunday and it was, well... see for yourself:

We followed the recipe I mentioned above, and they were so so so good. Just the right amount of crispiness. We had them with bacon and scrambled eggs with fried shallots. I'm thinking there will be a lot more brinners in our future (breakfast for dinner = brinner) so that we don't have to wait a whole week in between making them.

I'm tempted to try making the hash browns with butter next time instead of oil... I know it would make them a bit worse health-wise, but really - when you're going to serve them with bacon anyway, you might as well go all in.

Here's the recipe (courtesy of Elise @ Simply Recipes):

Ingredients:

  • 3 Tbsp olive oil, canola oil, or grapeseed oil
  • 1 lb Russet baking potatoes, peeled and grated
  • Salt and pepper

Equipment needed:

  • Large frying pan (at least a 9" diameter bottom)
  • Potato ricer

Method:

1) Heat 3 Tbsp of oil in a large frying pan on medium high heat.

2) While the pan is heating, squeeze out as much moisture as you can from the grated potatoes. It's easiest to do this with a potato ricer, using it much like you would a garlic press, except you don't force the potatoes through the ricer. You just press out the moisture. If you don't have a ricer, use paper towels to squeeze out as much moisture as you can from the grated potatoes.

3) When the oil in the pan heats up to the point of shimmering, but not smoking, add the grated potatoes, spreading them out along the bottom of the pan. The potatoes should not be too thick in any one place, no more than a half inch thick. Sprinkle some salt and pepper on the potatoes. After a few minutes, lift up one edge of the potatoes and see how done they are. If they have fried to a golden brown they are ready to flip. Use a large spatula to flip the potatoes over all at once, or divide the large potato cake into halves or quarters and flip. Continue to cook until they are golden brown on the bottom.

Serves 4.

the schedule

I used to be a really organized person.  I had a Franklin Covey planner, to-do lists that actually got done, a cleaning schedule that I stuck to, and there was order... blissful, wonderful order.  Now?  Not so much.  About a year ago I was a month away from getting married and our lives went from fairly routine to barely managed chaos.  I figured after we got back from our honeymoon I'd easily fall back into my nice, ordered routine... but that was not meant to be.  There was house hunting to do, a job change, Christmas, moving, painting, decorating, building, landscaping, a trip back east, summer... and that brings us to now.  Yep - a year later and the only routine I've managed to maintain from my previously organized life is my always painfully inefficient morning routine. So I got to thinking and realized that what I needed most to help me get back on track was a schedule... set days to take care of myself and my house.  Here's what it looks like:

Sunday: laundry While I don't love doing laundry, I do love starting the week off with clean clothes and fresh sheets and towels.  That should be enough of a motivator to get the laundry done on Sundays, but it's not always. A few weeks ago Jared almost ran out of white undershirts. He has at least 15. It was not my finest hour.

Monday: dusting & floors, Wednesday: kitchen & bathrooms In our old house, Jared and I split the cleaning duties.  But now that we have a front and back yard to take care of, he's taken charge of the outdoor maintenance, and the indoor maintenance has become my responsibility.  I'm not complaining, though.  Jared works his tail off outside, the grass gets mowed every week, the veggies and flowers actually grow... it's impressive.  He also cooks us dinner every night.  Let's be honest, I have it pretty damn good.  Which makes it even worse when I regularly put off my domestic duties.  I look at the tumbleweeds of dog hair floating across our beautiful hardwood floors and can't help but feel like a terrible wife.  Or at the very least, a crappy roommate.  I've been using the approach of super cleaning the house about once a month, usually all in one tiring, sweaty, sigh-filled day.  Needless to say, this approach ain't exactly working for us.  So I'm hoping that splitting out the cleaning over two days and making sure things don't get out of hand by cleaning every week will make this chore a little less painful.  Okay, it'll probably be just as painful... but at least it'll look good when I'm done.

Tuesday & Saturday: running I'm not training for a race right now, so my motivation to run has all but disappeared.  But we're going to Hawaii next month and I'm still carrying around the 5 pounds I gained on our honeymoon, so I need to get my butt in gear.  Immediately.

Thursday: strength training Speaking of weight gain, I gain all my weight in my mid-section, and running doesn't do as much to firm up that area as I'd like.  So I've been trying to add in pilates and balance ball workouts once a week.  I've done them twice in the past two months, hence why they ended up on The Schedule.

Friday: date night This certainly isn't a chore or a to-do, but having my favorite night of the week sandwiched in with all this cleaning and working out makes me very happy.  I don't really know when Fridays became date night for us, but it's been that way for about two years now.  We usually try to go to a restaurant we haven't been to yet, which there seem to be an endless supply of here in Portland.  (This past Friday we finally went to Belly and we both had their famous Belly Burger.  Bacon, blue cheese aioli, and fried shallots.  So freaking good.)

So there it is.  The Schedule.  A no more dirty floors and buddha bellies master plan.  Wish me luck.

before & after: our sun room

Of all the rooms in our house, our sun room has probably undergone the biggest transformation since we moved in.  The previous owners used it as a rather awkward family/tv room, but since Jared and I knew we'd be putting our TV in the living room, we had to come up with an alternate use.  We had a couple of big things we had no place for - mainly our small kitchen table and the bar/bookcase set Jared's parents got us as a wedding gift (seriously awesome.)  So we decided to make the room into a combo breakfast nook/lounging/reading/music listening room.  It sounds like a disastrous hodge-podge of a room idea, but bear with me... Here's what we started with:

This room was built as an addition to the original house, and the previous owners went with builder's beige, bare trim, and polished brass hardware.  No thanks.  So before we even moved in we hired the very awesome Benjamin at Portland Painting & Restoration to spray all the trim (it feels like glass now) and paint the walls with low VOC paint (Cape May Cobblestone from Benjamin Moore.)  We normally try to DIY the painting, but the trim made this job way beyond our abilities.  Given how great it looked when Ben and his team were done, we know we made the right call.

I love how the walls play off the stone tile, and the painted trim really helps connect the room to the rest of the house.  The table is the same one I had in my kitchen growing up, but spruced up with dark brown paint and white Ikea Ingolf chairs.

See, this is how the previous owners had it set up.  Pretty lame, in my opinion.  What's the point of a sun room if you're going to block the windows with roman blinds and a huge TV?  Clearly we love and appreciate this house way more than they did and are most likely far superior people.  ;)

And here's how they had the other side of the room set up...

I'll be honest... I've always found it a little strange that they didn't even bother to straighten the pillows for their listing photo.  My friend Sarah would make such things illegal if she could.  Anyway, here's how it looks now:

This is the lounging/reading/music listening portion of the room.  Alcohol may also get consumed here from time to time.  The chairs are the black leather Tullsta chairs (covered with Blekinge white Ektorp Tullsta slip covers) from Ikea that used to occupy Jared's office in Seattle.  The ottoman and side table are also from Ikea, and the jute rug is from Pottery Barn.  We thankfully already had all of these items so it was only a matter of re-imagining and re-purposing to give them a new life in the sun room.  The green accents were added to coordinate with the green placemats in the breakfast nook (the pillows are from Target and the tray is from West Elm.)

I'm not quite sure what this wall was before...

The sconces seemed strange since the room gets so much natural light and has a fairly bright overhead light, so we took them out and patched up the walls before painting.  Here's how it looks now...

Much better!  Believe it or not, those shelves are currently holding about 500 CDs.  Stylish CD storage has actually been a bit of a challenge for me since Jared and I moved in together.  Jared is a CDs on display kind of person... I'd be content having everything digital.  He'd be content not having a million candles strewn about the house, so we compromise.  I got a bunch of leather CD cases from Ikea (are you noticing a theme yet?) which enabled me to stack nearly 100 CDs on each shelf.   We were both skeptical about how it would look, so we were relieved that it ended up working out so well.  Which I guess could be said for the room as a whole... what started out as an awkward room turned out to be one of my favorite rooms in the whole house!  All it took was a little imagination, a bit of re-purposing, and a whole lot of paint.

DIY Modern Farm Dining Table

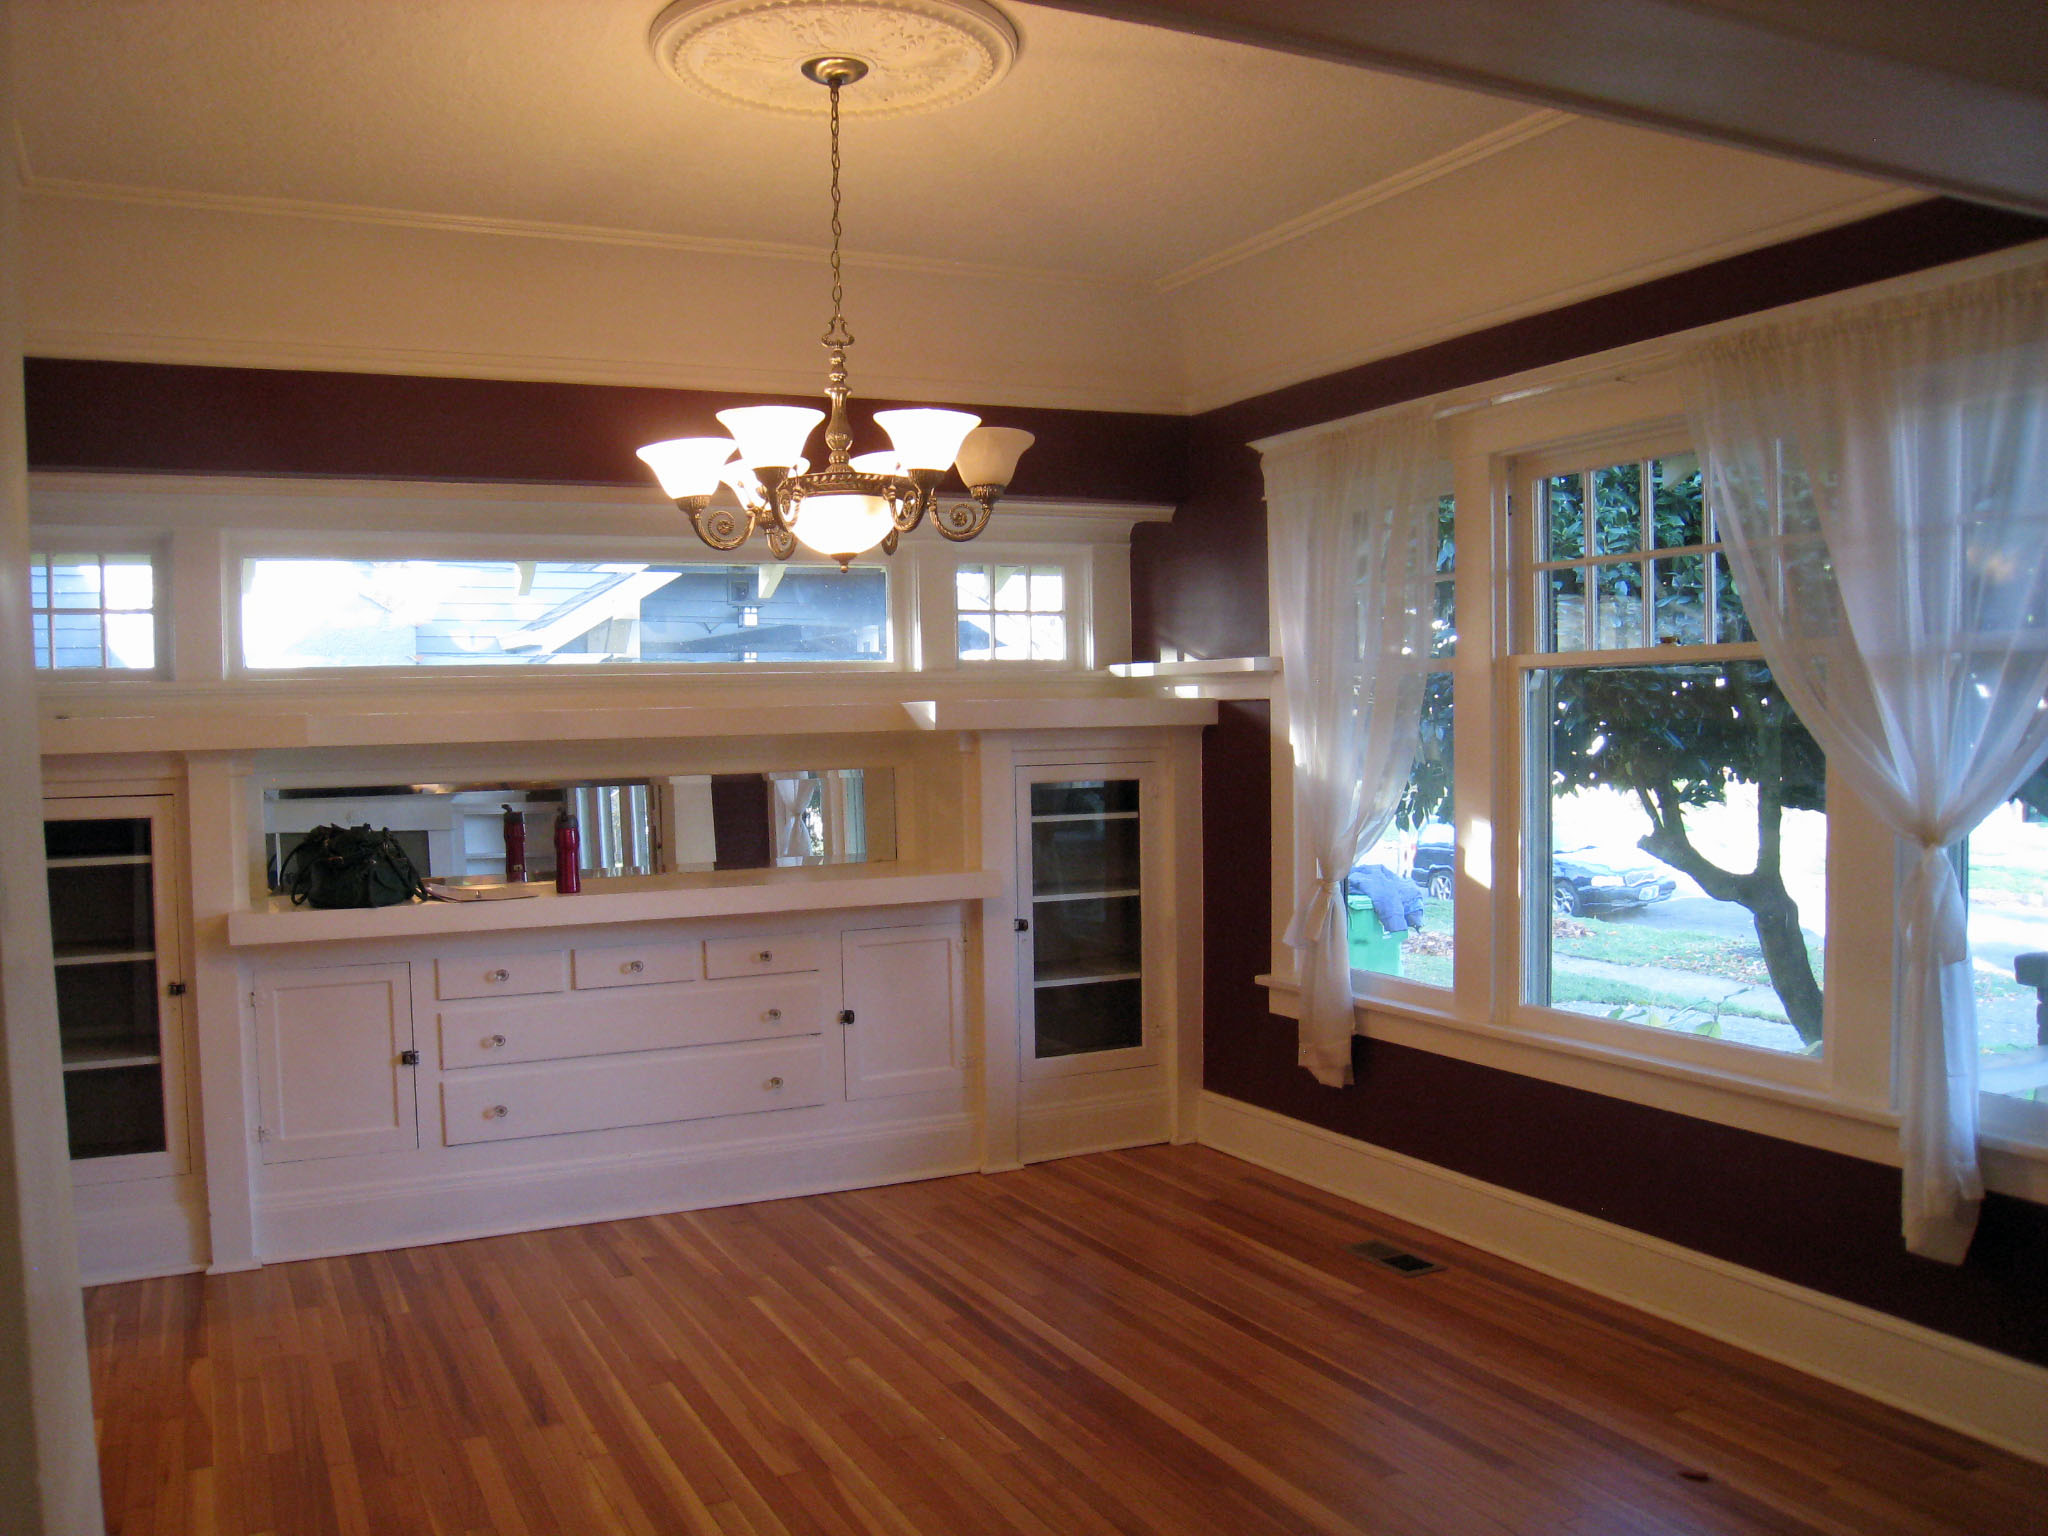
When Jared and I bought our first house earlier this year the one room that we had absolutely zero furniture for was our dining room.  This was the blank slate we had to fill:

I got as far as painting those plum walls a nice warm red, and then went looking for decor inspiration.  I immediately fell in love with this collection from Pottery Barn:

Unfortunately the table and chairs in the picture came to about $4,000.  Thankfully, it was around this same time that I discovered Knock Off Wood.  I saw the plans for the Modern Farmhouse Table and convinced Jared that we could just build our own table. Yet another shining example of my tendency to bite off way more than I can chew!  But it did make sense for us - we wanted a hard wood table that would last us several years and everything in our budget was wood veneer (including the table this plan is based on at West Elm.)  So we bought a miter saw and headed to Wood Crafters here in Portland.  Why didn't we just go to Home Depot and get all our lumber for $30 like the plan says?  Because if we were going through all the effort to build a dining room table that was to last a generation, we were going to use high quality - and most importantly - STRAIGHT boards.  I can't stress how important it is to have straight boards when building this table.  So, we ended up spending about $500 on wood, and received priceless advice from the kind folks at Wood Crafters who took pity on us and didn't make us feel like our stupid questions were - well, stupid.

The table frame was easier than we thought to put together and get square.  A little too easy, actually, since the next steps would prove rather frustrating.

One plank in!  So easy!  Yeah, one goes in great - it's getting all 6 in place that makes you want to give up and start rationalizing how artsy and different a one planked dining table would be.  Apparently, no matter how straight and perfect boards look to the naked eye, when you try to squeeze them in together you discover that each has its own little geographical quirks and that you'll need to try every combination possible before finding the perfect fit.  Fun.

A million screws and 10+ passes with the sander later, and we were ready to stain.  We used gel stain at the recommendation of the guys at Wood Crafters and it was about how I thought it would be - a pain in the rear, unforgiving, and a complete mess.  But the result was beautiful.

The final step was to apply multiple coats of table top varnish.   Then it was off to West Elm for chairs and a rug (Garvey leather chairs and the Jute Boucle rug, to be exact.)  A few candles, a handful of plants, a lot of picture frames and we finally had a formal dining room...

What I love about this table is that if it ever gets screwed up, we can sand, stain, re-coat with varnish, and it'll be as good as new.  You can't do that with wood veneer!  (I repeated those last two sentences to myself about 50 times during the course of making this table.)  In the end, we probably ended up spending about $600 to build and finish the table, and about $1500 for the chairs and rug.  We got the rustic formal dining room of my dreams for a lot more work but almost half the cost.  Not too shabby.

DIY table runners

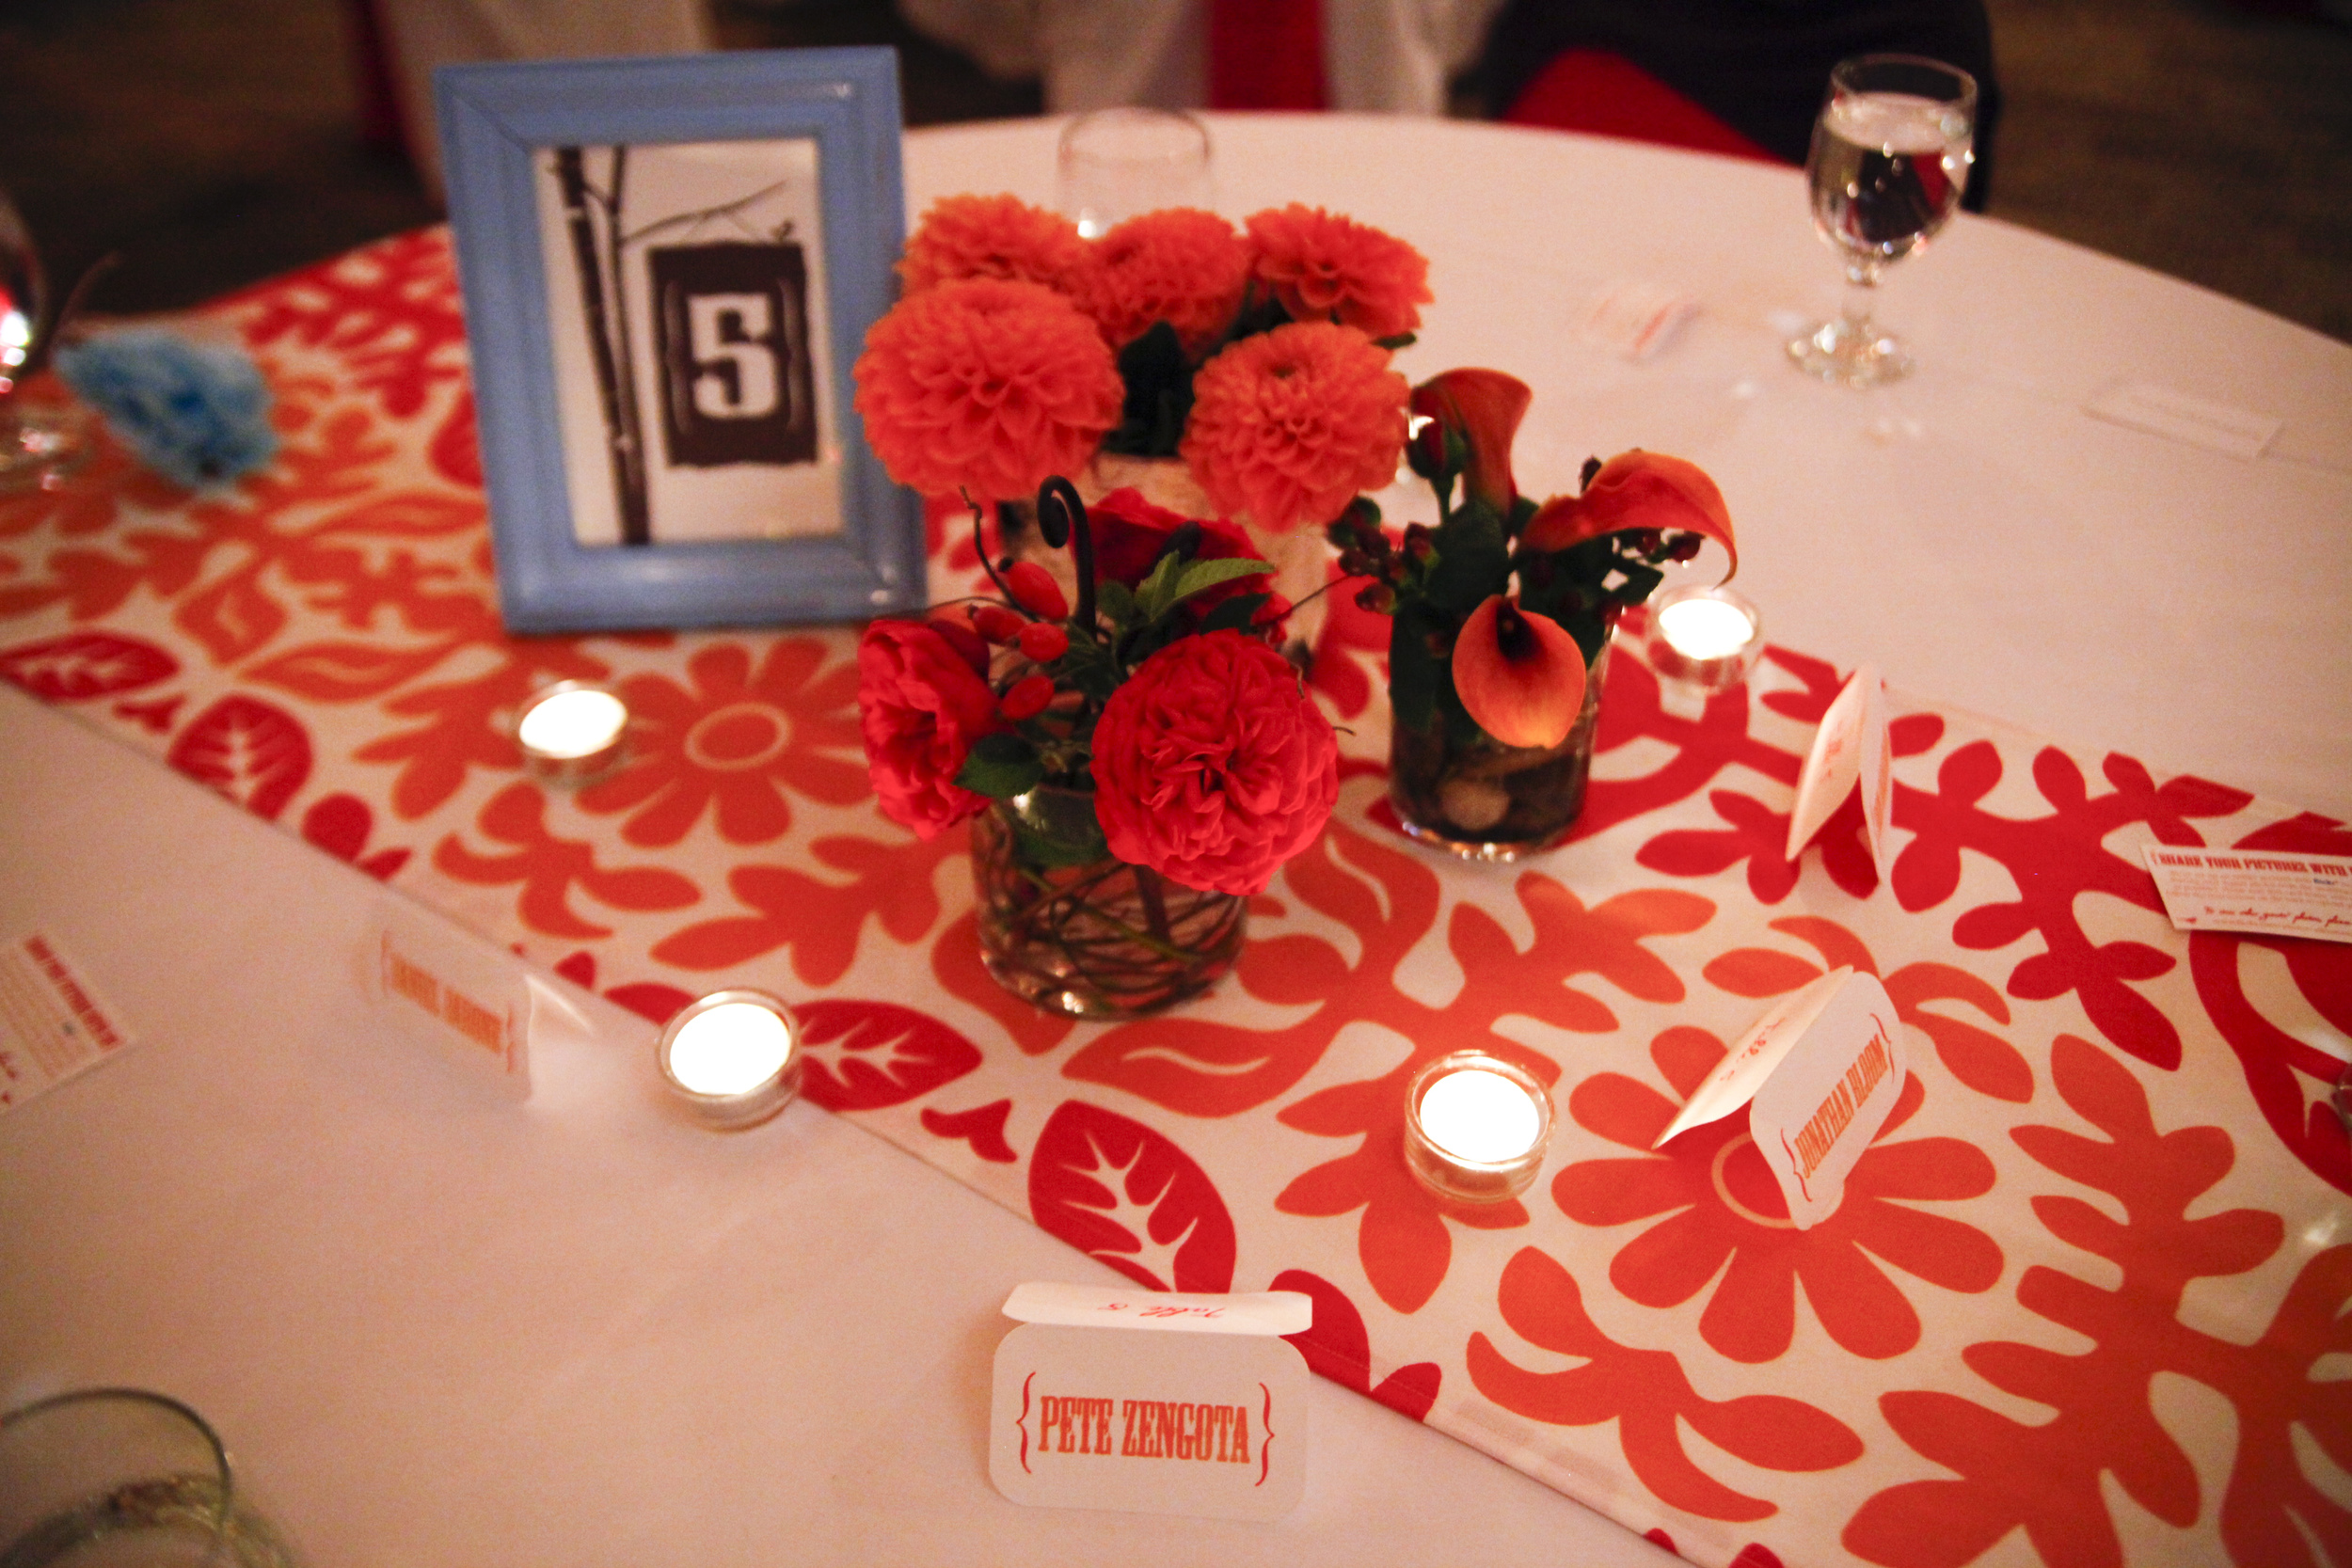
I had pretty clear visions for what I wanted most of our wedding details to look like... the reception tables, however, put me into an indecisive panic.  Our reception took place in a fairly typical resort ballroom with wall to wall windows on two sides.  Aside from these windows, the room itself didn't have a ton of character.  (I'll confess that the ballroom wasn't exactly the converted barn I'd dreamed of, but I learned pretty early on that when 90% of your guests are from out of town and you have to plan for the unpredictable Pacific NW weather - a dream wedding location is one that requires minimal travel and ensures your guests aren't dodging puddles on the dance floor.  And I really can't complain - the mountain setting and resort itself were simply perfect.)

I had to come up with ways to personalize the tables that were small in scale so as not to compete with the gorgeous view, but still big enough to transform the space into something that was fun, charming, and unique.  Oh, and they had to be budget friendly because we'd reached a point with the decor where things could easily (very very easily) get way out of hand.  Hence - DIY table runners.

I searched high and low for the right ones, since making them seemed out of the question given the timing.  But the rental ones just didn't seem right and even if I had found ones to buy (which I didn't), I couldn't justify the cost.  This is when having a bridesmaid that likes to shop (okay, likes is a total understatement in her case) comes in very handy.  Sarah remembered an Ikea fabric that we'd both seen a million times and after pricing out the cost of making my own vs renting or buying, it was clear this was the way to go.  (Did I mention Sarah also volunteered to have her mom go to the Ikea in Houston to get me the rest of the fabric when the Portland store only had 6 yards and the Seattle store was sold out?  Thoughtful, resourceful, and totally willing to pimp out her mom during fabric emergencies - what more could a girl want in a friend!??)

Anyway, I calculated that I'd need each runner to be 3 yards in length, and that I could get 3 18" wide runners (with double fold hems) out of a 3 yard piece of the Ikea fabric.  I needed 12 runners in all so I purchased 12 yards of fabric, which totaled $83.88 or about $7 a runner.  Not too shabby!  On top of that, they were pretty easy to make (one of those projects where the cutting takes longer than the sewing) and surprisingly one of the easier DIY wedding projects I took on.

PS... these runners are currently in storage, waiting for me to repurpose them or find them a new wedding to attend.  If you're interested in them, please let me know! :-)

lemon sorbet

Like most of the country, Portland is experiencing a massive heatwave this week. But unlike my friends and family on the east coast, most Pacific Northwesterners (including us) don't have central A/C. So for two weeks every summer we collectively roast in our homes, saying things like "be careful what you wish for" and "I hope the neighbors can't see me standing naked in front of this fan right now." It's not pretty. But this year we were prepared. We went to the store on Monday and bought a window A/C unit for our bedroom and the ingredients for a lemon sorbet. If lemonade is the perfect summer drink, lemon sorbet is the perfect summer dessert - especially when the temps get into the triple digits.

The recipe only yielded 2 and 1/2 cups, so I doubled it. It kind of defeats the purpose if the heatwave lasts longer than the sorbet, right? Right. I ended up needing 6 lemons to get 2 cups of lemon juice, which I ran through a fine mesh strainer before mixing with the simple syrup.

After the mixture reached 40 degrees it was time to put it in the ice cream machine. Oh, how I love this part. The freezing took approximately 25 minutes, after which I put the sorbet into a bowl and let it harden for a bit in the freezer.

Yuuuuummmmm. With a handful of cut strawberries (half store bought, half from our garden) this was such a tasty and refreshing dessert. It's going to be even hotter today so we'll definitely be having this again tonight. And tomorrow night...

fourth of july recap

Our 4th of July went something like this...

  1. wake up at the crack of dawn to run 13.1 miles around Sauvie Island
  2. celebrate another successful race with pancakes, bacon, and coffee
  3. attempt to nap
  4. prep food for the block party
  5. sit down whenever possible
  6. limp outside to join neighbors in games, eating, and drinking
  7. make sure Rocco doesn’t bark at the babies
  8. take Rocco back inside after he barked at a baby
  9. eat more, drink more
  10. watch fireworks
  11. move to backyard for firepit and smores
  12. deplete any remaining energy while attempting to stay awake past midnight
  13. blissfully fail at #12 and crawl into bed

Tired yet?  Yeah, me too.  So let’s get to the good stuff... the food!

Odd numbered houses were tasked with making sides (the even numbered houses got desserts) so I made our default pasta salad – Giada’s Antipasto Salad.  Not knowing how many people were going to attend and how much the other houses were making, I made about 5 times more than I needed to and will now be eating pasta salad for 3 meals a day for the next week.

We had the opposite problem with our other side dish – deep fried pickles.  If you’ve never had deep fried pickles, you haven’t really lived.  Honestly.  They’re worth buying a deep fryer for.  I’ve had them at restaurants and they’re never as good as homemade.  Many restaurants take the pickle slice approach, which is a shame because the spears are hands down the way to go.  But the home deep fryer also makes things less greasy than what you find at restaurants or state fairs… I don’t know why that is, but it makes me feel a little less guilty.  (We figure it’s a slippery slope from deep fryer purchase to The Biggest Loser, so when Jared and I bought the deep fryer we pinky swore that we’d only use it 2-3 times a year and we’ve stuck to it.  Yes, we pinky swear.  We also pass each other notes, talk in secret code, and promise to be bffs 4ever.  You don’t do that with your significant other?  Oh.  Damn.)  Anyway, the thing about the pickles is that each time we make them I swear I’m going to take pictures, and then the whole batch gets eaten before I can even get the lens cap off.  This time was sadly no different.  But in case you’re curious, they pretty much looked like this:

At one point in the evening there were several people holding a deep fried pickle in one hand and Jared’s home brew in the other, which was pretty awesome.  I don’t know if I’ve ever mentioned it on here before, but my husband has become a pretty avid home brewer over the past couple years.  So when an email went out to see what people could bring to the block party, I volunteered a keg of Jared’s beer.  It was sort of like the marriage equivalent of taking the training wheels off your kid’s bike and hoping like hell they don’t curse your name as they’re being carted off in an ambulance.  Thankfully, his beer was a rousing success (duh!) and before we knew it, Jared’s was the first keg finished and he breathed a massive sigh of relief.  I did, too, it was just drowned out by the groaning that occurred every time I had to move.

Bakerella's Congo Bars (and why they're worth the blisters)

We got invited over to our next door neighbors' house Friday night for a BBQ, which gave me the excuse I'd been looking for (i.e. desperately hoping for) to make the Congo Bar recipe Bakerella posted last month.

She gave two options for mixing the batter - stand mixer or by hand.  She tried it both ways and said the hand mixing approach turned out better.  I sure hope she's right because by the time I was done mixing the super thick batter I had multiple blisters on my right hand.  But, as the title of this post suggests, the blisters were totally worth the delicious goodness that came out of the oven.

Holy mama!  I promise you, they taste even better than they look.  As Bakerella notes in her post, they took much longer than 30 minutes to cook through... probably more like 40.  But, man oh man were they good.  I'm debating making them again with Rolos.  Aaaaaaaaaand now I'm hungry.

sink skirt storage solution

My friend Angela (mom to the beautiful Mirabel, wearer of this while nursing) came to me late last year with a bathroom sink dilemma.  (And yes, that means it's taken me an inexcusably long time to write about this particular project.)  She sent me this picture of her rather wide sink with no built in storage.  She wanted to be able to store extra toilet paper and such underneath, but wanted it hidden.

Her idea was to attach a sink skirt to the bottom ledge of the tile, but after weeks of searching she couldn't find one that would work.  So she very sweetly asked me to help her out.  I wasn't very familiar with sink skirt construction, so I found a few sink skirt tutorials online and used this as my base (with a few tweaks.)

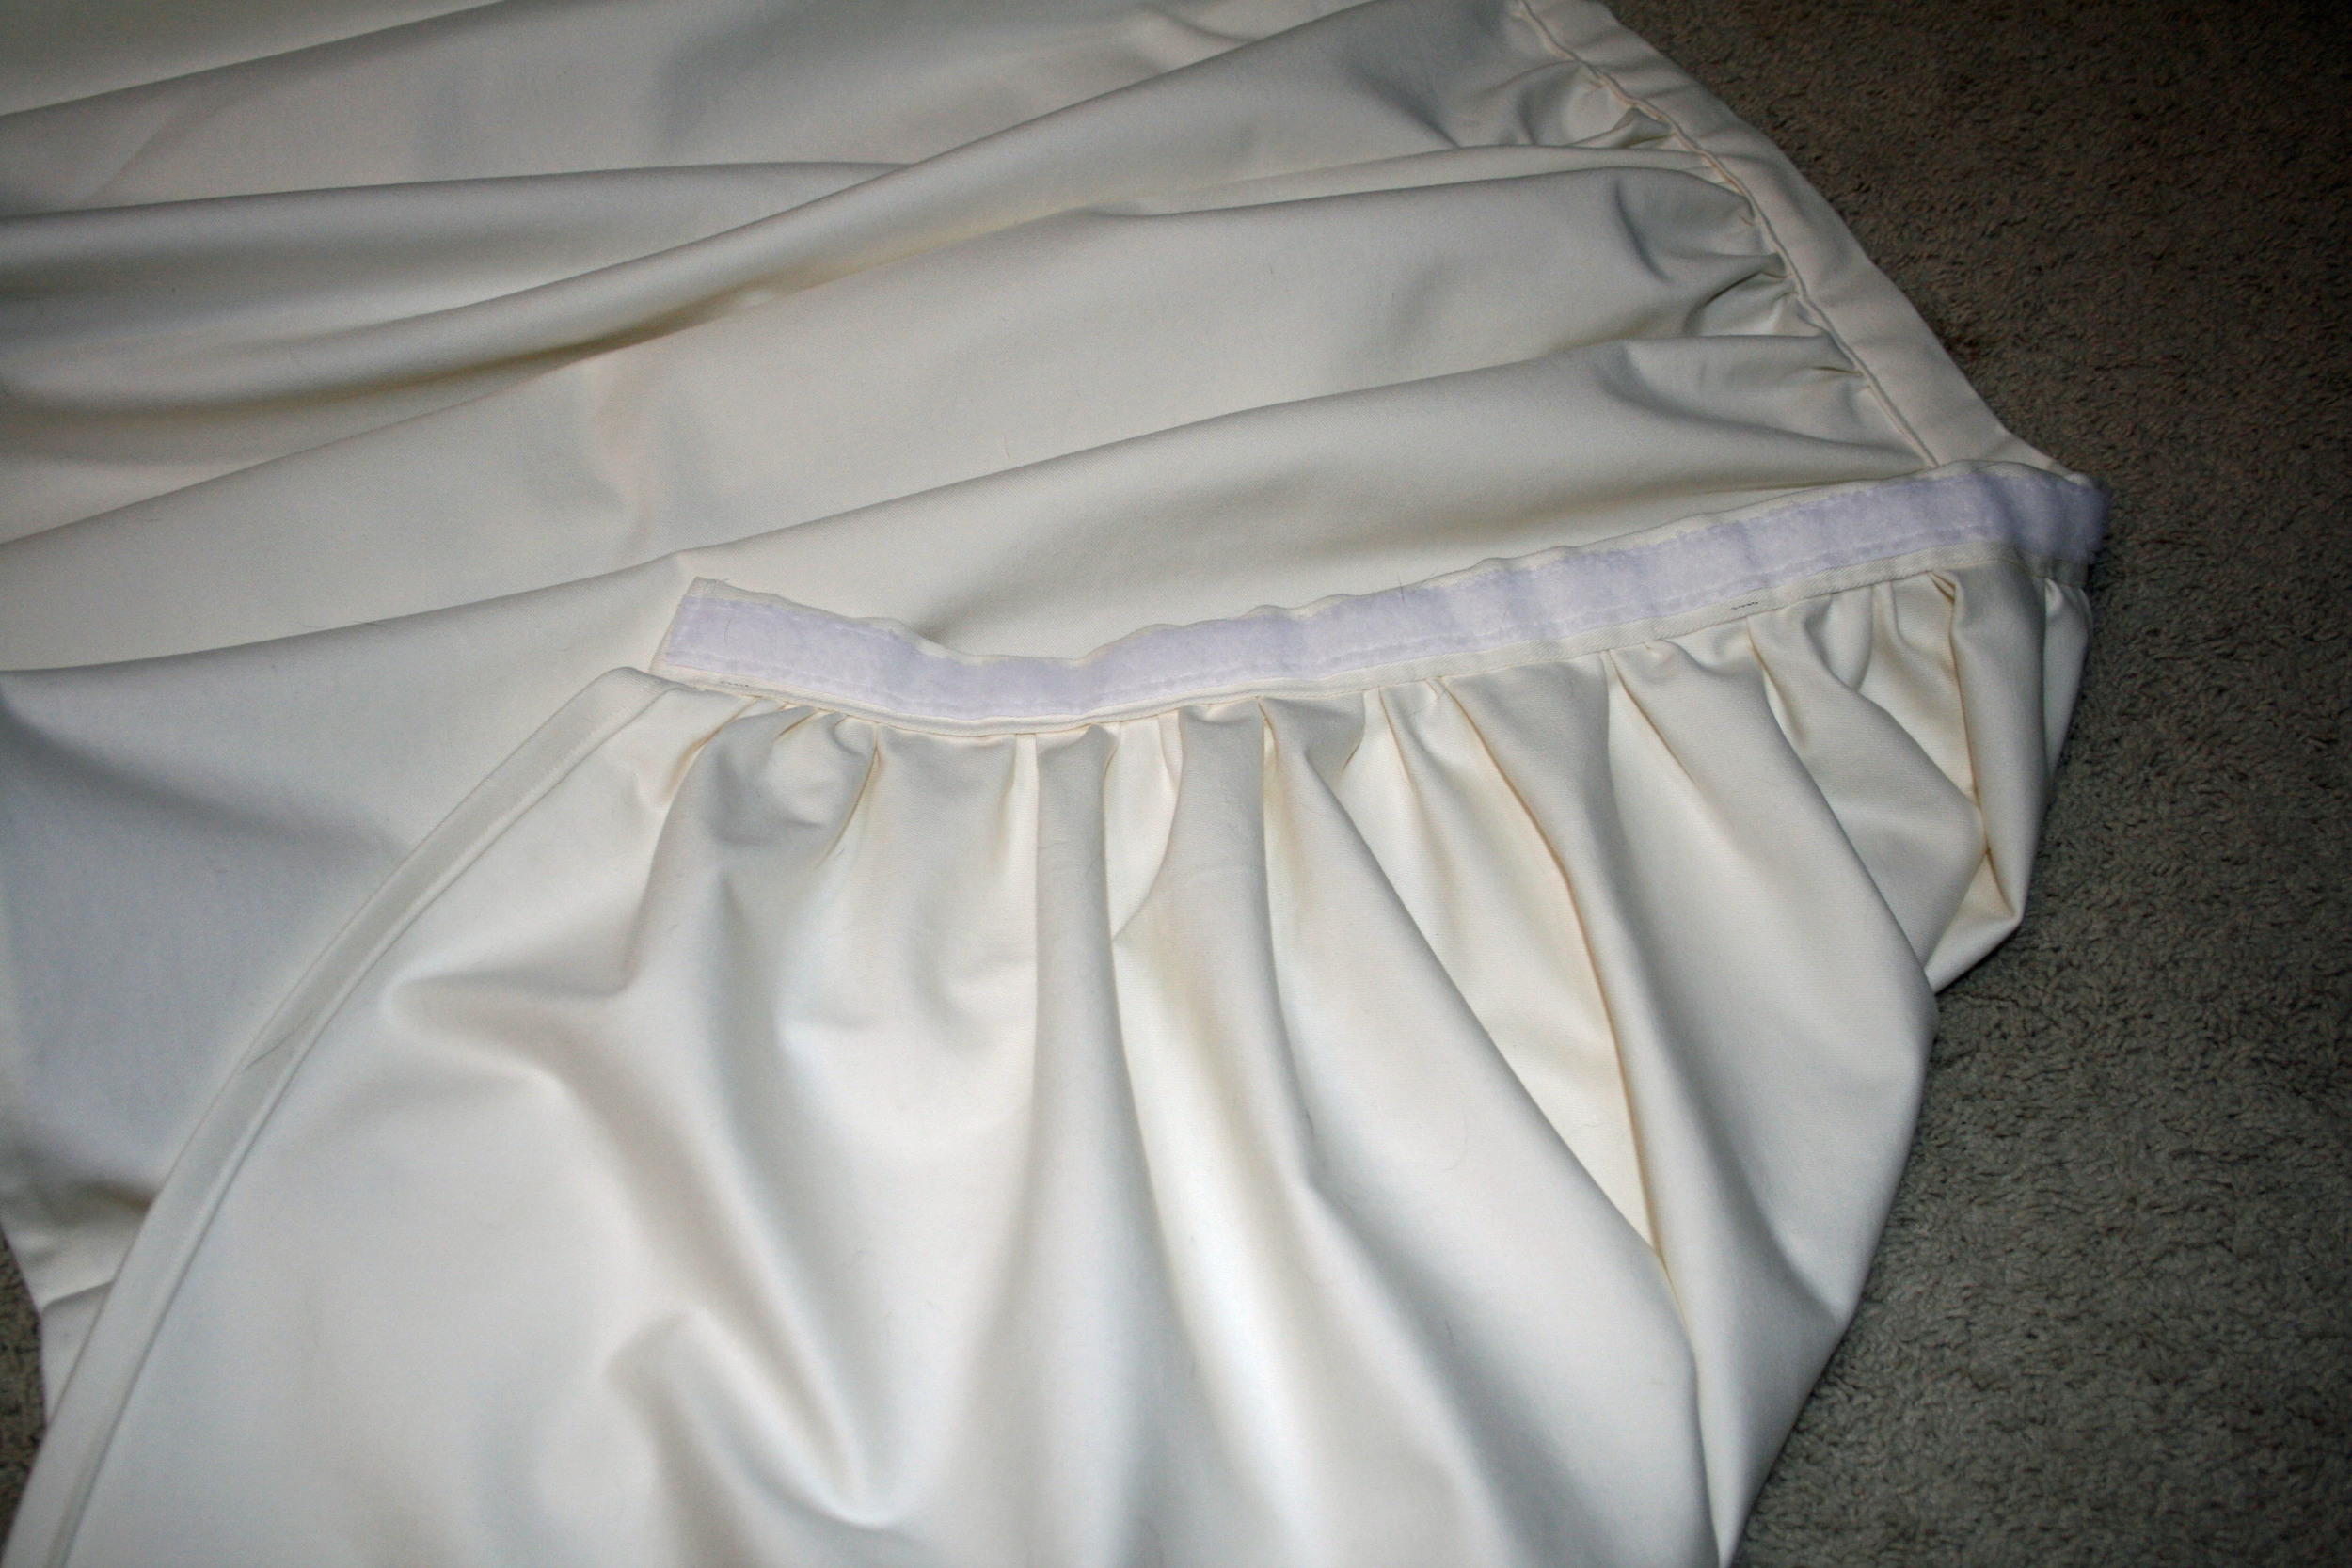
The measurements of Angela's sink are 28" x 60", so I used a 30" x 122" (double the width, plus 1" extra on each side) piece of heavyweight cotton twill fabric.  I also cut a 6" x 61" strip for a top cuff.  More on that later, but the primary reason I strayed from the tutorial here is because I planned to use Sew On and Sticky Back Velcro to attach the skirt to the sink.  I felt like regular sticky velcro wouldn't be strong enough to hold up the weight of the skirt, and the sew & stick seemed like a great solution.

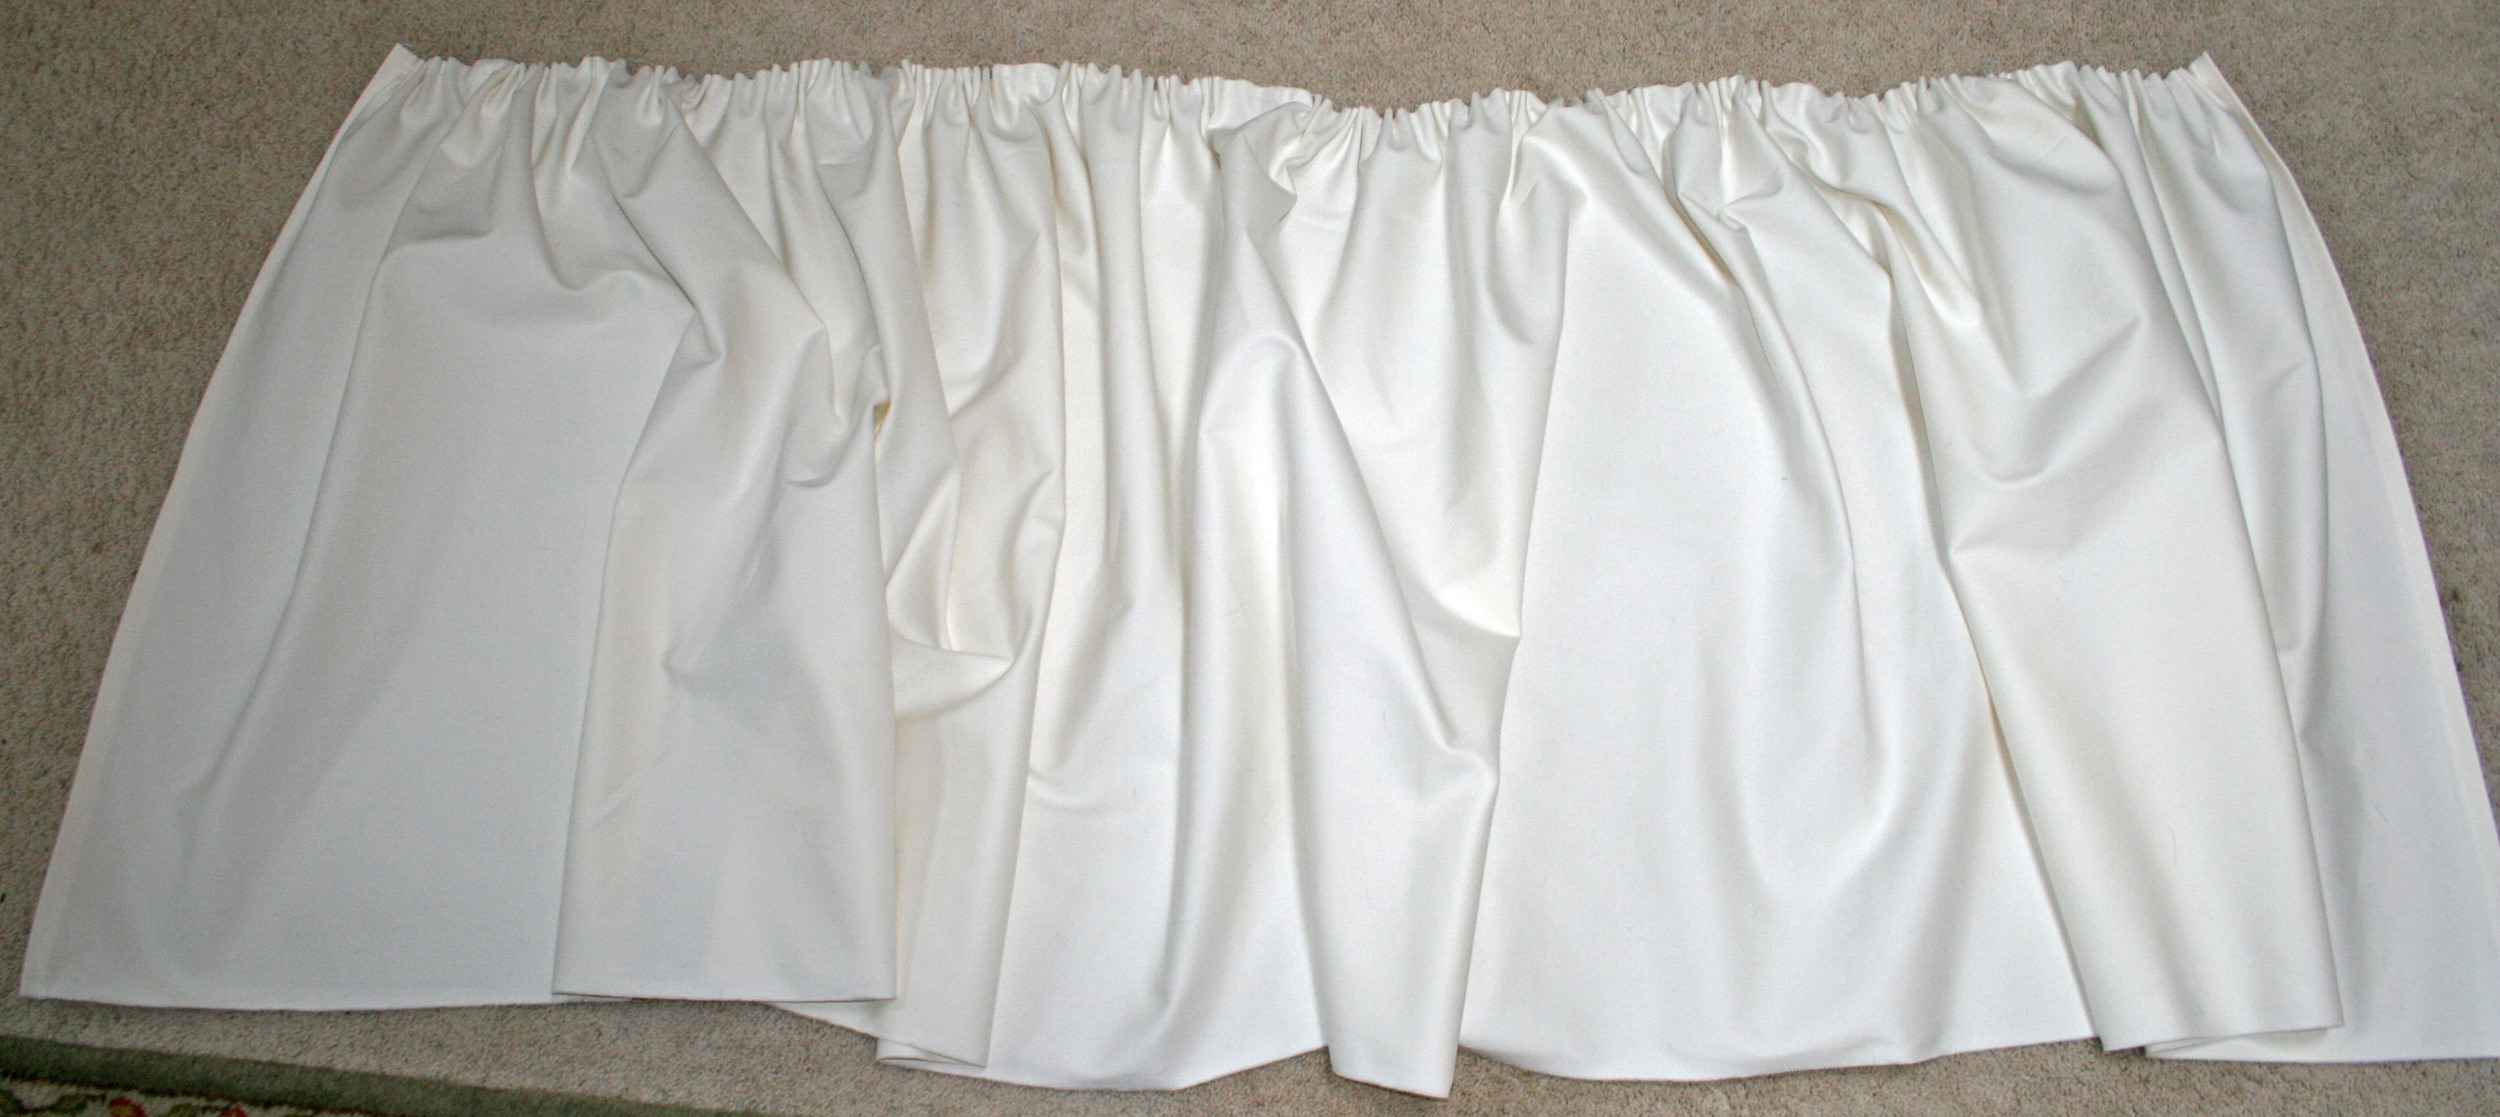
Once all my fabric was cut and thoroughly lint rolled (trying to keep dog hair off of a 10 ft piece of cream colored fabric is a losing battle) I started hemming the sides with a 1/2" double fold hem, and then the bottom.  Then it was time to baste.  The fabric was not liking my attempts to machine baste, so - starting in the middle of the skirt and working my way out on each side - I hand basted two rows about an 1/8" apart.   Then I gathered the skirt until it reached a width of 60".

Now back to that cuff... I took the 6" x 61" piece,  folded in a 1/2" on each short side, and pressed.  Then I folded the whole thing in half lengthwise and pressed.  I folded each long side in toward the center crease and pressed so that the cuff was 1.5".   Then it was time to attach the velcro.

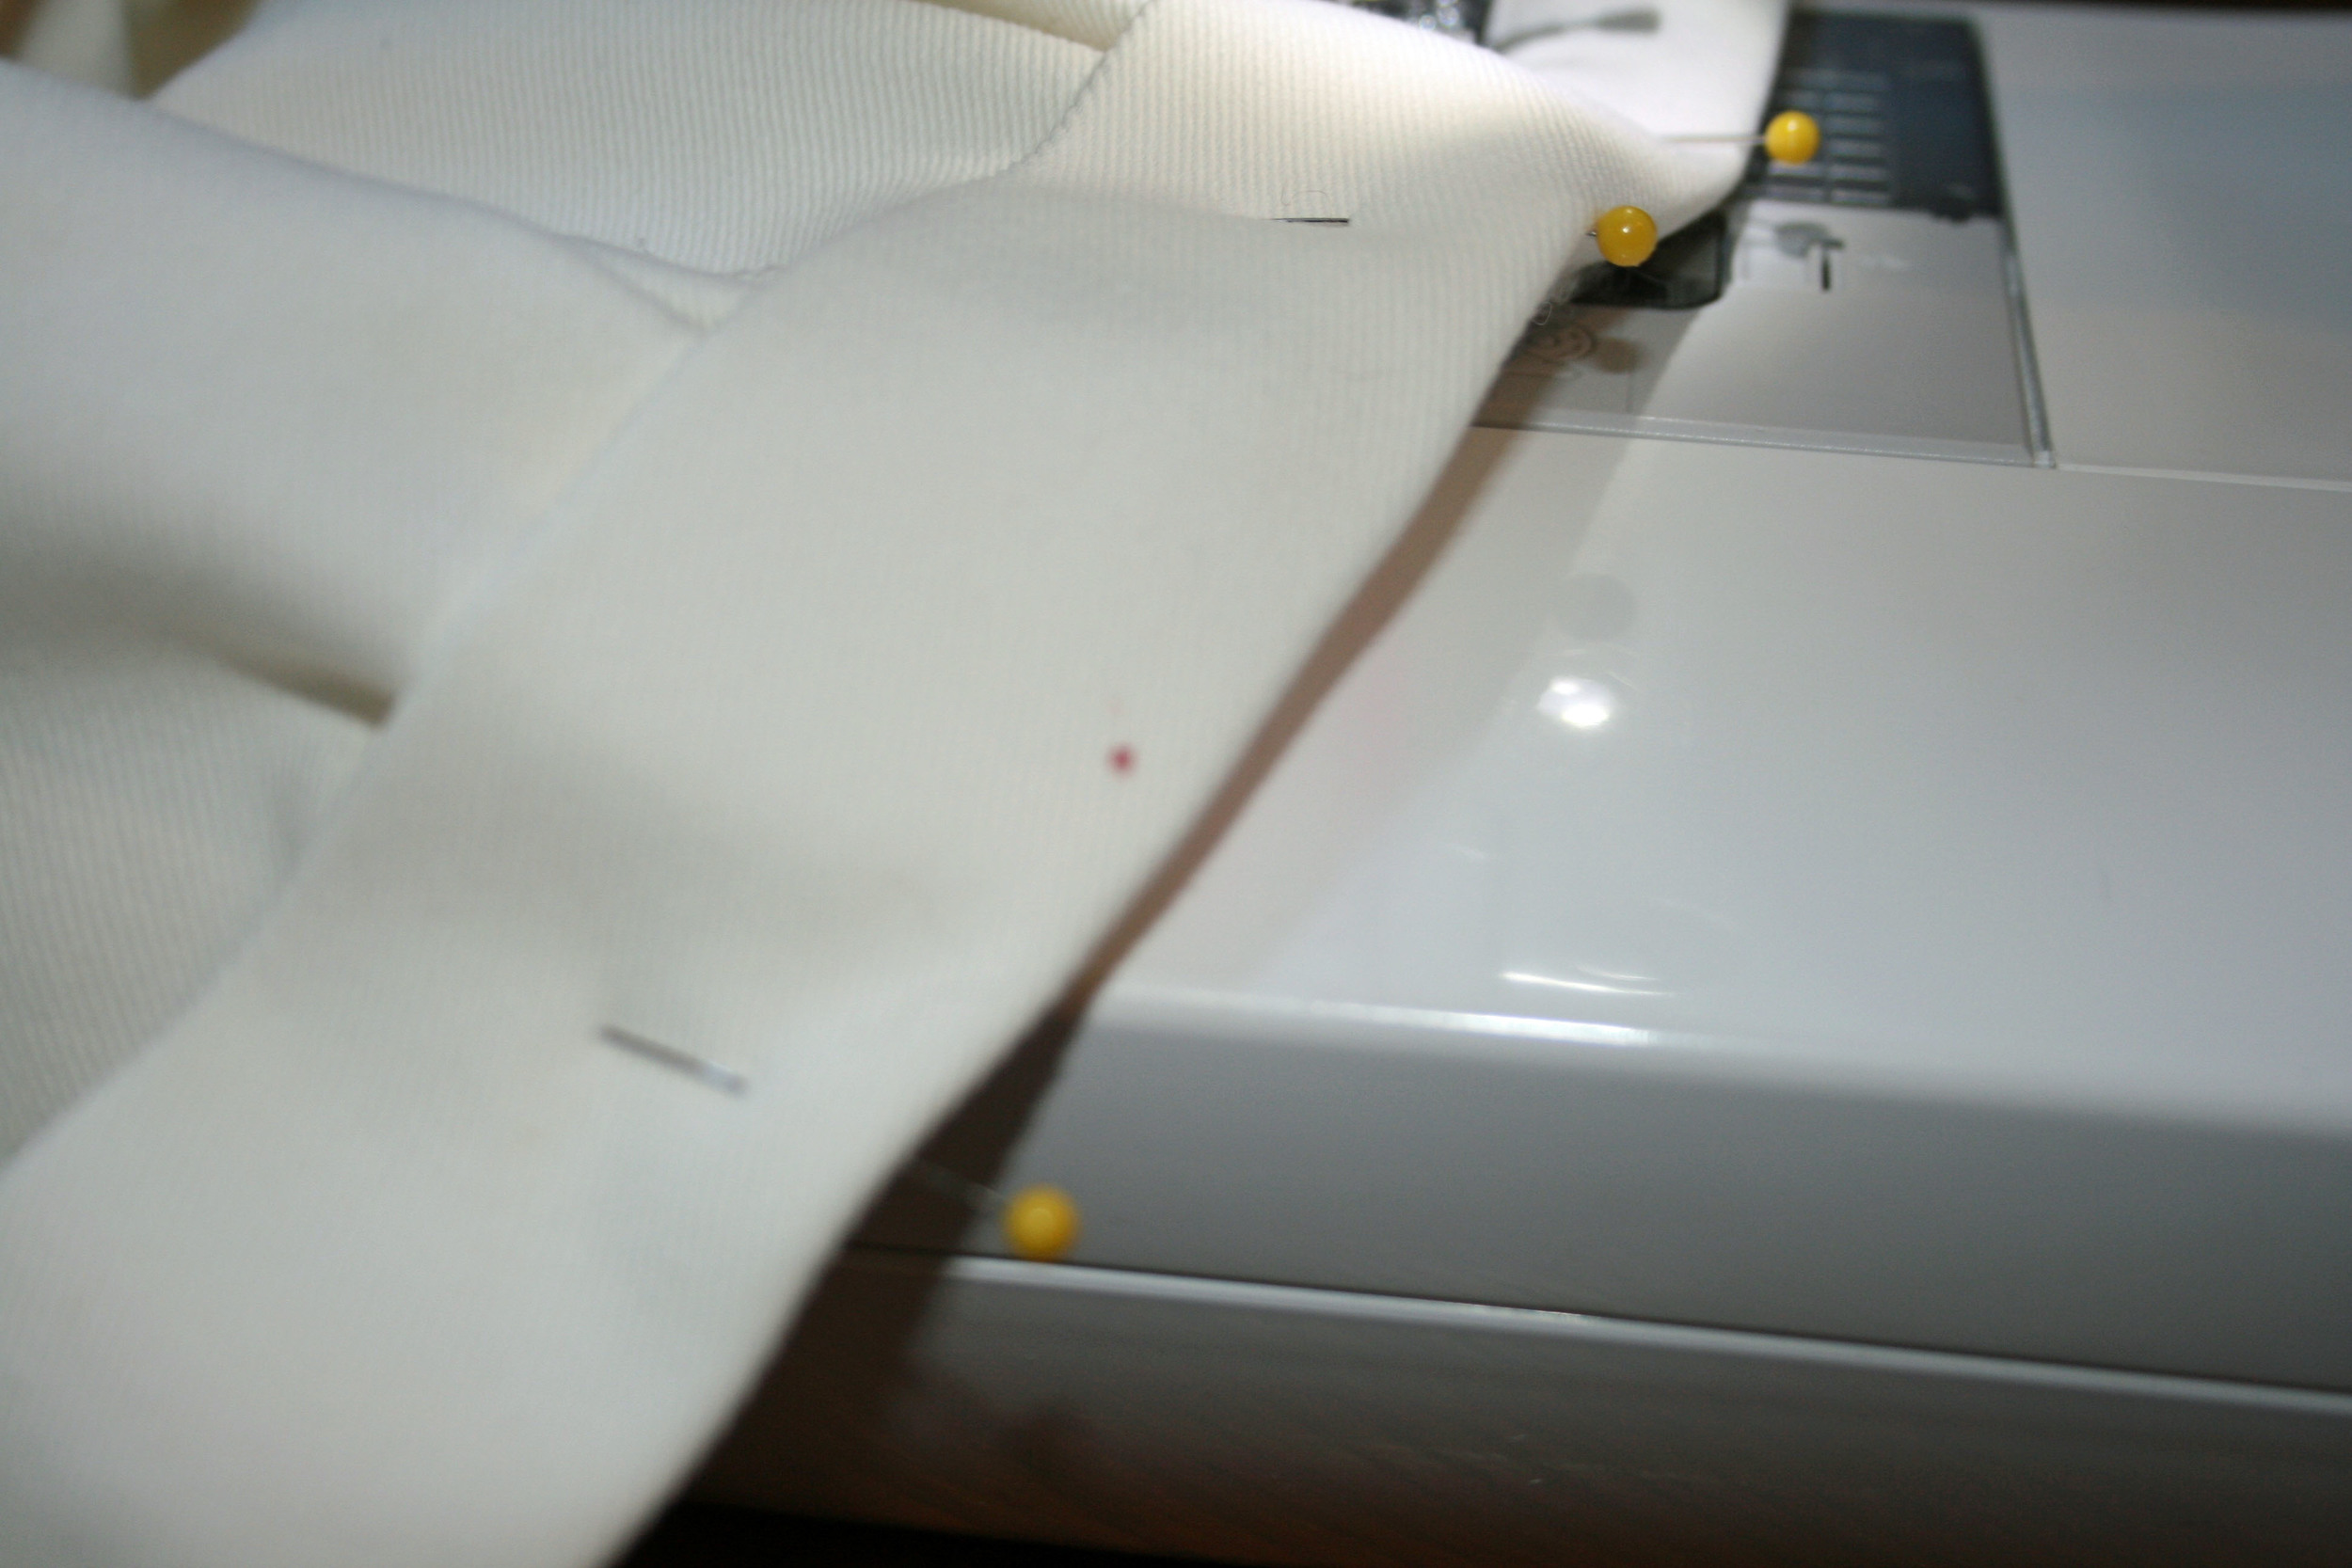
Once the velcro was attached, I was ready to sew the cuff onto the skirt.  5 feet of pinning later...

You see that little out of focus red dot on the cuff?  Yeah, that's blood.  My blood.  Because I'm a klutz.  Especially when it comes to pinning.  When I was making the Weekender Bags my arms looked like I had taken up kitten wrestling.  It wasn't pretty.

Excuse me for a minute while I tout the magic of the Tide Go pen.  If you don't already have one in your sewing kit, go get one.  Immediately.  I used it on the blood spot and - voila!  You can see the resulting wet spot in the picture above, but it left no evidence of my clumsiness once it dried.  Blood, people.  It got out blood.  Don't ask me how.  Just go get one.

Anyway, I attached the cuff with a 1/8" seam (or 1 and 3/8", depending on how you're looking at it), closed up the ends (also using a 1/8" seam) and the sink skirt was done!

I finally got to see the sink skirt in action when I went home to VA in April, and was relieved to see that it's working out exactly as Angela had hoped!  Her solution was brilliant, and I'm happy I was able to help her out.  I may have to make one now for MY bathroom!

Sock Monkey onesie gift set & tutorial!

I’m at a point in my life where it seems like most of my girlfriends are either pregnant or just had babies, and as a result I’ve become slightly obsessed with making baby gifts for them.  I started making applique onesies when Lindsey (awesome mama and best friend extraordinaire) was pregnant with her son, Will, last year.  The necktie tutorial on Crap I’ve Made got me hooked and from there I started making my own applique designs.  What I love about applique onesies is that they’re quick, a great way to use up fabric scraps, and there are endless design possibilities.

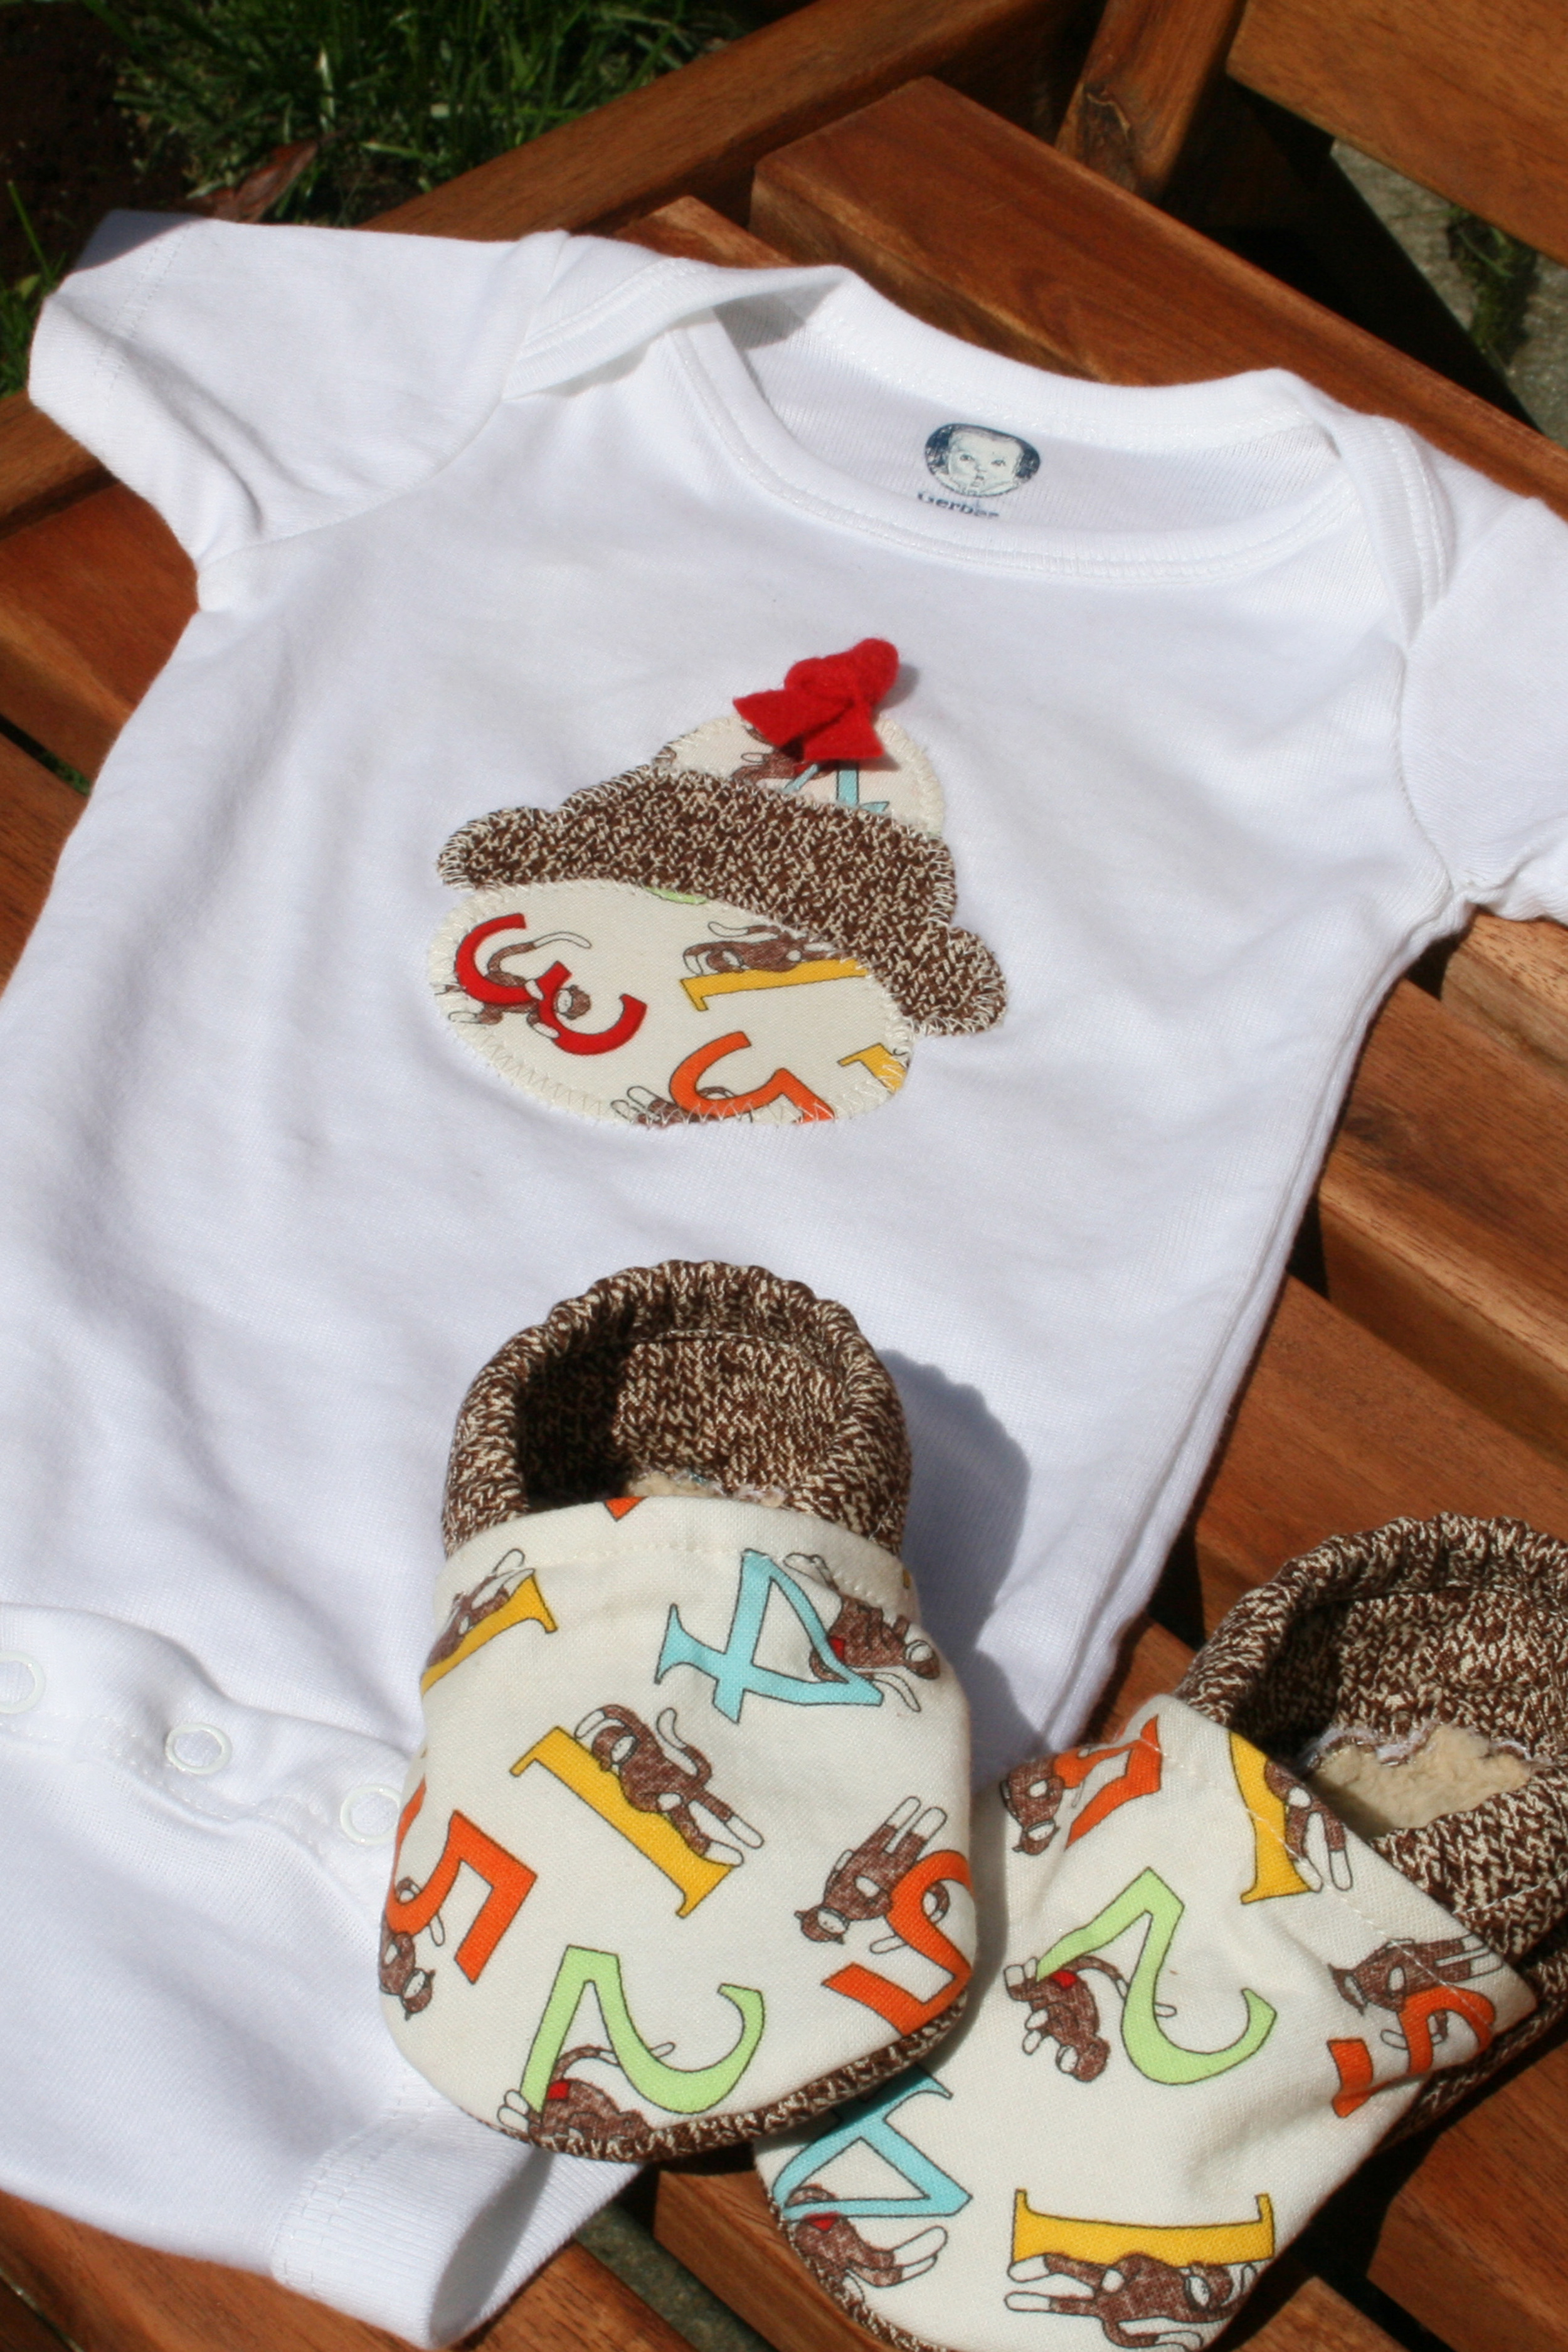
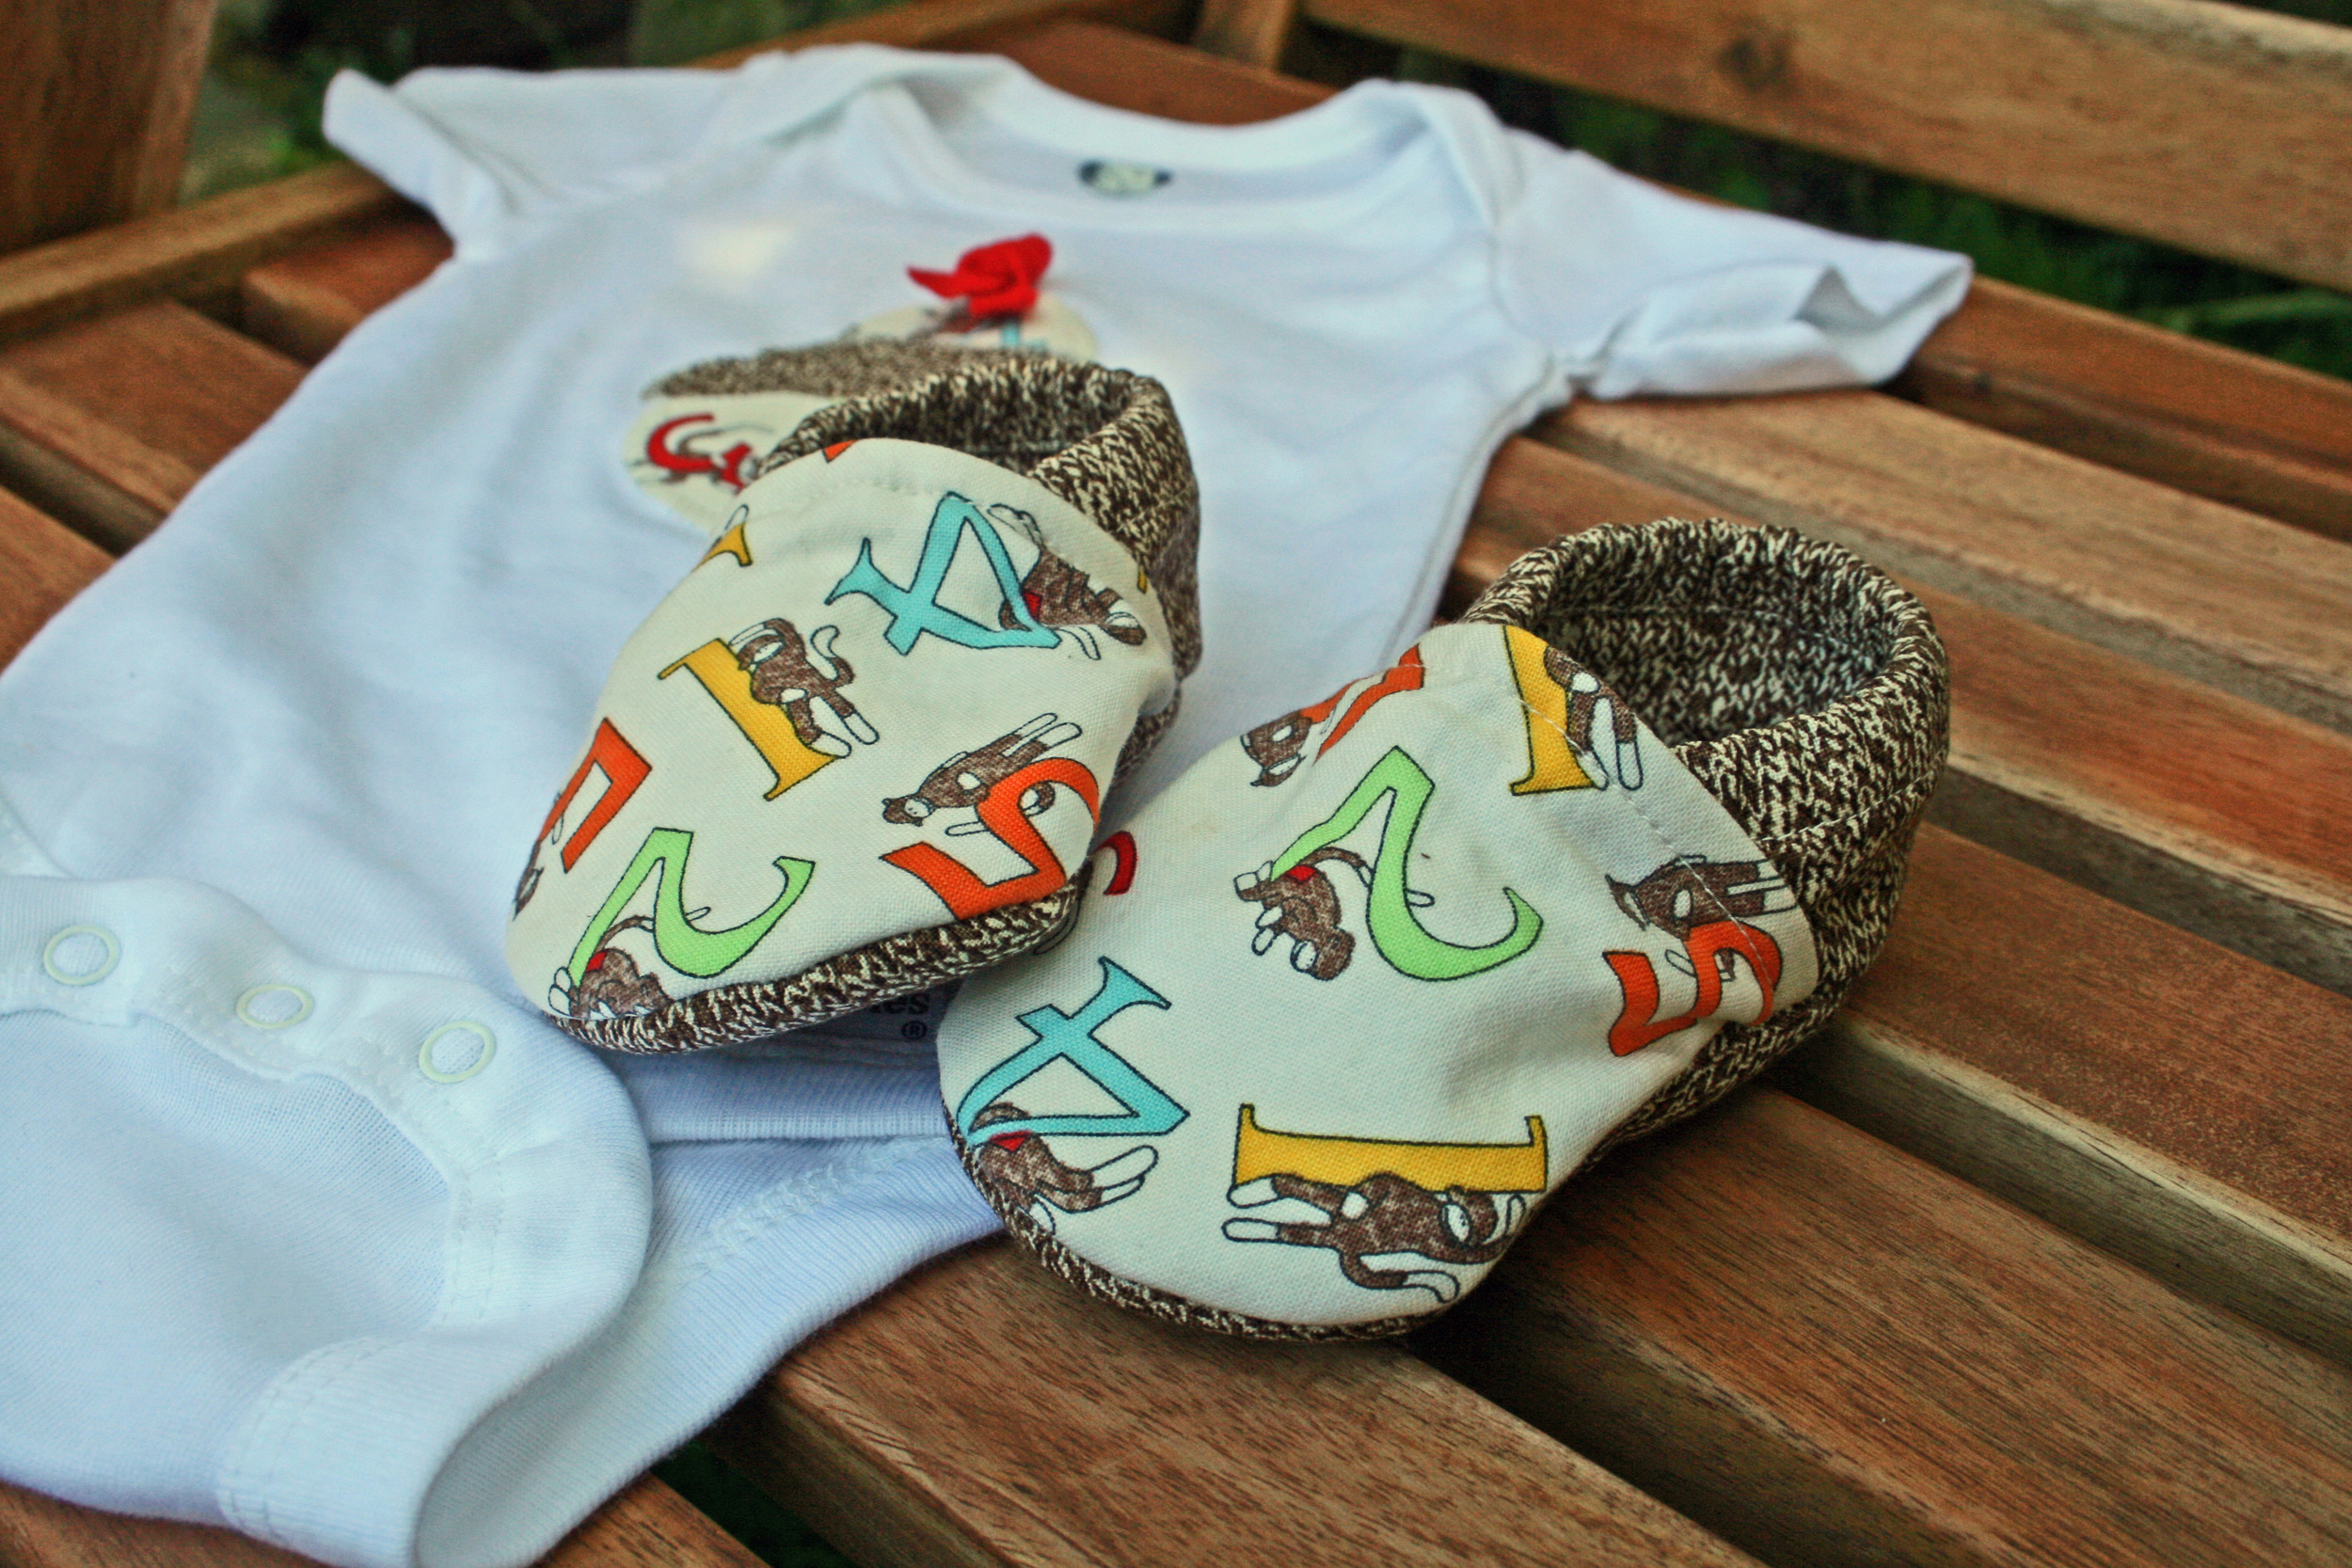
When deciding what to make for two of my girlfriends who are due this summer, I knew I wanted to try to use up some of my leftover Sock Monkey fabric so I created a Sock Monkey applique design using Microsoft PowerPoint (a program I use daily at work, but have recently started experimenting with for sewing and design projects).  You've probably noticed by now that I have a hard time stopping at just one baby gift, so when I came across this tutorial for cloth baby shoes, the Sock Monkey gift set was born.  They’re both having boys, but I think the set works for either a boy or a girl.

The cloth shoes were a little tricky to work with due to their small size and all the layers of fabric and interfacing, but - like most baby stuff - they were pretty quick to make.  It probably took me longer to cut out all the pattern pieces than it did to actually sew them together.  One thing I'd recommend is to play around with the length/tension of the elastic because if it's too tight it makes the tops of the shoes bunch up.  If you're attaching a little ribbon or button to the tops then this won't matter so much, but it can look a little wonky if you're leaving them bare.

Okay, now on to the exciting part...

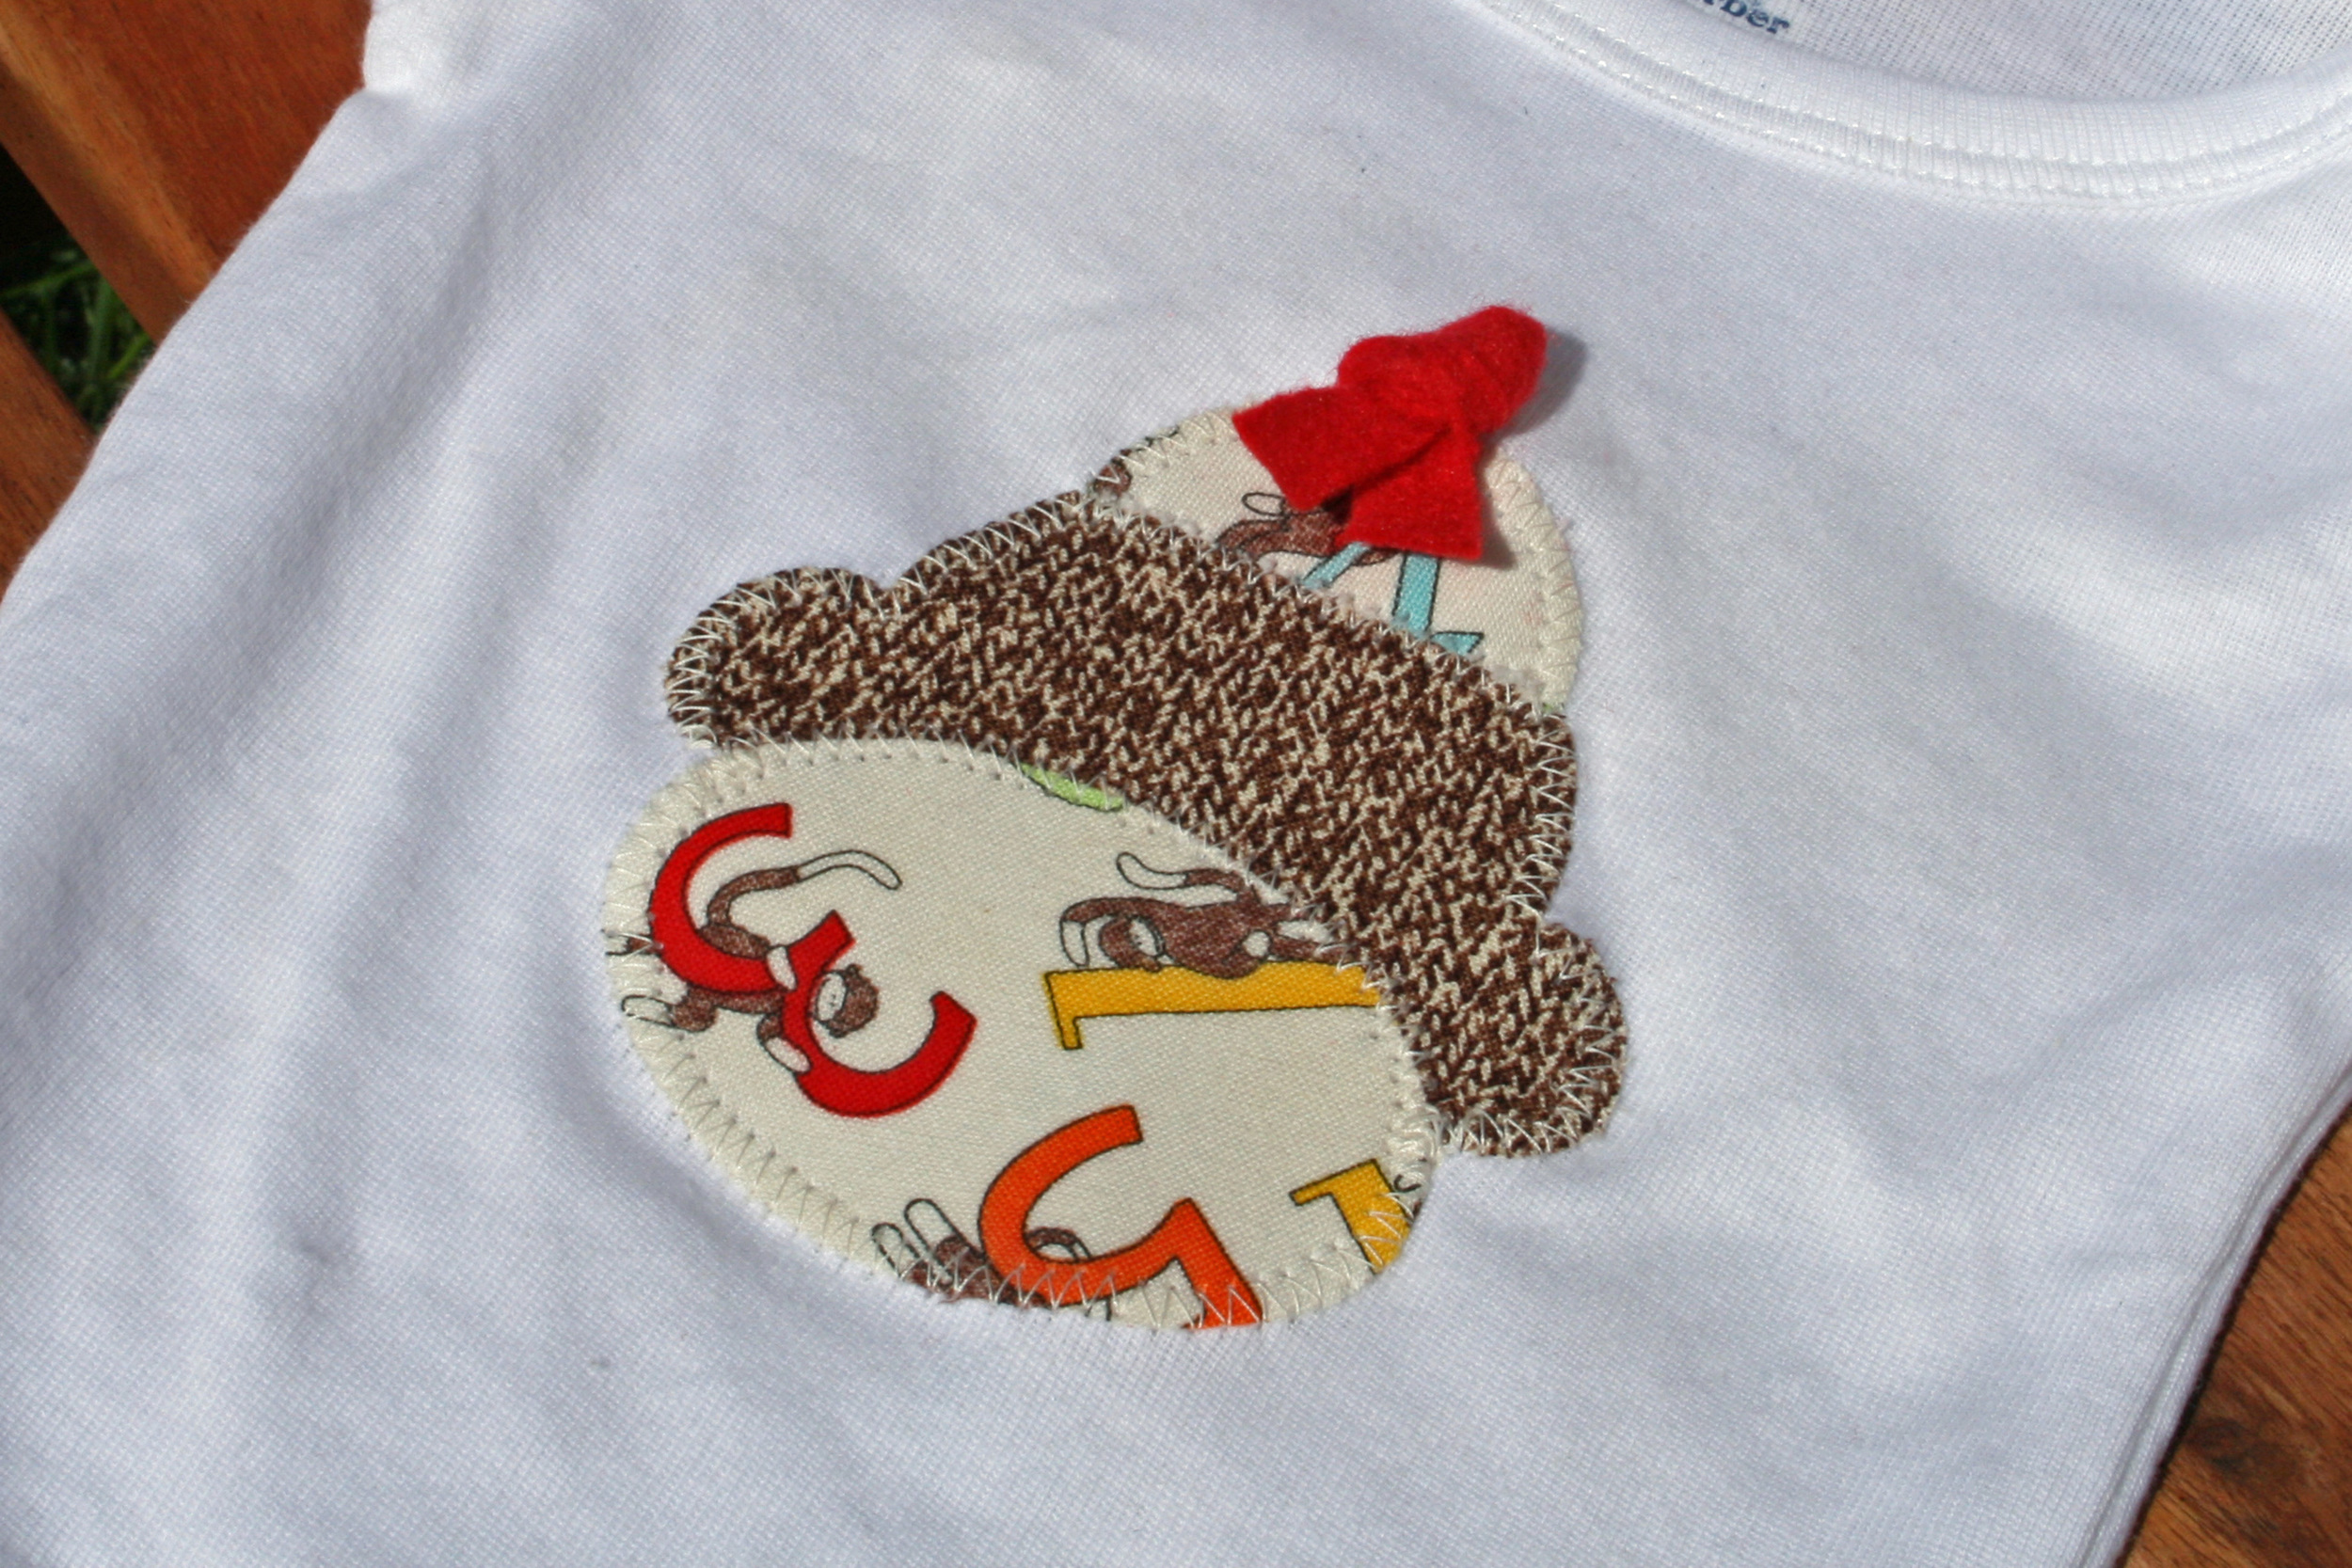
I'm so thrilled with how the Sock Monkey onesie design turned out that I decided to make it into my very first Made by Bird tutorial!  Click here to download the PDF pattern: [dm]4[/dm](The materials list and instructions are in the PDF and located below, but you'll need to download the PDF to get the pattern pieces.)

Here are the materials you'll need to make the onesie (or tee if your tot is a little older):

  • Baby bodysuit or tee
  • Sock Monkey pattern (see PDF download)
  • 4"x4” piece of cream colored Sock Monkey fabric by Moda
  • 3"x4” piece of brown sock texture Sock Monkey fabric by Moda
  • ½"x4” strip of red felt, ribbon, or fabric
  • Wonder Under
  • Thread
  • Sewing machine
  • Hand sewing or embroidery needle

And here are the instructions:

  1. Prewash your garment and fabric scraps in hot water.  Prewash the red strip for the hat in the warmest water your material can tolerate.  The goal here is to prevent any future bleeding when you wash the finished onesie or tee.
  2. Fuse Wonder Under to the wrong side of your fabric scraps (reference the Wonder Under packaging for fusing instructions.)
  3. Print the sock monkey pattern pieces found on page 2 of the PDF pattern.
  4. Trace the hat and mouth pieces onto the Wonder Under paper backing fused to your cream colored Sock Monkey fabric, and trace the face piece onto the backing fused to your brown sock texture Sock Monkey fabric.
  5. Cut out all three pieces and line them up on your onesie or tee.  The top of the hat should be about 3-4” down from the neckline.
  6. Fuse the pieces to your onesie or tee.
  7. Zig-zag stitch around the perimeter of each piece.  Be sure to remove the flat bed attachment on your machine so you can easily slip the onesie or tee around the base.
  8. Fold the red strip for the hat in half and knot the top.
  9. Hand sew the knot to the onesie using embroidery floss or strong thread. You’ll want to make sure it’s very securely attached to the onesie or tee.

If you have any questions or comments, please leave them in the comments section below.  I'd probably pass out from excitement if anyone sent me pictures of their finished onesies, but since this is my first tutorial, any type feedback you have would be greatly appreciated.  :-)

super yummy strawberry ice cream

Among the many DIY activities that take place in my house, making homemade ice cream has to be my favorite. If you've never tried it, it's much easier than you'd think. We ascribe to the Alton Brown approach as the base for pretty much all our ice creams, so when I came across this recipe for strawberry ice cream (Jared's favorite) I knew I'd have to alter it a bit. I ended up with a hybrid of the two - the ice cream base from Alton Brown, and the strawberries and syrup from Recipe Zaar: made by bird's super yummy strawberry ice cream:

  • Strawberries & Syrup:
    • 1 pint fresh strawberries, hulled and chopped (chop them a bit finer if you have sensitive teeth, otherwise the bigger strawberry chunks will be too cold for your teeth when you're eating the ice cream)
    • 1 tablespoon fresh lemon juice
    • 1/4 cup sugar
  • Ice Cream:
    • 3 cups half-and-half
    • 1 cup heavy cream
    • 8 large egg yolks
    • 9 ounces vanilla sugar (I know vanilla sugar might seem a little unnecessary, but it's so worth it.)
    • 2 teaspoons pure vanilla extract

Several of the comments on FoodNetwork.com for Alton's recipe say that 8 eggs is way too many and make the ice cream too custard-like. I don't know who these people are and I don't know what they're talking about. The texture of the ice cream is beyond perfect (in the humble opinion of this ice cream super fan.) Anyway... I followed Alton's recipe and - without adding the strawberries - started churning the vanilla ice cream in the ice cream maker.

I made the strawberries and syrup the night before (the recipe says to make it only an hour before but life got in the way - thankfully the mixture was still good the next day!)

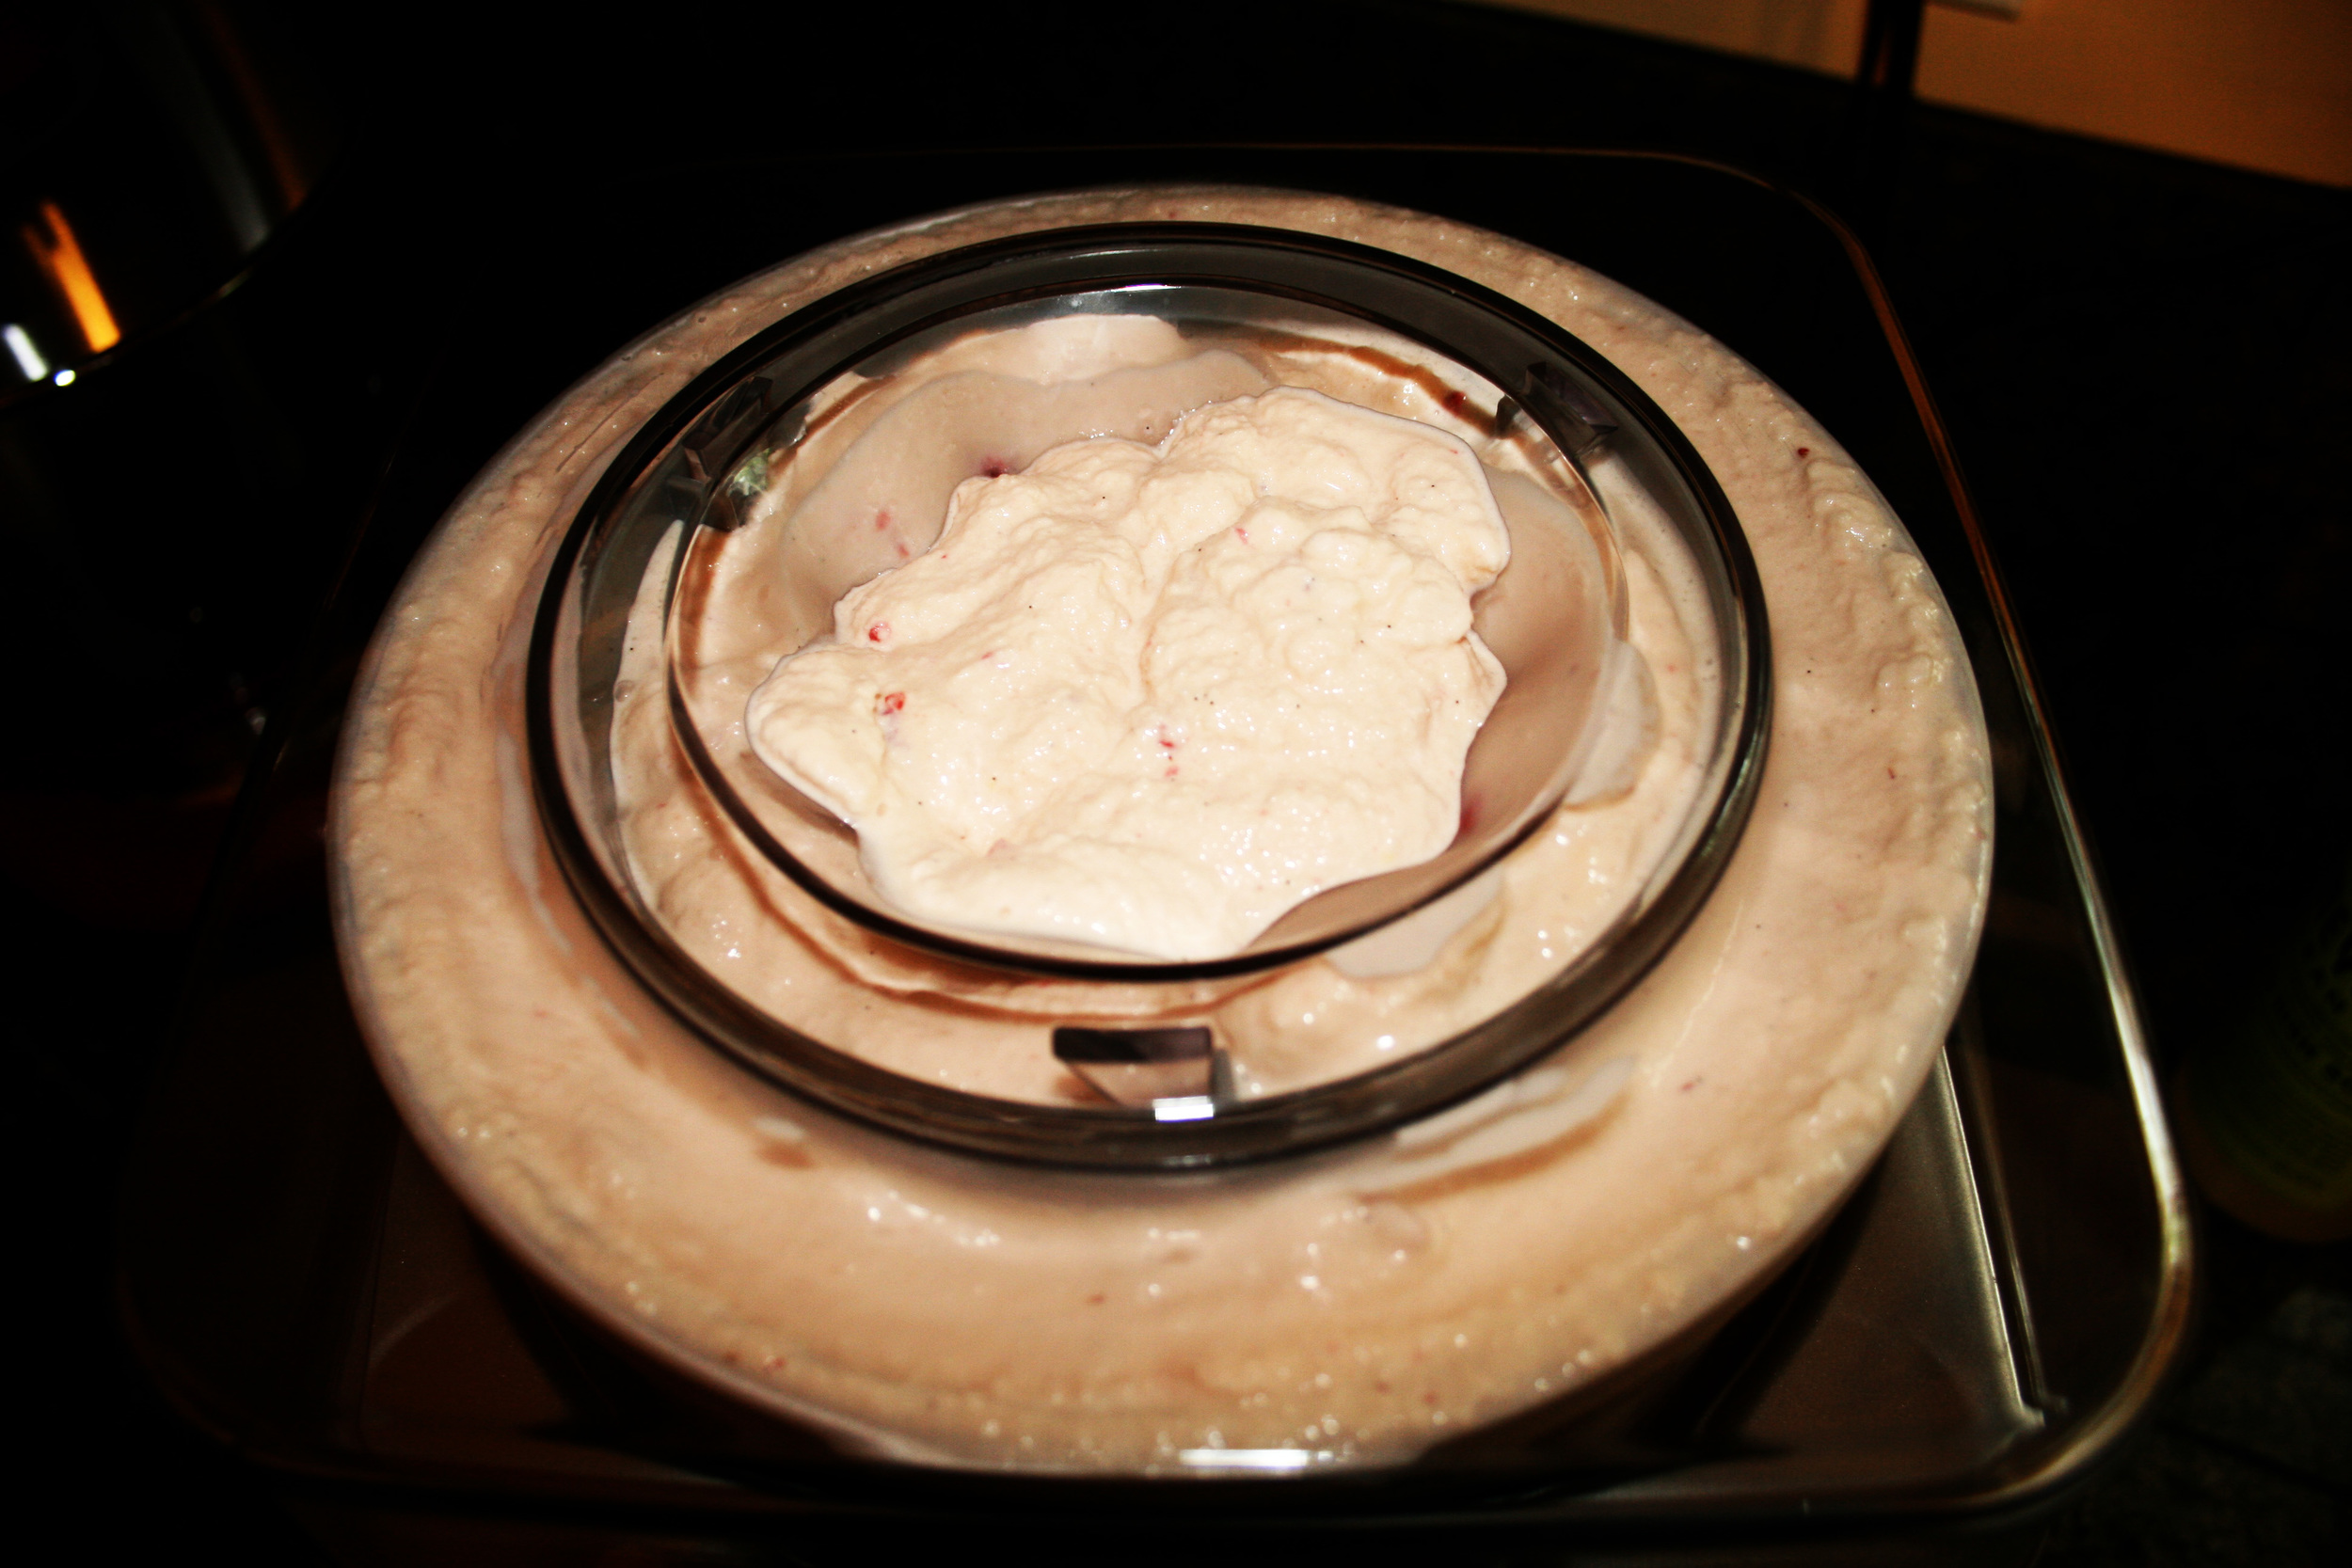
As much as I wanted to eat/drink the strawberry goodness, will power took over and the mixture made it safely into the ice cream maker. (At this point, I'd say the vanilla ice cream had been churning for 5-10 minutes and had just started to get thick. You could probably mix them beforehand, I was just experimenting with the timing.)

It was right about here that I knew this was going to be heavenly. I let it churn for another 20-30 minutes ("checking" it with a few or 5 spoonfuls along the way), then divided it into two air-tight bowls, covered the soft ice cream with wax paper, put the tops on, and waited approximately 4 minutes for it to harden before "checking" it again. You know, just to make sure it was freezing properly.

I have absolutely no idea what I ate for dinner that night... something insignificant compared to what was awaiting me for dessert. The hardened ice cream was well worth the wait (the whole half hour since my last spoonful.)

Enjoy!

five for 2010: a 6 month progress report

It's June now, which means we're halfway through 2010. And I'd estimate about I'm halfway to my goals for the year (which I suppose is better than being behind schedule.) To refresh your memory (all 5 of you who read my blog) my goals were as follows: 1) Make our first house feel like home 2) Re-engage at work 3) Open my own Etsy shop 4) Run a marathon 5) Improve my photography skills

And here's where I'm at with each goal:

1) While I don't think I'll ever be able to look around my house and say "it's done," we've definitely made a ton of progress toward making it feel like home in the past 6 months. I've been slacking on posting project recaps (I promise, they're coming!) but to summarize - we've painted almost every room, given both the front and back yards a major overhaul complete with veggies and a fire pit (thanks to my hard workin' green thumbed husband), invested a small fortune to air seal and insulate the basement and attic, remade the sun room into a great breakfast/lounging room, built a dining room table from scratch (the Modern Farmhouse Table thanks to the awesome plan at Knock-off Wood!), gutted the basement and made it into a livable space for storage, crafting, brewing, laundry, and hanging out, and outfitted our front porch with the requisite adirondack chairs and table. By the end of the summer I hope to have the landing and hallways painted (bye bye ugly mustard walls!!!) and finally hang our art and photos. It's been hard work, but it's been more than worth it. Most days I still can't believe we get to live here.

2) I'd say this one is 90% there. The last 10% will come when we move into our new office space at the end of the summer. We've been in a temporary, shared workspace since the company started up last September, and I'm really really looking forward to finally having our own space.

3) Ohh, my own Etsy shop. The thought of this finally becoming a reality later this year fills me with joy... anxious, terrified joy - but joy nonetheless. I just finished a prototype for 1 of my 2 initial products and it looks even better than I hoped! Very very exciting. If everything goes as planned, I'm hoping to launch at the end of September when Jared and I get back from vacation. Stay tuned!! :)

4) This is the only goal that I had to change. You could probably sense from the way I talked about it that my heart wasn't exactly into the idea of running a marathon. It wasn't at the time, but I was hoping it would be when I started training. Sadly, it wasn't then either. I was doing a training run and everything inside of me was saying "Why are you doing this? Is this really something you want to accomplish or are you doing it because you feel like it's what you're supposed to do once you've checked the half marathon off the list?" To train for and run a marathon you REALLY have to want it, and I just didn't. This was Jared's goal, not mine, and after making the decision to do the 1/2 in San Diego instead of the full I never once had a feeling of failure or regret. I have so much going on with the house and my sewing, and I'd be insanely disappointed with myself if I didn't achieve goal #3 because I spent all my free time training. So instead I ran the 1/2 this past weekend in San Diego, and set a new PR. It was a great weekend and a great race. It was Jared's moment to shine and I'm just happy I got to share it with him. After pacing like a nervous wreck for an hour I finally saw him come into view at mile 25. When he got to me at 25.7 it was clear - like with so many other runners - the heat of the day had taken everything he had. We ran last 1/2 mile together, and crossing that finish line with him was a moment I'll never forget. There will be more goals and more races, but this one will always be very special to me.

5) It's hopefully clear by now that I've made some progress on this one (though not including iPhone pics in my posts is hardly a photographic achievement.) I'm definitely starting to get the hang of lighting and composition, and I've discovered the awesomeness of Photoshop actions. I still want to learn how to use the manual settings on my camera and continue to improve my editing skills - could come in handy for that whole selling my products online thing. ;)

So there you have it. 6 months down, 6 more to go, lots more to do. But first, me and my hobbled legs need to go to bed so I can dream about etsy shops and painfree quads. Goodnight!

make this look: garden wedding

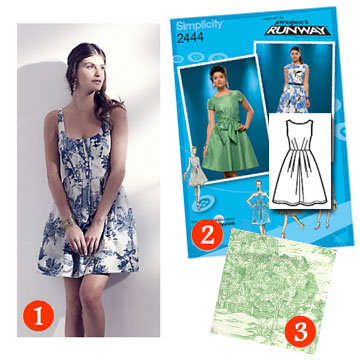
  1. Original dress: Anthropologie
  2. Pattern: Simplicity 2444
  3. Green toile: Fashion Fabrics Club

Today’s “make this look” is proof that I’m living in sewing dreamland… I’m not going to a wedding this weekend, I’m cleaning out my basement.  In fact the only weddings I’m going to this year are both in October, when it will be cool and drizzly and decidedly un-gardenlike.  But alas, while I’m wearing grubby housework clothes this weekend I’ll be dreaming of wearing this lovely little number from Anthropologie – which you can knock off and make your own for a fraction of the price.  You’ll need Simplicity 2444, 3 ¼ yards of green toile, and 3/8 yard of lightweight fusible interfacing.  (After my Weekender Bag experience, I swear by Pellon Stacy Shape-Flex.)  Finish the look with a gold cuff, earrings, and sandals.

Have fun with your Pinot and finger sandwiches!  I'll be in my basement, wondering how we accumulated so much stuff we have absolutely no use for.

supersized strawberry shortcake

My friend Sarah's (insert very low number here) birthday was last week, and we decided the best way to celebrate would be to put on some folksy western garb and head on down to the Little Red Hen.  If you live in Seattle and have never been there, I highly recommend it.  As long as you don't want your food right away or mind walking to the bar for your drinks.  I felt like a southern style cake was in order, and nothing says southern summer quite like strawberry shortcake.  Or I just really like strawberry shortcake.  Either way, I settled on this recipe and subbed out the butter cake for the yellow cake recipe Bakerella swears by.

First, the yellow cake - I poured the batter into two cake rounds instead of three, which greatly increased the bake time and the density of the cake.  It was a little too dense for my general liking (I tend to prefer light and fluffy), but for strawberry shortcake it was PERFECT!  With this kind of cake, light and fluffy would have collapsed under all the strawberry and cream goodness.

Second, the strawberry tallcake.  Holy moly.  I think the best thing about this recipe is that it couldn't have been easier to make and looks insanely impressive once it's all put together.  I made the cakes the night before, and whipped (no pun intended) it all together the next day in about a half an hour.  And on top of all that, it tasted SO good.  Just look how happy the birthday girl was to eat it!

DIY sewing labels!

Ack!  My very own "made by bird" labels!  I know I shouldn't be so excited about such a little thing... but I am.  I really really am.  As I mentioned in my last post, I added these to the baby shower gifts I gave my friend Angela.  I've been experimenting with labels for a while now, and these are by far my favorite.  I tried the printing on fabric approach and while I was super impressed with printed fabric in general, I wasn't crazy about the finished labels.  They were too stiff for my liking and the Fray Chek was still visible once it dried.  On a whim, I tried using iron-on transfer paper and twill tape and it worked soooo much better than I thought it would.  Here are the steps I followed:

  1. Design the labels in the program of your choice.  (I actually used PowerPoint for mine.)  Just remember to flip the image before you print.
  2. Cut out the label from the transfer paper (I only cut as many as I needed for the gifts so I didn't have to worry about losing a bunch of tiny little pieces of paper.)
  3. Cut as close to the design as possible.
  4. Decide how you're going to attach the label to your item.  If you want a loop (as pictured above), fold the twill tape in half leaving a 1/4 inch or 1/2 inch extra so you can sew the label into your seam.  If you want them "flat," leave a 1/2 inch extra on each side of your label design so you can fold the ends in a 1/4 inch and attach the label to your item using a zig-zag stitch.  (I used the latter approach for the burp cloths, but forgot to take a picture.  I'll be sure to add an example to this post the next time I sew the labels on that way.)
  5. Transfer the label design to the twill tape (following the instructions that came with your iron-on transfer paper)
  6. Here's the important part: only let the label cool for a few seconds before peel off the backing paper.  I think this really helps reduce the visibility of the film the iron-on paper leaves on your labels.
  7. Attach the label to your item as indicated in step 4, and you're done!

baby shower gift set

My dear friend Angela is expecting her first baby any minute now, and I was lucky enough to be home in Virginia for her shower a couple weeks ago.  About a month before the shower I started searching the web for gift ideas and settled on a nursing cover / burp cloth combo set.   (I'm not one for going completely off-registry, so Jared and I also got her the breast pump and pump car charger she'd been wanting... yes I know, a bit of an accidentally awkward theme gift.)  Angela doesn't know if she's having a boy or girl (I'm in awe of her will power), and I had a stash of Amy Butler's Morning Glory fabric so... voila:

The nursing cover tutorial couldn't have been easier.  As you can see I opted to use one fabric (I also skipped the optional pocket.. shhhhh.)

I went a little off-tutorial for the burp cloths, though not intentionally.  The tutorial makes it very clear that you should cut your fabric to the size of each pre-washed cloth diaper, as each one is different and very rarely 18" long.  So what did I do?  I cut each strip 18" inches long!  Brilliant.  I didn't have enough fabric left over to cut new strips, so I added the ribbon trim to the top and bottom of the strips (instead of down the sides) to hide the shortages.  They still look pretty cute, though.  Right?  (Yes, in my humble-completely-biased-opinion.)

I added a very special little touch to this gift set...

...but more on that later.  :)