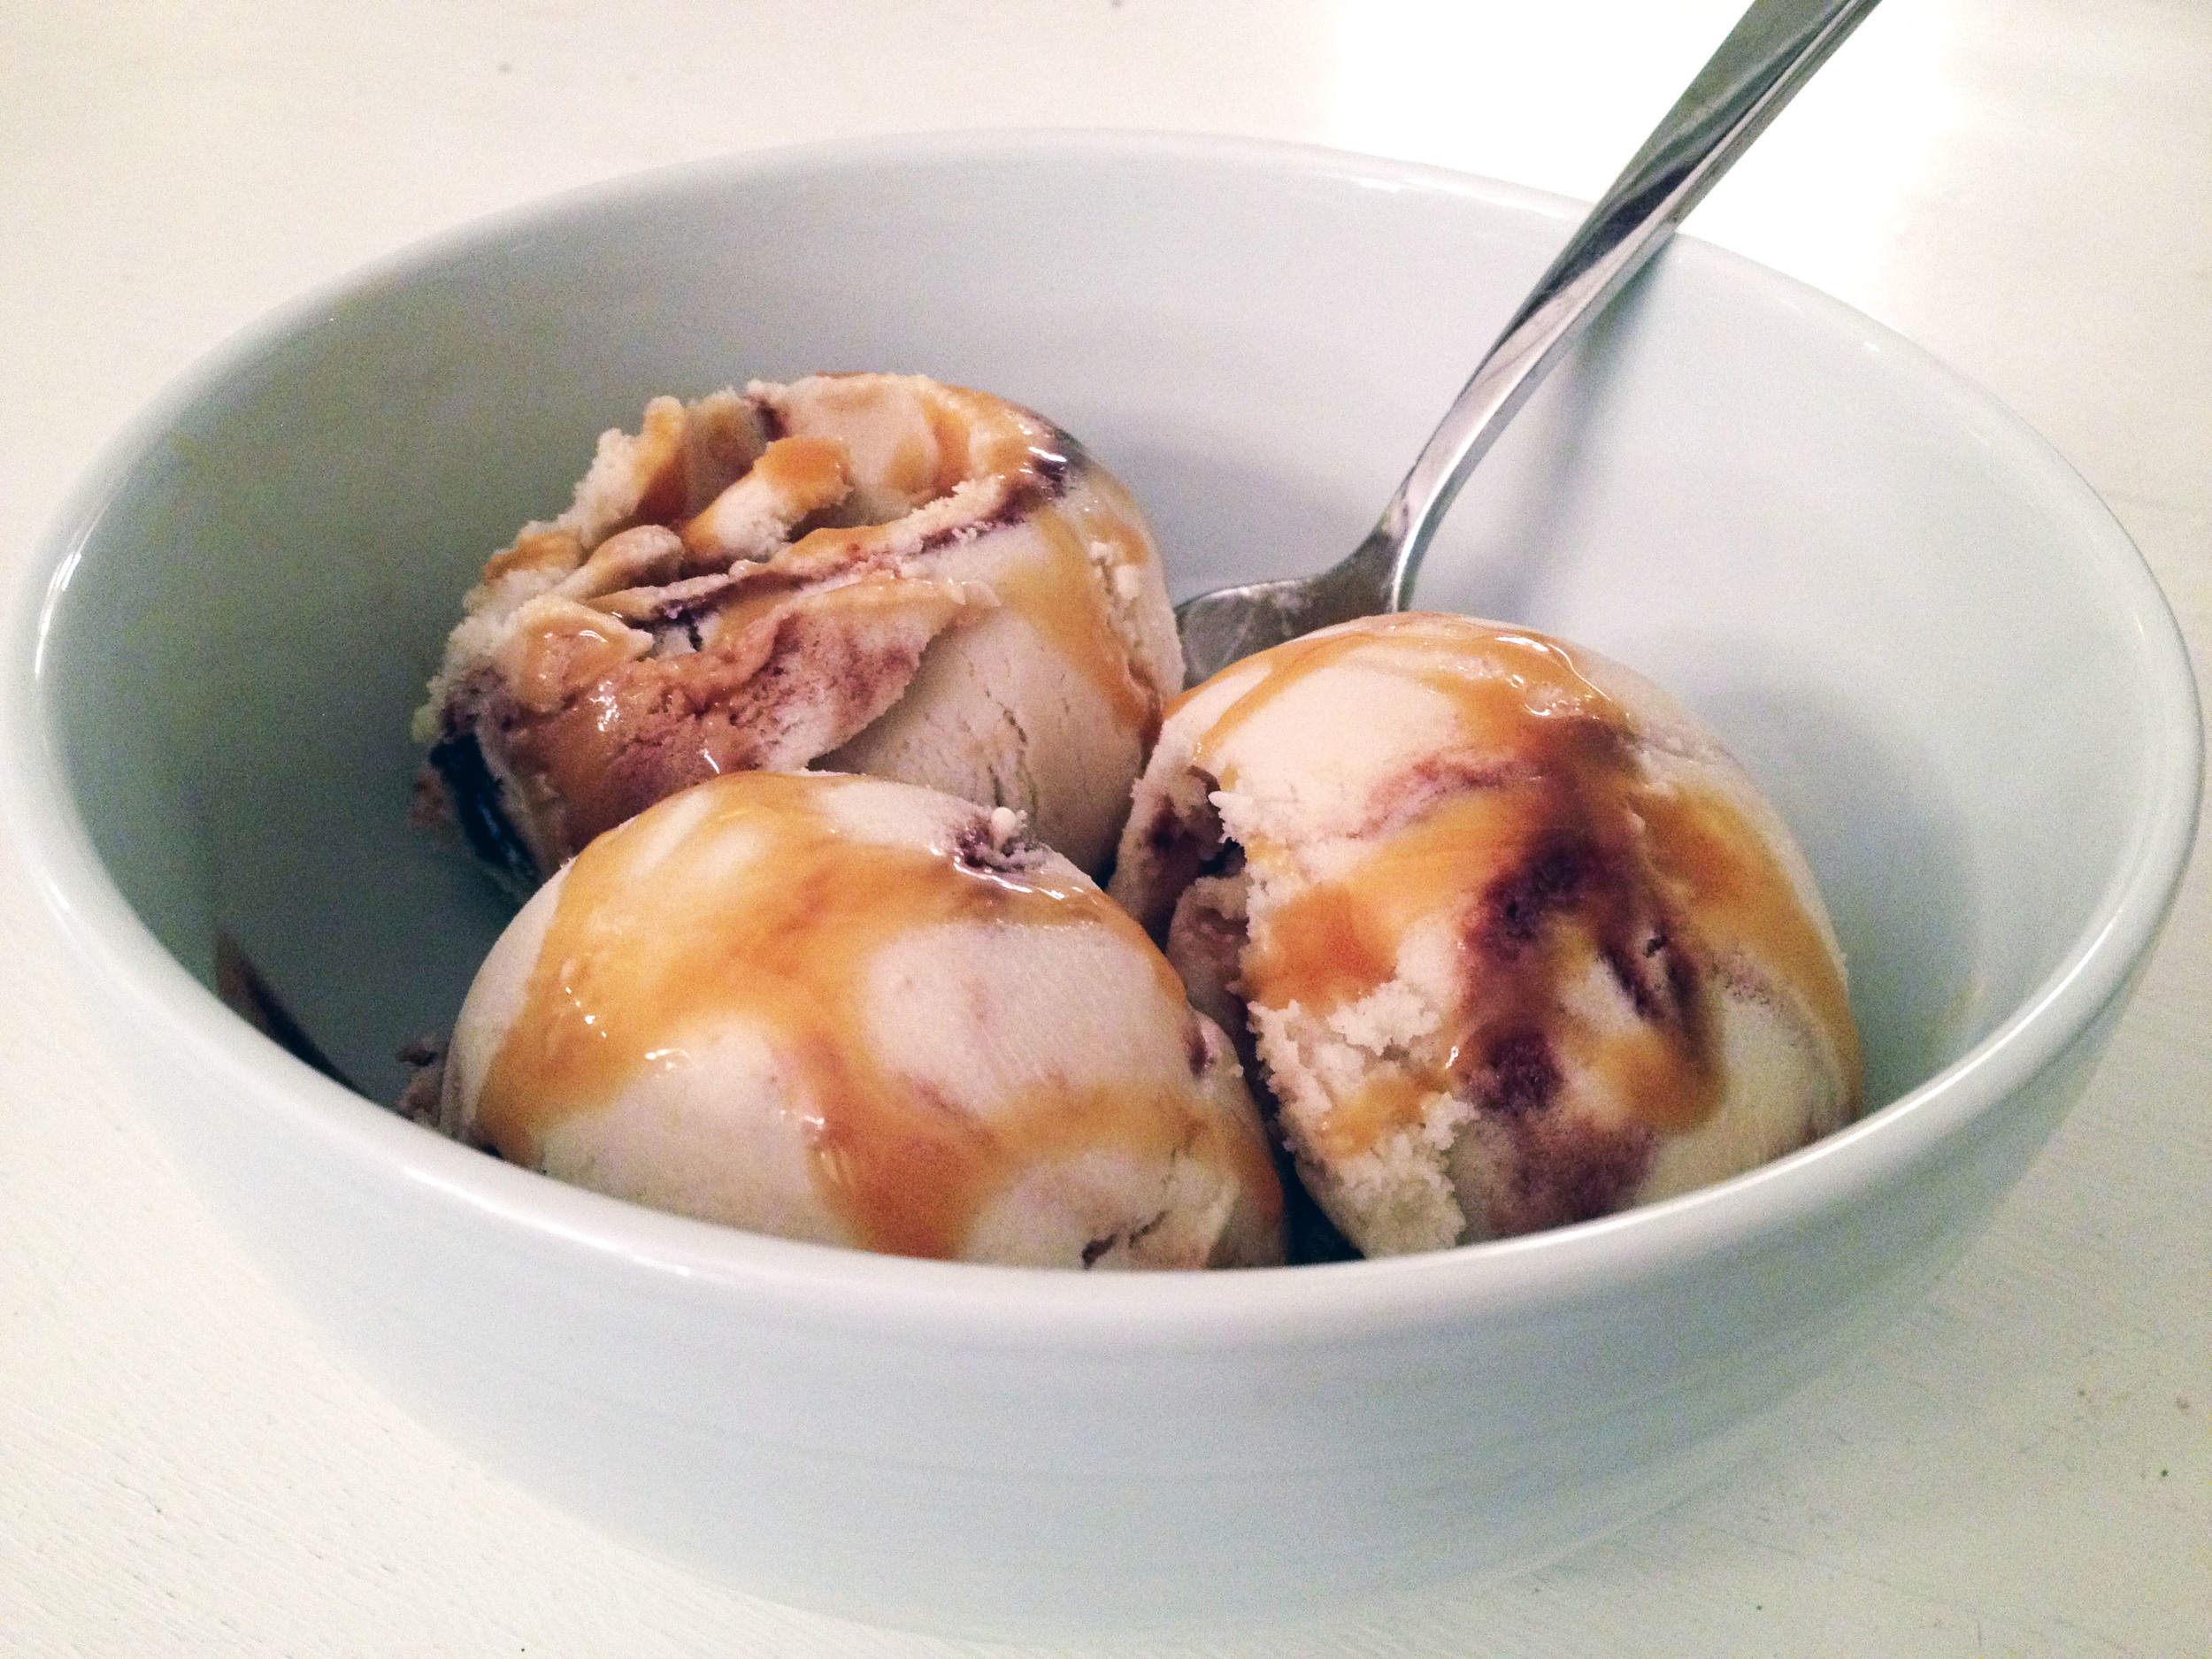
Coconut Ice Cream with Caramel and Fudge Ribbons

coconut-ice-cream-caramel-fudge.jpg

As I mentioned yesterday, the pièce de résistance of our Oscar Sunday was this Coconut Ice Cream with Caramel and Fudge Ribbons. It's easily one of the best ice creams I've ever made, and almost makes the lack of dairy in my life completely bearable. Oh, that's right - those three glorious gooey scoops have absolutely zero dairy. I concocted this recipe solely for the purpose of testing the limits of dairy free-dom... could there be such a thing as a dairy free ice cream I'd crave even after my dairy free days are behind me? Well, I'm happy to say I think I've found it. Here's how to make it...

Note that you don't have to make any of this dairy free. Just use regular heavy cream and butter where noted in the sauce ingredients. For the ice cream, make a regular vanilla ice cream base, substituting half the milk with coconut milk.

You'll need to make everything separately - the caramel sauce, the hot fudge sauce, and the coconut ice cream. Yes, it's a lot of steps, but both sauce recipes make way more than you'll need for the ice cream, so you could make the ice cream 3 or 4 more times and only have to make the sauces once. Or you could just grab a spoon and eat the leftover sauce right out of the jar. I won't judge. Either way, you'll need to start by making my faux heavy cream using a couple cans of coconut milk.

Coconut milk heavy cream substitute

Ingredients:

  • 2 cans of full fat coconut milk (I recommend Thai Kitchen brand)

Directions:

Open both cans of coconut milk and spoon the coconut fat ONLY (the thick white stuff at the top) into a medium size bowl. Then, add all of the liquid from one can and half of the liquid from the other can into the bowl. Whisk until smooth. Note that this will appear much thicker than regular heavy cream. That's okay. (I tried thinner - and even thinner than that - versions and this thickness worked best.)

Dairy Free Caramel Sauce

Ingredients:

  • 1 cup sugar
  • 1¼ cups coconut milk heavy cream substitute (or regular heavy cream if not making it dairy free)
  • ¼ tsp. coarse salt
  • ½ tsp. vanilla extract

Directions:

Spread the sugar in an even layer over the bottom of a large, heavy-bottomed saucepan. Place over medium-low heat, watching carefully. When the sugar begins to liquefy around the edges, use a heatproof spatula to gently stir it towards the center. Continue stirring very gently until all the sugar is melted, taking care not to over stir. Measure out the coconut milk heavy cream substitute in a liquid measuring cup and set aside. Once the caramel reaches a deep amber color, immediately remove the sauce pan from the heat. Carefully whisk in half of the coconut milk heavy cream substitute. The mixture will steam and bubble violently. Stir until the cream is well incorporated, then whisk in the remaining cream. Stir in the salt and the vanilla. If any sugar has hardened, place the saucepan over low heat and whisk until smooth.

Store in an airtight container in the refrigerator. If needed, it can be rewarmed in the microwave or in a saucepan over low heat.

If you're attempting this recipe, you really must read this post by David Lebovitz on making the perfect caramel. Even following his extremely helpful advice, it took me 3 tries to get the caramel just right. It's tricky, but it's so worth it.

Source: adapted from The Perfect Scoop by David Lebovitz

Dairy Free Hot Fudge Sauce

Ingredients:

  • 3/4 cup coconut milk heavy cream substitute (or regular heavy cream if not making it dairy free)
  • 1/4 cup packed dark brown sugar (if you don't have dark, just use light and add a teaspoon of molasses)
  • 1/4 cup unsweetened Dutch-process cocoa powder
  • 1/2 cup light corn syrup
  • 6 ounces bittersweet or semisweet chocolate, chopped
  • 1 tablespoon dairy free butter substitute (I like Earth Balance), cut into small pieces (or use regular salted butter if not making it dairy free)
  • 1/2 teaspoon vanilla extract

Directions:

Mix the cream, brown sugar, cocoa powder, and corn syrup in a large saucepan. Bring to a boil and cook stirring frequently, for 30 seconds.

Remove from the heat and add the chocolate and butter, stirring until melted and smooth. Stir in the vanilla. Serve warm.

(This sauce can be stored in the refrigerator for up to two weeks. Rewarm gently in the microwave or by stirring in a saucepan over very low heat)

Alright, with the special ingredients all prepped, you're ready to make the ice cream!

Coconut Ice Cream with Caramel and Hot Fudge Ribbons

Ingredients:

  • 2 14 oz. cans of full fat coconut milk (I like Thai Kitchen)
  • 4 eggs
  • 2 tbsp vanilla extract
  • 6 tbsp raw honey
  • Caramel sauce
  • Hot fudge sauce
  • ice cream maker

Directions:

Set up a double boiler by placing a heat proof bowl over a pot of simmering water (be sure it’s simmering and not a full rolling boil, as this will give you better control later). Add the coconut milk and vanilla extract to the bowl. Stirring fairly frequently, heat until the coconut milk is hot but not boiling.

Meanwhile, whisk the eggs well in a separate bowl. Once the coconut milk is hot, add a ladleful to the eggs while you’re whisking – you want to bring the eggs up to the temperature of the coconut milk without scrambling them. Add in another ladleful of hot coconut milk to the egg mixture while whisking. Take the now hot egg mixture and whisk it into the bowl of coconut milk on the double boiler.

Now, whisk constantly until the mixture thickens to a custard. This may take several minutes. If it’s getting too hot and starting to scramble, remove from the heat immediately but keep whisking, then return it to the double boiler. Once it has thickened to a custard, remove the bowl from the heat and let it cool.

Once the custard is cool enough for you to stick your finger in it and hold it there without burning, whisk in the raw honey. Put the custard base in the refrigerator for at least 6 hours (preferably overnight). Freeze in your ice cream machine per the manufacturer’s instructions.

Spoon a small amount of the ice cream into a large, sealable bowl. Then spread a small layer of the fudge sauce onto the ice cream. Spoon more of the ice cream into the bowl, then a layer of caramel, then more ice cream, etc. Keep going, working in layers until all of the ice cream is in the bowl. Now run a butter knife through the ice cream (I found a figure eight worked well, but use whatever motion you'd like - just make sure not to overmix!)

That's it! Okay, I know it seems like a lot of work. But, I promise it's worth it. Especially if you love ice cream but can't have dairy. And it's perfect for kids with dairy allergies who never get to enjoy fun stuff like caramel sauce and hot fudge. My heart aches for their deprived taste buds.

Please, please let me know if you make this or if you're thinking about attempting it and have any questions!

And the Oscar goes to...

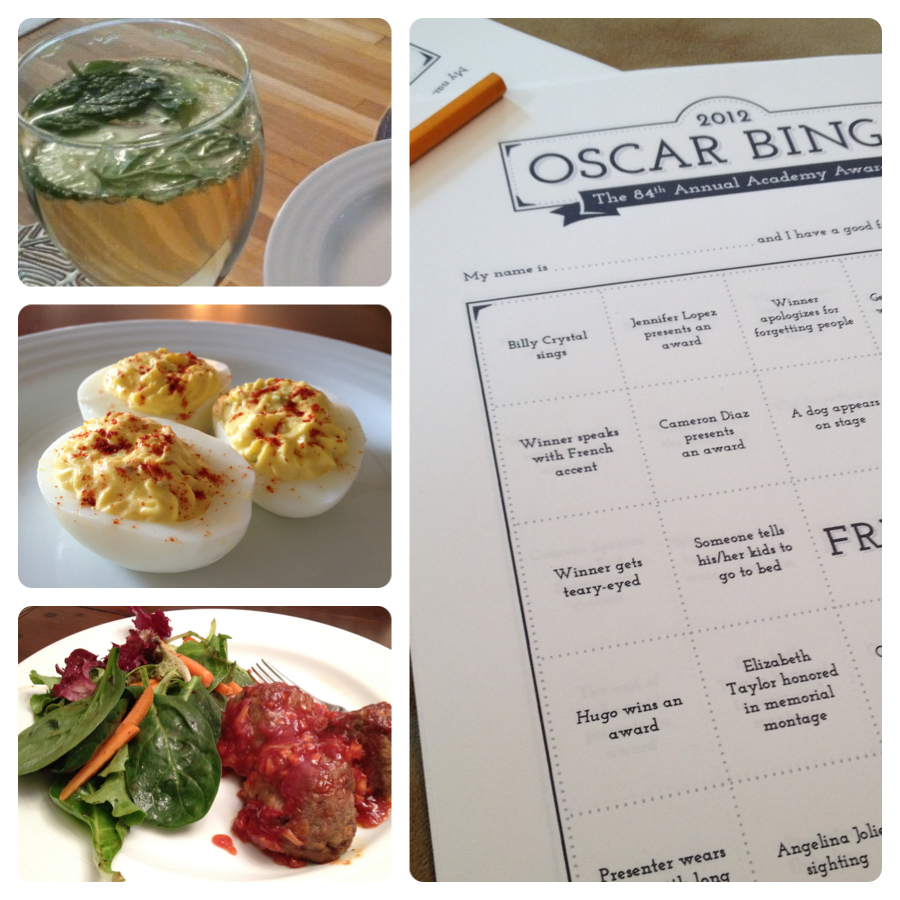
As I mentioned on Friday, I looove Oscar Sunday. It's like my Super Bowl. And this year I pulled out all the stops. (Well, all the stops I had the energy to pull.) My friend Ailsa came by, and she and Jared did their best to get on board with my enthusiasm. We had Oscar inspired food, and we even played Oscar Bingo (courtesy of How About Orange), which I highly recommend if you're trying to get people to sit through all 18 hours and 37 minutes of the Oscar telecast.

Ailsa started out our afternoon with some delicious elderflower champagne cocktails, which we figured covered the whole French contingent: Midnight in Paris, The Artist, and Hugo. I loved the combination of the St. Germain and mint in these cocktails. If you have a bottle of champagne leftover from a party, this would be a great way to jazz it up.

Then it was time to scarf down delicately eat a few traditional Southern Deviled Eggs, inspired by The Help. I don't know why deviled eggs get relegated to holidays and showers. They are entirely too delicious to only be eaten a few times a year.

For dinner we made Pioneer Woman's BBQ Comfort Meatballs (or Moneyballs... hey-o!) and they were everything PW promised they would be. Like little meatloaf balls of heaven. Make these for anything - Oscars, a potluck, Saturday snacktime. They'll be a hit. Unless you're a vegetarian.

For dessert... well, for dessert I really pulled out all the stops. I made Coconut Ice Cream with Caramel and Fudge Ribbons. I wanted to call it "Descending into Decadence" for the Descendants, but Jared rolled his eyes so many times at that name I figured I'd better drop it and let the coconut be homage enough. This was my own little concoction, so I was crossing everything I had that it would be good... and it was. Oh, holy hannah, it was good. Homemade caramel sauce, homemade hot fudge sauce, it was all worth it. The whole thing was dairy free, but it doesn't have to be. I'll be posting the recipe tomorrow so be sure to check back.

I hope you all enjoyed Oscar Sunday as much as I did! :-)

{made for dinner} black bean + butternut soup

bean-and-butternut-soup-2.jpg

I'd been excited to try this soup ever since I saw it on Sprouted Kitchen, and it definitely didn't disappoint. I loooove butternut squash (Jared less so, but he still liked the soup) and anything with homemade tortilla strips. Plus I've been trying to incorporate more veggies into our dinners and this is chock full of healthy stuff - but not so much that it tastes like tree bark. It's sort of a healthy version of winter comfort food, and a perfect rainy weeknight dinner.

Ingredients:

  • 1 Tbsp. coconut or extra virgin olive oil
  • 1 medium yellow onion, chopped
  • 3 cloves garlic, chopped
  • 1/2 a small head of cabbage, chopped (heaping 2 cups)
  • 3 cups cubed butternut squash (sweet potato would be good too)
  • 3 cups low sodium vegetable broth
  • 1 tsp. cumin
  • 1 tsp. cocoa powder
  • pinch of chipotle powder or cayenne pepper
  • 2 cups cooked, black beans (about one can, rinsed and drained)
  • salt to taste
  • avocado, for garnish (optional)
  • cilantro, for garnish (optional)

// tortilla crispies //

  • 3 corn tortillas
  • scant 1 tsp. extra virgin olive oil
  • 1/2 tsp. sea salt

In a heavy bottomed pot, warm the oil over medium heat. Add the chopped onion and saute until just beginning to brown, about 6-8 minutes. Add the garlic, cabbage, squash and broth. Turn the heat down to a gentle simmer, cover the pot and cook for about 15-20 minutes for the vegetables to cook. Add the spices and the beans and stir. Let everything continue to cook another ten minutes for the flavors to blend. Salt to taste. At this point, I did a few pulses with my immersion blender through the soup, because I wanted to thicken up the broth a bit. This is optional, but makes it seem a bit thicker. You could alternatively, run just a bit of the soup through a blender or food processor, and add it back in to the pot. OR a sprinkle of cornmeal will help thicken it as well.

For the tortilla crispies, preheat the oven to 375'. Stack them and slice into thin matchsticks. Spread on a baking sheet, dirzzle with the oil, sprinkle the salt and toss gently to coat. Spread them in a single layer on the baking sheet and bake for about 10-15 minutes until they are light brown and crispy, giving the pan a shake halfway through.

Garnish each both with some diced avocado, a handful of chopped cilantro and some of the tortilla crispies! (We only added the tortilla crispies, mostly out of laziness. I'm sure it's even more delicious with the extra garnishes.)

Recipe from the Sprouted Kitchen

5 years ago...

Five years ago today, we brought home this little bundle of sweetness...

It was before Jared and I even started dating. We were just really good friends, and after encouraging him to finally get a dog - despite the fact that we were working 90 hour weeks and he was still living in corporate housing - I went with him to what seemed like every shelter in the Seattle area to find the perfect pup. When we were about to give up our search, I called one last shelter out in Woodinville... they had just gotten in a litter of half Weimaraner half Australian Shepherd puppies, and we were on our way. When we got there we learned that they had named all the puppies in the litter after characters from 90210 - and we both fell head over heels for the flopsy pup climbing all over his brothers and sisters to try to get a prime sleeping spot. I was always more of a Dylan kind of girl, so it was pretty funny that the one we'd fallen for was, in fact, Dylan. We took him outside to play, where he promptly went to the bathroom, and we were sold. (That dog had zero interest in going to the bathroom outside after that for weeks!)

He was so mellow and sleepy that first day. We both remarked at how lucky Jared had gotten to have such a laid back pup. Jared decided to call him Rocco, and we spent the rest of the day relishing in his cuteness.

Well, that sweet sleepy little puppy has been a complete jerkface every day since then. He is hyper, nervous, barks at strangers and little kids. Heaven forbid someone makes the teeny tiniest noise outside - he barks as though the world was coming to an end. And if someone dares ring the doorbell? Forget it. We have spent thousands of dollars on trainers and behavioral therapists with only mild success. He's not mean, he's just anxious and not very bright, which makes for a terrible combination. In short, he is very little of what we wanted in a dog. But, he's ours. This sweet, crazy mutt is ours, and I love him to pieces...

link love - 2.23.12

Happy Friday! For a 4 day week this sure felt like a long one - lots of working mama internal conflict. Some days I have it all together, and some days I just don't. But - the weekend has finally arrived and I'm looking forward to this one. I'm getting my hair done tomorrow, aaaand I may or may not be going back to my natural color. I'm about 90% committed to doing it. If nothing else I'll get a couple of hours to do nothing but sit in a chair reading magazines while someone makes me pretty, which is a big luxury these days. Sunday I'll be watching the Oscars, and I'm very excited. I always love the Oscars... the dresses, the stars, the movies. Love it all. I even have some fun Oscar-themed food planned. I know, huge dork. Anywho, here's what I loved this week...

  • World Map on Children Inspire Design - I fell instantly in love with these "My Roots Live Here" maps. You can get it as a world map, continent, country, or state and it comes with little heart stickers to place on parent or family hometowns. This would be so sweet for a kid's room.


  • The Adulting blog - Oh my god, I love this blog. It's a hilarious take on what it means to be an adult, and how to do it effectively... I particularly love Step 156: Don't Be a Re-runner.


  • Lemon Cream Scones on One Hungry Mama - Confession: I do not like scones. They're dry and crumbly and every time I eat one I think, "I wish you were a muffin." Stacie at One Hungry Mama agrees with me, but swears these are different. I'm anxious to try them as soon as I can eat dairy again.

coconut cookies & cream ice cream

I know this combination of flavors might seem a little strange - coconut and Oreos? But I promise you, it's delicious. This is one of the best ice creams I've ever made, and easily the best dairy free ice cream I've ever made (I've only made two, but the first one was pretty bleh.) If you like coconut (or if you're a nursing mama whose baby still can't tolerate real milk and have learned to embrace coconut), you really need to try this...

Ingredients:

  • 2 14 oz. cans of Thai Kitchen full fat coconut milk (brand matters here... I've tried other brands and they're not nearly as good)
  • 4 eggs
  • 2 tbsp vanilla extract
  • 6 tbsp raw honey
  • Oreos (I used about 15, but I like a lot of cookie in my cookies and cream)
  • ice cream maker

Directions:

Set up a double boiler by placing a heat proof bowl over a pot of simmering water (be sure it's simmering and not a full rolling boil, as this will give you better control later). Add the coconut milk and vanilla extract to the bowl. Stirring fairly frequently, heat until the coconut milk is hot but not boiling.

Meanwhile, whisk the eggs well in a separate bowl. Once the coconut milk is hot, add a ladleful to the eggs while you're whisking - you want to bring the eggs up to the temperature of the coconut milk without scrambling them. Add in another ladleful of hot coconut milk to the egg mixture while whisking. Take the now hot egg mixture and whisk it into the bowl of coconut milk on the double boiler.

Now, whisk constantly until the mixture thickens to a custard. This may take several minutes. If it's getting too hot and starting to scramble, remove from the heat immediately but keep whisking, then return it to the double boiler. Once it has thickened to a custard, remove the bowl from the heat and let it cool.

Once the custard is cool enough for you to stick your finger in it and hold it there without burning, whisk in the raw honey. Put the custard base in the refrigerator for at least 6 hours (preferably overnight). Freeze in your ice cream machine per the manufacturer's instructions, adding in the Oreo cookie chunks once the mixture has started to freeze a bit.

Straight out of the machine this ice cream has a creamy soft serve texture. If you store it in the freezer for later, just let it sit at room temperature for about 10 minutes before eating to let it soften up a little bit.

Recipe adapted from Caveman Food

roll with the changes

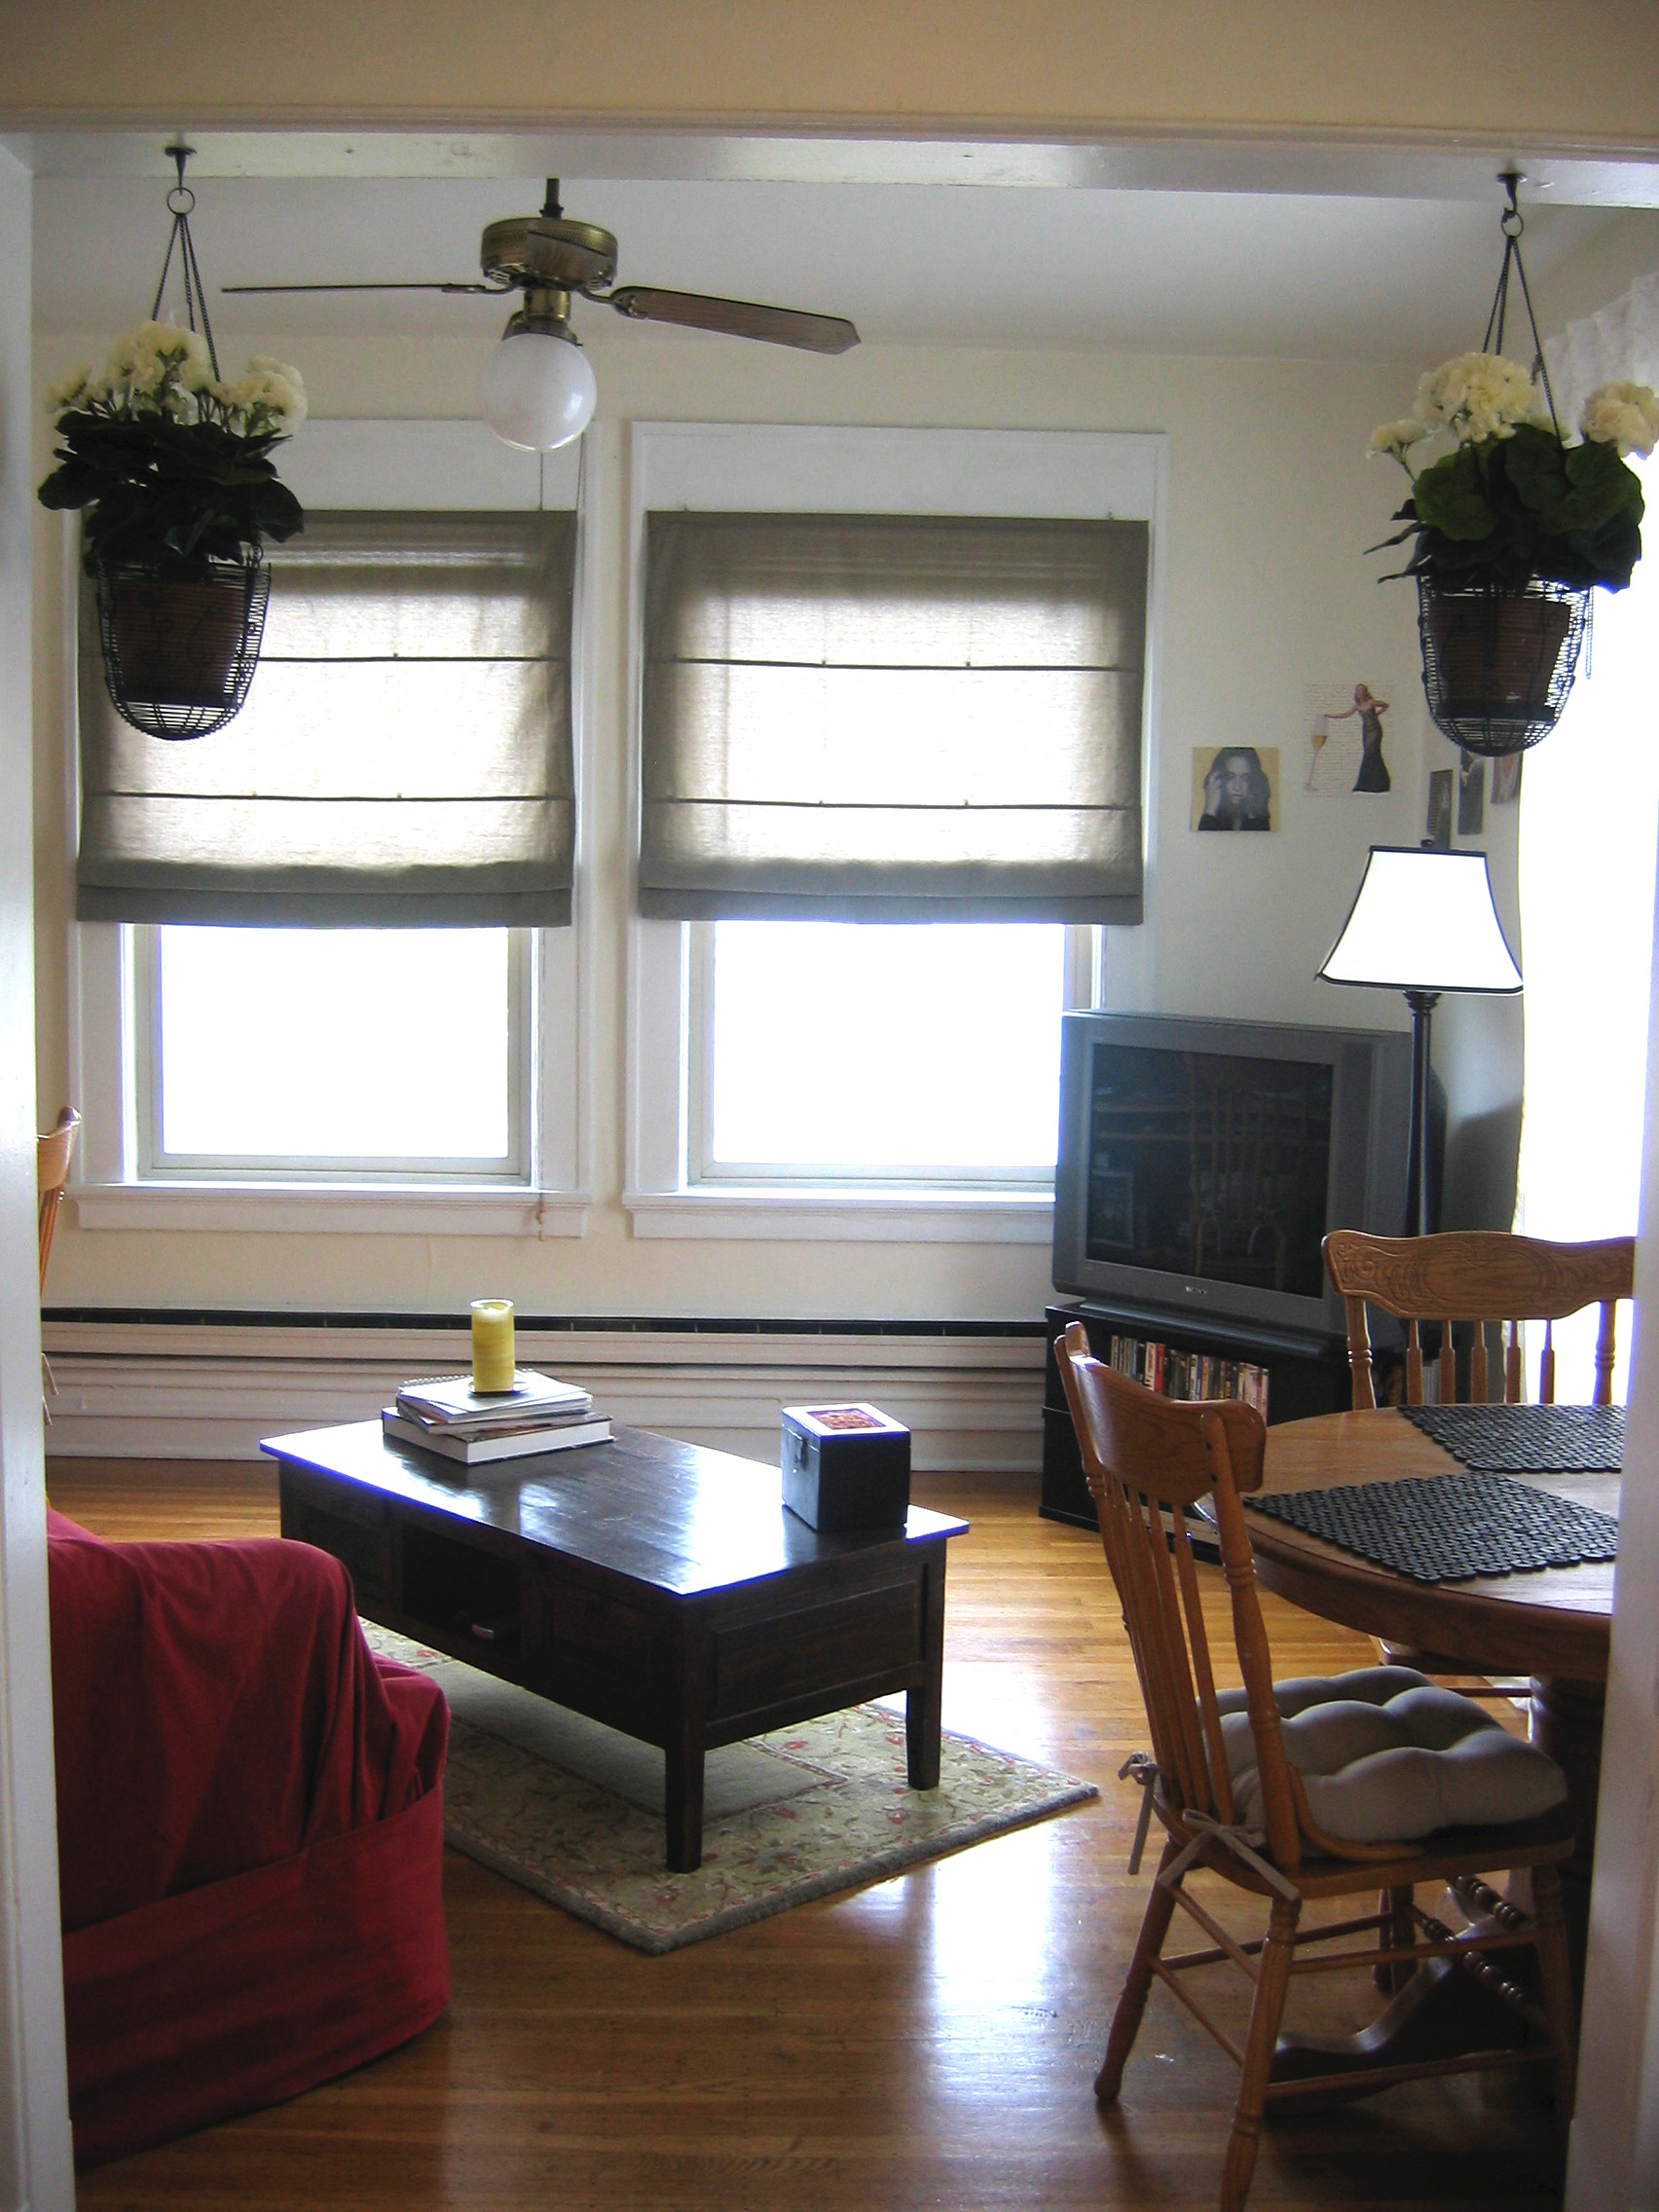
When Emma became mobile a couple of months ago we knew we'd have to make some changes to our living room to give her more space to play. My goal was to be able to go from living room to play room and back again in less than 2 minutes. I knew if it took any more time or effort that our living room would become a permanent playroom and five years from now we'd be one of those desperate couples on Dear Genevieve who used to have semi-decent taste but whose house has become overrun with toys and laundry and kitchy sayings over the door like "a meal without wine... is breakfast!" Oh no. We will not be one of those couples. So, our first step was to buy a bigger rug... we opted for something relatively disposable since babies are not tidy creatures, nor is our 65 lb dog. The Havbro does the job, but I won't be sad to see it go. So now Emma had a nice big rug to play on, but we still had the issue of the coffee table. Then it hit me... what if we sawed off the legs and replaced them with casters so we could easily roll the table out of the way during play time?? I've certainly had crazier ideas, and Jared was on board so we used a circular saw to cut off the legs, and replaced them with the steel casters we ordered off of Amazon. And, voila!

And here's what it looks like during playtime...

Here's a close up of the casters...

It's working out surprisingly well for us, so far. And I actually kind of like the industrial feel the table now has. The only downside is that the casters don't lock, which is a bit concerning for her tiny fingers, and for when she gets strong enough to move the table on her own. So for now we're super careful not to let her play with the wheels (it's not like we leave her unattended anyway, so it's really not an issue). We didn't want to spend a lot on pricey casters in case the experiment was a bust, but now that we know it works we'd be willing to upgrade the casters if it becomes necessary.

If you're wondering what the coffee table looked like before, here's a shot of it in my first "big girl" apartment in Seattle... It's been through three moves since then. Hence all the scratches. :-)

So where do we hide all those toys when play time is over? They all have their own little basket that fits perfectly into the console table. And they're kept at kid height so eventually Emma can help clean up. (And she'll be able to more easily take each and every toy out of there when she decides the one at the very bottom is the one she wants to play with. But I'm choosing not to focus on that part.)

I'm certain these aren't the last of the living room changes... as Emma grows and becomes even more mobile, we'll need to do more baby proofing and likely more decluttering. But for now, operation rolling coffee table has been a great success.

free Mr. Bates!

SPOILER ALERT! If you haven't watched the season finale of Downton Abbey, stop reading and go watch it ASAP!

Holy crap. I don't think I've been that emotionally wrapped up in an episode of TV since the series finale of Friday Night Lights. What a roller coaster. The Bates and Anna scenes were heart-wrenching... there's something about a strong stoic man shedding a few tears that just slays me. And what the hell, Lord Grantham?? Shut your trap already. You're ruining everything. You deserve whatever evil mischief Thomas throws your way now that you've foolishly made him your valet. (Though I'm VERY relieved that Isis didn't freeze to death in that shelter... I was having a hard enough time composing myself during that episode without a dead dog thrown into the mix.)

And then there's Cousin Matthew and Lady Mary. I told Jared after the Bates' verdict that Matthew and Mary HAD to get together... they can't kill off Bates AND continue to drag out the Matthew and Mary will-they-or-won't-they saga. It's just too mean. Thankfully, Julian Fellowes took pity on my poor heart and gave us all the proposal we've been waiting for. But, really Mary? Insisting that Matthew get down on one knee and ask you properly? You're lucky he's asking at all! Not only do you NOT have to marry Sir Richard and all his douchebaggery, but you get to marry the future Earl of Grantham, an all around great guy and war hero, and someone who loves you in spite of the Mr. Pamuk debacle. Count your lucky stars, say yes, and help your former parapalegic future husband up off the ground before he hurts himself. Sheesh.

I can't believe we have to wait another year to see what unfolds at Downton. Rumor has it there will be TWO weddings next season - Matthew and Mary, but who else? Lady Edith and Anthony? Lady Edith and anyone who'll ask her?? There will also be a guest appearance by the always amazing Shirley MacLaine as Lady Cora's American mother. The scenes between her and the Dowager Countess are sure to be epic. (Btw, how tremendous was her "Do you promise?" zinger upon Sir Richard announcing they would never see each other again? Easily one of the best written and acted characters on TV.)

Those of you who watched - what did you think of the finale??

friday q&a

Rather than the usual Link Love post today, I'm taking a cue from Emily at Ever So Emily and doing this little quiz, instead. Enjoy, and happy Friday! :-D

1. Describe your blog in 5 words crafty, personal, quirky, honest, fun

2. Why did you start blogging? I originally just wanted a place to share my sewing projects, but it's evolved over the past few years to include food, DIY, and a lot more about me than I thought I'd want to share. I'm so grateful to have it as a creative outlet, and for the people who read and comment on my posts. Turns out I enjoy the interaction aspect of blogging more than any other part.

3. What's your favorite book? Extremely Loud and Incredibly Close by Jonathan Safran Foer... I first read this book about 5 years ago and was so blown away by it. I wanted to start reading it all over again the second I finished. It was so uniquely written, so powerful. I've gifted this book several times over the years. (And no, I haven't seen the movie because I'm certain it will ruin the book for me. Sorry, Tom Hanks!)

4. What were you like in high school? Oh gosh... cynical, insecure, awkward. Sorry, Bruce - my high school years definitely weren't my glory days! I viewed high school as the last stepping stone to getting the heck out of Northern Virginia, and couldn't wait to graduate. Looking back, I wish I hadn't been in such a rush to get through it... I wish I had embraced the fun and innocence of high school a bit more. But I learned a lot from those years about the kind of person I no longer wanted to be, and I'd like to think I'm a different person today.

5. Cat person or dog person? Definitely a dog person. Come on, just look at this face...

6. What's your favorite city in the world? That's so tough. For many reasons, I have to say London. I lived there the summer before my senior year of college and visited again with Jared before we started dating, and it will always hold a special place in my heart.

7. Do you think J.Crew is overrated or the most perfect example of branding ever to exist? (or somewhere in between) I loooove J. Crew. It's a never ending source for styling inspiration, and I think they've moved into a great space of being trendy and classic all at the same time. If I had an unlimited budget, I'd probably buy the majority of my clothes at J. Crew and Anthro.

8. What app do you use most often? Facebook... runners up are Pinterest, Huff Post, PopSugar, Words With Friends, and Instagram. I use my iPhone a lot.

9. Are you a Mac or a PC? Mac! I have to use a PC for work, and it's okay, but I love love love our MacBook Pro.

10. What movie never fails to make you laugh? It's not really a movie, but Louis C.K.'s "Shameless" stand-up special is my go-to when I need a good laugh. It makes me laugh until I cry no matter how many times I watch it.

cherry hand pies

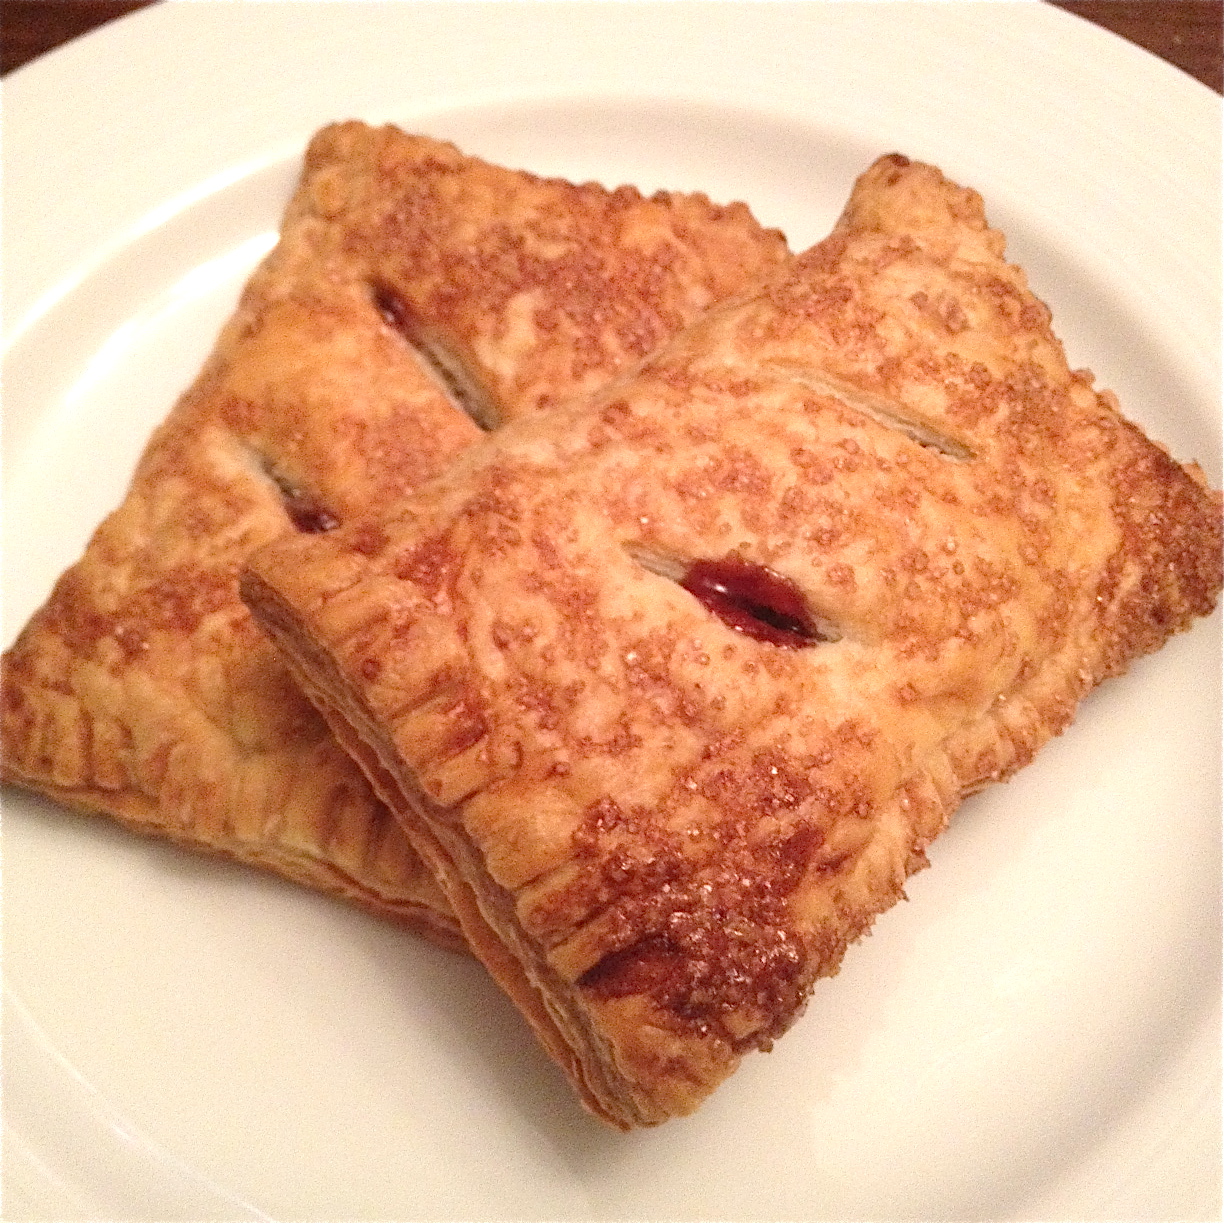
Jared and I had a fairly low-key Valentine's Day this year - we had our big date night last Saturday and didn't want to push our luck. So we exchanged cards, had a lovely dinner of pork marsala, and I made these...

Cherry hand pies!! They were so delicious. We nearly burned our mouths eating them because we got too impatient waiting for them to cool. I followed this recipe but halved it to make 4 hand pies. I also added a little glaze to the tops of 2 of them... it was Valentine's Day after all.

They made a perfect Valentine's Day dessert. Jared requested that I make them again next year... and this weekend, and tomorrow.

{craft the catalog} West Elm glass terrariums

As I mentioned on Friday, I'm starting a new feature on the blog called Craft the Catalog and I'm so excited to share the first installment! I got the idea for Craft the Catalog while browsing through the latest West Elm catalog before bed one night... I spotted these beautiful terrariums and thought how nice they'd look in our living room. Aaaaand then I looked at the price. $29 for a fish bowl? $69 for a slightly fancier terrarium?? And that doesn't even include the plants (which, let's face it, I'll eventually kill.) I was certain that with a little searching and elbow grease I could recreate the look for a lot less. And (thankfully) I was right...

{Ikea lantern / Petsmart fishbowl / plants and soil from Home Depot}

Not an exact match, but considering how much I saved I'm thrilled with the end result. I don't have a before picture, but they definitely brought some much needed life to the top of our bookshelf...

I already have two more projects planned, so I hope you guys like this new feature. I'm planning to do both home goods and clothing, making only things I'd actually want to buy (I set this rule for myself so that I wouldn't just make things because they were easy to DIY.) Look for the next project in a few weeks!

link love - 2.10.12

It's almost the weekend! I'm particularly excited about this weekend because Jared and I are going to see one of our absolute favorite musicians - Langhorne Slim - on Saturday night (huge thanks to our friend, Rachael, for babysitting!) If you haven't heard of Langhorne before, do yourself a favor and watch this. Here's what caught my eye this week...

  • Personalized Alphabet Book on Modern Parents Messy Kids - I saw this on Pinterest a few days ago and thought, "oh, how clever!" I'll definitely be making one of these for Emma.


  • Breakfast Cookie on Pinterest - These sound a bit too good to be true, but I'm cautiously optimistic. :-)


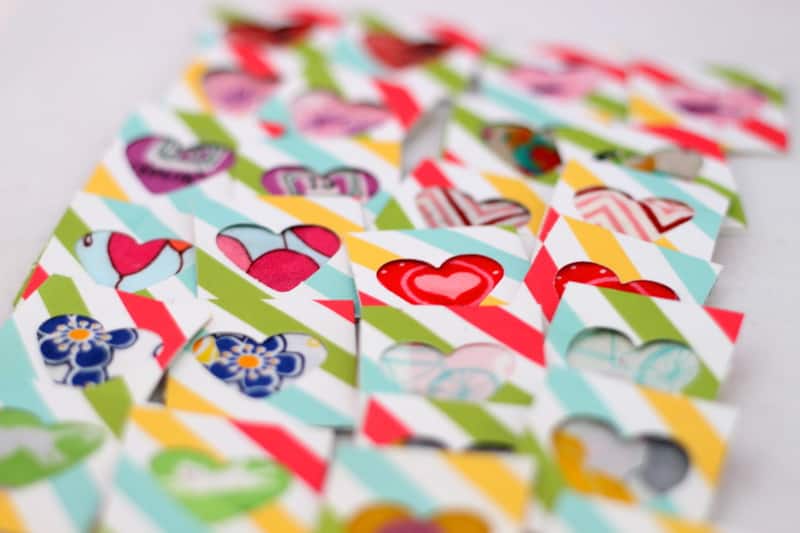
  • Craft Punch Concentration on Prudent Baby - I love a good scrap busting project, and this is a great one. You can use a circle or square punch to make them less girly/Valentines-y.

Have a great weekend! And be sure to check back next week when I'll be unveiling a fun new feature I'm calling "Craft the Catalog." It's basically just what it sounds like. Stay tuned! :-)

going natural

One of the easier to accomplish items on my Life List is to rock my natural hair color, and I've been pinning some inspiration in an attempt to motivate myself to take the plunge. First, let's take a journey back in time...

Here I am around age 2, with the blonde hair I've spent literally thousands of dollars over the years trying to pretend I still have...

And here I am a few years later, with the mousy brown hair I've spent literally thousands of dollars trying to hide... (and yes, I'm fully aware of the many awesome things going on in this picture)

And here I am this past Christmas, all dyed up...

So why the change? Well, despite being happy with the shade of blonde I've been getting the past couple of years, the upkeep is wearing on me. And I've been increasingly drawn to the natural-looking hair and makeup among the J Crew and Anthropologie models. And, honestly, I'm just curious what the heck my natural hair color actually looks like after all these years! Every girl who's been dying her hair for years has visions of shaving it all off and starting from scratch. (Or maybe that's just me.) And since there's no way that will ever happen, in order to do this I'll have to dye my hair what I think is my natural color and hope it grows out to match.

Here are a few of the inspiration pics I'm planning to take to my colorist. All three are essentially (what I think is) my natural color, with some warm dark gold highlights....

What do you think? Should I do it??

deep fried oreos (please forgive me)

I hope you all had a wonderful Super Bowl Sunday! I was pretty underwhelmed both by the game and the commercials, but thankfully the food was fantastic. Jared made some delicious wings, and for dessert - since we already had the fryer out - I made some deep fried Oreos. (We actually bought our deep fryer for the sole purpose of frying food for the Super Bowl a few years ago.) Now, before you judge, do not underestimate the perfection that is the deep fried Oreo. I know, I know - it sounds gluttonous and wrong in so many ways, but it's really so insanely good. I'm a fan of regular Oreos, but something happens to them in the frying process that takes them to a whole new level. You bite into the golden crispy dough and hit this warm cakey center of Oreo wonderment... it's so soft and pillowy and yes it's everything that's wrong with America in a single bite, but put that out of your mind and just appreciate the American ingenuity that went into creating something so delicious. Everything in moderation, right? Right! Okay, so here's how we make them...

Ingredients:

  • Double Stuf Oreos (you're frying the thing anyway, might as well go Double Stuf!)
  • Pancake mix (I use Bisquick)
  • Whatever you need to make 1 batch of pancake batter according to the instructions on the box
  • Deep fryer
  • Lots of oil (we use vegetable)
  • Powdered sugar

Directions

  1. Heat the oil to 375 degrees
  2. Make the pancake batter according to the instructions on the box
  3. Dip a few Oreos into the batter (I do 3 at a time) and cover them on all sides
  4. Make sure the basket in your fryer is completely submerged
  5. Take the Oreos out of the batter one by one and drop them into the oil (I use metal skewers to pinch the Oreos as I take them out of the batter and into the oil... I find this results in the least amount of batter coming off of the Oreo during this process)
  6. Fry the Oreos for 1-2 minutes per side, until each side is a nice golden brown
  7. Remove from the oil and place onto paper towels
  8. Sprinkle powered sugar over top (do not skip this, it's not nearly as good without it!) and serve hot

Confession... one of the Oreos in the photo is actually a Thin Mint. I had what I thought was a genius idea to deep fry a few Thin Mints - you know, since we were frying things - and I'm sad to report that they were a bit of a bust. The batter didn't cling to the cookie very well, and the cookie didn't soften when fried like the Oreos do. Verdict: Plain old Thin Mints with milk are still the way to go.

link love - 2.3.12

You know what this weekend is? The Super Bowl! (Duh.) And do you know what that means? As of Sunday night there will be no more football for the next 6 months! Hallelujah. The only kind of football I like is the kind where Tim Riggins scores with not a second to spare and then takes his shirt off and mumbles something about Texas forever. But, since that's not going to happen this Sunday, I'll have to settle for some deliciously high calorie food and funny commercials. As Tami Taylor would say, here's what I loved this week, y'all...

  • Mozzarella, Tomato, and Avocado Salad on Val So Cal - I saw this on Pinterest and my immediate thought was, "wow, I kind of want to stick my face in that bowl." Okay, not really. But I would like to shovel spoonfuls of this salad into my mouth. I am a lady, after all.

  • Chalkboard Backdrop on Style Me Pretty - Every now and then I'll come across a photo from a wedding that makes me want to get married all over again just so I can include that one element (and marry the love of my life again... that being the more important part. I swear.) This chalkboard backdrop is perfection - the typography, the way it arches around them, the whimsy, the vintage feel. I love every single thing about it.

  • Marilyn Quote on Note to Self - You know how sometimes you find the exact right words at the exact right time? Well that was this quote this week for me. Simply perfect.

I hope you all have a wonderful weekend!! :-D

Snickerdoodle Blondies

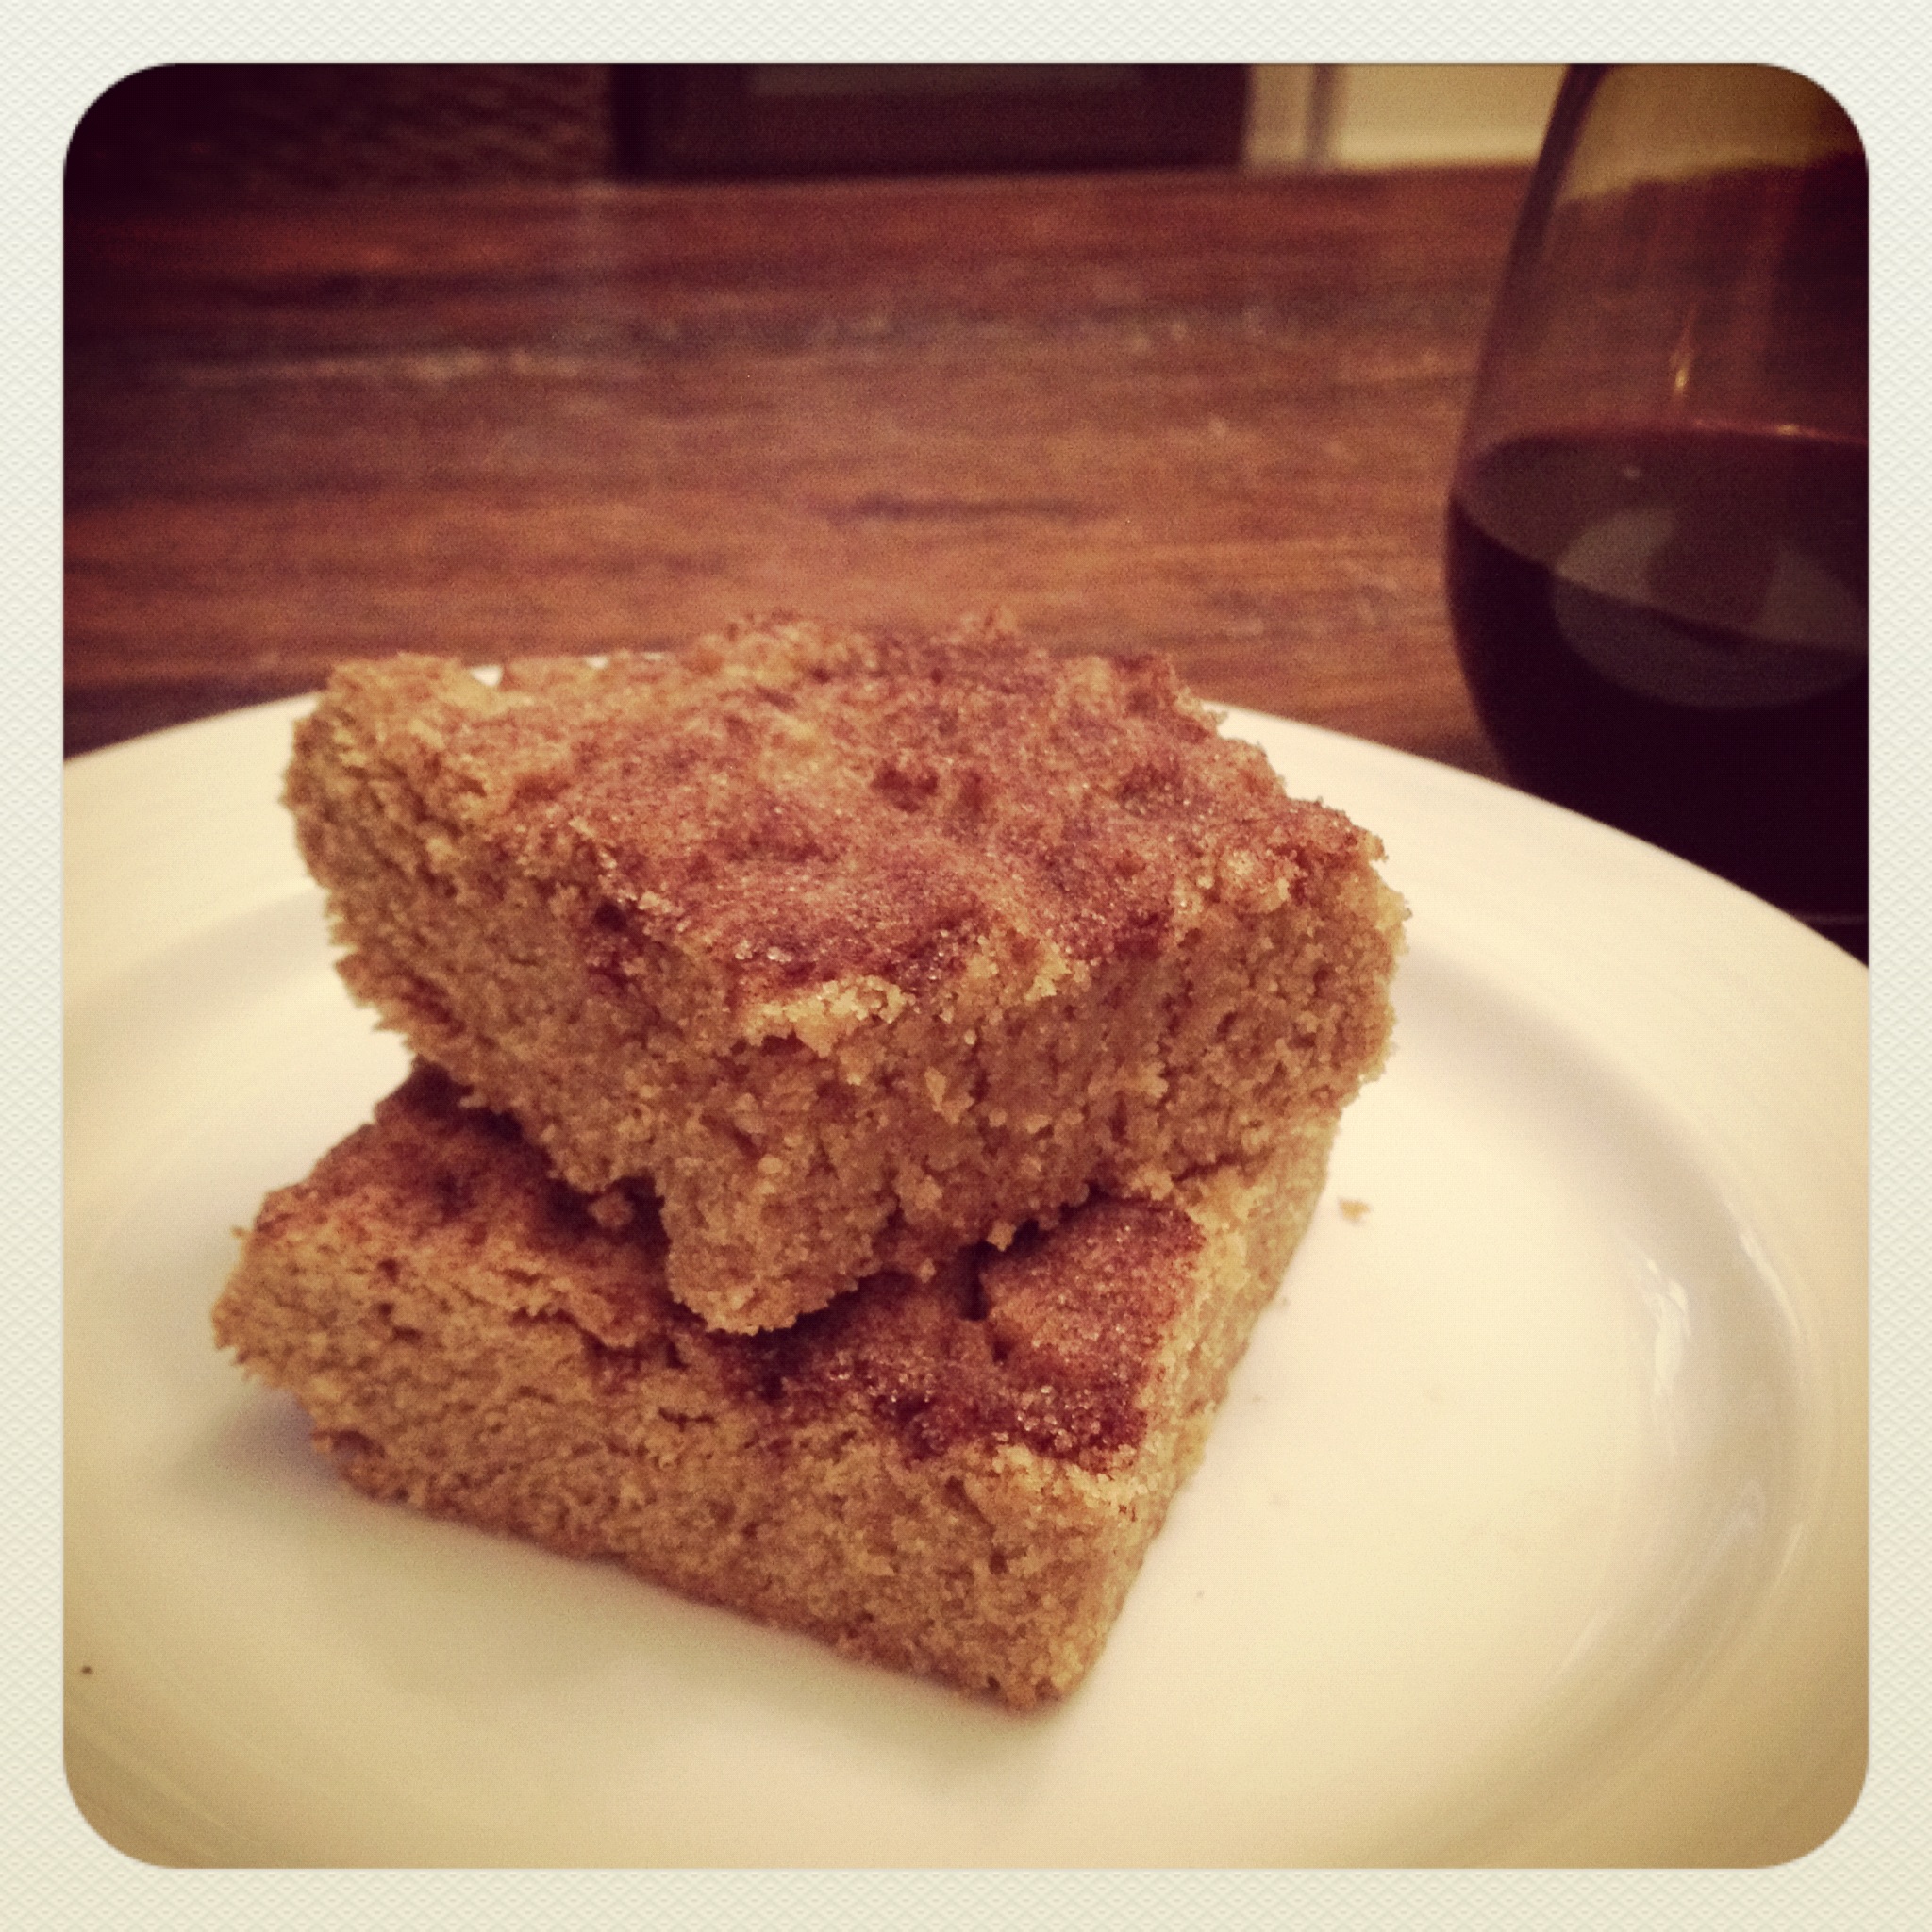
I was craving something sweet this weekend (when am I not) so I whipped up these Snickerdoodle Blondies I found on Pinterest. I made them dairy free, but I'm sure they'd be even better with real butter. The flavor was more savory than sweet because of the cinnamon and nutmeg, but they made for a great rainy winter night dessert. Here's the recipe:

Ingredients

  • 2-2/3 Cups All-Purpose Flour
  • 2 Teaspoons Baking Powder
  • 3 Teaspoons Ground Cinnamon, divided
  • 1/4 Teaspoon Ground Nutmeg
  • 1/2 Teaspoon Salt
  • 2 Cups Packed Dark Brown Sugar
  • 1 Cup butter, at room temperature (or use a dairy-free butter substitute)
  • 2 Large Eggs, at room temperature
  • 1 Tablespoon Real Vanilla Extract
  • 2 Tablespoons Sugar

Instructions

  1. Preheat your oven to 350ºF and lightly grease a 9×13 inch pan.
  2. In a medium-sized bowl, combine the flour, baking powder, 1 teaspoon of the cinnamon, nutmeg and salt and set aside.
  3. In large bowl, beat together butter and brown sugar until well combined.
  4. Add the eggs and vanilla, and beat until smooth.
  5. Stir in the flour mixture until well blended.
  6. Spread the batter evenly in your prepared pan (I lightly greased a spatula for easy stick-free spreading).
  7. Combine the 2 tablespoons of sugar and the remaining 2 teaspoons of cinnamon in a small dish. Evenly sprinkle the mixture atop the blondie batter (it may seem like a lot, but go for it).
  8. Bake the blondies for 25 to 30 minutes or until the surface springs back when gently pressed. They will be firmer and raised around the edges, sinking in the middle. No worries, this is okay.
  9. Let the blondies cool in the pan completely before cutting.

Recipe from Go Dairy Free

{made for dinner} Pesto Linguine with Green Beans & Artichoke Hearts

This caught my eye on Pinterest because it uses an ingredient we hardly ever cook with - green beans. And I'm happy to report it was deeeelicious. The artichokes added a nice saltiness, and the green beans gave it a great crunch. It's an easy weeknight dinner, and definitely makes the binder.

Ingredients:

  • 1 package fresh linguini
  • 1 1/4 cups fresh green beans, cut in half
  • 1 container of basil pesto (or make your own)
  • 3/4 cup artichoke hearts, quartered
  • Pinch of ground black pepper
  • 2 tbsp freshly shredded parmesan
  • Fresh basil sprigs (optional)

Directions:

Prepare pasta according to package directions, cooking green beans with pasta; drain. Transfer pasta and beans to large serving bowl; toss with pesto, artichoke hearts and pepper. Sprinkle with cheese. Garnish with basil.

Recipe courtesy of NestleUSA

link love - 1.27.12

Another week come and gone... time sure flies when you're chasing around a newly crawling baby! No big plans for this (football free, yay!) weekend. I'm hoping to hit up some local children's consignment stores and possibly start cutting my next quilt. I've had the fabric for it for months, so it's probably time I actually do something about getting it made! Anyway, here's what caught my eye this week...

  • Pleated Yoke Dress Tutorial on Craftiness is Not Optional - I just discovered this blog this week, and I'm so glad I did. Come on, how cute is this dress?!? Definitely adding it to my long list of things I want to make for Emma.

  • Simple Beaded Necklace on Craftiness is Not Optional - See, I told you I liked this blog! This necklace is just my style... not too big or flashy, but still fun and colorful - and you can make it yourself for a fraction of what you'd pay for it at a store like Anthropologie.

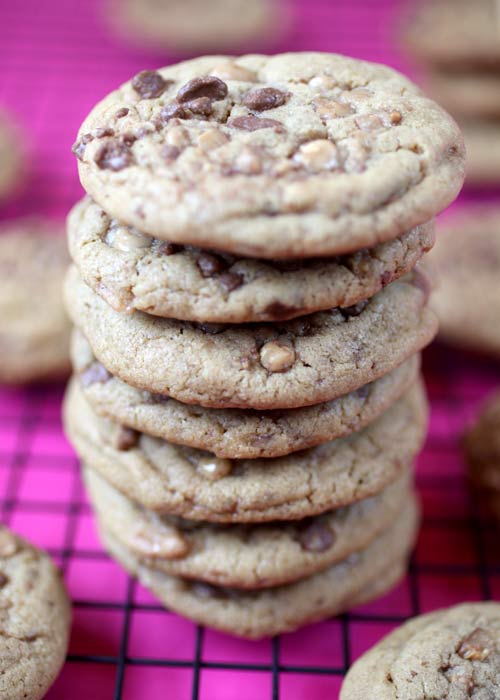
  • Heathy Cookies on Annie's Eats - It just wouldn't be Friday without something insanely yummy from Annie. She definitely hit a nerve in my sweet tooth with these bad boys. Say toffee and I'm there. Put it in a cookie and I'll even do the dishes for you.

Have a fantastic weekend!! :-)