DIY table runners

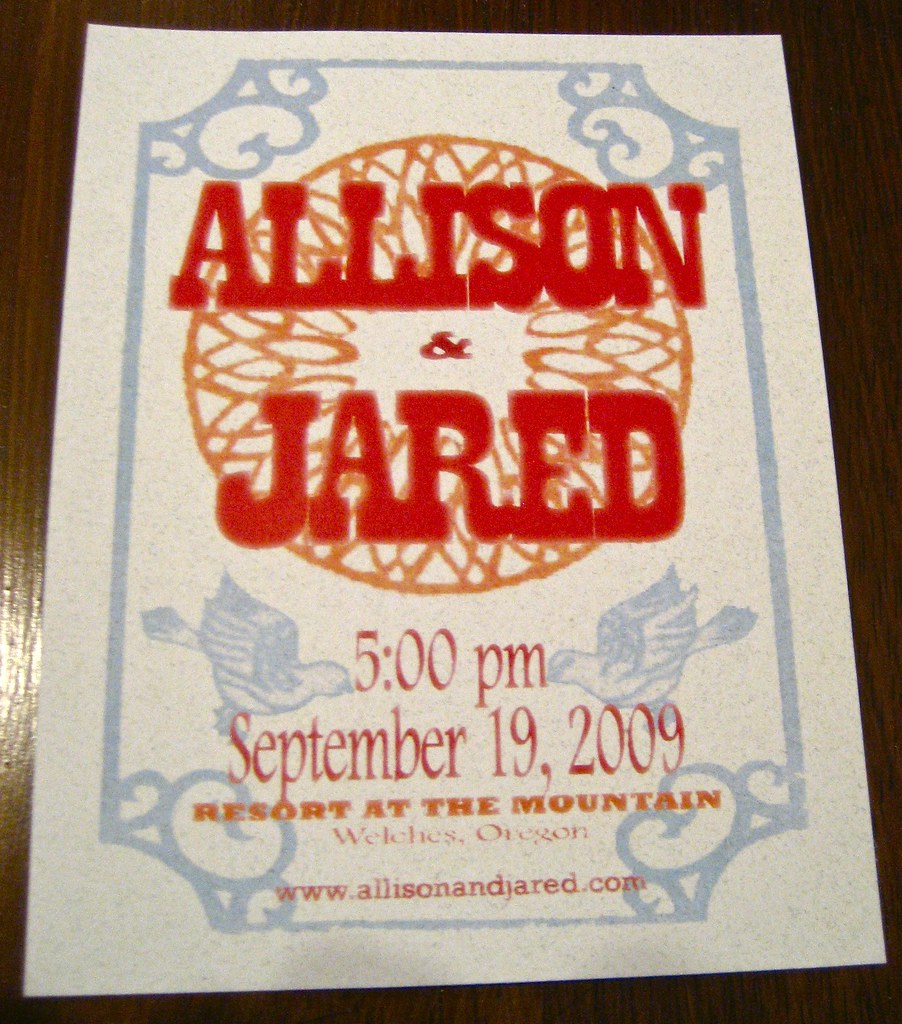
I had pretty clear visions for what I wanted most of our wedding details to look like... the reception tables, however, put me into an indecisive panic.  Our reception took place in a fairly typical resort ballroom with wall to wall windows on two sides.  Aside from these windows, the room itself didn't have a ton of character.  (I'll confess that the ballroom wasn't exactly the converted barn I'd dreamed of, but I learned pretty early on that when 90% of your guests are from out of town and you have to plan for the unpredictable Pacific NW weather - a dream wedding location is one that requires minimal travel and ensures your guests aren't dodging puddles on the dance floor.  And I really can't complain - the mountain setting and resort itself were simply perfect.)

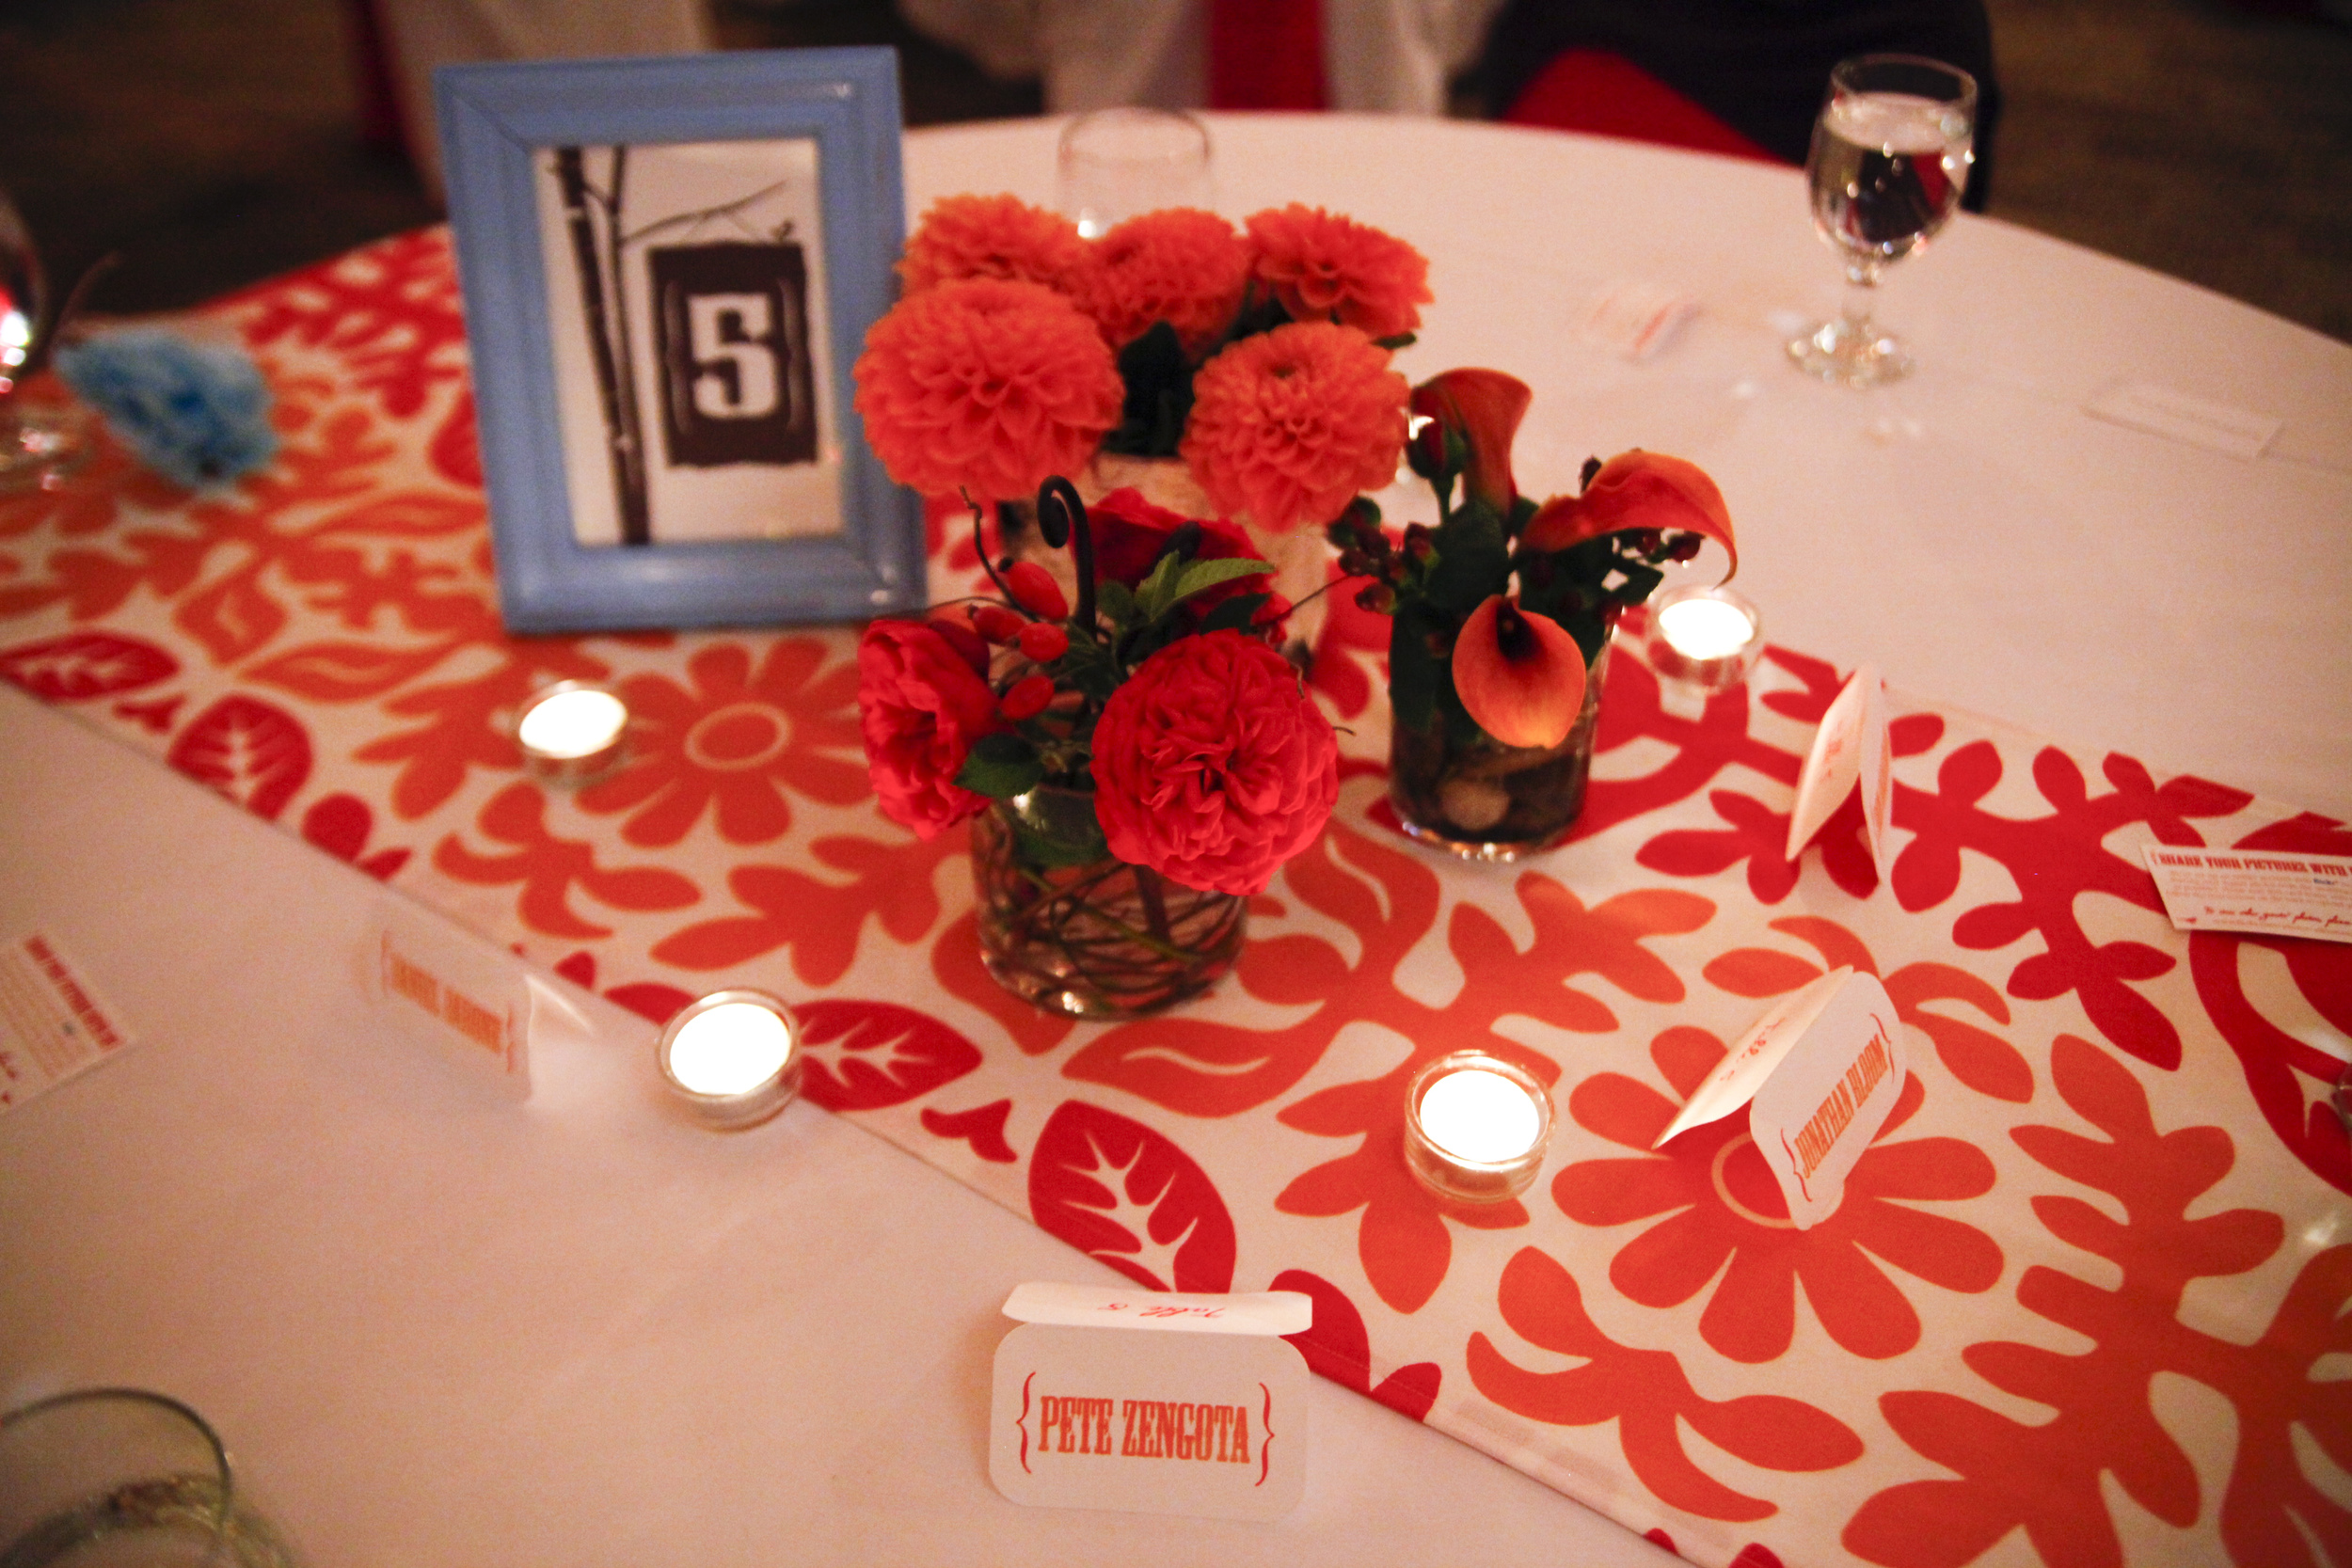
I had to come up with ways to personalize the tables that were small in scale so as not to compete with the gorgeous view, but still big enough to transform the space into something that was fun, charming, and unique.  Oh, and they had to be budget friendly because we'd reached a point with the decor where things could easily (very very easily) get way out of hand.  Hence - DIY table runners.

I searched high and low for the right ones, since making them seemed out of the question given the timing.  But the rental ones just didn't seem right and even if I had found ones to buy (which I didn't), I couldn't justify the cost.  This is when having a bridesmaid that likes to shop (okay, likes is a total understatement in her case) comes in very handy.  Sarah remembered an Ikea fabric that we'd both seen a million times and after pricing out the cost of making my own vs renting or buying, it was clear this was the way to go.  (Did I mention Sarah also volunteered to have her mom go to the Ikea in Houston to get me the rest of the fabric when the Portland store only had 6 yards and the Seattle store was sold out?  Thoughtful, resourceful, and totally willing to pimp out her mom during fabric emergencies - what more could a girl want in a friend!??)

Anyway, I calculated that I'd need each runner to be 3 yards in length, and that I could get 3 18" wide runners (with double fold hems) out of a 3 yard piece of the Ikea fabric.  I needed 12 runners in all so I purchased 12 yards of fabric, which totaled $83.88 or about $7 a runner.  Not too shabby!  On top of that, they were pretty easy to make (one of those projects where the cutting takes longer than the sewing) and surprisingly one of the easier DIY wedding projects I took on.
PS... these runners are currently in storage, waiting for me to repurpose them or find them a new wedding to attend.  If you're interested in them, please let me know! :-)

lemon sorbet

Like most of the country, Portland is experiencing a massive heatwave this week. But unlike my friends and family on the east coast, most Pacific Northwesterners (including us) don't have central A/C. So for two weeks every summer we collectively roast in our homes, saying things like "be careful what you wish for" and "I hope the neighbors can't see me standing naked in front of this fan right now." It's not pretty. But this year we were prepared. We went to the store on Monday and bought a window A/C unit for our bedroom and the ingredients for a lemon sorbet. If lemonade is the perfect summer drink, lemon sorbet is the perfect summer dessert - especially when the temps get into the triple digits.

The recipe only yielded 2 and 1/2 cups, so I doubled it. It kind of defeats the purpose if the heatwave lasts longer than the sorbet, right? Right. I ended up needing 6 lemons to get 2 cups of lemon juice, which I ran through a fine mesh strainer before mixing with the simple syrup.

After the mixture reached 40 degrees it was time to put it in the ice cream machine. Oh, how I love this part. The freezing took approximately 25 minutes, after which I put the sorbet into a bowl and let it harden for a bit in the freezer.

Yuuuuummmmm. With a handful of cut strawberries (half store bought, half from our garden) this was such a tasty and refreshing dessert. It's going to be even hotter today so we'll definitely be having this again tonight. And tomorrow night...

fourth of july recap

Our 4th of July went something like this...

  1. wake up at the crack of dawn to run 13.1 miles around Sauvie Island
  2. celebrate another successful race with pancakes, bacon, and coffee
  3. attempt to nap
  4. prep food for the block party
  5. sit down whenever possible
  6. limp outside to join neighbors in games, eating, and drinking
  7. make sure Rocco doesn’t bark at the babies
  8. take Rocco back inside after he barked at a baby
  9. eat more, drink more
  10. watch fireworks
  11. move to backyard for firepit and smores
  12. deplete any remaining energy while attempting to stay awake past midnight
  13. blissfully fail at #12 and crawl into bed

Tired yet?  Yeah, me too.  So let’s get to the good stuff... the food!

Odd numbered houses were tasked with making sides (the even numbered houses got desserts) so I made our default pasta salad – Giada’s Antipasto Salad.  Not knowing how many people were going to attend and how much the other houses were making, I made about 5 times more than I needed to and will now be eating pasta salad for 3 meals a day for the next week.

We had the opposite problem with our other side dish – deep fried pickles.  If you’ve never had deep fried pickles, you haven’t really lived.  Honestly.  They’re worth buying a deep fryer for.  I’ve had them at restaurants and they’re never as good as homemade.  Many restaurants take the pickle slice approach, which is a shame because the spears are hands down the way to go.  But the home deep fryer also makes things less greasy than what you find at restaurants or state fairs… I don’t know why that is, but it makes me feel a little less guilty.  (We figure it’s a slippery slope from deep fryer purchase to The Biggest Loser, so when Jared and I bought the deep fryer we pinky swore that we’d only use it 2-3 times a year and we’ve stuck to it.  Yes, we pinky swear.  We also pass each other notes, talk in secret code, and promise to be bffs 4ever.  You don’t do that with your significant other?  Oh.  Damn.)  Anyway, the thing about the pickles is that each time we make them I swear I’m going to take pictures, and then the whole batch gets eaten before I can even get the lens cap off.  This time was sadly no different.  But in case you’re curious, they pretty much looked like this:

At one point in the evening there were several people holding a deep fried pickle in one hand and Jared’s home brew in the other, which was pretty awesome.  I don’t know if I’ve ever mentioned it on here before, but my husband has become a pretty avid home brewer over the past couple years.  So when an email went out to see what people could bring to the block party, I volunteered a keg of Jared’s beer.  It was sort of like the marriage equivalent of taking the training wheels off your kid’s bike and hoping like hell they don’t curse your name as they’re being carted off in an ambulance.  Thankfully, his beer was a rousing success (duh!) and before we knew it, Jared’s was the first keg finished and he breathed a massive sigh of relief.  I did, too, it was just drowned out by the groaning that occurred every time I had to move.

Bakerella's Congo Bars (and why they're worth the blisters)

We got invited over to our next door neighbors' house Friday night for a BBQ, which gave me the excuse I'd been looking for (i.e. desperately hoping for) to make the Congo Bar recipe Bakerella posted last month.

She gave two options for mixing the batter - stand mixer or by hand.  She tried it both ways and said the hand mixing approach turned out better.  I sure hope she's right because by the time I was done mixing the super thick batter I had multiple blisters on my right hand.  But, as the title of this post suggests, the blisters were totally worth the delicious goodness that came out of the oven.

Holy mama!  I promise you, they taste even better than they look.  As Bakerella notes in her post, they took much longer than 30 minutes to cook through... probably more like 40.  But, man oh man were they good.  I'm debating making them again with Rolos.  Aaaaaaaaaand now I'm hungry.

sink skirt storage solution

My friend Angela (mom to the beautiful Mirabel, wearer of this while nursing) came to me late last year with a bathroom sink dilemma.  (And yes, that means it's taken me an inexcusably long time to write about this particular project.)  She sent me this picture of her rather wide sink with no built in storage.  She wanted to be able to store extra toilet paper and such underneath, but wanted it hidden.

Her idea was to attach a sink skirt to the bottom ledge of the tile, but after weeks of searching she couldn't find one that would work.  So she very sweetly asked me to help her out.  I wasn't very familiar with sink skirt construction, so I found a few sink skirt tutorials online and used this as my base (with a few tweaks.)

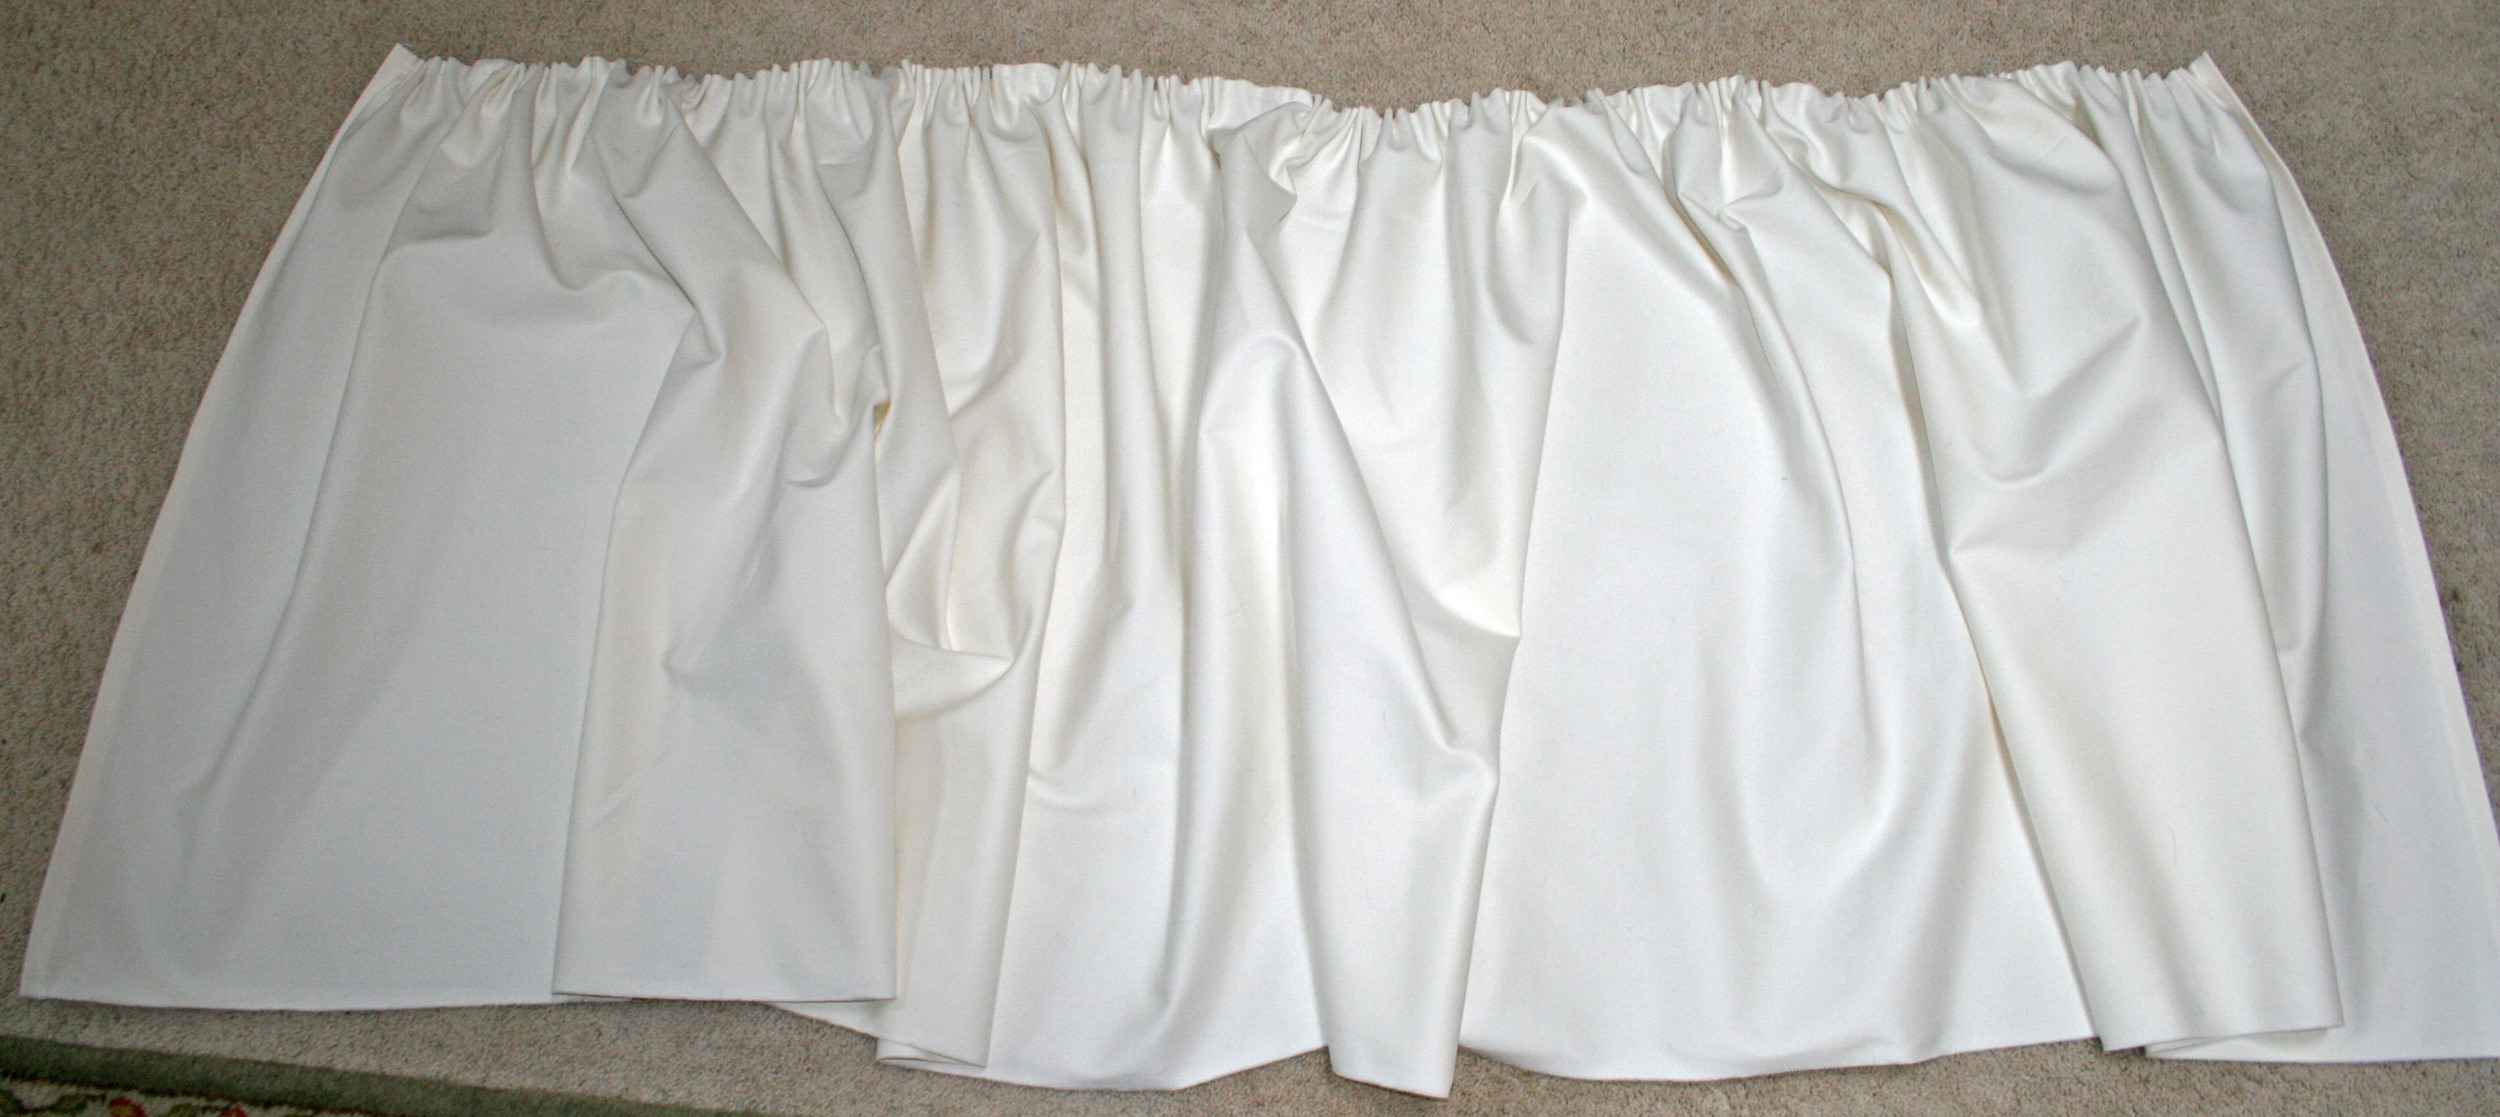
The measurements of Angela's sink are 28" x 60", so I used a 30" x 122" (double the width, plus 1" extra on each side) piece of heavyweight cotton twill fabric.  I also cut a 6" x 61" strip for a top cuff.  More on that later, but the primary reason I strayed from the tutorial here is because I planned to use Sew On and Sticky Back Velcro to attach the skirt to the sink.  I felt like regular sticky velcro wouldn't be strong enough to hold up the weight of the skirt, and the sew & stick seemed like a great solution.

Once all my fabric was cut and thoroughly lint rolled (trying to keep dog hair off of a 10 ft piece of cream colored fabric is a losing battle) I started hemming the sides with a 1/2" double fold hem, and then the bottom.  Then it was time to baste.  The fabric was not liking my attempts to machine baste, so - starting in the middle of the skirt and working my way out on each side - I hand basted two rows about an 1/8" apart.   Then I gathered the skirt until it reached a width of 60".

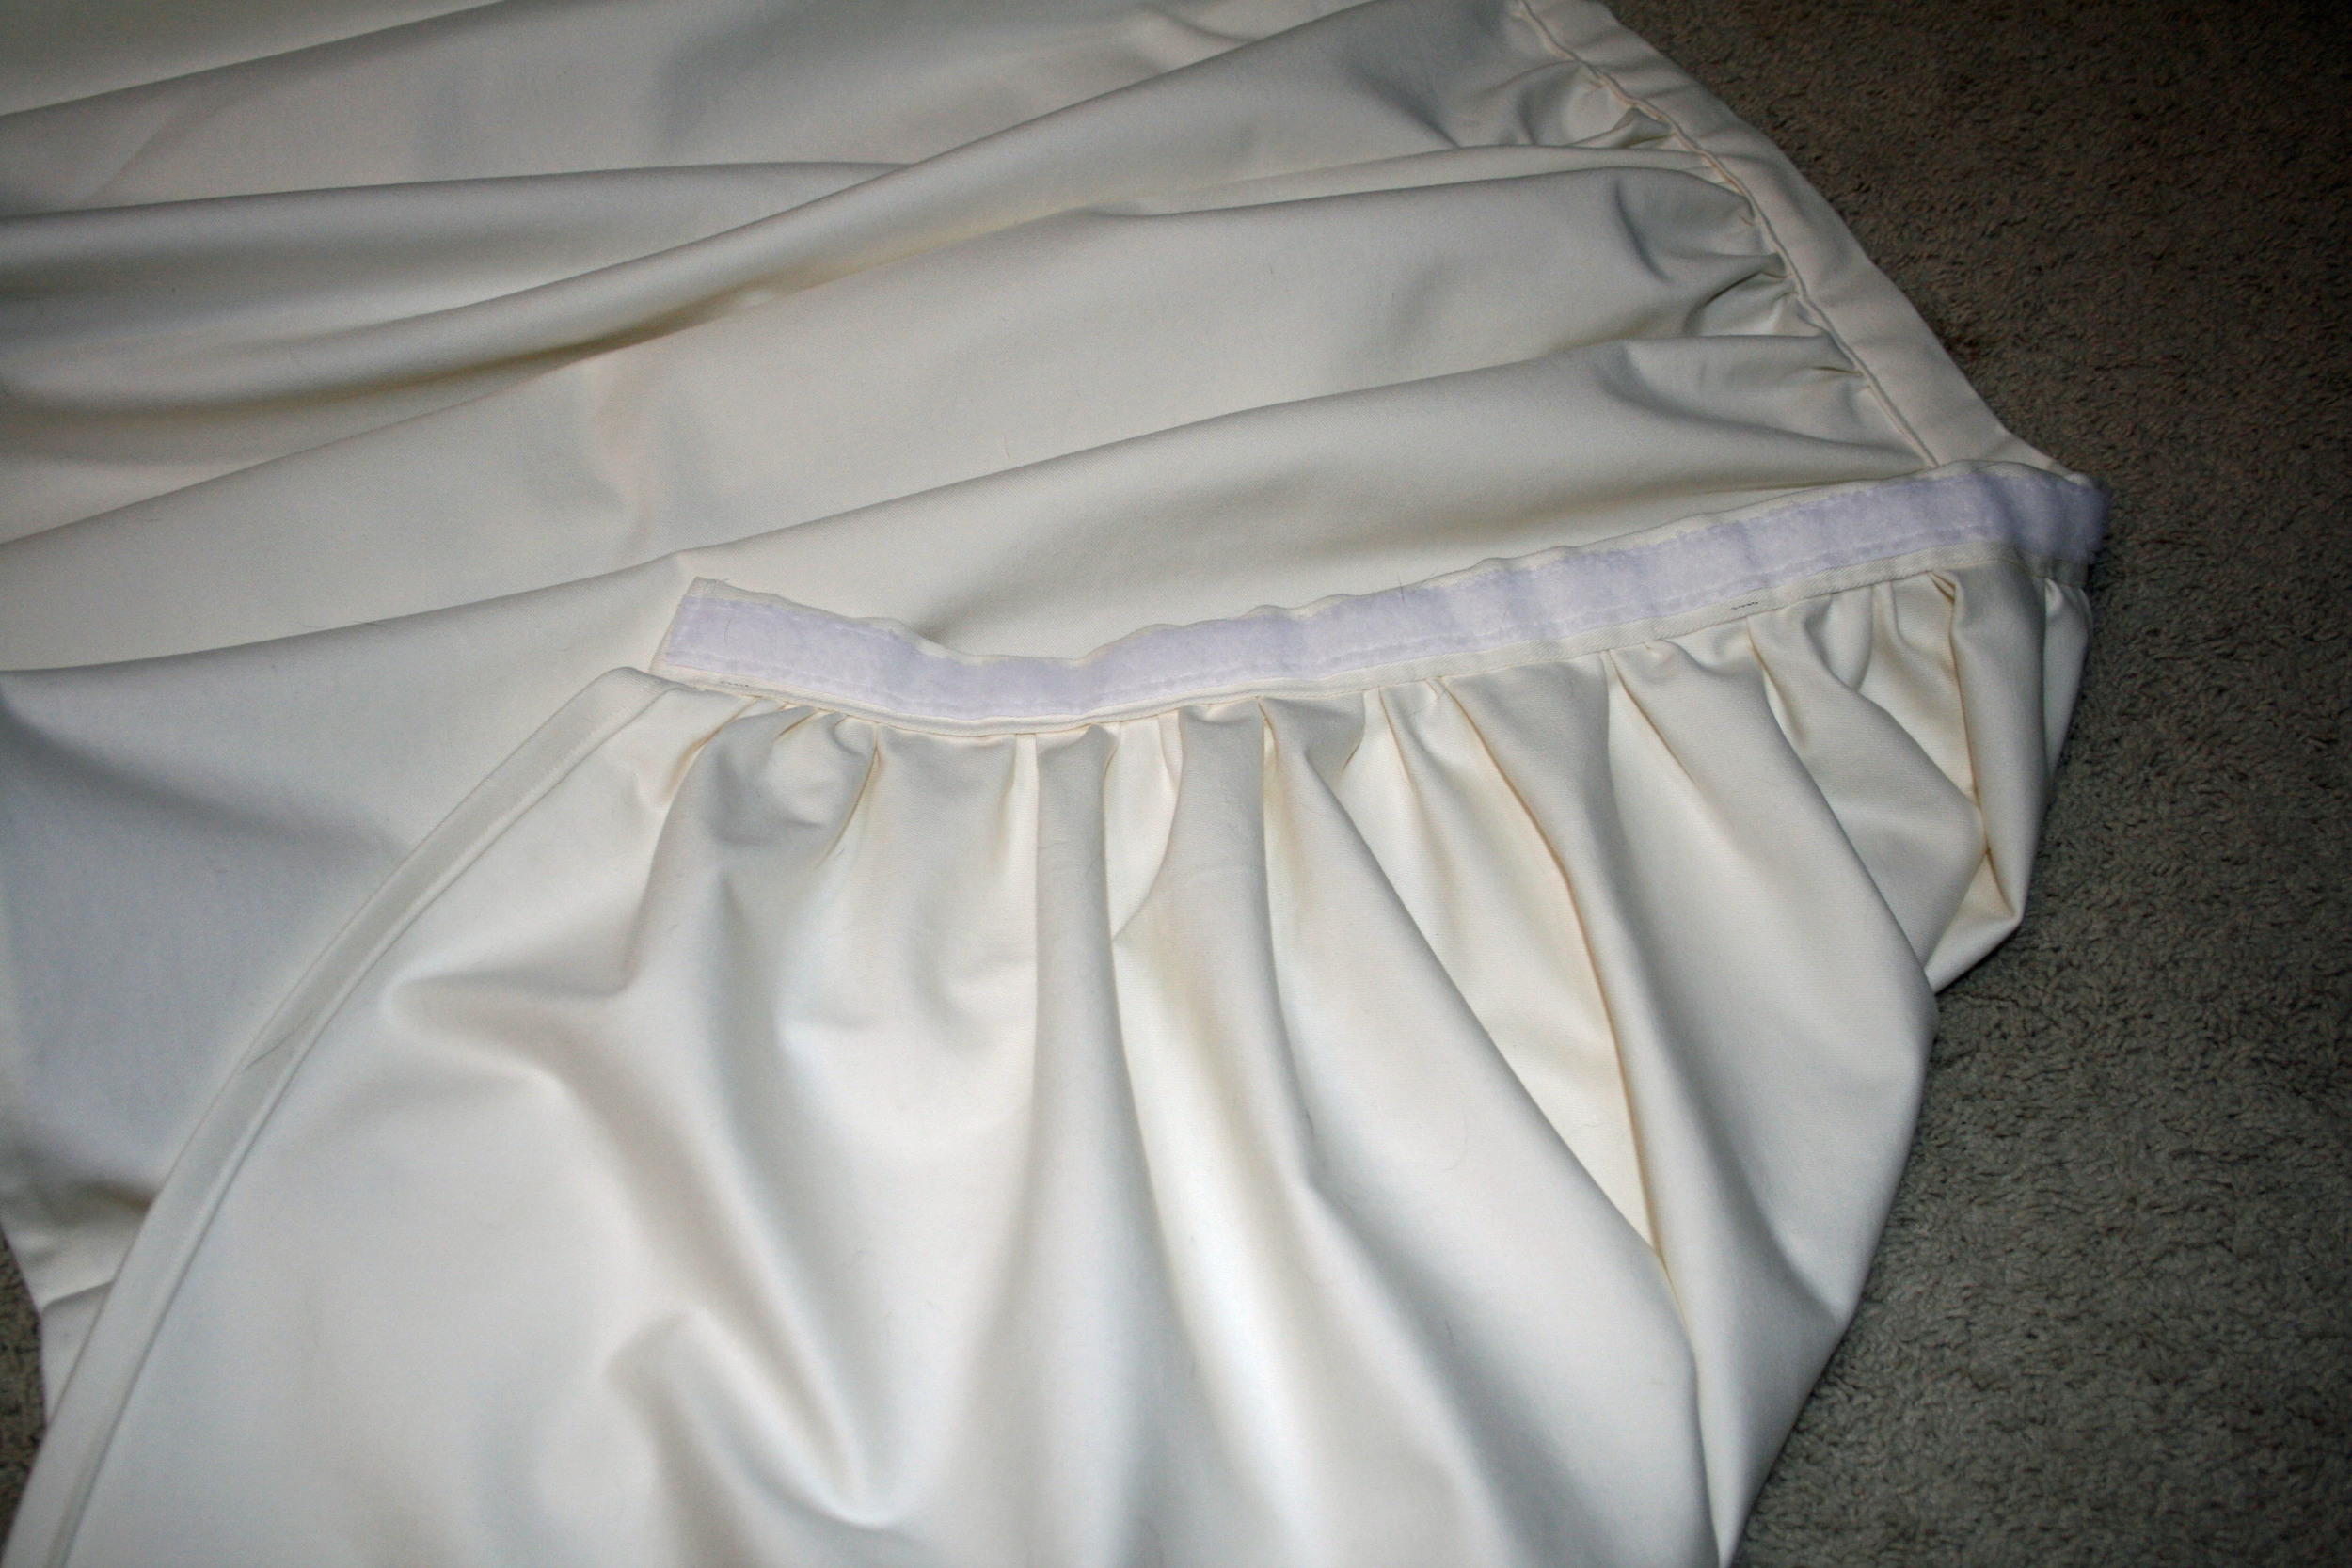
Now back to that cuff... I took the 6" x 61" piece,  folded in a 1/2" on each short side, and pressed.  Then I folded the whole thing in half lengthwise and pressed.  I folded each long side in toward the center crease and pressed so that the cuff was 1.5".   Then it was time to attach the velcro.

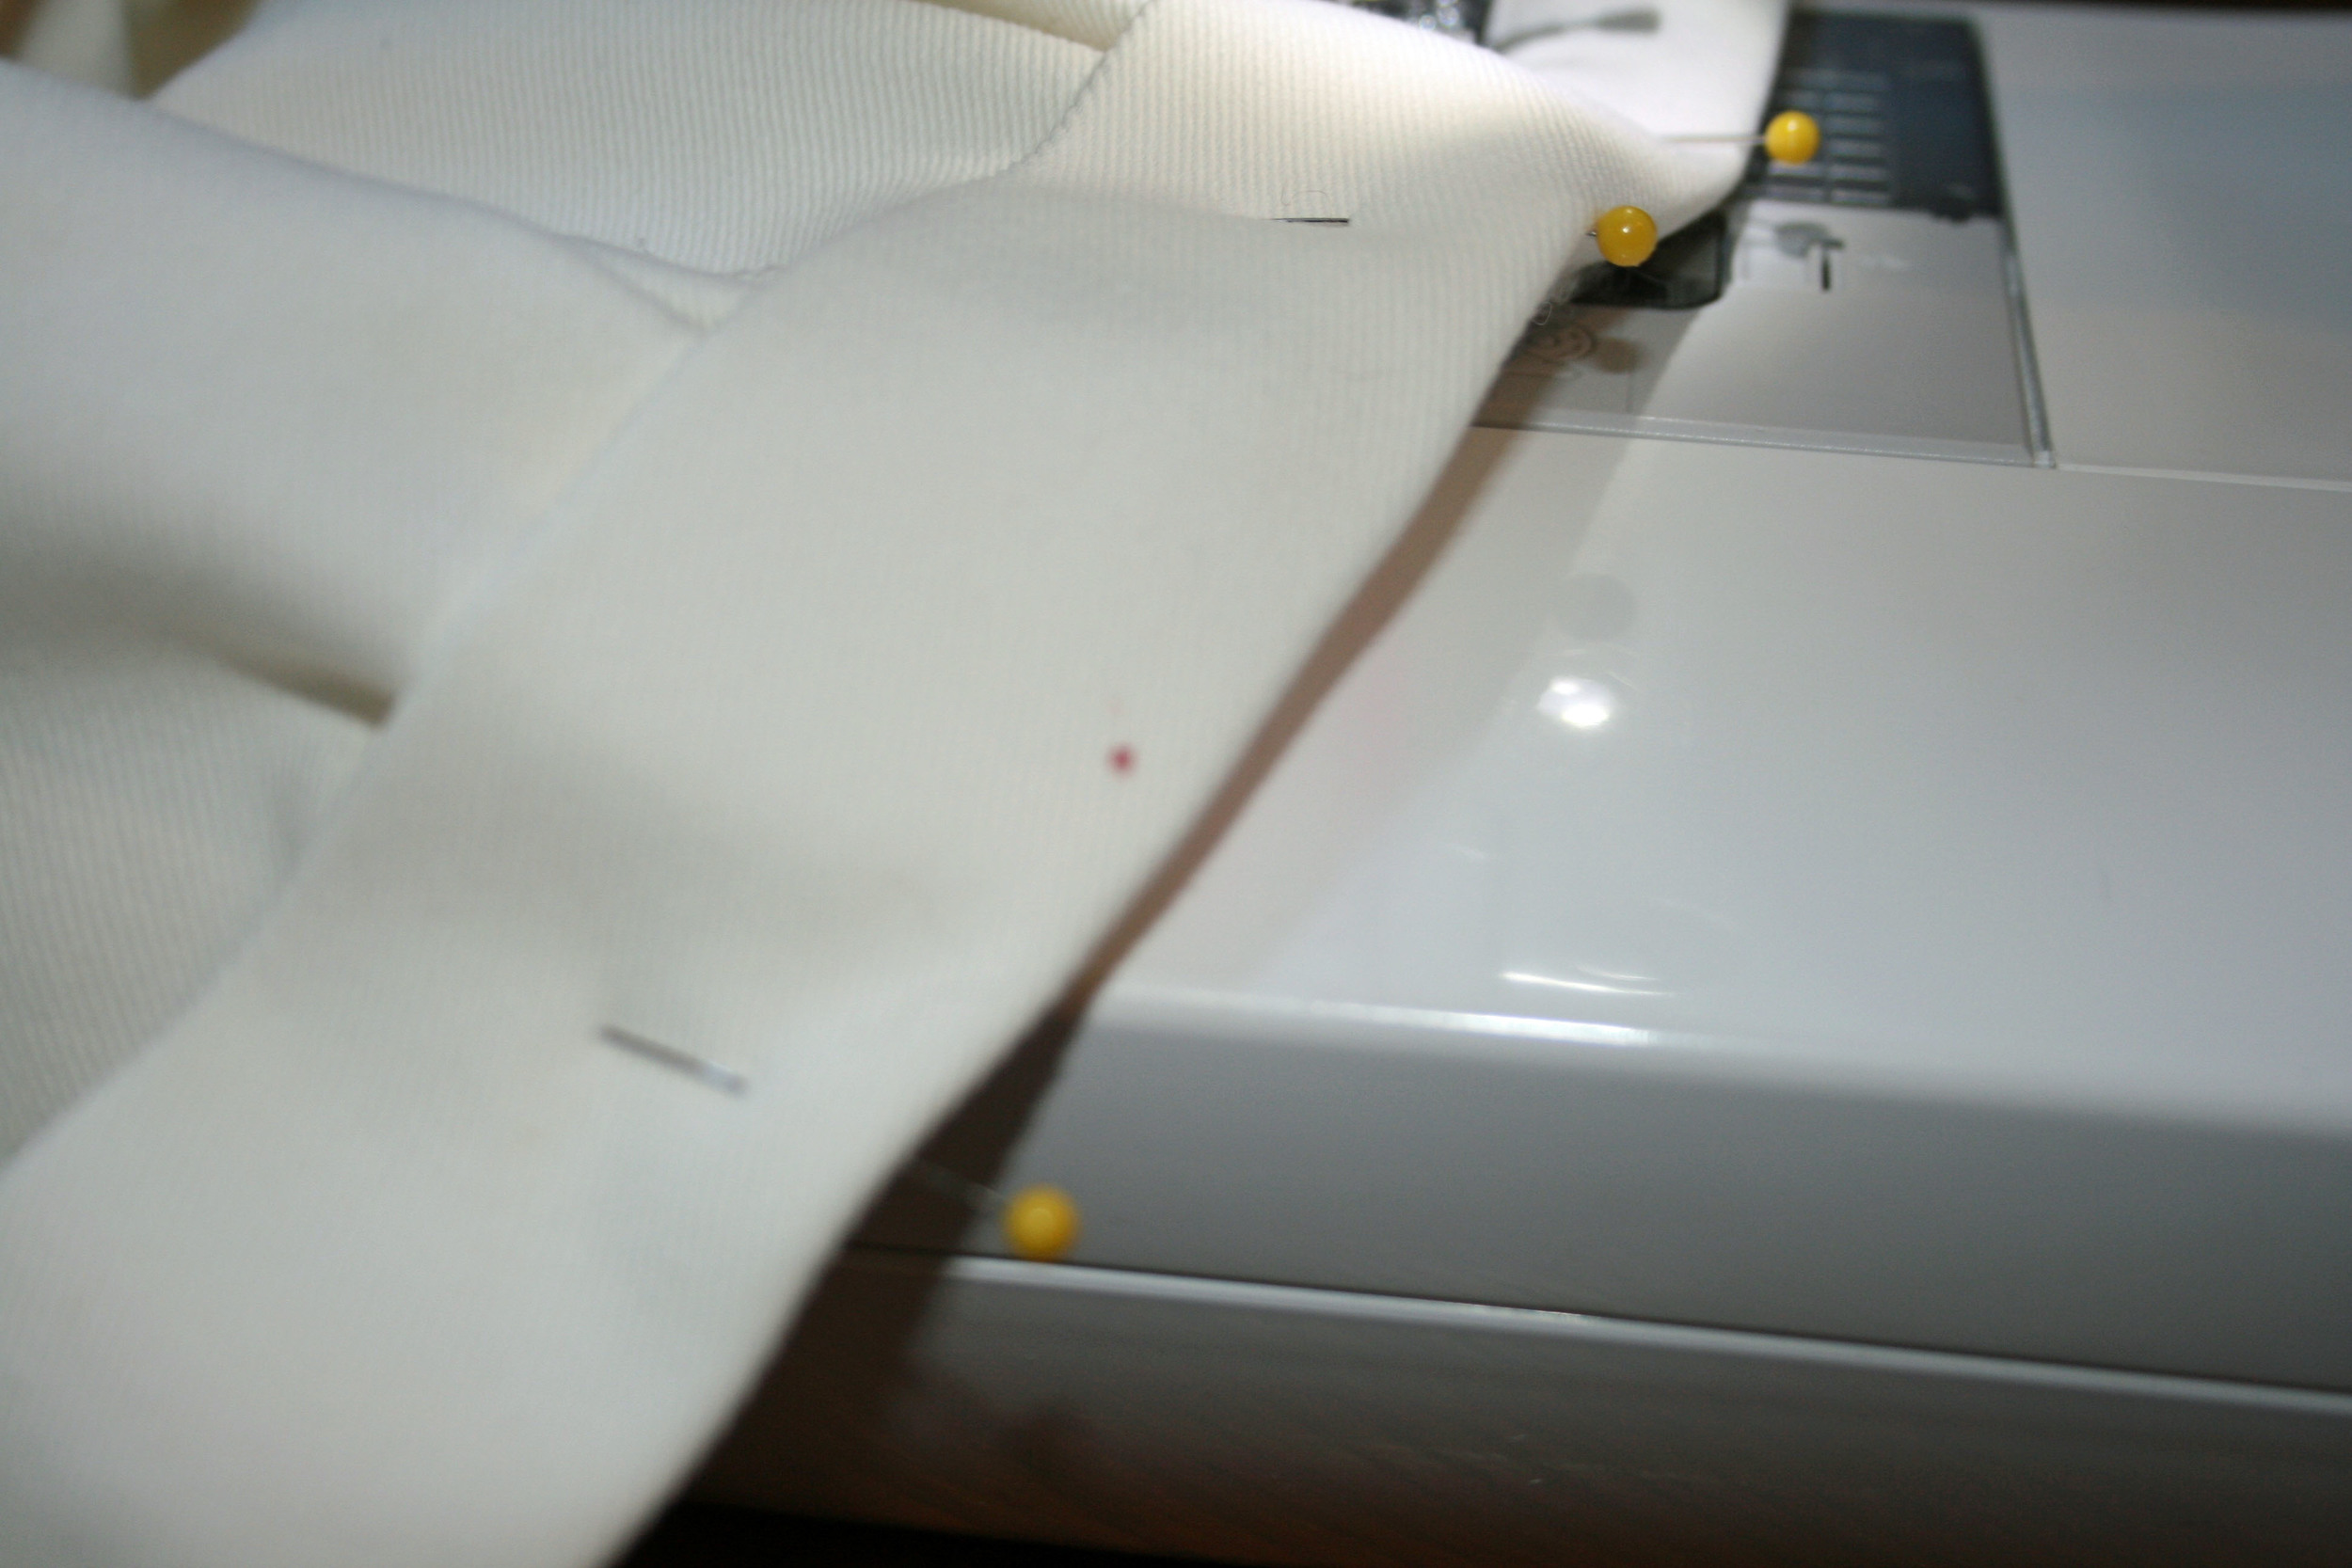
Once the velcro was attached, I was ready to sew the cuff onto the skirt.  5 feet of pinning later...

You see that little out of focus red dot on the cuff?  Yeah, that's blood.  My blood.  Because I'm a klutz.  Especially when it comes to pinning.  When I was making the Weekender Bags my arms looked like I had taken up kitten wrestling.  It wasn't pretty.

Excuse me for a minute while I tout the magic of the Tide Go pen.  If you don't already have one in your sewing kit, go get one.  Immediately.  I used it on the blood spot and - voila!  You can see the resulting wet spot in the picture above, but it left no evidence of my clumsiness once it dried.  Blood, people.  It got out blood.  Don't ask me how.  Just go get one.

Anyway, I attached the cuff with a 1/8" seam (or 1 and 3/8", depending on how you're looking at it), closed up the ends (also using a 1/8" seam) and the sink skirt was done!

I finally got to see the sink skirt in action when I went home to VA in April, and was relieved to see that it's working out exactly as Angela had hoped!  Her solution was brilliant, and I'm happy I was able to help her out.  I may have to make one now for MY bathroom!

Sock Monkey onesie gift set & tutorial!

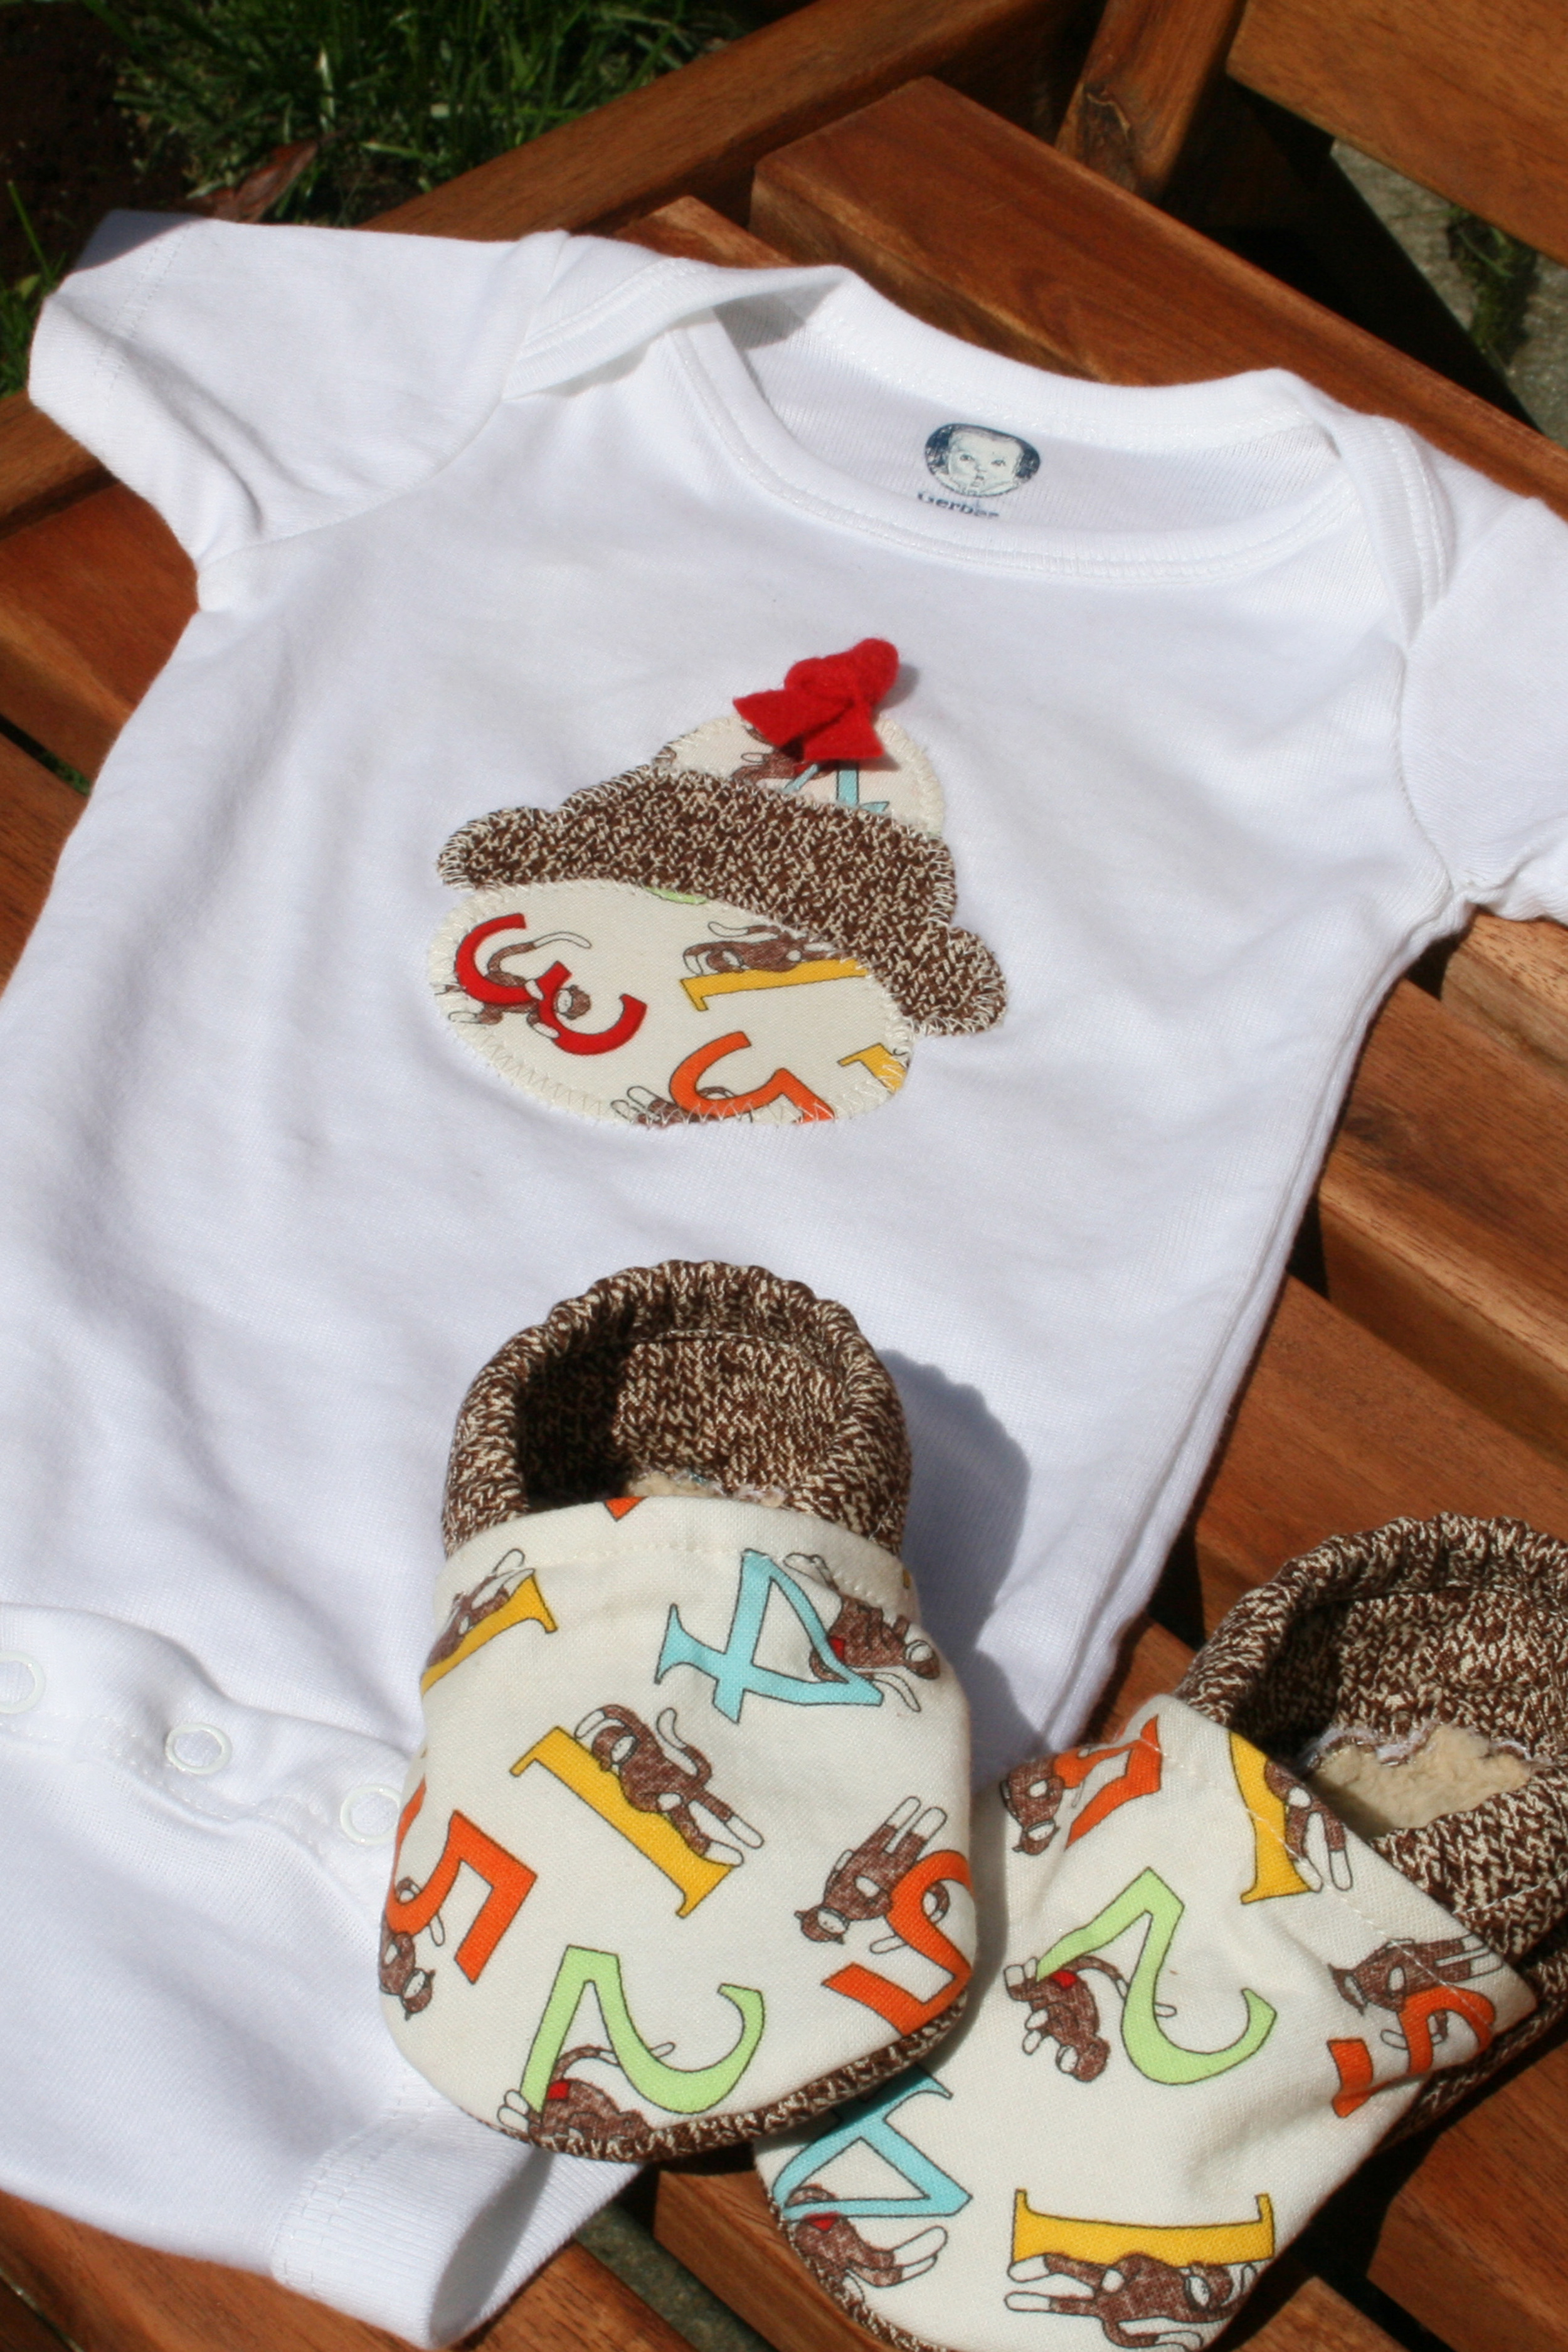
I’m at a point in my life where it seems like most of my girlfriends are either pregnant or just had babies, and as a result I’ve become slightly obsessed with making baby gifts for them.  I started making applique onesies when Lindsey (awesome mama and best friend extraordinaire) was pregnant with her son, Will, last year.  The necktie tutorial on Crap I’ve Made got me hooked and from there I started making my own applique designs.  What I love about applique onesies is that they’re quick, a great way to use up fabric scraps, and there are endless design possibilities.

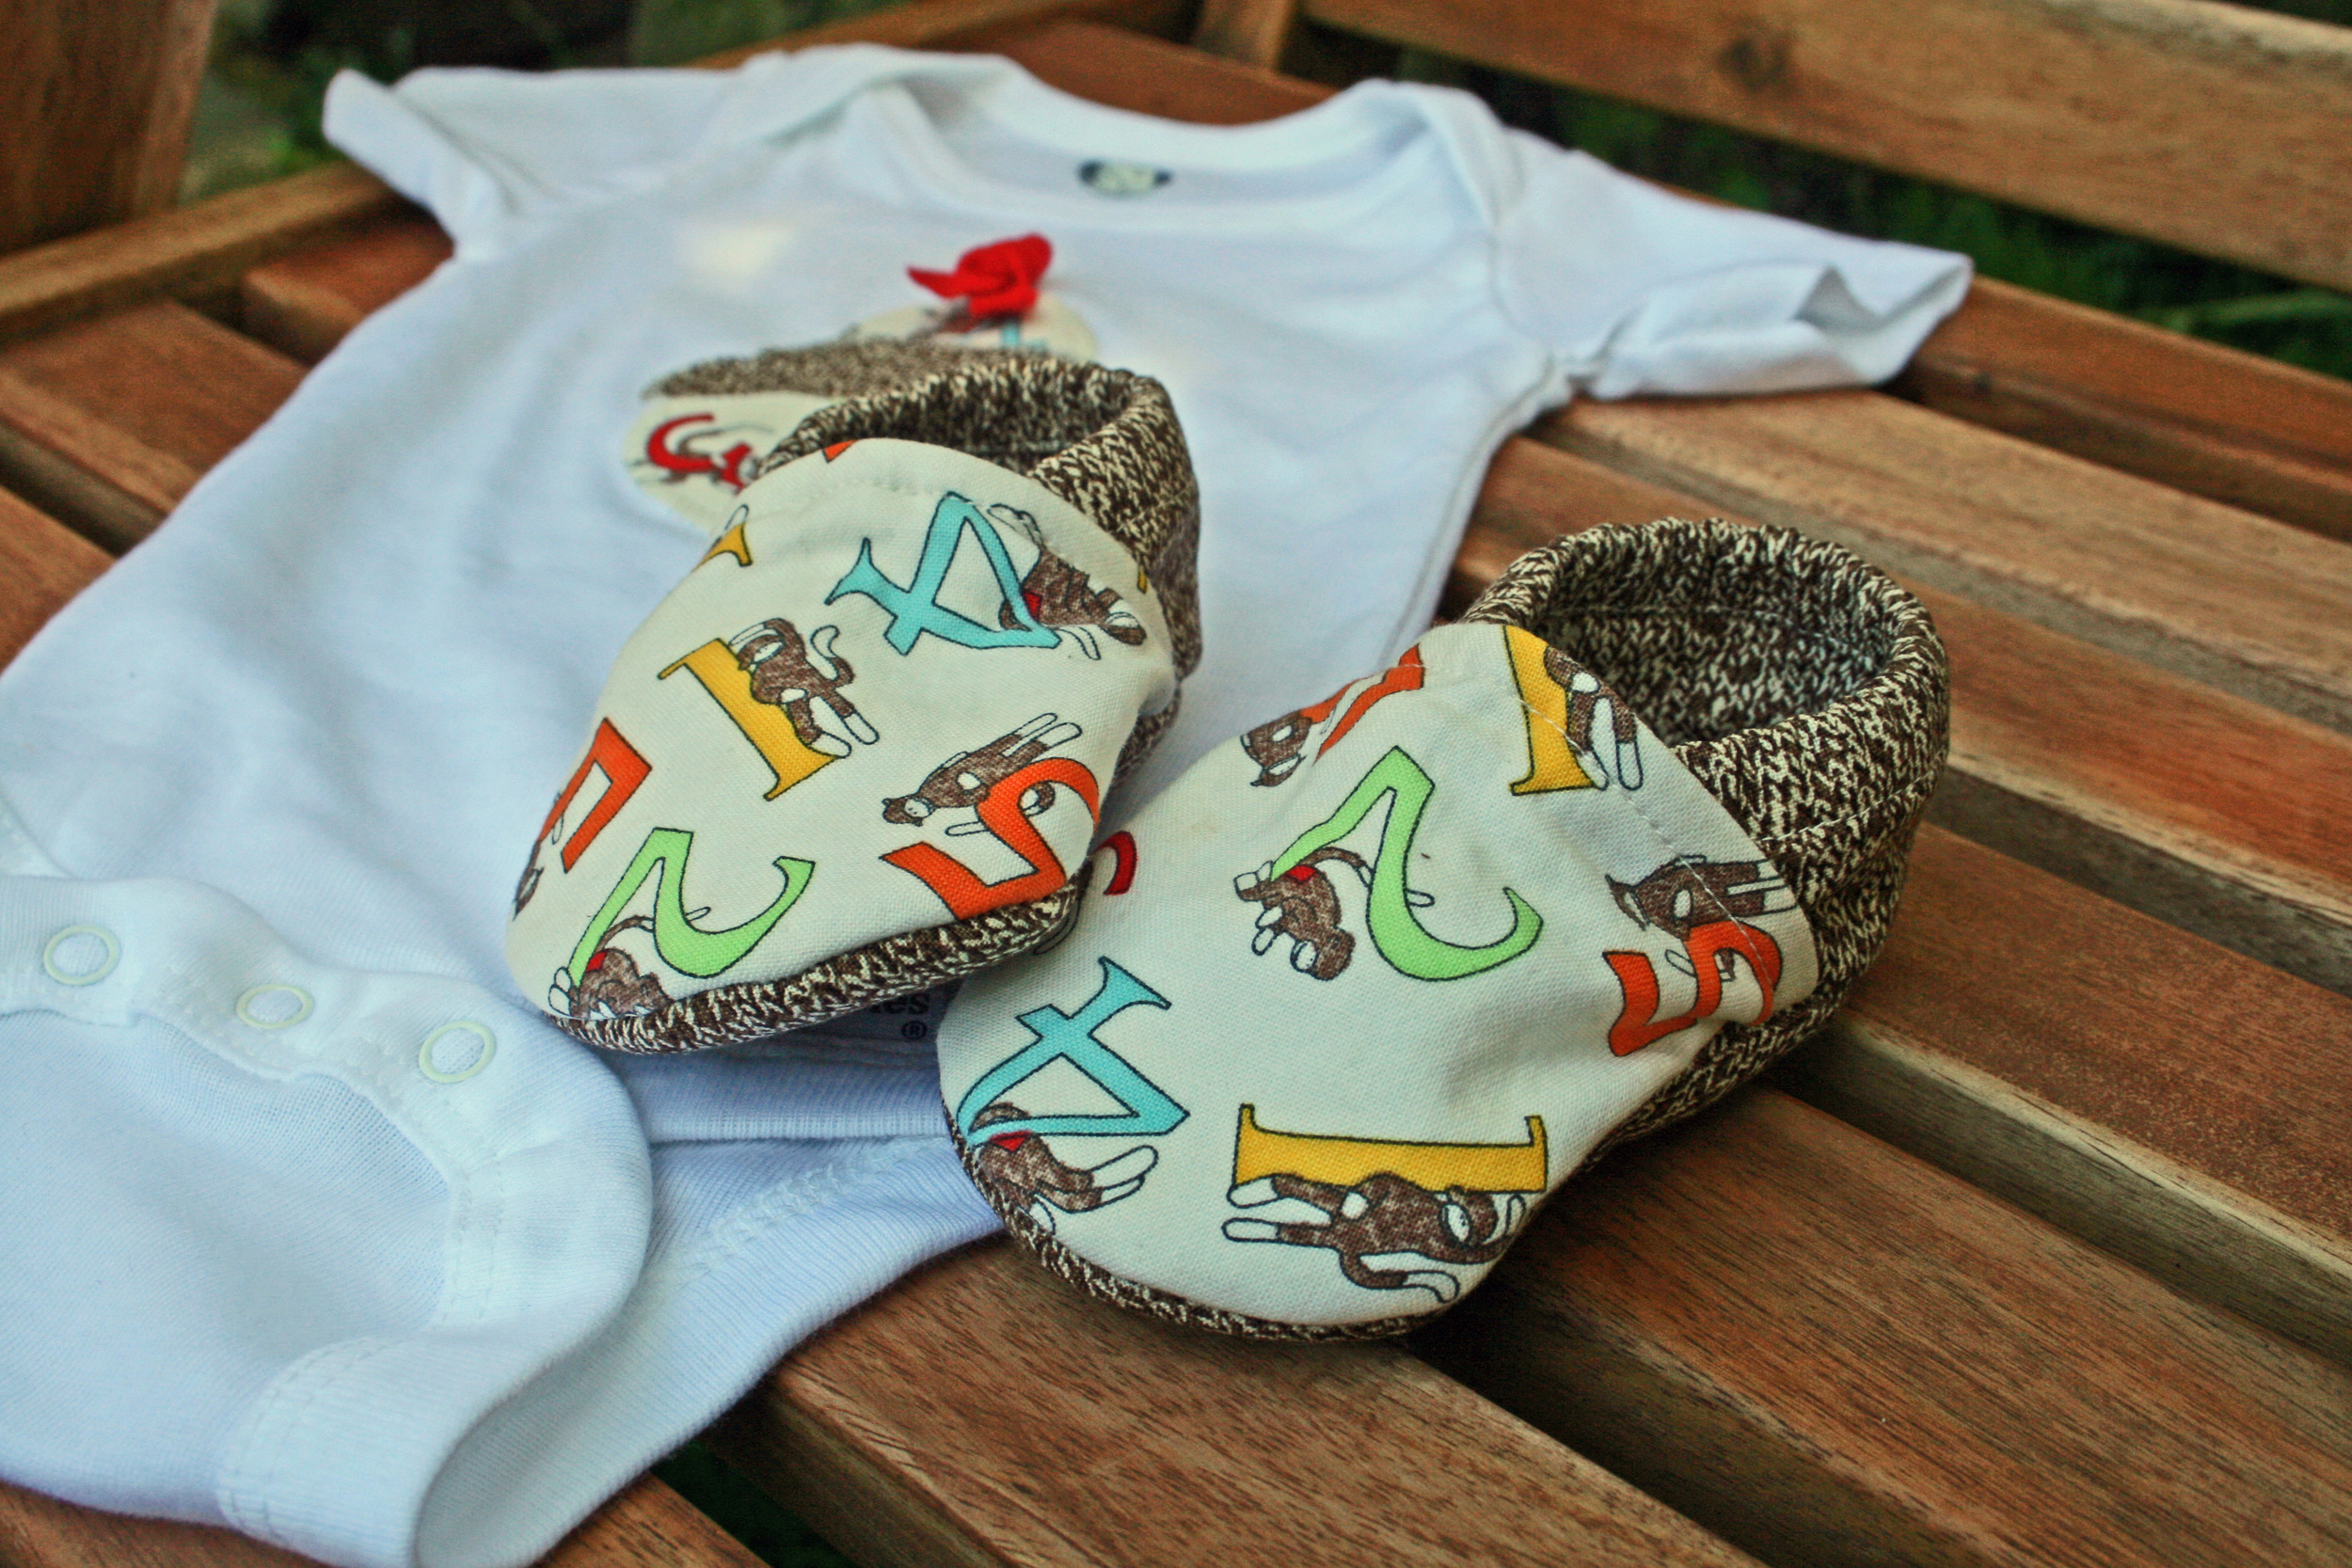
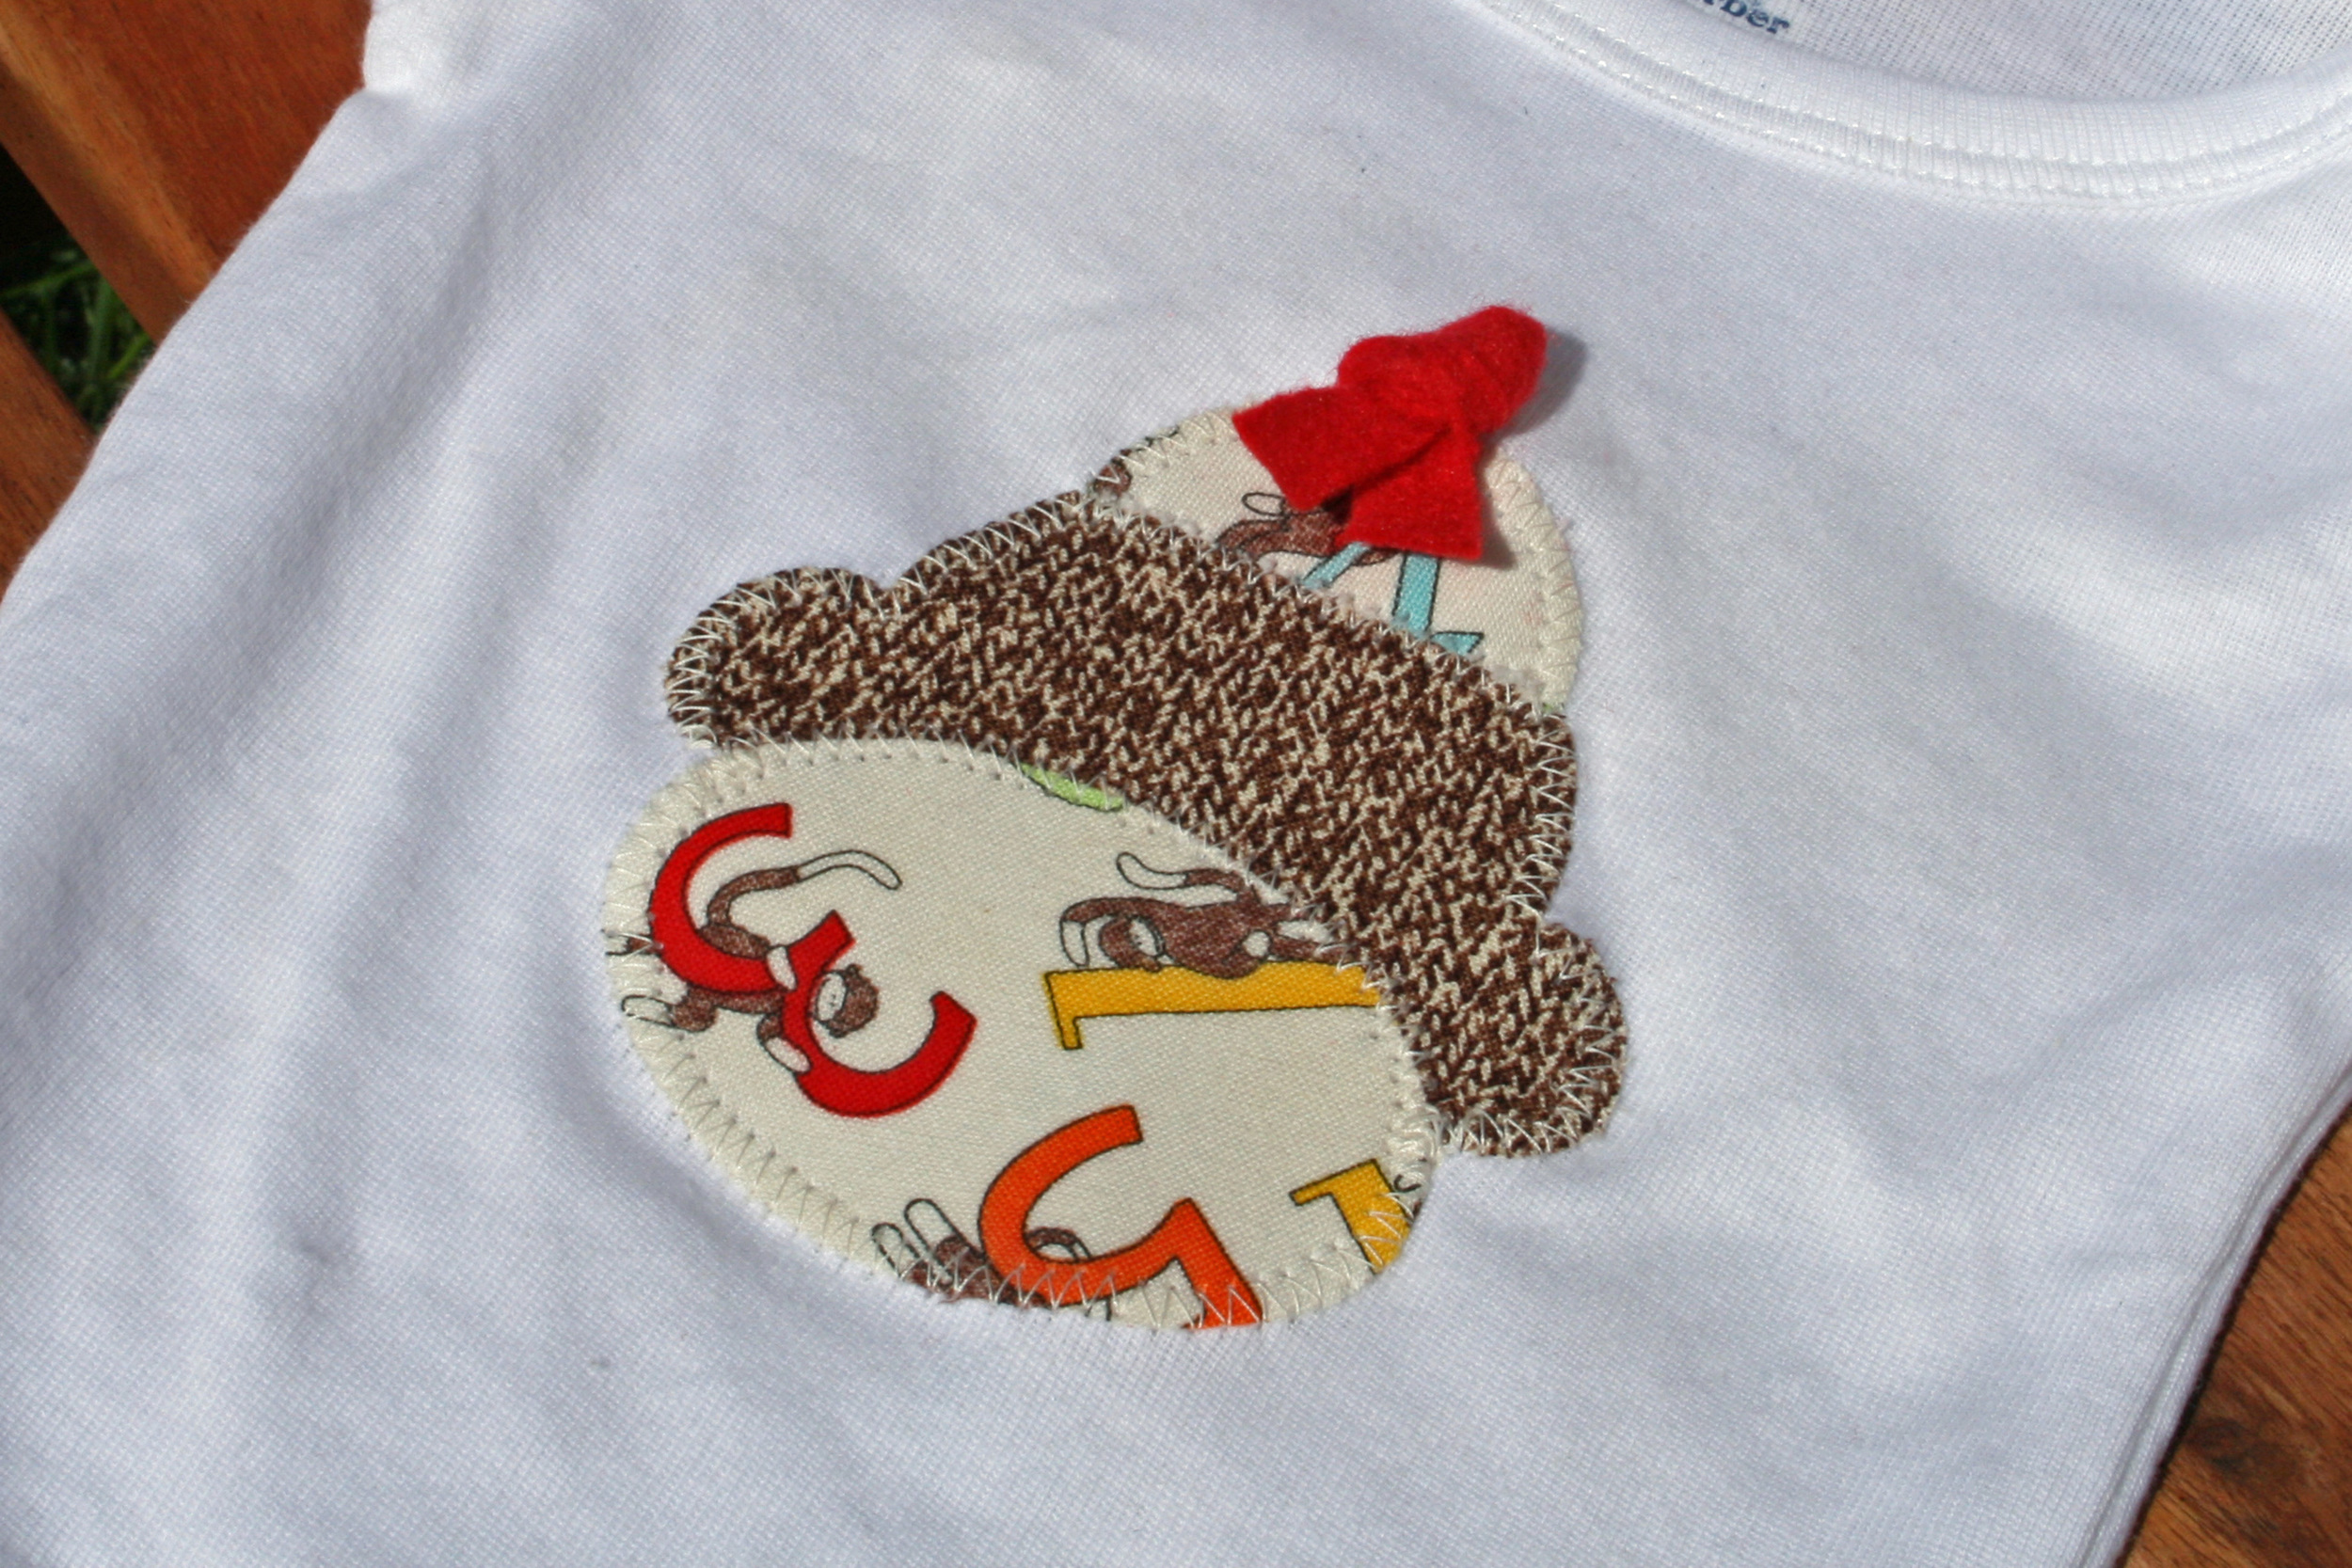
When deciding what to make for two of my girlfriends who are due this summer, I knew I wanted to try to use up some of my leftover Sock Monkey fabric so I created a Sock Monkey applique design using Microsoft PowerPoint (a program I use daily at work, but have recently started experimenting with for sewing and design projects).  You've probably noticed by now that I have a hard time stopping at just one baby gift, so when I came across this tutorial for cloth baby shoes, the Sock Monkey gift set was born.  They’re both having boys, but I think the set works for either a boy or a girl.

The cloth shoes were a little tricky to work with due to their small size and all the layers of fabric and interfacing, but - like most baby stuff - they were pretty quick to make.  It probably took me longer to cut out all the pattern pieces than it did to actually sew them together.  One thing I'd recommend is to play around with the length/tension of the elastic because if it's too tight it makes the tops of the shoes bunch up.  If you're attaching a little ribbon or button to the tops then this won't matter so much, but it can look a little wonky if you're leaving them bare.

Okay, now on to the exciting part...

I'm so thrilled with how the Sock Monkey onesie design turned out that I decided to make it into my very first Made by Bird tutorial!  Click here to download the PDF pattern: [dm]4[/dm](The materials list and instructions are in the PDF and located below, but you'll need to download the PDF to get the pattern pieces.)

Here are the materials you'll need to make the onesie (or tee if your tot is a little older):

  • Baby bodysuit or tee
  • Sock Monkey pattern (see PDF download)
  • 4"x4” piece of cream colored Sock Monkey fabric by Moda
  • 3"x4” piece of brown sock texture Sock Monkey fabric by Moda
  • ½"x4” strip of red felt, ribbon, or fabric
  • Wonder Under
  • Thread
  • Sewing machine
  • Hand sewing or embroidery needle

And here are the instructions:

  1. Prewash your garment and fabric scraps in hot water.  Prewash the red strip for the hat in the warmest water your material can tolerate.  The goal here is to prevent any future bleeding when you wash the finished onesie or tee.
  2. Fuse Wonder Under to the wrong side of your fabric scraps (reference the Wonder Under packaging for fusing instructions.)
  3. Print the sock monkey pattern pieces found on page 2 of the PDF pattern.
  4. Trace the hat and mouth pieces onto the Wonder Under paper backing fused to your cream colored Sock Monkey fabric, and trace the face piece onto the backing fused to your brown sock texture Sock Monkey fabric.
  5. Cut out all three pieces and line them up on your onesie or tee.  The top of the hat should be about 3-4” down from the neckline.
  6. Fuse the pieces to your onesie or tee.
  7. Zig-zag stitch around the perimeter of each piece.  Be sure to remove the flat bed attachment on your machine so you can easily slip the onesie or tee around the base.
  8. Fold the red strip for the hat in half and knot the top.
  9. Hand sew the knot to the onesie using embroidery floss or strong thread. You’ll want to make sure it’s very securely attached to the onesie or tee.

If you have any questions or comments, please leave them in the comments section below.  I'd probably pass out from excitement if anyone sent me pictures of their finished onesies, but since this is my first tutorial, any type feedback you have would be greatly appreciated.  :-)

super yummy strawberry ice cream

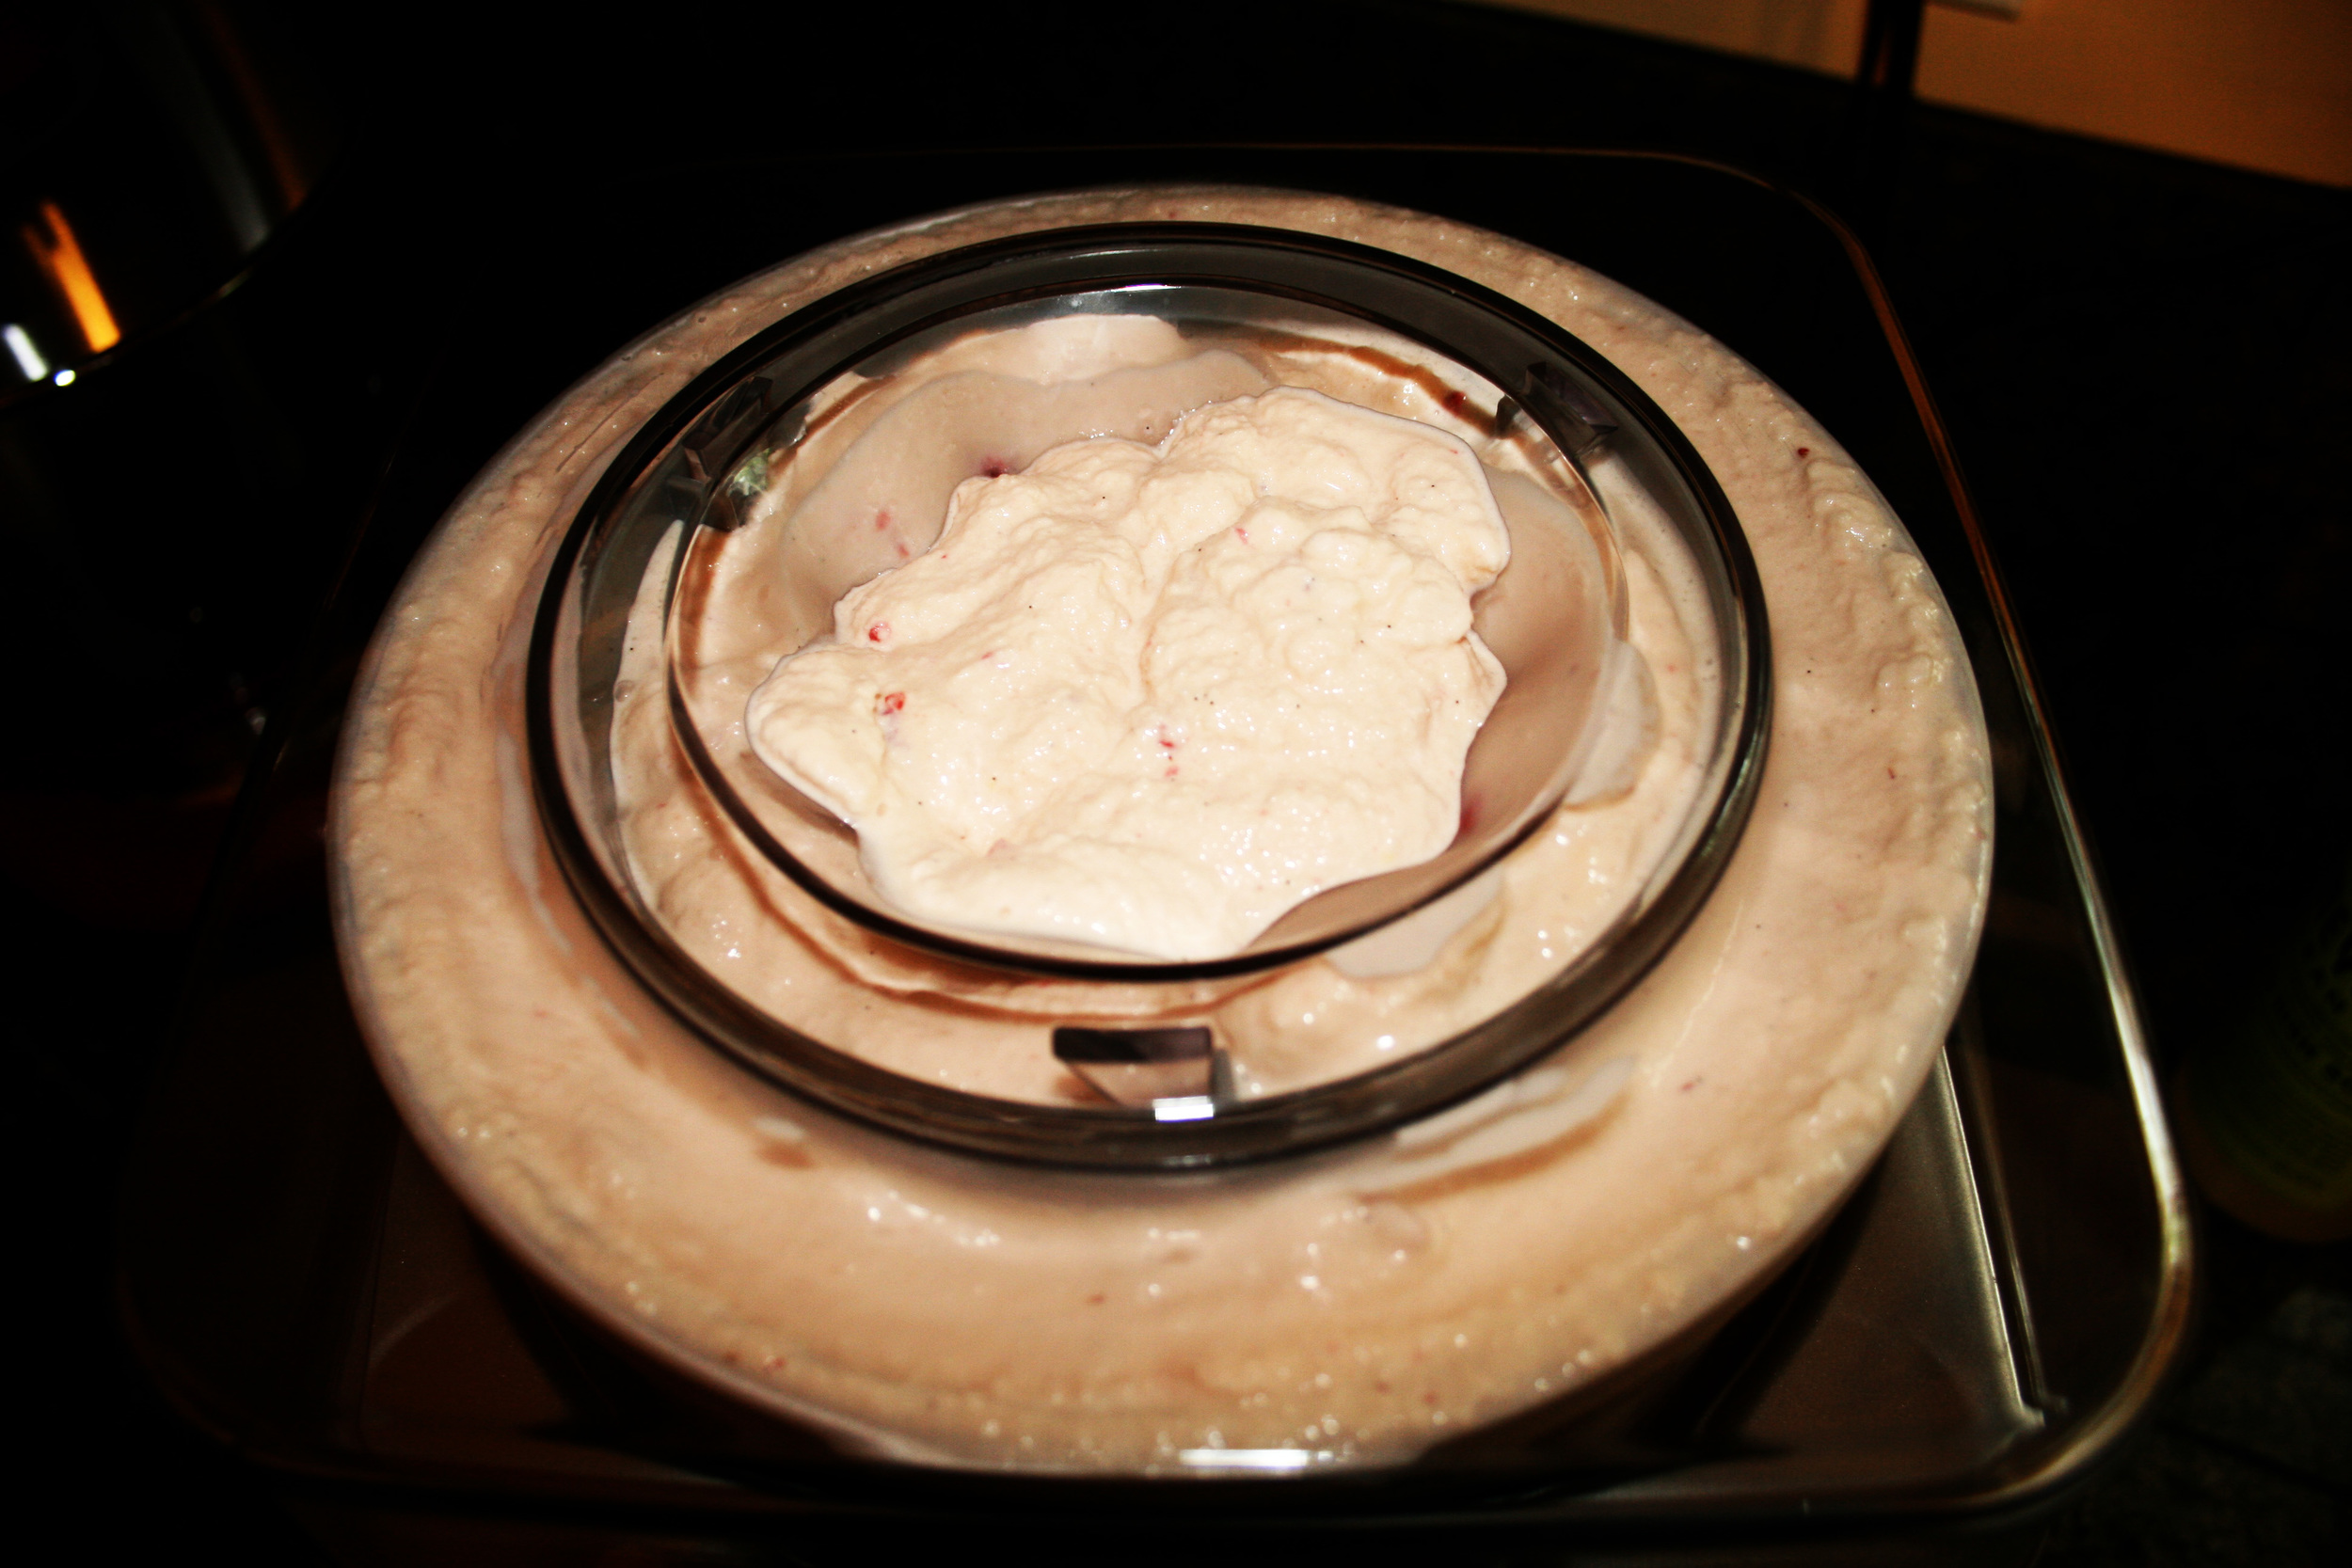
Among the many DIY activities that take place in my house, making homemade ice cream has to be my favorite. If you've never tried it, it's much easier than you'd think. We ascribe to the Alton Brown approach as the base for pretty much all our ice creams, so when I came across this recipe for strawberry ice cream (Jared's favorite) I knew I'd have to alter it a bit. I ended up with a hybrid of the two - the ice cream base from Alton Brown, and the strawberries and syrup from Recipe Zaar: made by bird's super yummy strawberry ice cream:

  • Strawberries & Syrup:
    • 1 pint fresh strawberries, hulled and chopped (chop them a bit finer if you have sensitive teeth, otherwise the bigger strawberry chunks will be too cold for your teeth when you're eating the ice cream)
    • 1 tablespoon fresh lemon juice
    • 1/4 cup sugar
  • Ice Cream:
    • 3 cups half-and-half
    • 1 cup heavy cream
    • 8 large egg yolks
    • 9 ounces vanilla sugar (I know vanilla sugar might seem a little unnecessary, but it's so worth it.)
    • 2 teaspoons pure vanilla extract

Several of the comments on FoodNetwork.com for Alton's recipe say that 8 eggs is way too many and make the ice cream too custard-like. I don't know who these people are and I don't know what they're talking about. The texture of the ice cream is beyond perfect (in the humble opinion of this ice cream super fan.) Anyway... I followed Alton's recipe and - without adding the strawberries - started churning the vanilla ice cream in the ice cream maker.

I made the strawberries and syrup the night before (the recipe says to make it only an hour before but life got in the way - thankfully the mixture was still good the next day!)

As much as I wanted to eat/drink the strawberry goodness, will power took over and the mixture made it safely into the ice cream maker. (At this point, I'd say the vanilla ice cream had been churning for 5-10 minutes and had just started to get thick. You could probably mix them beforehand, I was just experimenting with the timing.)

It was right about here that I knew this was going to be heavenly. I let it churn for another 20-30 minutes ("checking" it with a few or 5 spoonfuls along the way), then divided it into two air-tight bowls, covered the soft ice cream with wax paper, put the tops on, and waited approximately 4 minutes for it to harden before "checking" it again. You know, just to make sure it was freezing properly.

I have absolutely no idea what I ate for dinner that night... something insignificant compared to what was awaiting me for dessert. The hardened ice cream was well worth the wait (the whole half hour since my last spoonful.)

Enjoy!

five for 2010: a 6 month progress report

It's June now, which means we're halfway through 2010. And I'd estimate about I'm halfway to my goals for the year (which I suppose is better than being behind schedule.) To refresh your memory (all 5 of you who read my blog) my goals were as follows: 1) Make our first house feel like home 2) Re-engage at work 3) Open my own Etsy shop 4) Run a marathon 5) Improve my photography skills

And here's where I'm at with each goal:

1) While I don't think I'll ever be able to look around my house and say "it's done," we've definitely made a ton of progress toward making it feel like home in the past 6 months. I've been slacking on posting project recaps (I promise, they're coming!) but to summarize - we've painted almost every room, given both the front and back yards a major overhaul complete with veggies and a fire pit (thanks to my hard workin' green thumbed husband), invested a small fortune to air seal and insulate the basement and attic, remade the sun room into a great breakfast/lounging room, built a dining room table from scratch (the Modern Farmhouse Table thanks to the awesome plan at Knock-off Wood!), gutted the basement and made it into a livable space for storage, crafting, brewing, laundry, and hanging out, and outfitted our front porch with the requisite adirondack chairs and table. By the end of the summer I hope to have the landing and hallways painted (bye bye ugly mustard walls!!!) and finally hang our art and photos. It's been hard work, but it's been more than worth it. Most days I still can't believe we get to live here.

2) I'd say this one is 90% there. The last 10% will come when we move into our new office space at the end of the summer. We've been in a temporary, shared workspace since the company started up last September, and I'm really really looking forward to finally having our own space.

3) Ohh, my own Etsy shop. The thought of this finally becoming a reality later this year fills me with joy... anxious, terrified joy - but joy nonetheless. I just finished a prototype for 1 of my 2 initial products and it looks even better than I hoped! Very very exciting. If everything goes as planned, I'm hoping to launch at the end of September when Jared and I get back from vacation. Stay tuned!! :)

4) This is the only goal that I had to change. You could probably sense from the way I talked about it that my heart wasn't exactly into the idea of running a marathon. It wasn't at the time, but I was hoping it would be when I started training. Sadly, it wasn't then either. I was doing a training run and everything inside of me was saying "Why are you doing this? Is this really something you want to accomplish or are you doing it because you feel like it's what you're supposed to do once you've checked the half marathon off the list?" To train for and run a marathon you REALLY have to want it, and I just didn't. This was Jared's goal, not mine, and after making the decision to do the 1/2 in San Diego instead of the full I never once had a feeling of failure or regret. I have so much going on with the house and my sewing, and I'd be insanely disappointed with myself if I didn't achieve goal #3 because I spent all my free time training. So instead I ran the 1/2 this past weekend in San Diego, and set a new PR. It was a great weekend and a great race. It was Jared's moment to shine and I'm just happy I got to share it with him. After pacing like a nervous wreck for an hour I finally saw him come into view at mile 25. When he got to me at 25.7 it was clear - like with so many other runners - the heat of the day had taken everything he had. We ran last 1/2 mile together, and crossing that finish line with him was a moment I'll never forget. There will be more goals and more races, but this one will always be very special to me.

5) It's hopefully clear by now that I've made some progress on this one (though not including iPhone pics in my posts is hardly a photographic achievement.) I'm definitely starting to get the hang of lighting and composition, and I've discovered the awesomeness of Photoshop actions. I still want to learn how to use the manual settings on my camera and continue to improve my editing skills - could come in handy for that whole selling my products online thing. ;)

So there you have it. 6 months down, 6 more to go, lots more to do. But first, me and my hobbled legs need to go to bed so I can dream about etsy shops and painfree quads. Goodnight!

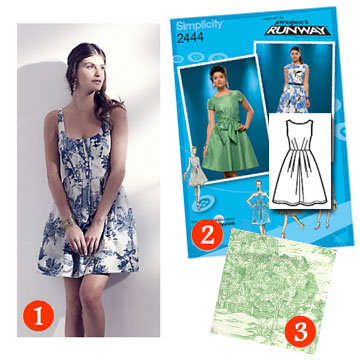
make this look: garden wedding

  1. Original dress: Anthropologie
  2. Pattern: Simplicity 2444
  3. Green toile: Fashion Fabrics Club

Today’s “make this look” is proof that I’m living in sewing dreamland… I’m not going to a wedding this weekend, I’m cleaning out my basement.  In fact the only weddings I’m going to this year are both in October, when it will be cool and drizzly and decidedly un-gardenlike.  But alas, while I’m wearing grubby housework clothes this weekend I’ll be dreaming of wearing this lovely little number from Anthropologie – which you can knock off and make your own for a fraction of the price.  You’ll need Simplicity 2444, 3 ¼ yards of green toile, and 3/8 yard of lightweight fusible interfacing.  (After my Weekender Bag experience, I swear by Pellon Stacy Shape-Flex.)  Finish the look with a gold cuff, earrings, and sandals.

Have fun with your Pinot and finger sandwiches!  I'll be in my basement, wondering how we accumulated so much stuff we have absolutely no use for.

supersized strawberry shortcake

My friend Sarah's (insert very low number here) birthday was last week, and we decided the best way to celebrate would be to put on some folksy western garb and head on down to the Little Red Hen.  If you live in Seattle and have never been there, I highly recommend it.  As long as you don't want your food right away or mind walking to the bar for your drinks.  I felt like a southern style cake was in order, and nothing says southern summer quite like strawberry shortcake.  Or I just really like strawberry shortcake.  Either way, I settled on this recipe and subbed out the butter cake for the yellow cake recipe Bakerella swears by.

First, the yellow cake - I poured the batter into two cake rounds instead of three, which greatly increased the bake time and the density of the cake.  It was a little too dense for my general liking (I tend to prefer light and fluffy), but for strawberry shortcake it was PERFECT!  With this kind of cake, light and fluffy would have collapsed under all the strawberry and cream goodness.

Second, the strawberry tallcake.  Holy moly.  I think the best thing about this recipe is that it couldn't have been easier to make and looks insanely impressive once it's all put together.  I made the cakes the night before, and whipped (no pun intended) it all together the next day in about a half an hour.  And on top of all that, it tasted SO good.  Just look how happy the birthday girl was to eat it!

DIY sewing labels!

Ack!  My very own "made by bird" labels!  I know I shouldn't be so excited about such a little thing... but I am.  I really really am.  As I mentioned in my last post, I added these to the baby shower gifts I gave my friend Angela.  I've been experimenting with labels for a while now, and these are by far my favorite.  I tried the printing on fabric approach and while I was super impressed with printed fabric in general, I wasn't crazy about the finished labels.  They were too stiff for my liking and the Fray Chek was still visible once it dried.  On a whim, I tried using iron-on transfer paper and twill tape and it worked soooo much better than I thought it would.  Here are the steps I followed:

  1. Design the labels in the program of your choice.  (I actually used PowerPoint for mine.)  Just remember to flip the image before you print.
  2. Cut out the label from the transfer paper (I only cut as many as I needed for the gifts so I didn't have to worry about losing a bunch of tiny little pieces of paper.)
  3. Cut as close to the design as possible.
  4. Decide how you're going to attach the label to your item.  If you want a loop (as pictured above), fold the twill tape in half leaving a 1/4 inch or 1/2 inch extra so you can sew the label into your seam.  If you want them "flat," leave a 1/2 inch extra on each side of your label design so you can fold the ends in a 1/4 inch and attach the label to your item using a zig-zag stitch.  (I used the latter approach for the burp cloths, but forgot to take a picture.  I'll be sure to add an example to this post the next time I sew the labels on that way.)
  5. Transfer the label design to the twill tape (following the instructions that came with your iron-on transfer paper)
  6. Here's the important part: only let the label cool for a few seconds before peel off the backing paper.  I think this really helps reduce the visibility of the film the iron-on paper leaves on your labels.
  7. Attach the label to your item as indicated in step 4, and you're done!

baby shower gift set

My dear friend Angela is expecting her first baby any minute now, and I was lucky enough to be home in Virginia for her shower a couple weeks ago.  About a month before the shower I started searching the web for gift ideas and settled on a nursing cover / burp cloth combo set.   (I'm not one for going completely off-registry, so Jared and I also got her the breast pump and pump car charger she'd been wanting... yes I know, a bit of an accidentally awkward theme gift.)  Angela doesn't know if she's having a boy or girl (I'm in awe of her will power), and I had a stash of Amy Butler's Morning Glory fabric so... voila:

The nursing cover tutorial couldn't have been easier.  As you can see I opted to use one fabric (I also skipped the optional pocket.. shhhhh.)

I went a little off-tutorial for the burp cloths, though not intentionally.  The tutorial makes it very clear that you should cut your fabric to the size of each pre-washed cloth diaper, as each one is different and very rarely 18" long.  So what did I do?  I cut each strip 18" inches long!  Brilliant.  I didn't have enough fabric left over to cut new strips, so I added the ribbon trim to the top and bottom of the strips (instead of down the sides) to hide the shortages.  They still look pretty cute, though.  Right?  (Yes, in my humble-completely-biased-opinion.)

I added a very special little touch to this gift set...

...but more on that later.  :)

the mapron

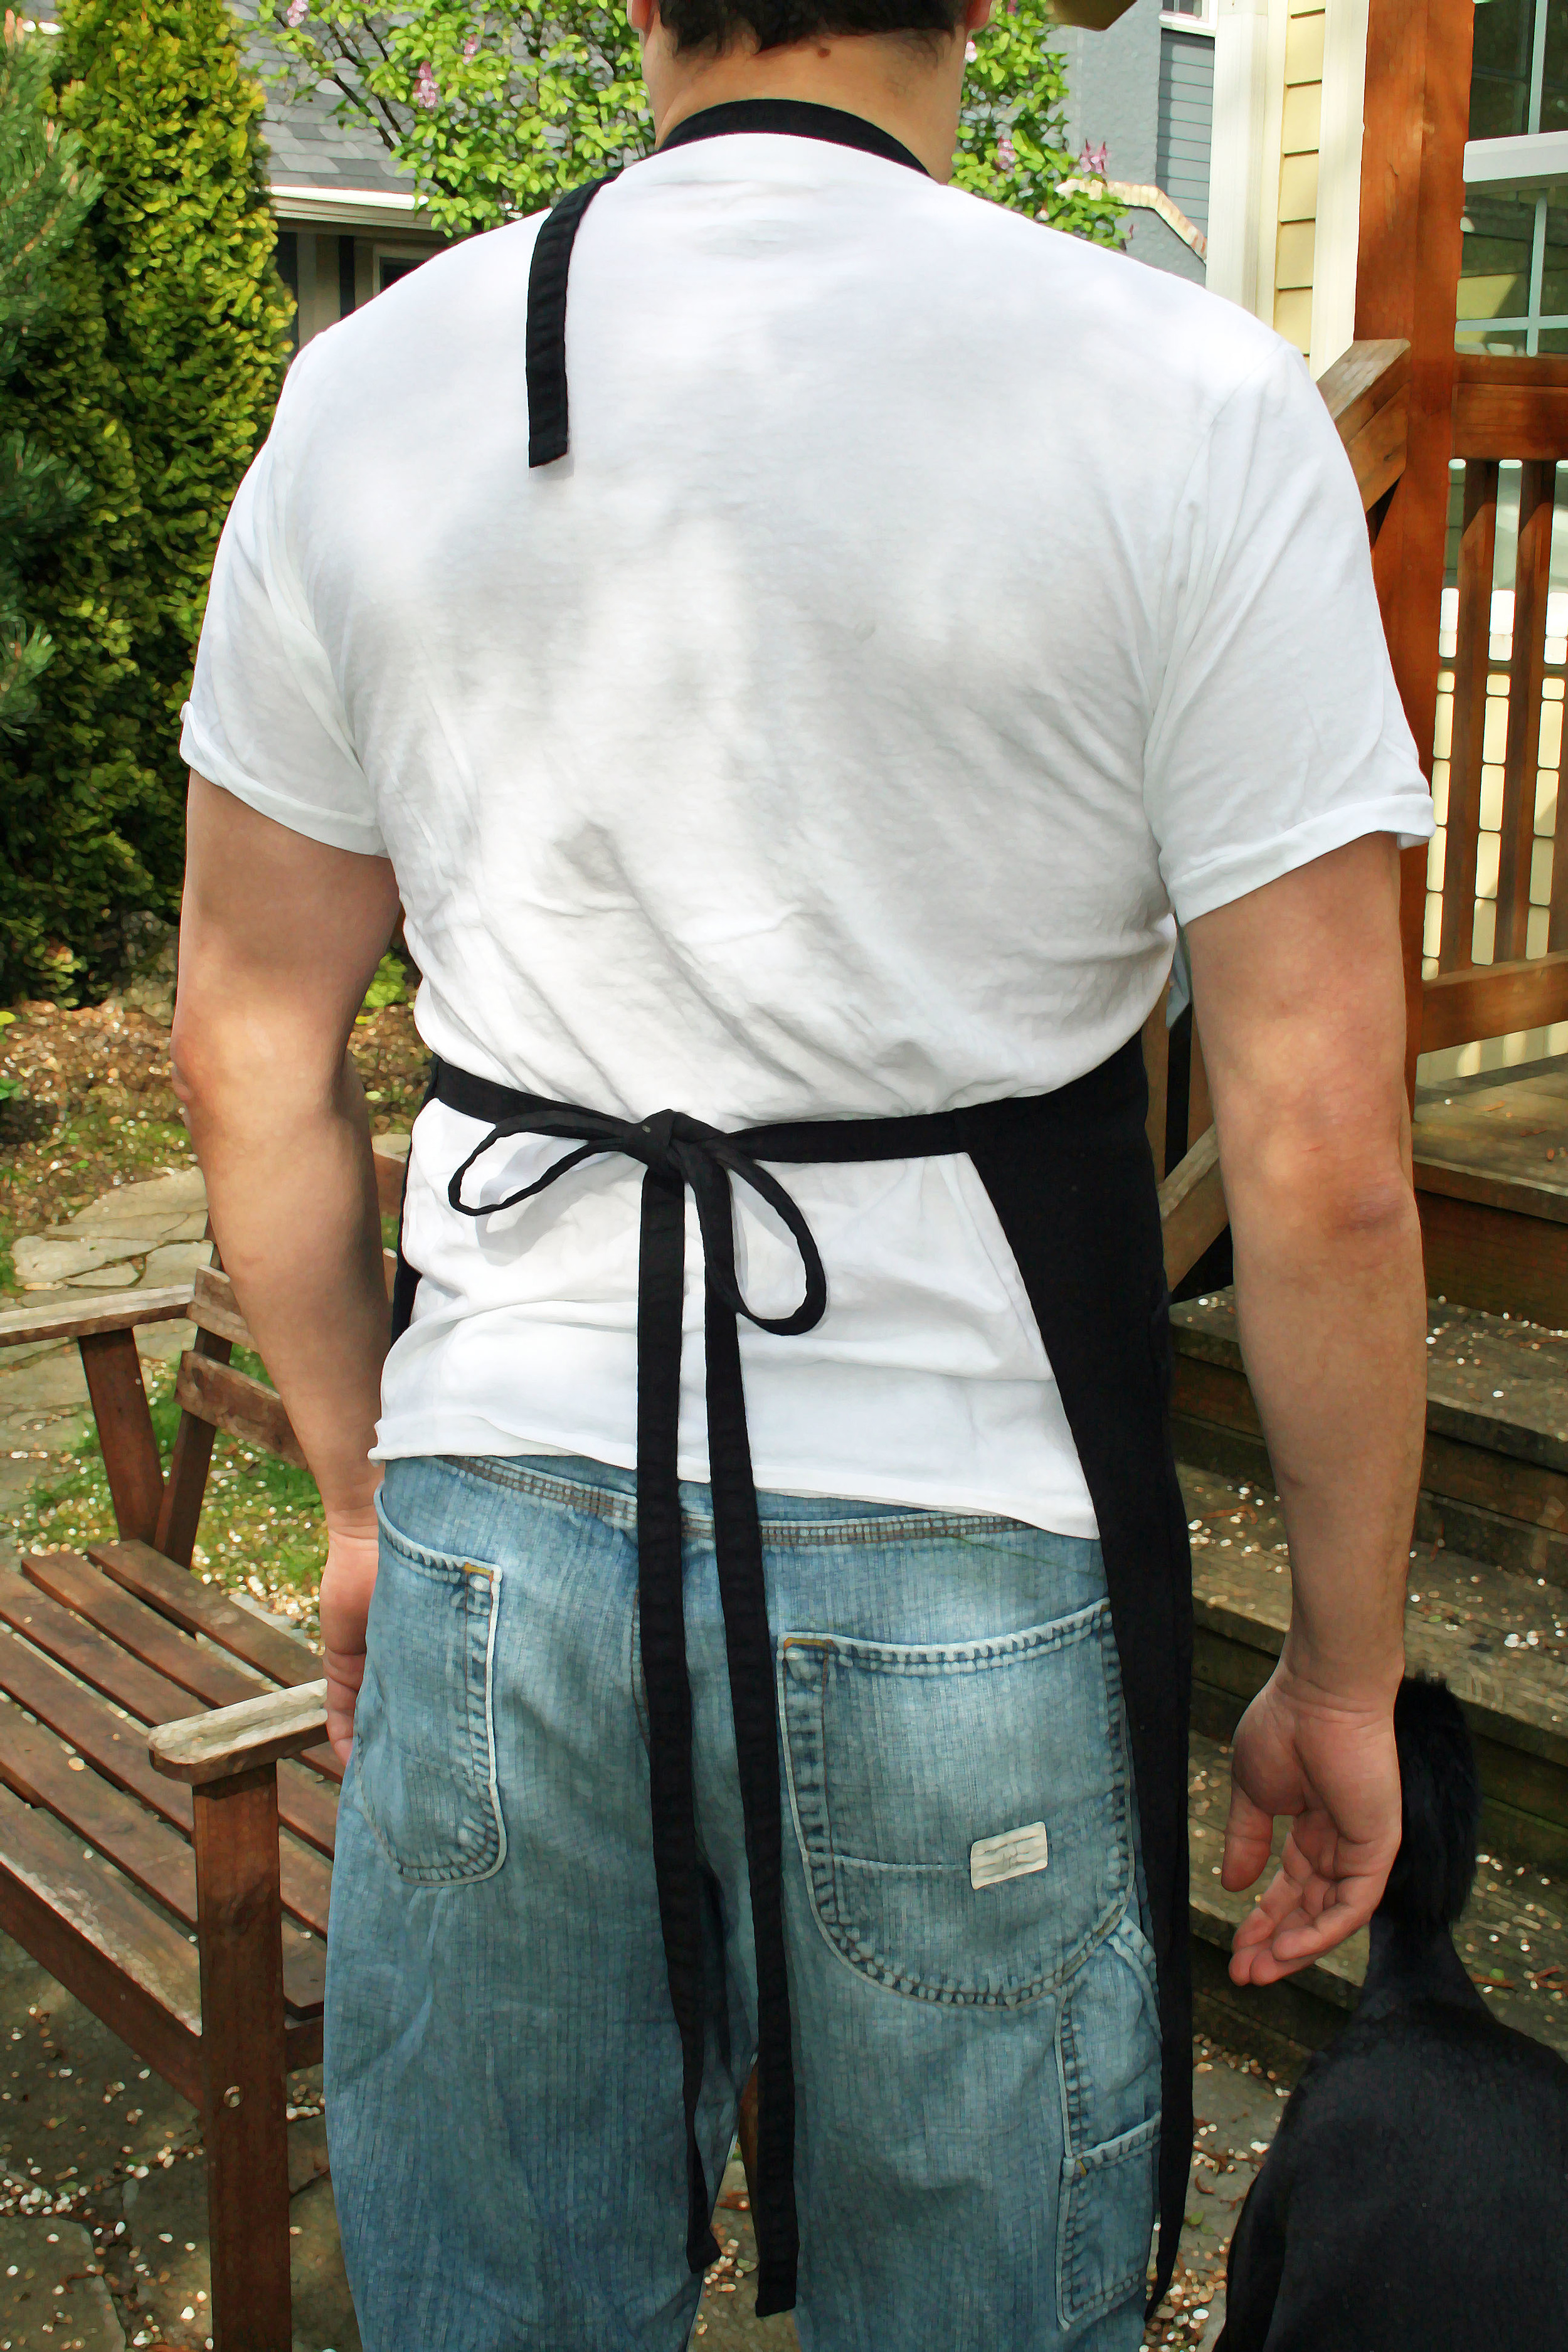
Not long after Jared and I moved in together, I knew I had to convince him to start wearing an apron.  See, he does most of the cooking and I do the laundry… which means I spend a lot of time standing in front of the washer fighting a never ending battle with the food stains on his clothes.  Don’t get me wrong, I know how lucky I am to have a husband that cooks dinner for me every night.  I just wish it wouldn’t end up on his shirts.  Hence, the need for an apron, or in his case - a mapron.  His preference was for one that was the complete opposite of my girly Anthropologie apron, so I went with basic black using Kwik Sew 3613.  The pattern couldn’t have been easier, but the apron on its own was a little boring so I busted out the Yudu and screen printed a grungy looking cutlery design on the front.

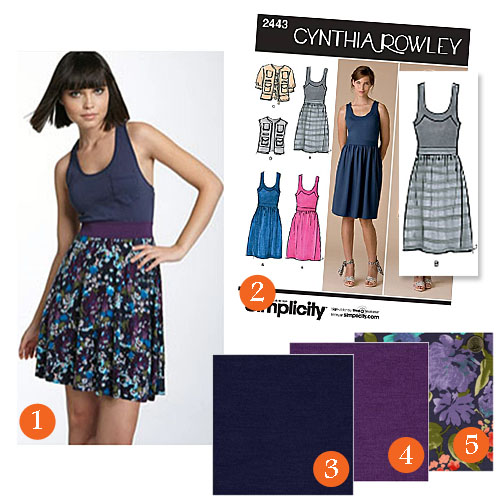
make this look: saturday shopping

  1. original outfit: Nordstrom
  2. tank dress: Simplicity 2443
  3. navy knit: Fabric.com
  4. purple knit: Fabric.com
  5. navy floral shirting: Fashion Fabrics Club

I'm headed up to Seattle this weekend to see some of my closest girlfriends and do a bit of shopping. I love wearing simple dresses (like this one from Nordstrom) when I'm shopping - less to take off, less to put back on. So easy. To make this look, start with Simplicity's 2443 View B (by the way, these Cynthia Rowley patterns for Simplicity are fantastic. I want to make all of them.) You can stick to the original look by using navy and purple knits, and a lightweight navy floral cotton, or you can adapt the look by combining a floral or similar pattern with 2 coordinating knits. Heck, make multiples. :-) Finish the look for spring by pairing it with a denim jacket and flats, and wear it into summer with leather sandals.

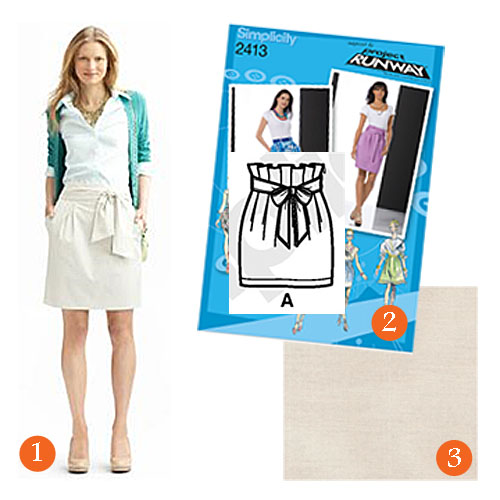
make this look: skirting the issue

  1. original outfit: Banana Republic
  2. tie-waist skirt: Simplicity 2413, View A
  3. gray stretch sateen fabric: Fashion Fabrics Club

I'm loving this spring work look from Banana Republic. It's the kind of outfit that manages to pull off the elusive combo of effortless and super cute. I especially love how fun and versatile the skirt is... it's just the type of thing I've been needing to breathe new life into my tired work staples. To re-create this look, you'll need Simplicity's 2413 pattern (View A), 2 1/4 yards of cotton blend fabric with a slight stretch, a 9" invisible zipper, and a hook-and-eye closure. To complete the look, pair the skirt with a fitted white button down, lightweight cardigan, and nude pumps.

make this look: farmers market tunic

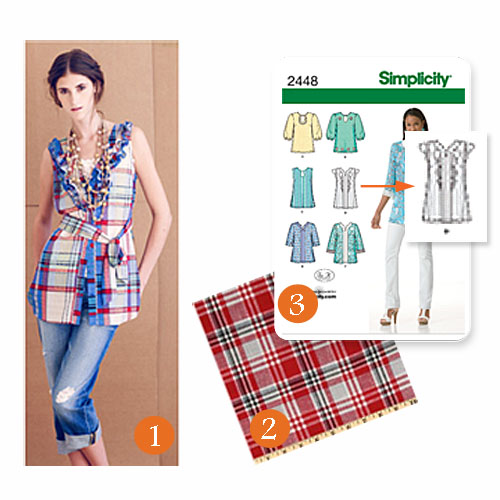
  1. original outfit: Anthropologie
  2. red plaid shirting: Fabric.com
  3. ruffle tunic: Simplicity 2448, View D

Anthropologie calls this look "At the Ballpark", but to me it seems more suited for strolling through Portland's amazing downtown farmers market.  To re-create the look, you'll need Simplicity's 2448 pattern (view D is the ruffle tunic) and a couple yards of plaid shirting.  Purchase additional yardage if you want to add a matching belt to the pattern, like in the original version.  Pair the tunic with faded cropped jeans, a layered necklace, and sandals to complete the look.

word game wedding programs

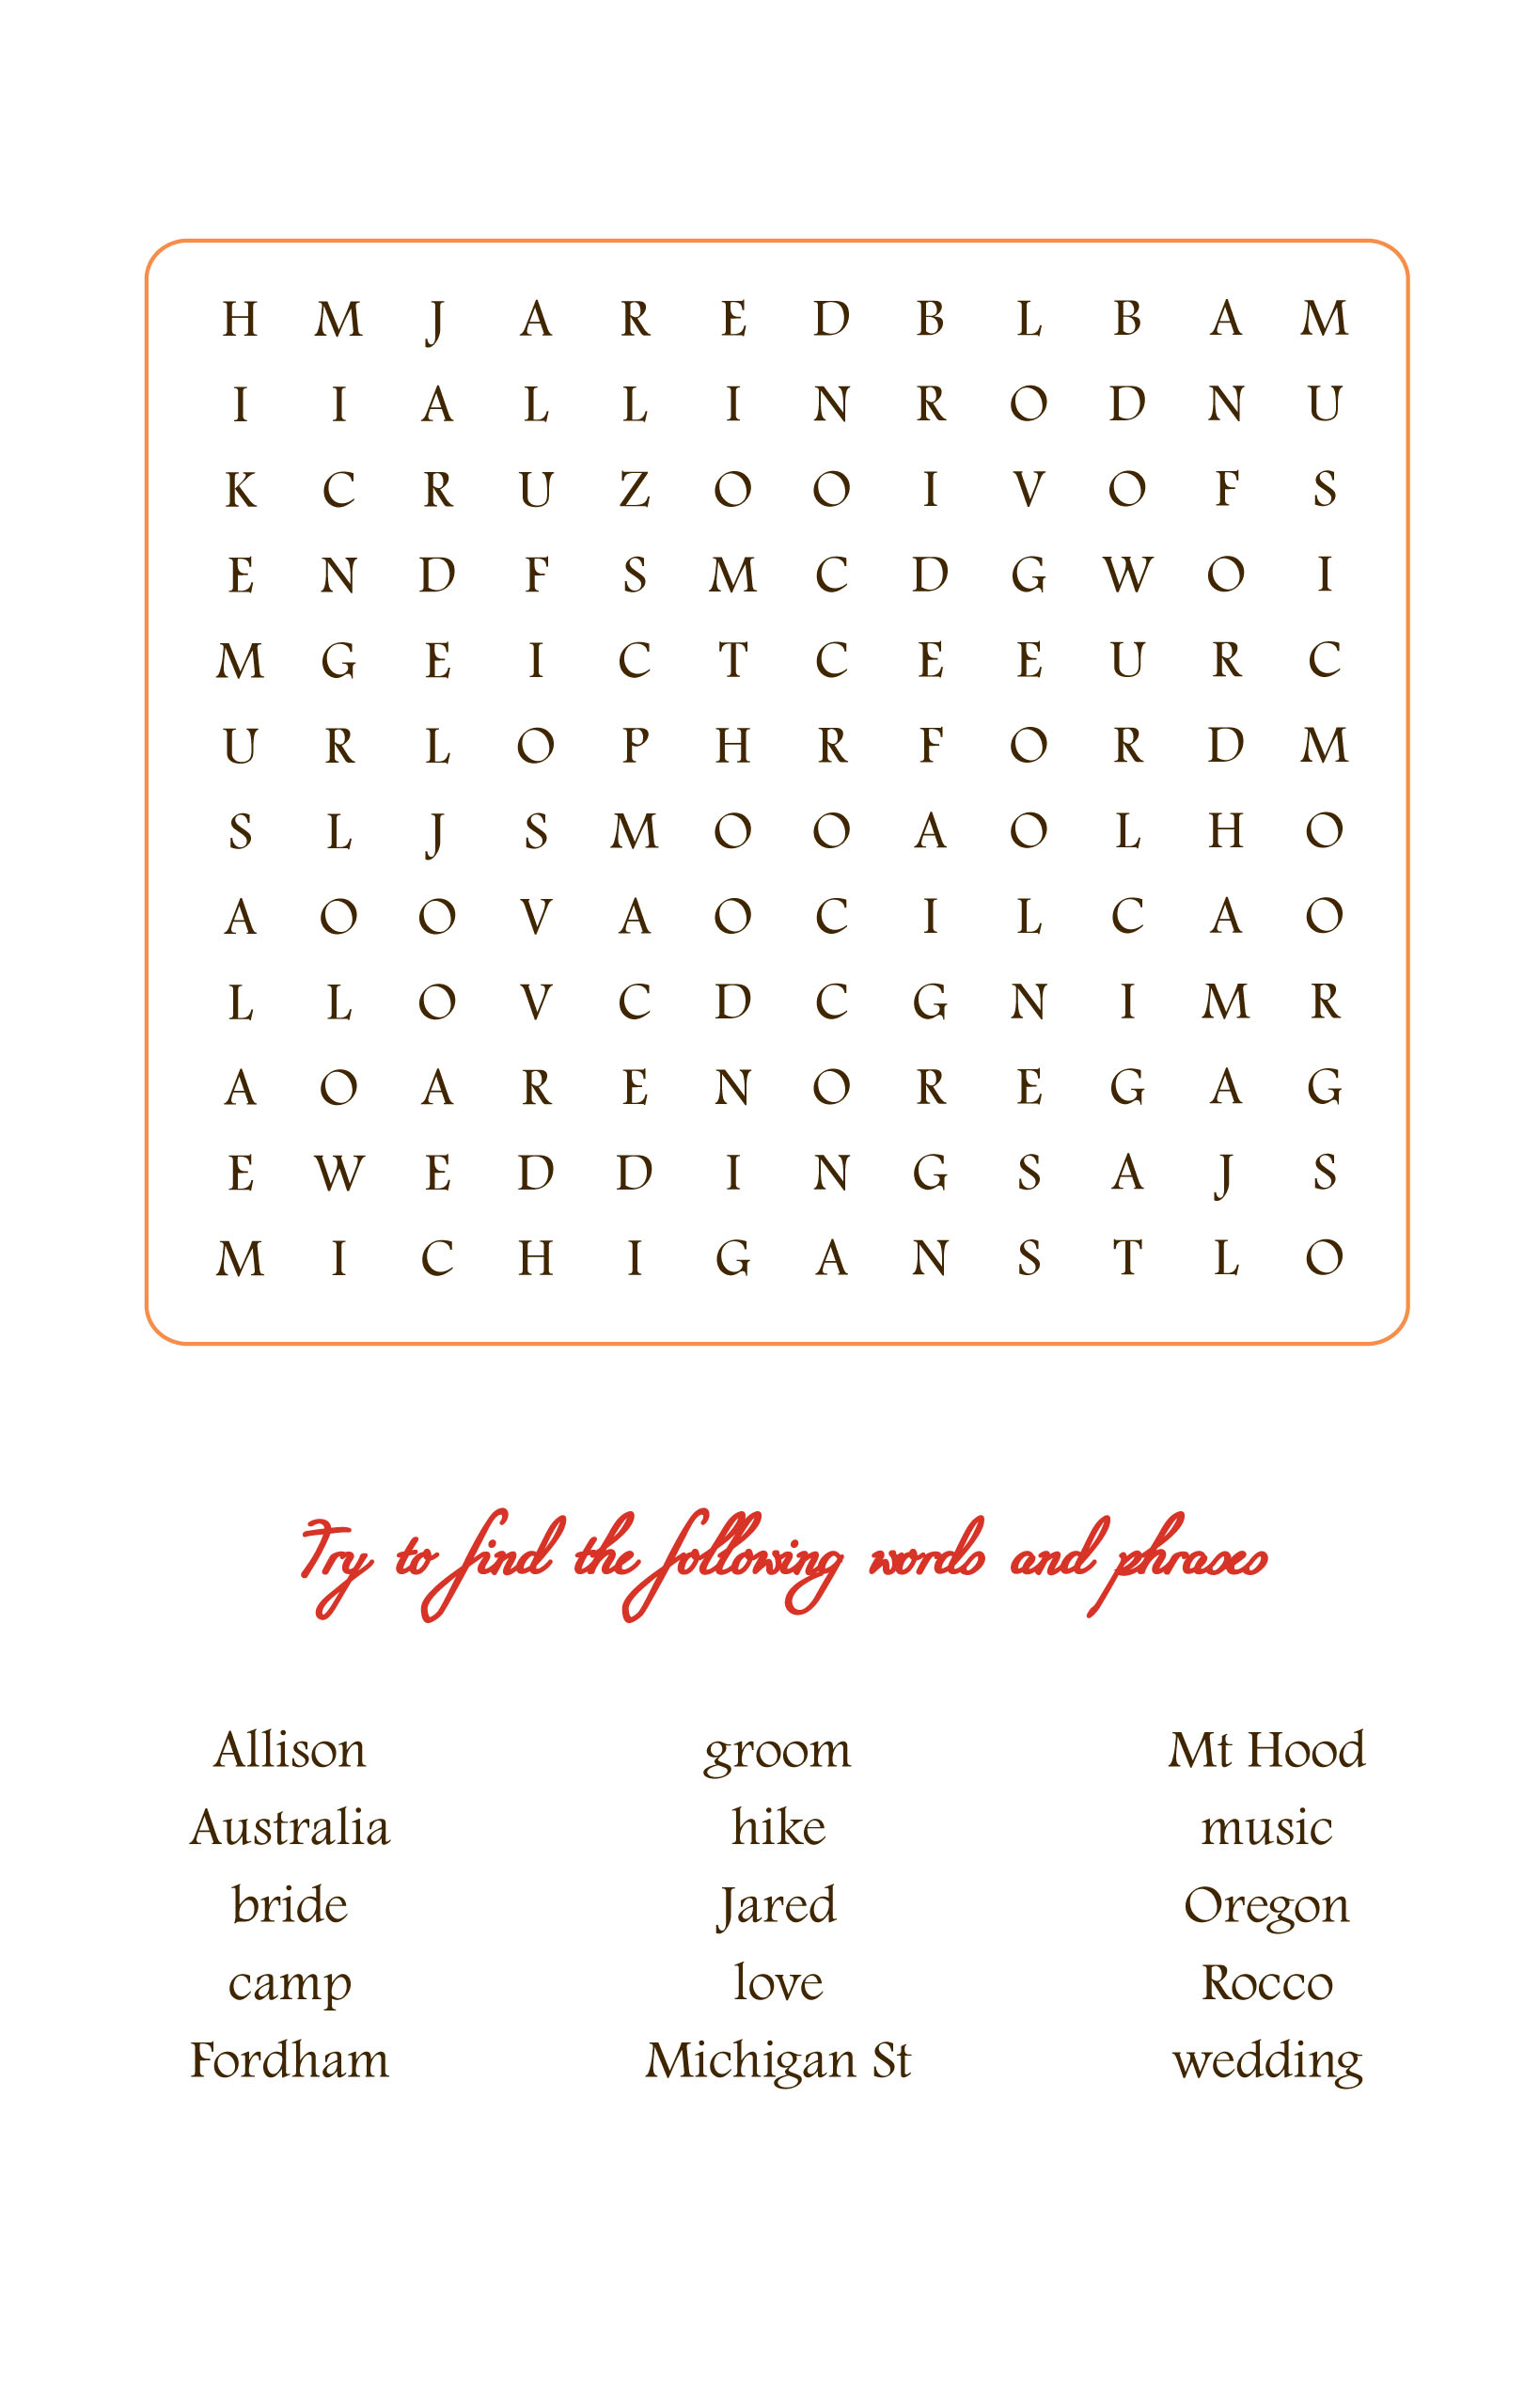
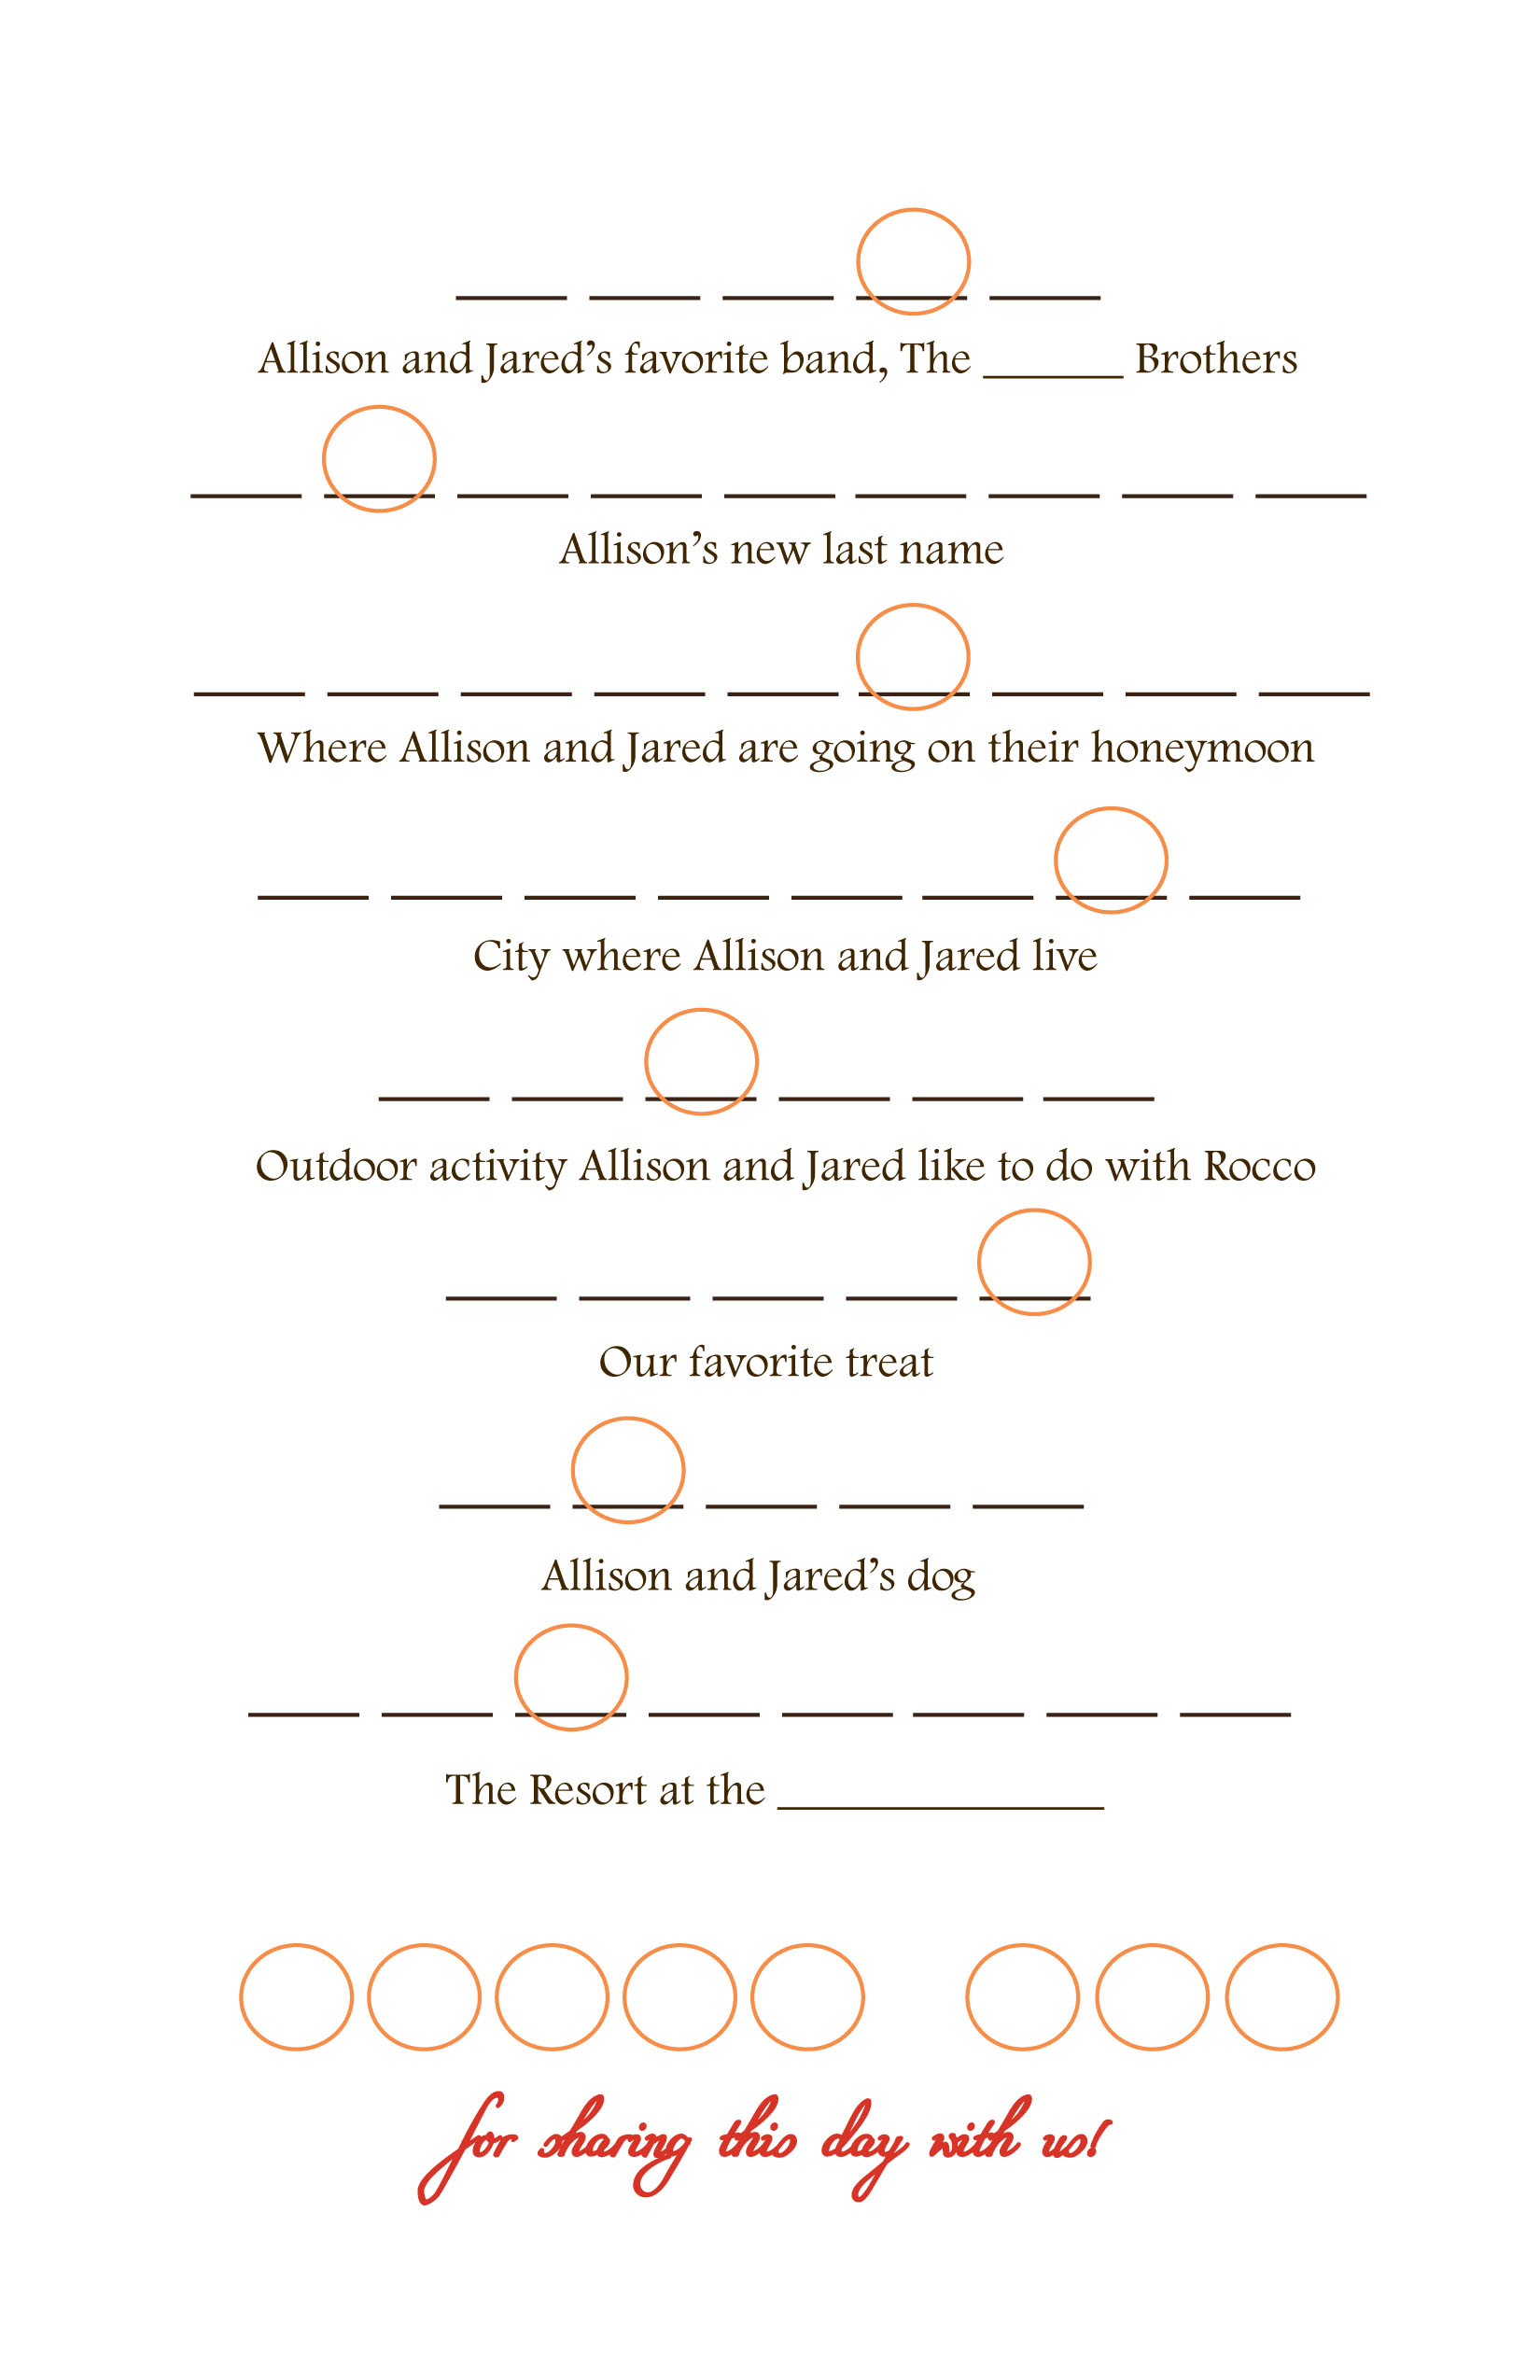
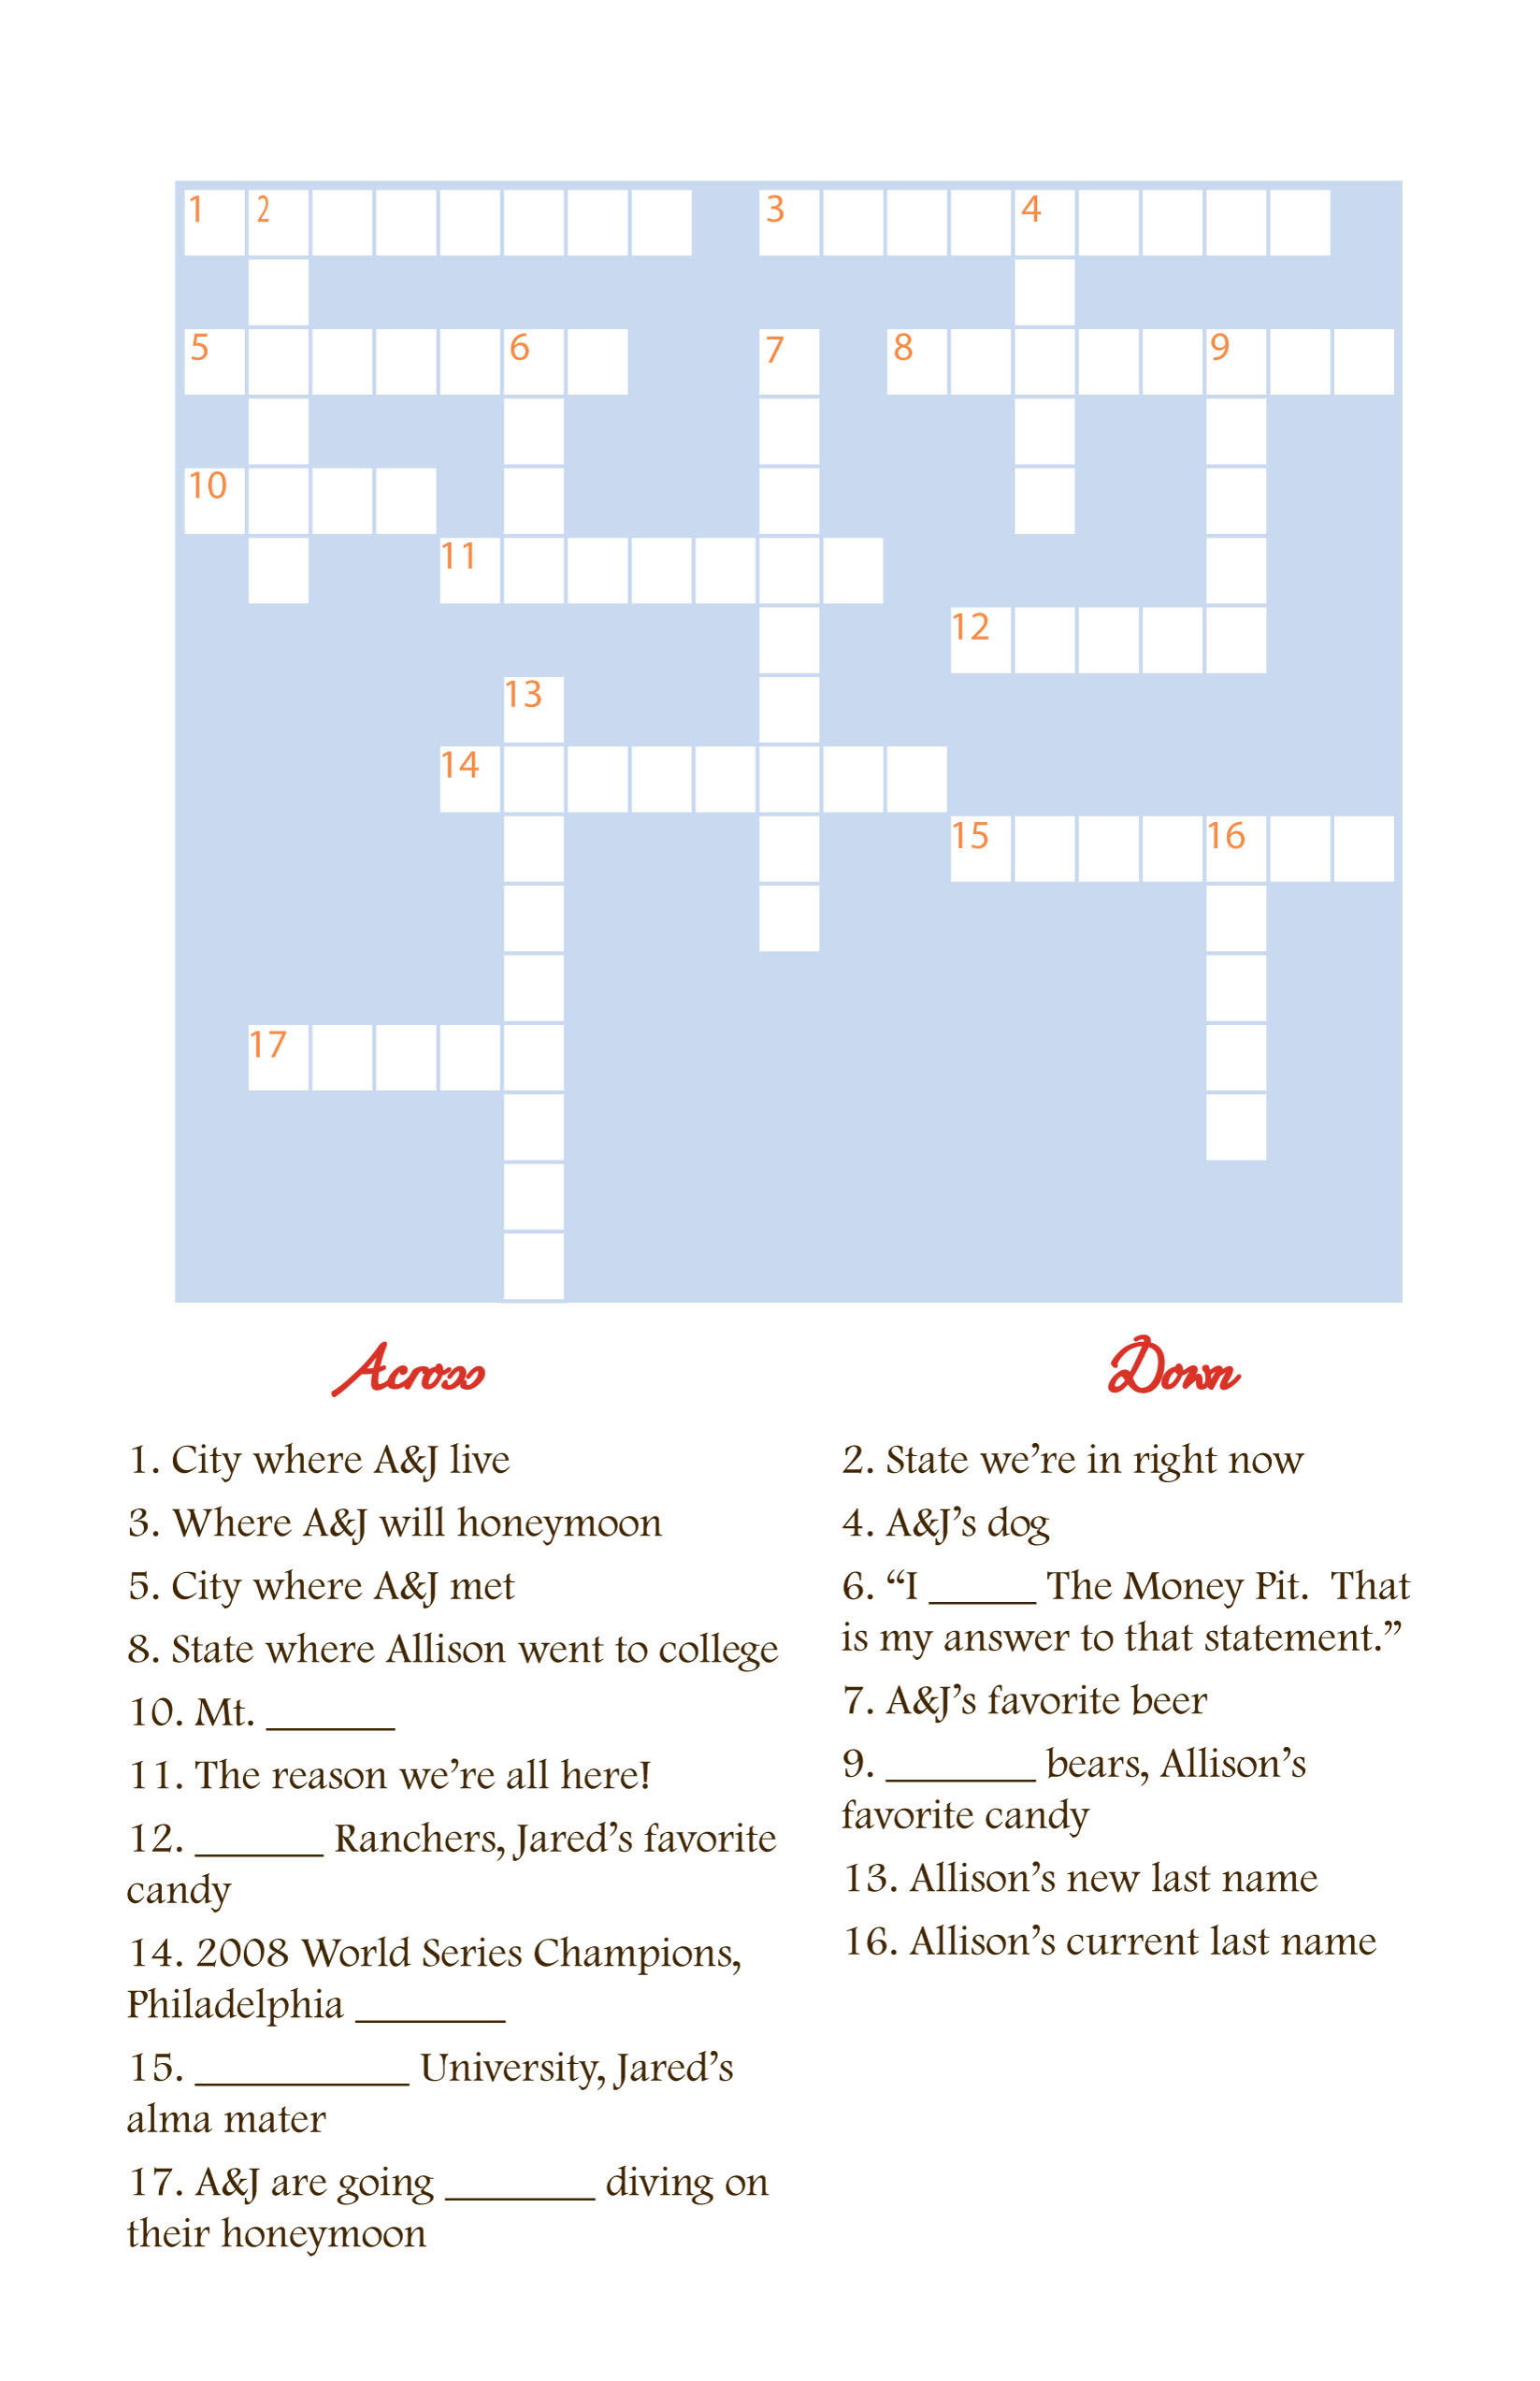
The moment I saw these DIY programs at Della Stella, I knew I wanted to replicate them for our wedding.  I loved the idea of giving guests something to do while they wait for the ceremony to start, and my inner word nerd got a little geeked out at the idea of our own personalized word games.  Jared created all three games – a crossword, word search, and a fill-in-the-blank – and I used Illustrator to design the 3 versions of the program:

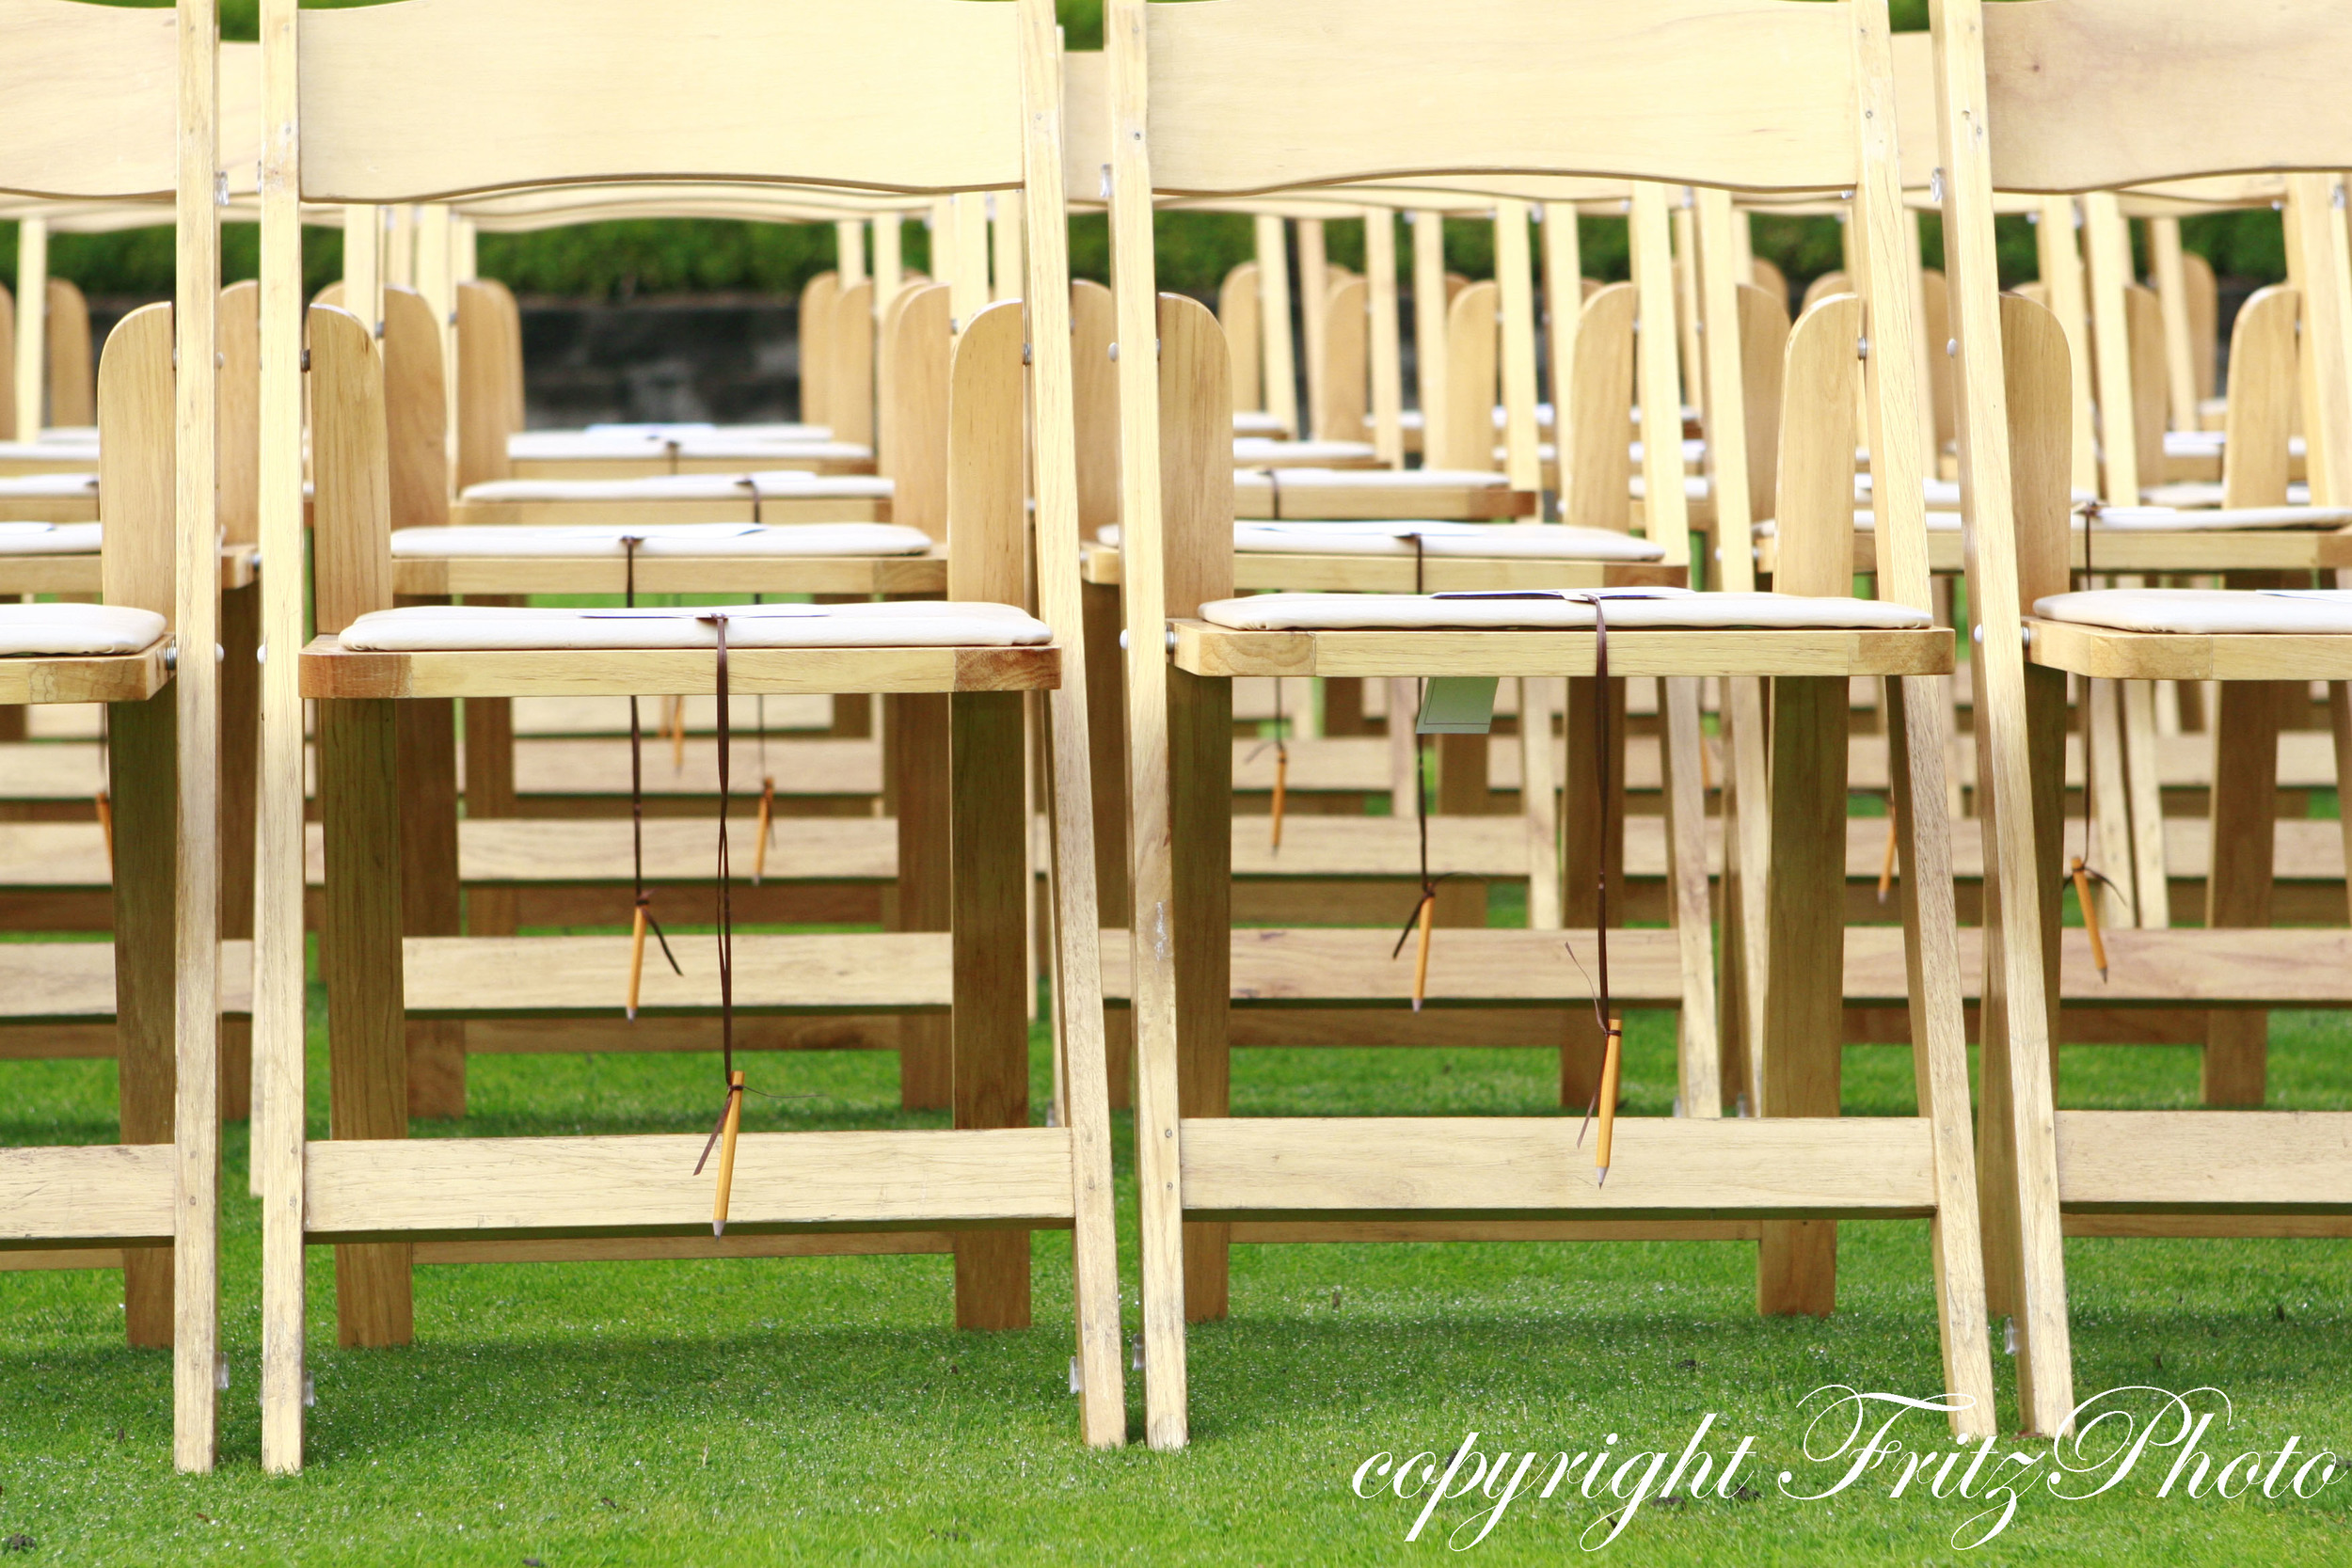
We got the programs printed at Kinkos on Letter sized cardstock, then folded them in half so that the final size was A9.  I was in the midst of Weekender Bag insanity, but Jared was a huge help and did ALL of the assembly for the programs, including drilling holes in all the pencils and craft sticks.  We followed all the assembly steps on Della Stella’s tutorial and couldn’t be happier with how the programs turned out.

The resort staff placed the programs on our guests’ chairs before the ceremony, which we felt would be easier than setting up a separate table or having our poor ushers deal with keeping all the pencils untangled.  The feedback from our guests was great!  Thanks so much to Della Stella and her brilliant tutorial!!

(In other exciting wedding news, my and Jared's wedding was the featured Real Wedding on Perfect Wedding Guide today!  Check it out here.)

***UPDATE!*** My wedding program word games are now available for download.  Click on the link below to start downloading the set of 3 templates.  (Note: You'll need to have Adobe Illustrator to open and use the files.)

***NEW UPDATE*** The download link seems to be hit or miss for people. If you have trouble just post your request in the comments and I'll email you the files.

DOWNLOAD HERE.

A few things to know about the templates:

  • The front of my programs aren't included in the templates because they were created using stock vectors that I purchased from iStockPhoto.com.
  • The answer to the word jumble is Thank You.
  • The crossword puzzle is a grid, so if you need to "move" any words, just color or uncolor the cells.

Thanks so much for all the compliments!  Let me know if you end up using the templates for your programs.  I'd love to see them!!

bye bye, brass!

I hate polished brass hardware. Hate it. Unfortunately, there was a lot of it in our house when we moved in. Two and a half months later I'm happy to report that 99% of it has been replaced with brushed nickel hardware. The one hangup we encountered was with our guest bathroom door knob and lock. Our house was built in 1915, and several of the doors have antique mortise locks installed. The way the locks are cut, we either have to replace the entire door or install a new mortise lock. I had no idea how hard it would be to find a new mortise lock!  If money grew on trees, I would have happily gone to Rejuvenation and gotten the Putnam Classic Door Set.  The money-doesn't-grow-on-trees version is this:

Yep - polished brass.  That's the only finish you can get a mortise lock in these days unless you're willing to spend $200.  I reluctantly bought the lock, and immediately started researching how to paint polished brass.  The first step was to disassemble the lockset, soak it in a stripping agent and sand the polished brass paint off with coarse sandpaper.  Once the paint was removed I was ready to prime (I used Valspar spray primer in gray.)  I rigged up a stand for the lock pieces using a piece of styrofoam and toothpicks taped off with a bit of painters tape (the dumbbell was to keep the whole thing from blowing away.)

I applied the primer using multiple light coats, followed by several light coats of Rust-Oleum Metallic spray in Matte Nickel.  Rust-Oleum makes a different metallic "satin nickel" spray for their Universal line, but I highly advise against using any of the metallics in this line because they have a very glittery - not at all realistic - finish (and yes, I learned that the hard way.)  I sealed all the pieces with several coats of Rust-Oleum's Crystal Clear Enamel.

The door is a bit banged up from the old lock, and the finish isn't an exact match with our other brushed nickel hardware, but it's surprisingly close.  Given the effort and time it took to re-finish the lockset, I wouldn't recommend painting your hardware unless money or availability (or both, in my case) make it a necessity, in which case it's a great - and fairly easy to do - project.  I'd be curious to see how it would work in a different finish, especially oil-rubbed bronze.

our DIY wedding invitations

After our relatively pain-free experience with DIY Save the Dates, we decided we might actually be able to pull off DIY wedding invitations. I spent a couple weeks searching sites like Wedding Bee and Snippet & Ink for inspiration, and finally decided on the style of invites I wanted - a pocketfold with a matted invitation, accommodations and directions enclosure cards, and an RSVP. I tried to be consistent with our wedding colors and design elements (red/orange/blue, Hatch show print style typography, birds, and birch trees.) Here are the details:

The belly bands were made of ribbon that I sewed into a band after slipping it through the tag (cut from white cardstock and shaped with a corner punch.)

Pocketfolds from Cardsandpockets.com, ribbon from Fabric Depot, cardstock from Paper Source, custom stamp from Rubberstamps.net, trees, birds, and wood planks for the sign board are from istockphoto.com.

Invitation mats from Cardsandpockets.com, envelopes from Paper Source; fonts: Miama, Mesquite Std Medium, and Palatino; tree and bird vectors are from istockphoto.com; white cardstock and printing from a great local (and green!) print shop here in Portland called NW Printed Solutions.

I designed the stamps for the logo tag and return address/rsvp and had them custom made by RubberStamps.net. They did SUCH an amazing job, and the turnaround time was extremely fast. I wanted to use custom stamps because it was cheaper, easier, and greener than using labels or our home printer for the tags and addresses. Plus they had a great DIY rustic look to them.

The full invitation suite

Hatch-style Save the Dates

***I'm very excited to bring you the first post in a new series I'm calling "made to wed," featuring all the DIY wedding crafts from my and Jared's big day.*** Around this time last year, I was in full-on wedding mode.  Jared and I had just gotten engaged, and with 9 months to go until the wedding, there was a ton to do.  Once our lovely Mt. Hood location was booked, it was time to get started on the Save the Dates.  I knew right away that I wanted to do something in the style of a Hatch show print.  Jared and I began collecting show posters not long after we started dating, and they now make up much of the artwork in our home.  Most importantly, we felt like the look was something that was both representative of us and the tone we wanted to set for our wedding.

Here are the steps that went into creating our Save the Dates...

1) I designed the Save the Date in Photoshop at 4.25x5.5" so that we could get 4 cards out of a standard 8.5x11" sheet of cardstock.  I wanted the cards to have a vintage look to them, so the original design had a grainy pale blue background.

2) When we took the design to Kinkos to be printed, the folks there recommended using this great grainy pale blue cardstock they had instead of trying to do a colored background on white cardstock.   We tried it both ways, and they were totally right.  In addition to printing, we also had Kinkos cut the cards for us.  The cost was minimal and definitely worth how much time it saved us.

3) We wanted to back the Save the Dates with magnets for easy fridge-hanging for our friends and family, so we rolled out a magnet sheet from the Xyron and cut it into small strips.

4) The cards were then run through the Xyron to create a sticky backing.

5) Paper Source A6 note cards in bluebell were used as the backing for the Save the Dates, after cutting them to 4.5x5.75".

6) The final step was to adhere the magnet strips.

7) Only 83 more to do!  ;-)
I can't even tell you how thrilled we were with the final result.  Of all the paper goods I did for the wedding, the Save the Dates were by far my personal favorite.  The biggest challenge was settling on a final design, but the design process was actually kind of fun.  Okay, okay... I was in a total engagement bliss haze at the time - everything wedding-related was fun.  But, there was something really exciting and gratifying about doing our own Save the Dates.  We're DIY people, so it only made sense that our wedding be as DIY as we could make it.  Next up: the invitations...